Home>Production & Technology>Audio Interface>How To Connect DJ Controller To Audio Interface
Audio Interface
How To Connect DJ Controller To Audio Interface
Modified: March 4, 2024
Learn how to connect your DJ controller to an audio interface for seamless audio integration. Discover the best techniques for optimizing your DJ setup with an audio interface.
(Many of the links in this article redirect to a specific reviewed product. Your purchase of these products through affiliate links helps to generate commission for AudioLover.com, at no extra cost. Learn more)
Table of Contents
Introduction
Welcome to the world of DJing, where music meets technology! Whether you’re a professional DJ or an aspiring enthusiast, having the right equipment is crucial for creating an unforgettable and seamless mix. One essential component that plays a critical role in the setup is the audio interface. In this article, we’ll explore the process of connecting a DJ controller to an audio interface, providing you with the necessary knowledge to enhance your DJing experience.
Before we dive in, let’s understand the two key components involved: the DJ controller and the audio interface. A DJ controller is a hardware device that allows DJs to mix and manipulate music using knobs, faders, and other interactive controls. It acts as a central hub, connecting various sources such as turntables, CD players, and computers.
An audio interface, on the other hand, is an external device that converts analog audio signals into digital data and vice versa. It serves as the bridge between your DJ controller and your computer or other audio devices. The audio interface ensures high-quality sound output and provides additional functionalities, such as multiple audio inputs and outputs, MIDI connectivity, and enhanced signal processing.
To connect your DJ controller to an audio interface, you will need specific equipment and follow a step-by-step process. In the next sections, we will discuss the necessary equipment and provide a detailed guide to help you establish a seamless connection.
Note: The exact setup and connection process may vary depending on the DJ controller and audio interface models you are using. Always refer to the user manuals provided by the manufacturers for detailed instructions specific to your equipment.
Understanding DJ Controllers and Audio Interfaces
Before we delve into the process of connecting a DJ controller to an audio interface, let’s take a closer look at these two vital components and their individual functionalities.
DJ Controllers:
A DJ controller is a hardware device that enables DJs to manipulate and mix music. It typically resembles a traditional DJ mixer, featuring knobs, faders, buttons, and jog wheels. Modern DJ controllers often come equipped with built-in soundcards, allowing DJs to connect directly to their computer or audio interface via USB. This integration offers convenient plug-and-play functionality and eliminates the need for additional audio cables.
Some DJ controllers also include features such as touch-sensitive pads, performance effects, and advanced looping capabilities, empowering DJs to push the boundaries of creativity. Additionally, many DJ controllers support various software platforms, such as Serato DJ, Traktor, or rekordbox, providing DJs with a wide range of options to suit their preferences and workflow.
Audio Interfaces:
An audio interface is an external device that connects to your computer or other audio devices. Its primary function is to convert analog audio signals into digital data and vice versa, ensuring high-quality audio transmission. Audio interfaces come in various shapes and sizes, offering different input and output options to accommodate different setups and requirements.
When it comes to DJing, audio interfaces play a crucial role in maintaining optimal sound quality. They provide multiple audio inputs to connect your DJ controller, turntables, or other sources. Additionally, audio interfaces often include features like mic preamps, headphone outputs, and adjustable gain controls, allowing DJs to fine-tune their audio signals and monitor their mix with precision.
Furthermore, audio interfaces may offer enhanced functionalities such as MIDI connectivity, timecode support, and DSP (Digital Signal Processing) effects. These features expand the capabilities of your DJ setup and enable seamless integration with DJ software and other performance tools.
Now that we have a clear understanding of DJ controllers and audio interfaces let’s move on to the necessary equipment you will need to connect them.
Necessary Equipment for Connecting a DJ Controller to an Audio Interface
Before you connect your DJ controller to an audio interface, it’s important to ensure that you have all the necessary equipment. Here is a list of essential items you’ll need:
- DJ Controller: Of course, you’ll need a DJ controller for this setup. Choose a controller that suits your needs and budget, ensuring that it has the necessary outputs to connect to an audio interface.
- Audio Interface: Select an audio interface that offers the desired features and connectivity options. Look for input and output connectors that are compatible with your DJ controller and other audio devices you plan to incorporate into your setup.
- USB Cable: Most DJ controllers and audio interfaces connect via USB, so having a reliable USB cable is essential. Ensure that the cable is of good quality and capable of transmitting data and power effectively.
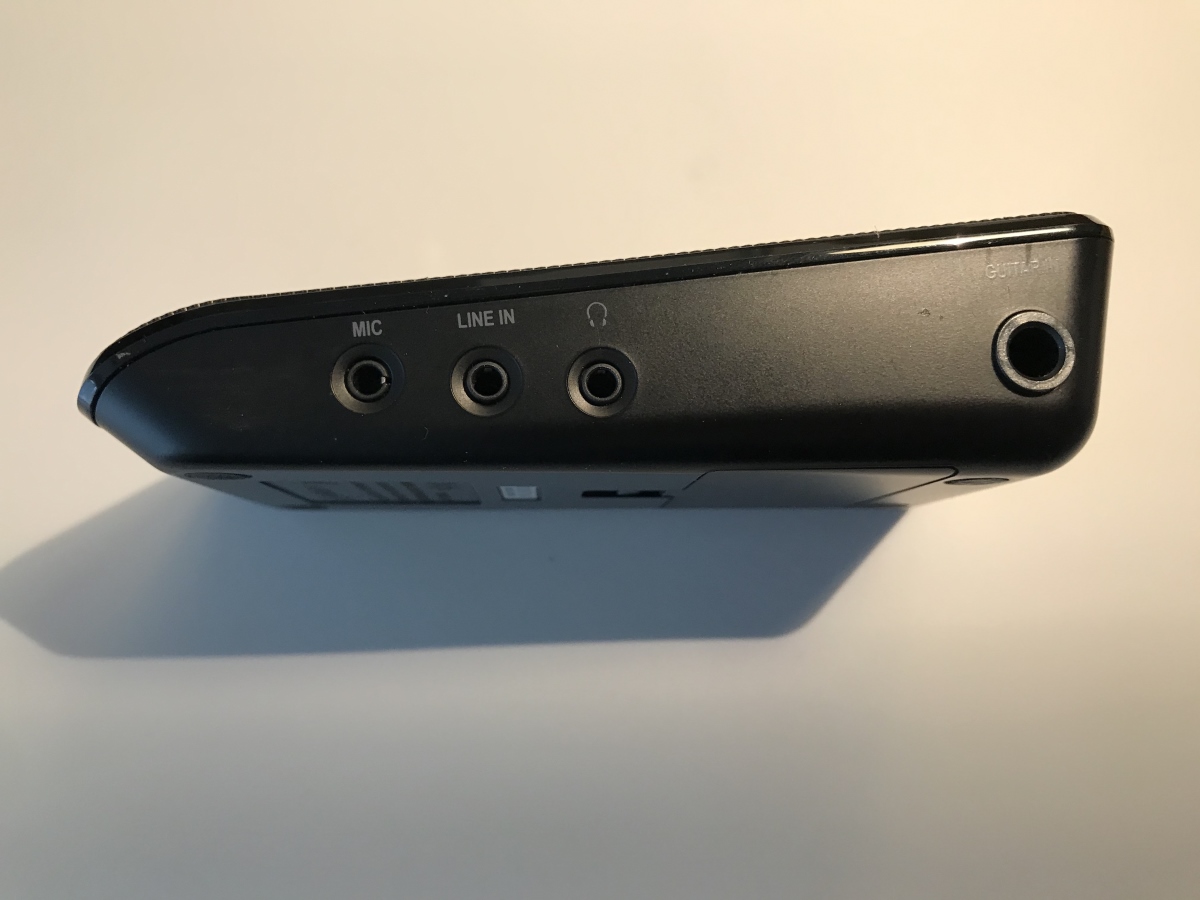
- Audio Cables: Depending on the connectors available on your DJ controller and audio interface, you may need audio cables. Common types include RCA cables, 1/4″ (6.35mm) TRS cables, or XLR cables.
- Headphones: A good pair of headphones is crucial for monitoring your mix. Make sure you have headphones with a suitable connector (usually 1/8″ or 1/4″) that can be connected to your DJ controller or audio interface.
- Computers and Software: You’ll need a computer to run DJ software and manage your music library. Ensure that your computer meets the software’s system requirements and has enough processing power and storage capacity for smooth operation. Install the necessary DJ software and keep it up to date.
- External Speakers or Amplifier: While not directly related to the connection between the DJ controller and audio interface, having external speakers or an amplifier is essential for delivering high-quality sound during your performances.
Remember to check the user manuals of your DJ controller and audio interface for any specific requirements or recommendations from the manufacturers. With all the necessary equipment prepared, let’s move on to the step-by-step guide to connect your DJ controller to an audio interface.
Step-by-Step Guide to Connect DJ Controller to Audio Interface
Now that you have all the necessary equipment ready, let’s walk through the step-by-step process of connecting your DJ controller to an audio interface:
- Power off all devices: Before making any connections, turn off your DJ controller, audio interface, and computer.
- Connect the DJ controller to the audio interface: Depending on the connectors available on your DJ controller and audio interface, use the appropriate audio cables to connect the outputs of your DJ controller to the inputs of the audio interface. Common connections include RCA-to-RCA, 1/4″ TRS, or XLR. Ensure a secure and snug connection.
- Connect the audio interface to the computer: Use the provided USB cable to connect the audio interface to an available USB port on your computer. Make sure to use a reliable and high-quality USB cable to ensure stable data transfer.
- Power on all devices: Turn on your audio interface, DJ controller, and computer. Wait for the devices to initialize and establish a connection.
- Configure your computer settings: Open the audio settings on your computer and select the audio interface as the default input and output device. Adjust the sample rate and buffer size according to your preferences and system capabilities. Consult the user manual of your audio interface or software for specific instructions on configuring the settings.
- Launch the DJ software: Open your preferred DJ software on your computer. Ensure that the software recognizes the connected audio interface and DJ controller. Configure the software settings as needed, including audio routing, MIDI mapping, and other preferences, to optimize your DJing experience.
- Test the connection: Play a track in your DJ software and monitor the audio output through your headphones or external speakers. Verify that the audio is being routed correctly through the DJ controller and audio interface. Adjust the volume levels and audio settings as necessary.
- Explore additional features: Take some time to explore the features and functionalities provided by the DJ software and audio interface. Experiment with effects, EQs, filters, and other tools to enhance your mixing and performance capabilities.
It’s essential to consult the user manuals of your DJ controller, audio interface, and DJ software for specific instructions and troubleshooting guidance. Following these steps will help you establish a solid connection between your DJ controller and audio interface, allowing you to unleash your creativity and master the art of DJing.
Troubleshooting Tips for Connection Issues
While connecting your DJ controller to an audio interface is a straightforward process, you may encounter some connection issues along the way. Here are some troubleshooting tips to help you overcome common problems:
- Check cable connections: Ensure that all audio and USB cables are securely connected at both ends. Loose connections can result in audio dropouts or unreliable communication between devices.
- Try different USB ports: If you’re experiencing issues with the USB connection, try connecting your audio interface to different USB ports on your computer. Some ports may have better power or data transfer capabilities than others.
- Restart devices: Sometimes, a simple restart can resolve connection problems. Turn off all devices, including the DJ controller, audio interface, and computer. Then power them back on in the correct sequence, allowing them to initialize properly.
- Update drivers and firmware: Ensure that you have the latest drivers and firmware for your DJ controller, audio interface, and computer. Manufacturers often release updates to address compatibility issues and improve overall performance.
- Verify software compatibility: Check if your DJ software is compatible with your DJ controller and audio interface. Visit the software manufacturer’s website and consult the documentation to confirm compatibility and, if necessary, download any required drivers or updates.
- Adjust buffer size and sample rate: If you’re experiencing audio latency or distortion, try adjusting the buffer size and sample rate settings in your audio interface or DJ software. Lower buffer sizes may decrease latency but require more processing power.
- Test with different devices: If possible, connect your DJ controller and audio interface to a different computer or device to isolate any hardware-related issues. This can help determine if the problem lies with the devices themselves or with the specific computer setup.
- Consult the user manuals and support: If all else fails, refer to the user manuals of your DJ controller, audio interface, and DJ software for troubleshooting guidance. Additionally, reach out to the manufacturer’s customer support for further assistance and personalized solutions.
Remember, audio setup issues can be frustrating, but with patience and careful troubleshooting, you can overcome them and get back to your DJing endeavors. Keep exploring and experimenting with different settings and techniques to unleash your full creative potential.
Conclusion
Connecting a DJ controller to an audio interface is a crucial step in creating a powerful and professional DJ setup. By understanding the roles of DJ controllers and audio interfaces and following the step-by-step guide we have provided, you can establish a seamless connection and unlock a world of creative possibilities.
Remember to gather all the necessary equipment, including your DJ controller, audio interface, USB and audio cables, headphones, and computer. Take the time to configure the settings on your computer and DJ software to ensure optimal performance and audio quality.
If you encounter any connection issues along the way, refer to our troubleshooting tips to overcome common problems. Check cable connections, try different USB ports, update drivers and firmware, and consult the user manuals and support resources provided by the manufacturers.
Understanding the connection process between your DJ controller and audio interface empowers you to create exceptional mixes and deliver captivating performances. Experiment with various DJ software, explore different effects and features, and let your creativity flow.
With a solid connection between your DJ controller and audio interface, you’re well-equipped to embark on your DJing journey, whether you’re performing at clubs, parties, or even in the comfort of your home studio. Let the music set the mood, and let your skills and imagination take center stage.
Remember, practice makes perfect. Keep honing your DJing skills, stay updated with the latest technology advancements, and never stop exploring new techniques and styles. Happy mixing!