Home>Production & Technology>Audiobook>How To Load MP3 Audiobook Into Itunes

Audiobook
How To Load MP3 Audiobook Into Itunes
Modified: January 22, 2024
Learn how to easily load MP3 audiobooks into iTunes and enjoy your favorite audiobooks on the go. Simplify your audiobook management with this step-by-step guide.
(Many of the links in this article redirect to a specific reviewed product. Your purchase of these products through affiliate links helps to generate commission for AudioLover.com, at no extra cost. Learn more)
Table of Contents
Introduction
With the rise of technology, audiobooks have become an increasingly popular form of entertainment and learning. The convenience of being able to listen to a story or gain knowledge while on the go has made audiobooks a go-to choice for many individuals. Audiobooks can be easily accessed and enjoyed on various platforms, and iTunes is one such platform that offers a seamless experience for audiobook enthusiasts.
In this article, we will guide you through the process of loading your MP3 audiobook into iTunes so that you can enjoy your favorite titles within the iTunes ecosystem. Whether you have purchased an audiobook or ripped it from a CD, this step-by-step tutorial will help you get your audiobook onto iTunes, organize it, and sync it with your Apple device.
Before we dive into the steps, it’s important to note that iTunes supports a specific format for audiobooks. By default, iTunes recognizes the M4B format for audiobooks – a format that allows for convenient playback and navigation. However, if your audiobook is in the MP3 format, you will need to convert it to the M4B format before importing it into iTunes. Don’t worry, we’ll cover this in more detail in the following steps.
So, if you’re ready to embark on this audiobook adventure, let’s get started!
Step 1: Convert MP3 Audiobook into iTunes-Compatible Format
To ensure that your MP3 audiobook can be recognized and played smoothly in iTunes, you’ll need to convert it into the iTunes-compatible format, M4B. Here’s a simple process to follow:
- Choose a Conversion Tool: There are several software options available for converting MP3 files to M4B. One popular choice is the iTunes software itself, which provides a built-in converter. Alternatively, you can use third-party conversion programs like TunesKit Audiobook Converter, FFmpeg, or MediaHuman Audio Converter.
- Install and Open the Conversion Tool: Once you’ve decided on a conversion tool, download and install it on your computer. Open the program to prepare for the conversion process.
- Select the MP3 Audiobook: In the conversion tool, locate and select the MP3 audiobook file that you want to convert. You can usually do this by clicking on a “Browse” or “Add File” button within the software.
- Choose Output Format: Select the output format as M4B. Some tools may have the format pre-selected, while others might require you to manually choose it from a dropdown menu or settings option.
- Set Conversion Settings: Adjust any specific conversion settings if desired, such as the audio quality or the destination folder where the converted M4B file will be saved.
- Start the Conversion: Once you have everything set, initiate the conversion process by clicking on the “Convert” or “Start” button within the software. Depending on the size of your audiobook file and the speed of your computer, the conversion may take some time.
- Verify the Conversion: After the conversion is complete, check the output file to ensure that it has been successfully converted into the M4B format. Listen to a few minutes of the audiobook to confirm that it plays smoothly and without any issues.
Congratulations! You have successfully converted your MP3 audiobook into the iTunes-compatible M4B format. Now, it’s time to import it into iTunes.
Step 2: Import the Audiobook into iTunes
Now that your MP3 audiobook has been converted into the iTunes-compatible M4B format, it’s time to import it into iTunes. Follow these steps:
- Open iTunes: Launch the iTunes application on your computer. If you don’t have iTunes installed, you can download it from the Apple website and install it.
- Go to “File” menu: In the top menu bar of iTunes, click on “File”.
- Select “Add File to Library” or “Add Folder to Library”: In the dropdown menu that appears when you click on “File”, select either “Add File to Library” if you have a single M4B file, or “Add Folder to Library” if you have a folder containing multiple M4B files.
- Navigate to the M4B Audiobook File: A file browser window will open. Browse through your computer’s files and locate the M4B audiobook file that you converted in Step 1. Select the file and click “Open”.
- Wait for the Import: iTunes will start importing the M4B audiobook file into your library. The duration of this process will depend on the size of the file.
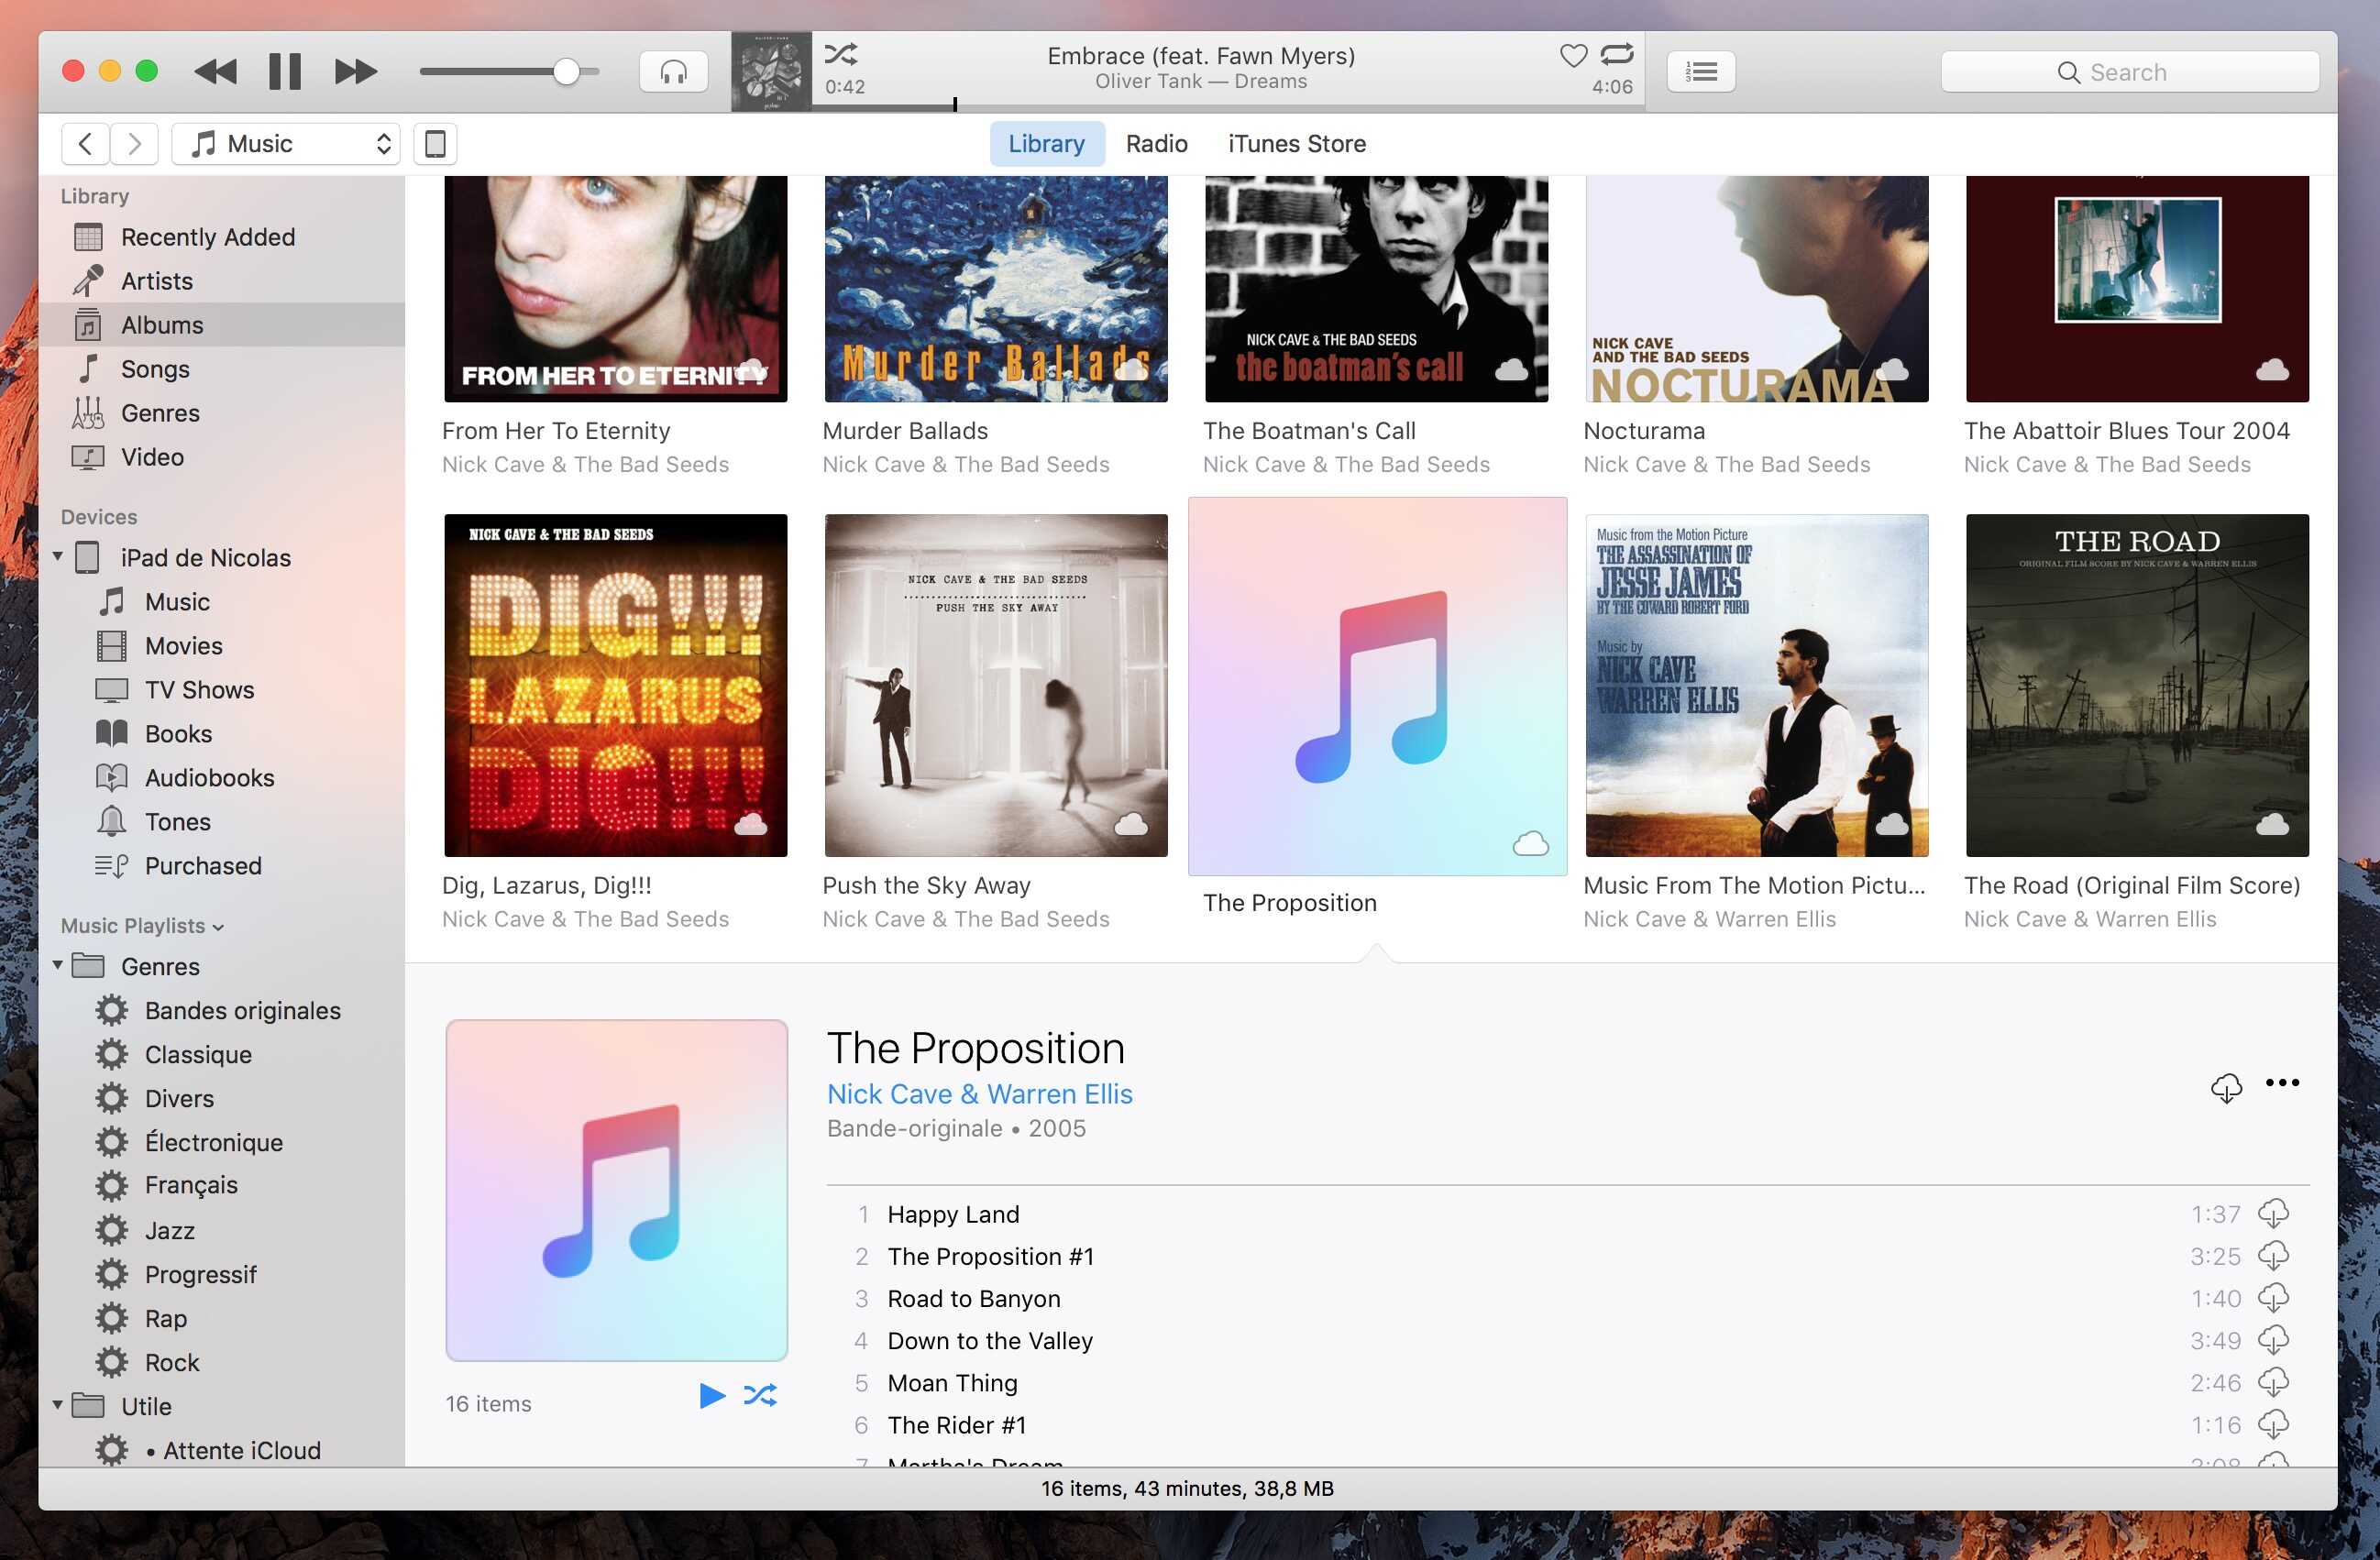
- Verify the Import: Once the import is complete, you should see the audiobook listed in your iTunes library. You can check under the “Audiobooks” section in the left sidebar of the iTunes window.
Great job! You have successfully imported your M4B audiobook into iTunes. Now, it’s time to organize it in iTunes for easy access and navigation.
Step 3: Organize the Audiobook in iTunes
After importing the audiobook into iTunes, it’s important to organize it so that you can easily find and enjoy it. Follow these steps to organize your audiobook:
- Select the Audiobook: In the iTunes library, locate and click on the audiobook you want to organize. This will highlight it.
- Get Info: Right-click on the highlighted audiobook and select “Get Info” from the context menu.
- Edit Metadata: In the “Get Info” window, you can edit various metadata fields such as the title, author, genre, and artwork of the audiobook. Fill in the relevant information to enhance the organization and aesthetics of your audiobook library.
- Add Chapters: If your audiobook is divided into chapters, you can add chapter markers for easy navigation. To add chapters, go to the “Options” tab in the “Get Info” window and click on “Add Chapter”. Enter the title and duration for each chapter and click “OK” to save.
- Sort and Arrange: To further organize your audiobook, you can sort and arrange it based on your preferences. For example, you can sort by title, author, or genre. You can also create custom playlists or folders to group related audiobooks together.
- Apply Changes: Once you have made the desired changes and organization, click “OK” in the “Get Info” window to apply the changes to your audiobook.
By following these steps, you have successfully organized your audiobook in iTunes. Now, it’s time to sync it with your Apple device so that you can enjoy your audiobook on the go.
Step 4: Sync the Audiobook to your Apple Device
Once you have organized your audiobook in iTunes, you can easily sync it with your Apple device, such as an iPhone or iPad, so that you can listen to it wherever you go. Follow these steps to sync your audiobook:
- Connect your Apple Device: Use a USB cable to connect your Apple device to your computer. Ensure that iTunes is open and running.
- Select your Device: In iTunes, you will see an icon representing your connected device in the top-left corner of the window. Click on this icon to select your device.
- Navigate to the Audiobook Section: In the left sidebar of the iTunes window, click on the “Books” or “Audiobooks” tab, depending on your iTunes version.
- Choose the Audiobook: From the list of audiobooks, check the box next to the audiobook you want to sync to your device.
- Apply the Sync: Click on the “Sync” or “Apply” button in the bottom-right corner of the iTunes window to start the sync process. Wait for the sync to complete.
- Eject your Device: Once the sync is complete, safely eject your Apple device from your computer by clicking on the eject icon next to your device’s name in the iTunes sidebar.
That’s it! Your audiobook is now synced to your Apple device and ready for you to enjoy. Disconnect your device from the computer and grab your headphones to start listening to your audiobook on the go.
Step 5: Enjoy your Audiobook on iTunes
Now that you have successfully loaded and organized your audiobook in iTunes, it’s time to sit back, relax, and enjoy your listening experience. Here are a few tips to enhance your audiobook enjoyment on iTunes:
- Playback Controls: Use the playback controls in iTunes to easily pause, play, skip, or rewind your audiobook. You can find these controls at the top of the iTunes window or in the mini player.
- Bookmarking: iTunes allows you to bookmark your audiobook, so you can easily resume listening from where you left off. To create a bookmark, simply click on the bookmark icon within the audiobook player.
- Playback Speed: Adjust the playback speed of your audiobook to your preference. You can speed up or slow down the narration pace by selecting the desired speed in the playback settings.
- Sync Across Devices: If you have multiple Apple devices, you can sync your audiobook library across them. This means that you can start listening on one device and continue from where you left off on another.
- iTunes Store: Explore the iTunes Store for a wide selection of audiobooks. You can purchase and download audiobooks directly within iTunes to add to your library.
- Create Playlists: If you have multiple audiobooks or want to combine audiobooks with other types of media, consider creating playlists. This allows you to curate your listening experience based on your mood or preferences.
- Discover Recommendations: iTunes provides recommendations and suggestions based on your listening history. Explore and discover new audiobooks that align with your interests.
With these tips, you can fully immerse yourself in the world of audiobooks on iTunes and make the most out of your listening experience. So, grab your headphones, find a comfortable spot, and enjoy the captivating stories and valuable knowledge that await you in your audiobook library.