Home>Production & Technology>Background Music>How To Use Audacity To Remove Background Music And Keep Vocals
Background Music
How To Use Audacity To Remove Background Music And Keep Vocals
Published: October 29, 2023
Learn how to use Audacity to remove background music and isolate vocals with our step-by-step guide. Perfect for musicians and content creators looking to improve their audio quality.
(Many of the links in this article redirect to a specific reviewed product. Your purchase of these products through affiliate links helps to generate commission for AudioLover.com, at no extra cost. Learn more)
Table of Contents
Introduction
Background music can enhance the atmosphere and evoke emotions in various forms of media. However, there are times when you may want to remove the background music from a particular audio file while keeping the vocals intact. Whether you are a content creator, a DJ, or a filmmaker, understanding how to remove background music can be a valuable skill.
One popular and powerful tool for audio editing is Audacity. Audacity is a free, open-source software that provides a range of features for recording and editing audio. In this article, we will guide you through the process of using Audacity to remove background music and keep the vocals, allowing you to create cleaner and more focused audio tracks.
Before we dive into the steps, it’s important to note that removing background music can be a complex process, especially if the music is heavily intertwined with the vocals. The success of the removal largely depends on the quality of the original recording and the characteristics of the background music.
It’s also worth mentioning that while Audacity offers powerful tools for audio editing, it may not always produce perfect results. However, with practice and experimentation, you can achieve significant improvements in isolating vocals and reducing the presence of background music.
Now, let’s get started with the step-by-step process of using Audacity to remove background music and preserve vocals.
Step 1: Download and Install Audacity
The first step in removing background music using Audacity is to download and install the software on your computer. Audacity is compatible with Windows, macOS, and Linux, making it accessible for users across different operating systems.
To download Audacity, you can visit the official website at https://www.audacityteam.org/. On the website, navigate to the “Downloads” section and select the appropriate version for your operating system.
Once you have downloaded the installation file, follow the on-screen instructions to install Audacity on your computer. The installation process is straightforward and usually involves accepting the terms and conditions and selecting the installation location.
After the installation is complete, launch Audacity to ensure it is running properly. You are now ready to start removing background music from your audio files.
Note: If you already have Audacity installed on your computer, make sure you have the latest version to access the most up-to-date features and improvements.
With Audacity installed, you can now move on to the next step, which is importing the audio file into the software.
Step 2: Import the Audio File
After successfully installing Audacity, the next step is to import the audio file that you want to remove the background music from. Audacity supports various file formats, including MP3, WAV, AIFF, and more.
To import the audio file, follow these simple steps:
- Launch Audacity on your computer.
- Click on the “File” menu at the top left of the screen.
- Select the “Open” option from the dropdown menu.
- Navigate to the location where your audio file is saved and select it.
- Click the “Open” button to import the audio file into Audacity.
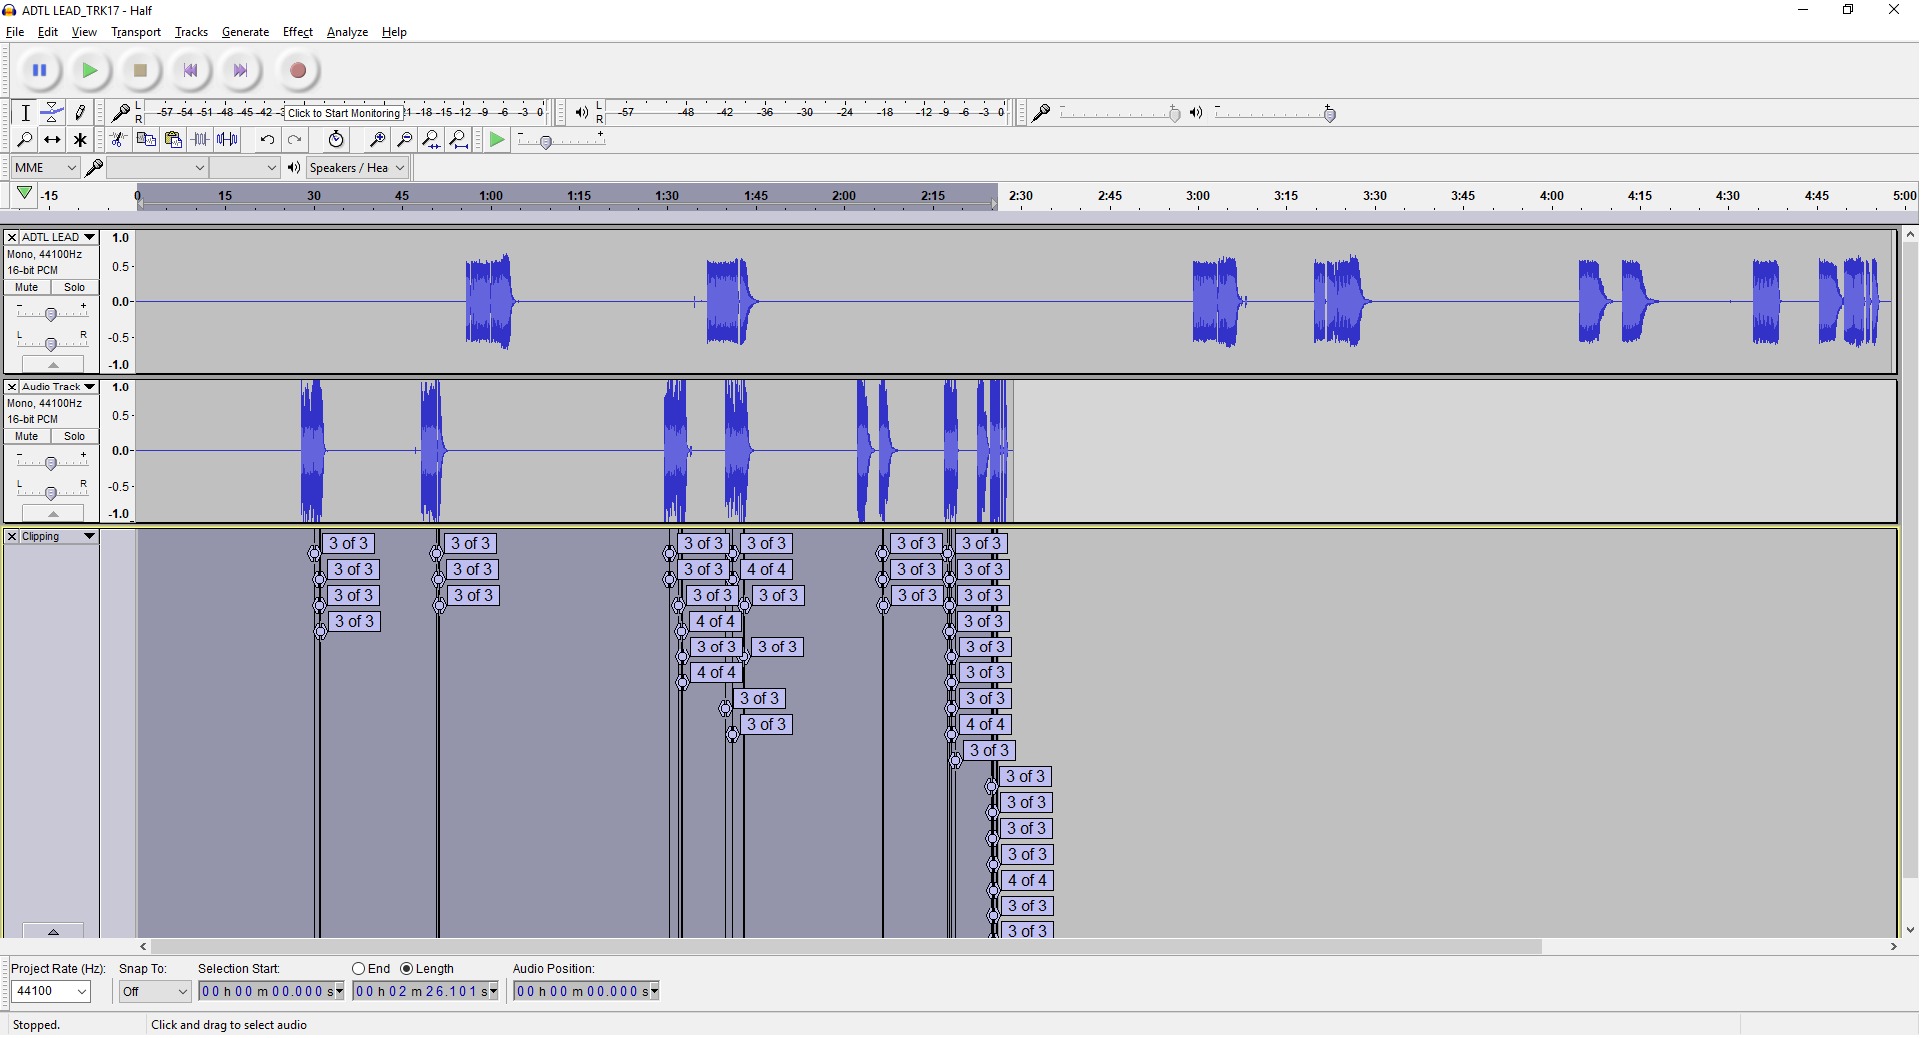
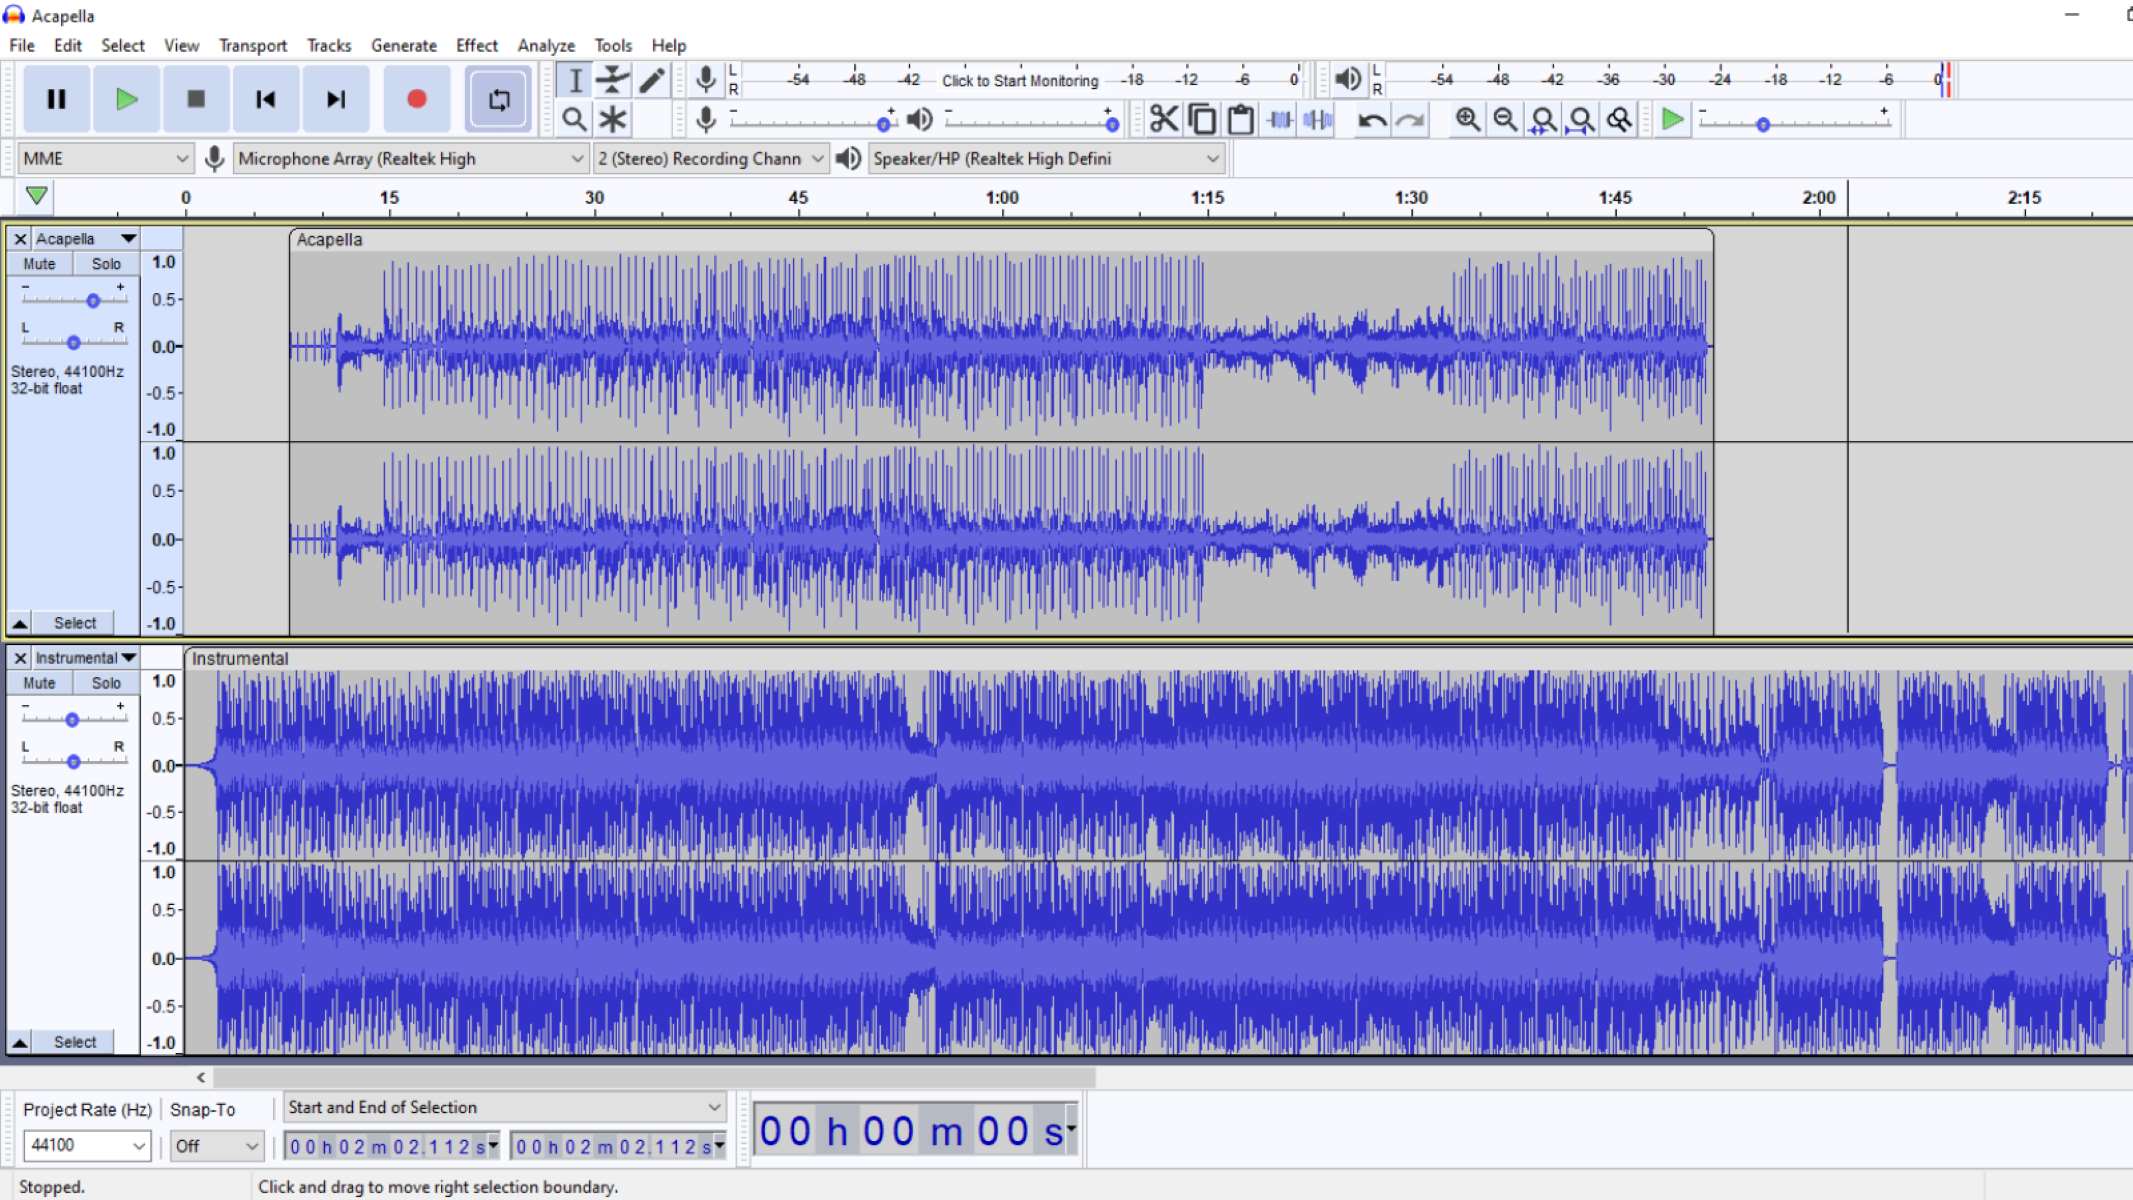
Once the audio file is imported, it will be displayed as a waveform in the main Audacity window. The waveform represents the visual representation of the audio file, with time on the horizontal axis and amplitude on the vertical axis.
By default, Audacity displays the entire waveform, but you can zoom in and out to get a closer look at specific sections of the audio file. Use the zoom tools located at the top of the Audacity window to adjust the zoom level accordingly.
Now that you have successfully imported the audio file into Audacity, you’re ready to move on to the next step, which involves identifying the background music track.
Step 3: Identify the Background Music Track
In order to effectively remove the background music from your audio file, it is important to identify the specific track or section of the audio that contains the unwanted music. This step involves listening to the audio file and visually analyzing the waveform in Audacity.
Here are the key steps to identify the background music track:
- Play the audio file in Audacity to familiarize yourself with its content.
- Listen for distinctive elements in the audio that indicate the presence of background music, such as instruments, melodies, or rhythm patterns.
- Observe the waveform in Audacity as the audio plays. Look for sections of the waveform that correspond to the background music. These sections might have higher amplitude or different patterns compared to the vocal sections.
- Use the playback controls in Audacity, such as play, pause, and scrubbing, to navigate through different parts of the audio and pinpoint the background music sections.
- Take note of the approximate start and end time of the background music sections.
It’s important to note that identifying the background music accurately may require multiple listens and close attention to detail. In some cases, the background music might be continuous throughout the entire audio file, while in others, it might appear intermittently.
By understanding the characteristics and duration of the background music track, you can proceed to the next step and start isolating the vocals in Audacity.
Step 4: Isolate the Vocals
Once you have identified the background music track, the next step is to isolate the vocals from the rest of the audio. This process involves using various techniques available in Audacity to separate the vocals as much as possible.
Follow these steps to isolate the vocals:
- Select a portion of the audio that contains only the background music. This will serve as a reference for distinguishing it from the vocals.
- Create a copy of the selected background music track by going to the “Edit” menu and selecting “Duplicate.” This will ensure that you have a backup of the original audio.
- Use Audacity’s selection tools, such as the “Time Shift Tool” or the “Selection Tool,” to highlight the portion of the audio that contains both the background music and the vocals.
- Go to the “Effect” menu and select “Invert.” This will invert the selected audio waveform, effectively cancelling out any sound that is identical in both the original audio and the selected background music track.
- At this point, the vocals should be more prominent in the audio. You can adjust the volume or use additional effects to further enhance the vocal isolation. Experiment with Audacity’s effects, such as “Equalization” or “Amplify,” to achieve the desired result.
- Repeat the process for different sections of the audio where the vocals are present, ensuring that you isolate them as much as possible.
Keep in mind that the success of isolating the vocals depends on the complexity of the original audio and the background music. In some cases, the vocals may be difficult to completely separate from the background music, but with practice and experimentation, you can achieve satisfactory results.
Now that you have successfully isolated the vocals, it’s time to move on to the next step: removing the background music from the audio.
Step 5: Remove the Background Music
Now that you have isolated the vocals, it’s time to remove the background music from the audio file completely. Audacity provides several methods and tools to accomplish this task.
Follow these steps to remove the background music:
- Select the portion of the audio that contains only the background music.
- Choose the “Edit” menu and select “Delete.” This will remove the selected audio, effectively deleting the background music from the track.
- Repeat the process for different sections of the audio where the background music is present until it is completely removed.
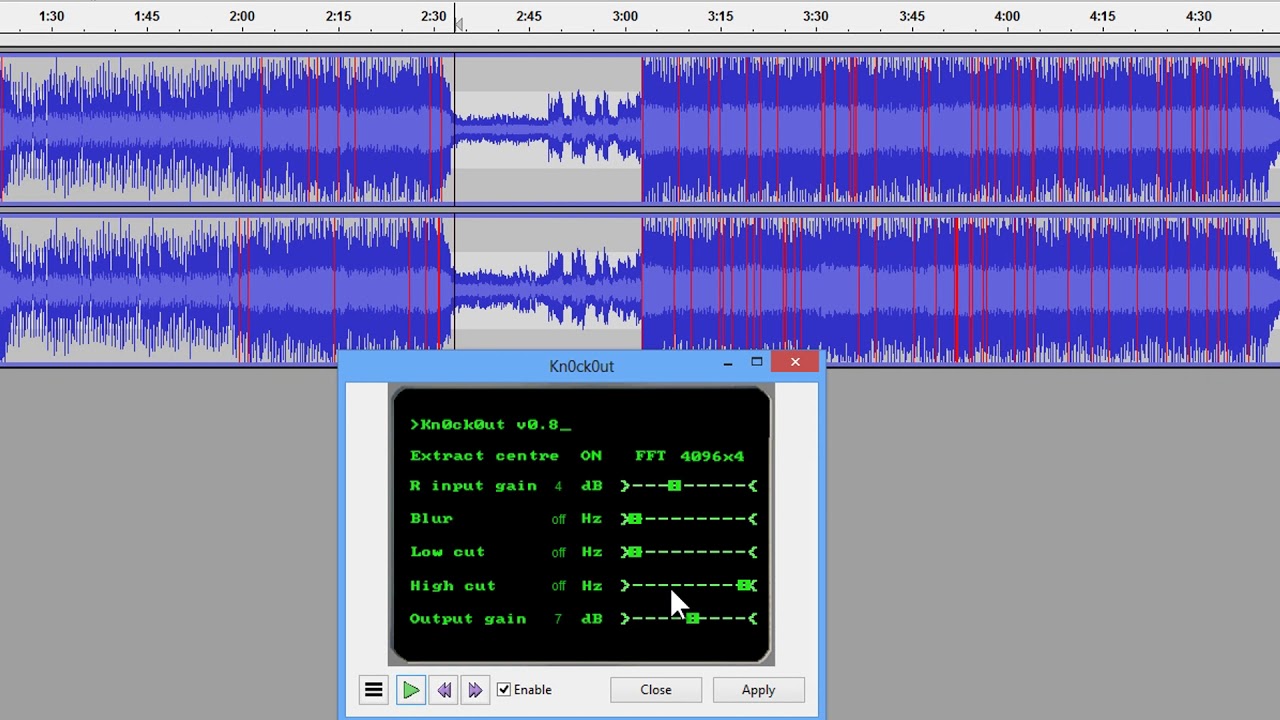
Alternatively, you can use Audacity’s “Noise Reduction” feature to further reduce the presence of the background music. This feature analyzes a sample of the background music and applies a noise reduction algorithm to minimize its impact on the vocal track.
Here’s how to utilize the “Noise Reduction” feature:
- Select a portion of the audio that contains only the background music.
- Go to the “Effect” menu and click on “Noise Reduction.”
- In the “Noise Reduction” dialog box, click on the “Get Noise Profile” button. This action will analyze the selected section and create a noise profile for the background music.
- Next, select the entire audio track by pressing “Ctrl+A” (or “Command+A” on Mac).
- Go back to the “Effect” menu, click on “Noise Reduction” once again, and adjust the sliders to fine-tune the noise reduction settings to your preference.
- Click on “OK” to apply the noise reduction effect to the track.
It is important to note that the success of removing the background music entirely depends on the quality of the original recording and the characteristics of the background music. Some background music elements may be more challenging to remove completely than others.
After removing the background music, take the time to listen to the track and ensure that the vocals are clear and the overall sound quality meets your expectations.
Now that you have successfully removed the background music from the audio file, it’s time to export the cleaned track.
Step 6: Export the Cleaned Audio File
After removing the background music and achieving the desired vocal isolation, it’s time to export the cleaned audio file from Audacity. Exporting the file allows you to save the edited track as a separate audio file that you can use for various purposes.
Follow these steps to export the cleaned audio file:
- Go to the “File” menu at the top left of the Audacity window.
- Select the “Export” option from the dropdown menu.
- Choose the desired file format for your exported file, such as MP3, WAV, or AIFF. Select a high-quality format that suits your needs.
- Specify the location where you want to save the exported file.
- Provide a name for the file, ensuring it is descriptive and relevant.
- Click the “Save” or “Export” button to begin the export process.
- Adjust any additional export settings, such as bit rate or sample rate, if necessary, and click “OK” to proceed with the export.
- Audacity will process the audio and save the cleaned file to the specified location.
After exporting the cleaned audio file, take the time to listen to it and make sure it meets your expectations. If needed, you can always revisit the previous steps to make further adjustments or apply additional effects.
Congratulations! You have successfully removed the background music and preserved the vocals using Audacity. Your cleaned audio file is now ready for use in your projects or to be shared with others.
Remember, practice and experimentation are key to mastering the art of removing background music. The more you work with Audacity and explore its features, the better you will become at achieving clean vocal isolations.
Keep in mind that removing background music completely may not always be possible, especially with complex recordings. However, with a combination of careful selection, isolation, and noise reduction techniques, you can significantly reduce the presence of the background music and create a more focused audio track.
Now go ahead and unleash your creativity with Audacity as you remove background music and bring your audio projects to life!
Conclusion
Removing background music while preserving vocals is a valuable skill that can enhance your audio projects and help you create cleaner and more focused tracks. Audacity, with its powerful features and user-friendly interface, provides an excellent platform for achieving this goal.
In this comprehensive guide, we have walked you through the step-by-step process of using Audacity to remove background music. From downloading and installing Audacity to exporting the cleaned audio file, each step has been detailed to ensure a smooth and successful experience.
While the process of removing background music can be complex, it is important to remember that practice and experimentation are key to mastering this skill. By familiarizing yourself with Audacity’s tools and techniques, you can significantly decrease the presence of background music and create a more professional sound.
However, it is worth noting that completely removing background music may not always be possible, especially when the music is deeply intertwined with the vocals. The success of the removal depends on the quality of the original recording and the characteristics of the background music.
Throughout the entire process, it is crucial to listen closely to the audio, visually analyze the waveform, and make adjustments as needed. Trust your ears and make subjective judgments to achieve the best possible results.
With practice, patience, and a touch of creativity, you can master the art of removing background music with Audacity, elevating the overall quality of your audio projects.
So, what are you waiting for? Download Audacity, follow the steps outlined in this guide, and unlock the potential of your audio editing skills. Remove the background music, highlight the vocals, and let your creativity shine!