Home>Production & Technology>Background Music>How To Take Out Background Music In Audacity
Background Music
How To Take Out Background Music In Audacity
Published: October 29, 2023
Learn how to remove background music from your audio files using Audacity. Follow our step-by-step guide to eliminate unwanted music and enhance your recordings.
(Many of the links in this article redirect to a specific reviewed product. Your purchase of these products through affiliate links helps to generate commission for AudioLover.com, at no extra cost. Learn more)
Table of Contents
Introduction
Welcome to this tutorial on how to take out background music in Audacity. Background music can be a great addition to videos, presentations, and other multimedia projects. However, there are times when you may want to remove or reduce the background music to highlight other audio elements or to create a more focused listening experience. This can be particularly useful when editing videos, creating podcasts, or cleaning up audio recordings.
Audacity is a popular and user-friendly audio editing software that allows you to manipulate and edit audio files easily. It offers a wide range of powerful tools and effects, including the ability to remove background music. In this tutorial, we will guide you through the process of removing background music using Audacity.
Before we begin, it’s important to note that removing background music entirely may not be possible in all cases. The effectiveness of the technique will depend on various factors, such as the quality of the audio recording and the similarity between the background music and the primary audio you wish to preserve. However, even partial reduction can significantly improve the overall audio quality and make the desired elements stand out.
Now, let’s dive into the process of taking out background music in Audacity step by step. By the end of this tutorial, you’ll have the skills and knowledge to confidently edit your audio files and remove or reduce unwanted background music.
Understanding Background Music in Audacity
Before we delve into the steps of removing background music in Audacity, let’s take a moment to understand what background music is and how it can impact our audio projects.
Background music refers to the musical accompaniment played behind the main audio content. It is often used to evoke emotions, enhance the atmosphere, or support a particular theme. While background music can add depth and richness to our creations, there are instances where we might want to reduce or remove it. This could be to highlight dialogue or narration, emphasize sound effects, or simply create a cleaner and more focused audio experience.
When it comes to background music, it is essential to consider its frequency range and how it interacts with the primary audio. Background music typically occupies a specific frequency spectrum, such as the mid to high range, while the primary audio occupies a different range, such as the vocal frequencies. By understanding this distinction, we can use Audacity’s tools and effects to selectively reduce or eliminate the background music while preserving the clarity and integrity of the primary audio.
In Audacity, the process of removing background music involves applying a noise reduction effect. This effect analyzes the audio waveform and identifies portions that match the characteristics of the background music. It then reduces the volume of these sections, effectively minimizing their presence in the final output.
It is important to note that the success of removing or reducing background music in Audacity depends on various factors. These include the quality of the original recording, the similarities between the primary audio and background music, and the settings chosen for the noise reduction effect. It may require some experimentation and fine-tuning to achieve the desired result.
Now that we have a basic understanding of background music and its impact, let’s move on to the practical steps of removing background music in Audacity. Remember, patience and practice are key as you become more proficient in using Audacity’s tools to enhance your audio projects.
Step 1: Importing the Audio File
The first step in removing background music in Audacity is to import the audio file you want to edit. Follow these simple instructions to get started:
- Launch Audacity on your computer. If you don’t have Audacity installed, you can download it for free from the official Audacity website.
- Click on “File” in the top menu bar and select “Open” from the drop-down menu.
- Navigate to the location where your audio file is stored and select it. Click on “Open” to import the audio file into Audacity.
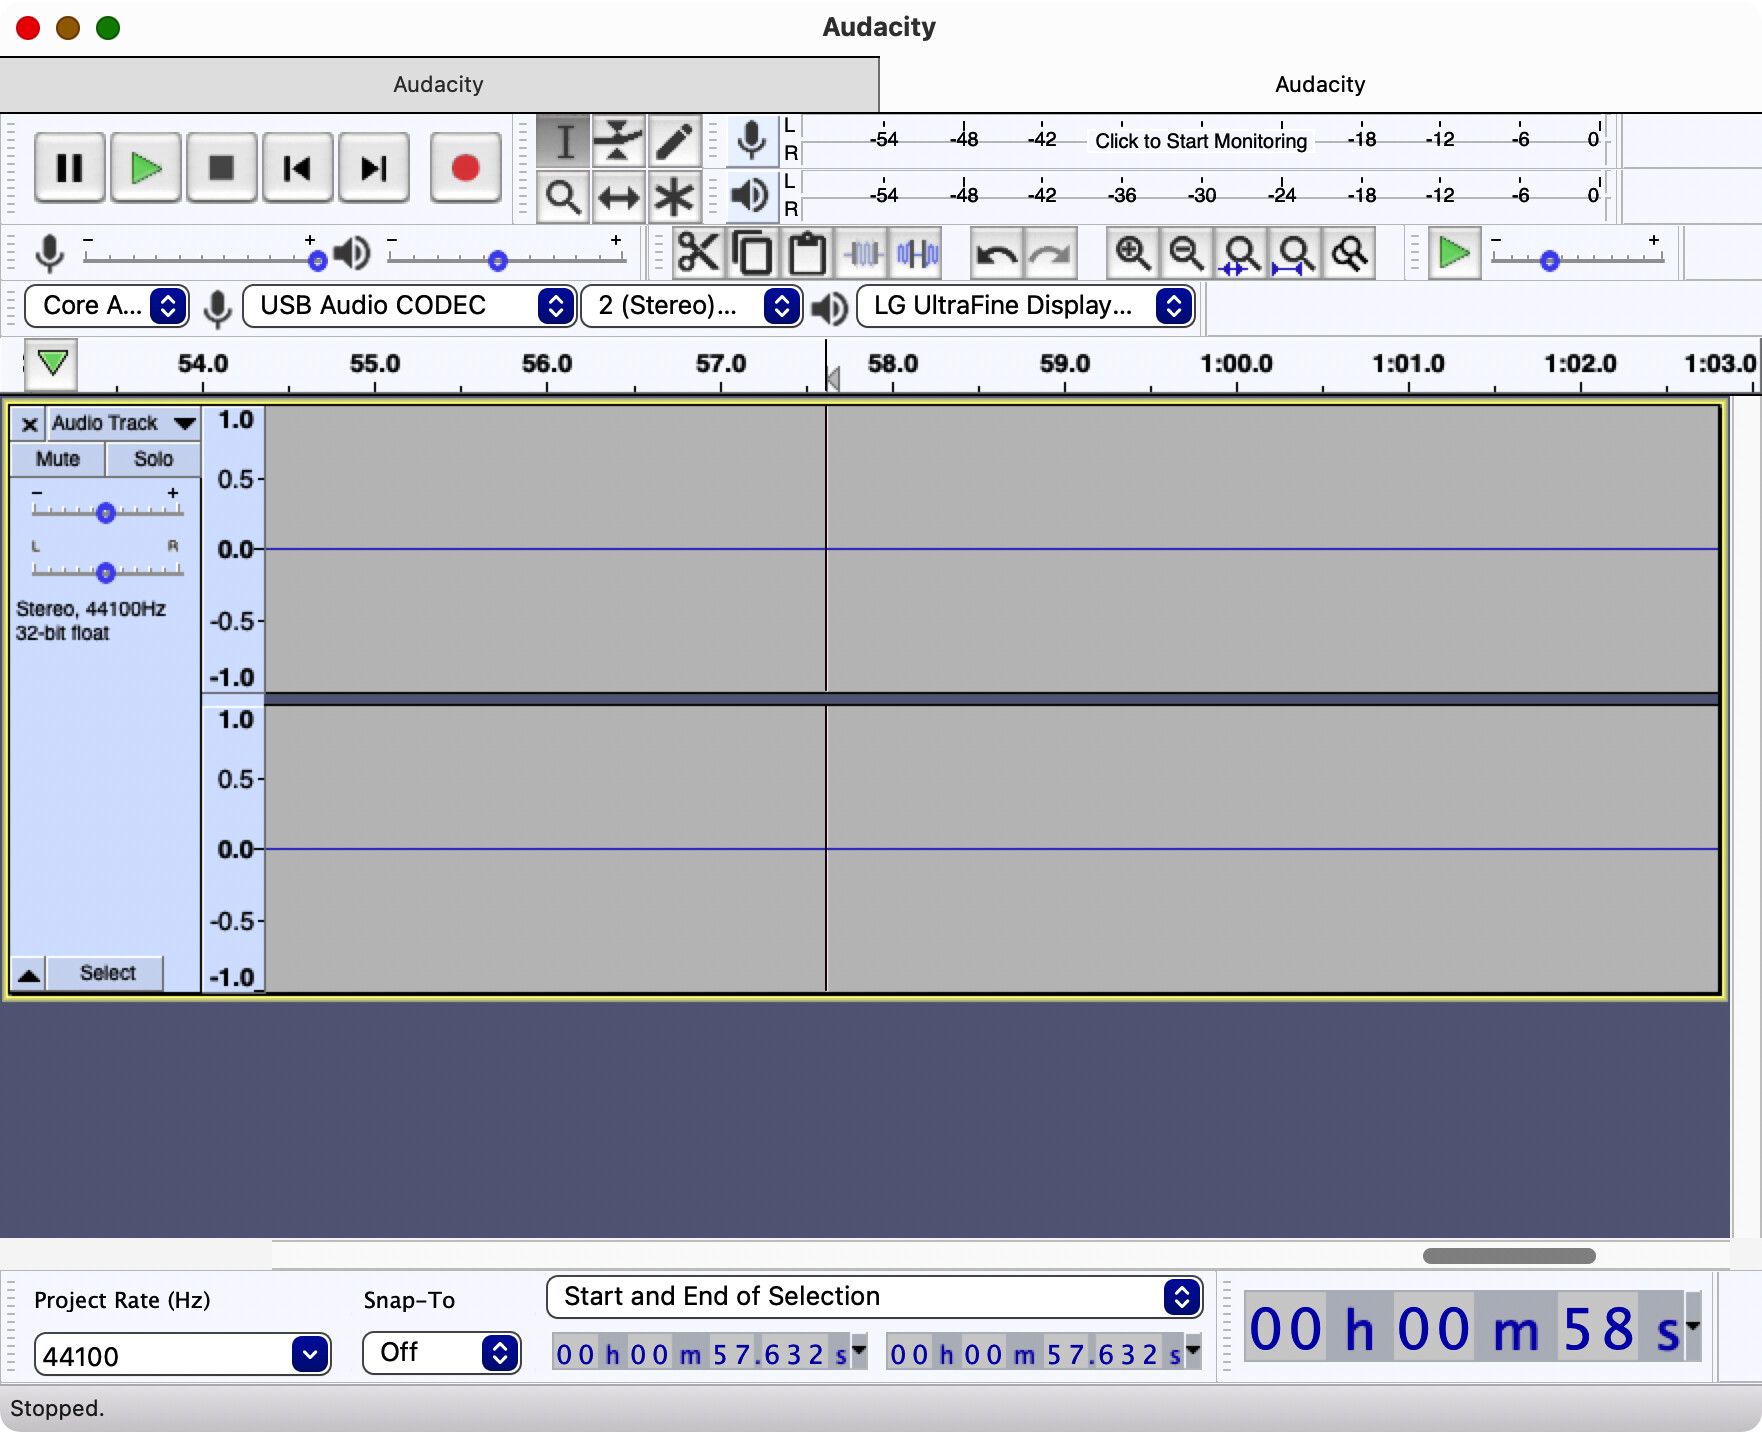
- You will see the waveform of your audio file displayed in the main editing window of Audacity. This waveform represents the visual representation of the audio.
It’s crucial to choose an audio file that contains both the background music and the primary audio you want to preserve. Depending on the source of your audio, you might have a separate track for background music or a single track with both elements mixed together.
If you have separate tracks, select the one containing the background music. If the background music and the primary audio are mixed on the same track, don’t worry – we will isolate the background music track in the following steps.
By importing the audio file into Audacity, you are now ready to proceed to the next step of removing background music. Remember to save your work regularly to avoid any potential loss of progress.
Step 2: Isolating the Background Music Track
After importing the audio file into Audacity, the next step in removing background music is to isolate the track containing the background music. This will allow us to focus our editing efforts specifically on the background music, while preserving the primary audio. Follow these steps to isolate the background music track:
- Locate the track containing the background music in the Audacity timeline. If you have separate tracks, this will be relatively straightforward. However, if the background music and primary audio are mixed on the same track, you will need to proceed to the next step.
- Click on the dropdown arrow next to the audio track name. This will reveal additional options.
- Select “Split Stereo to Mono” from the options. This function separates the mixed track into two mono tracks, allowing us to work with them individually.
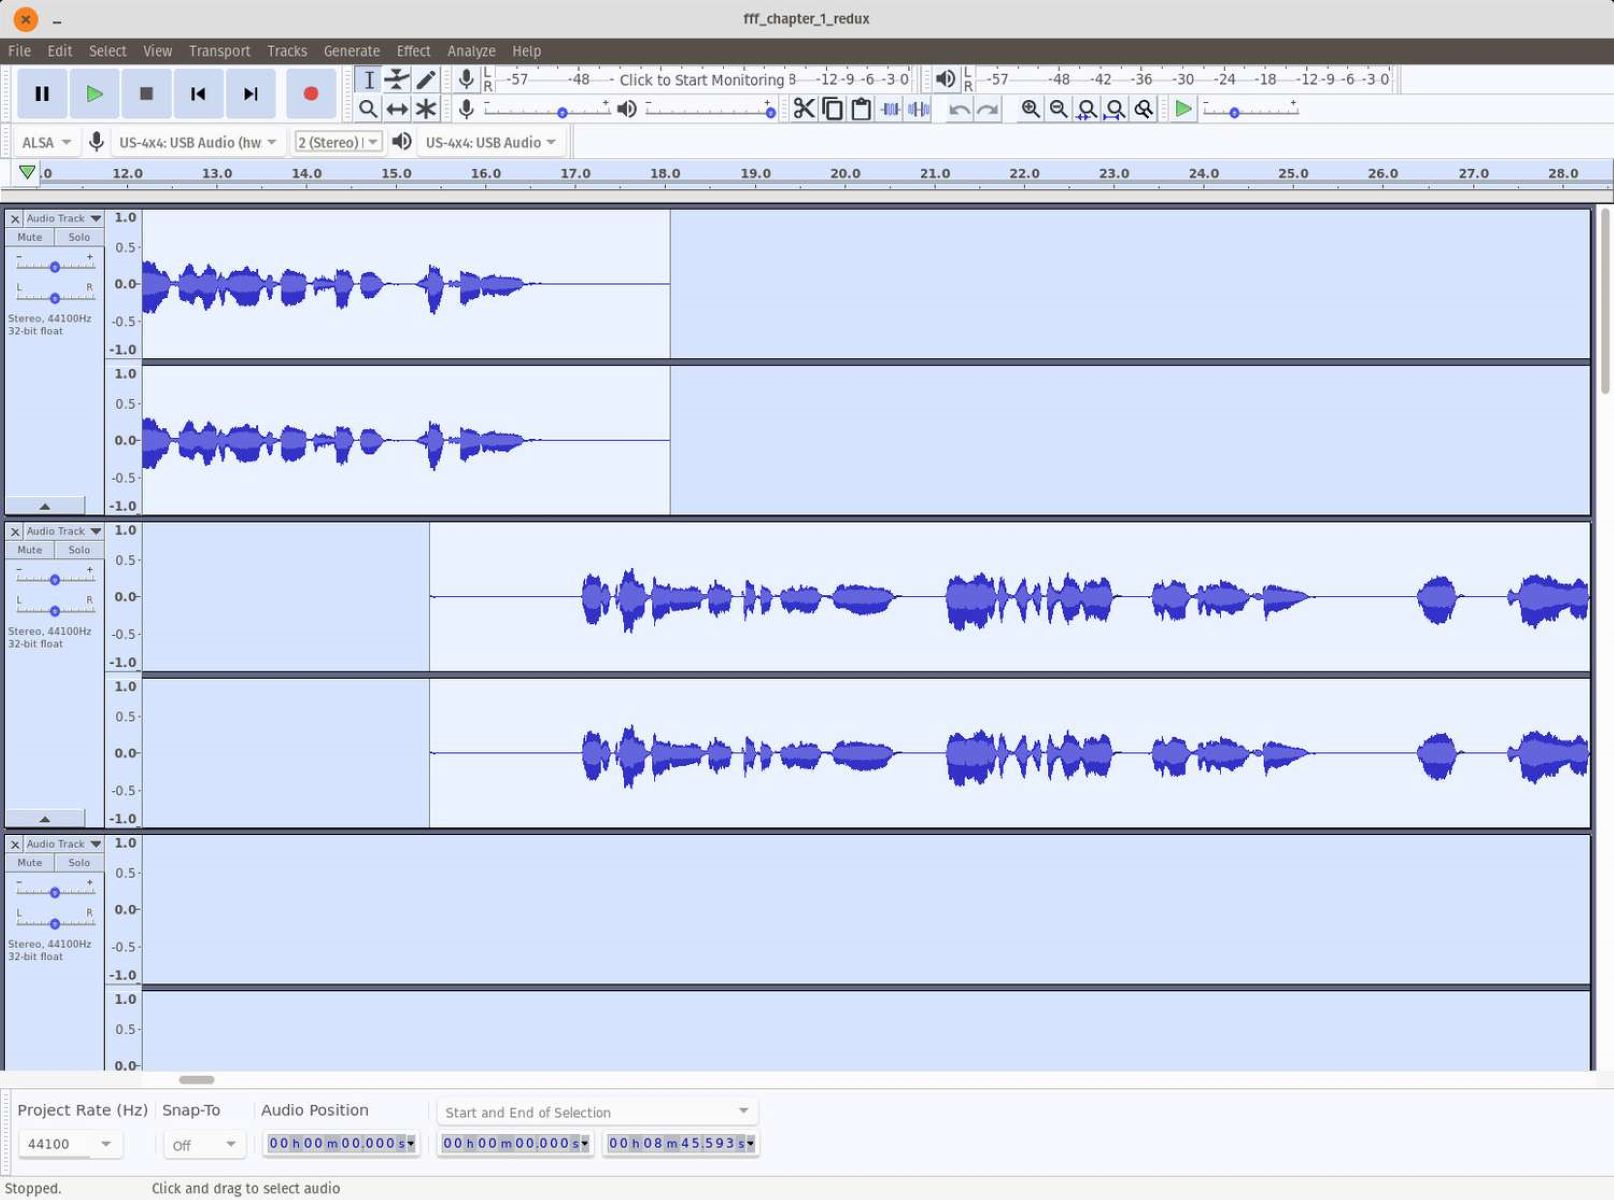
- You will now have two separate mono tracks. One will contain the background music, and the other will contain the primary audio. Double-check to ensure that the background music track is correctly identified.
- If you encounter any issues with the separation or need to adjust the tracks further, you can use Audacity’s selection and editing tools to manipulate the audio as needed. Ensure that the background music track is isolated and ready for the next step.
Isolating the background music track is a vital step in precisely targeting the background music for removal or reduction. With this accomplished, we can move on to applying the noise reduction effect in the following steps.
Remember to save your progress regularly to avoid any loss of work. Audacity provides a variety of editing and manipulation tools, so don’t be afraid to experiment and fine-tune the tracks to achieve the best possible result.
Step 3: Applying the Noise Reduction Effect
Now that we have isolated the background music track, we can proceed to remove or reduce the background music using Audacity’s noise reduction effect. This powerful tool allows us to analyze and manipulate the audio waveform to reduce the presence of the background music. Follow these steps to apply the noise reduction effect:
- Select the portion of the audio track containing the background music. You can do this by clicking and dragging over the desired section in the Audacity timeline.
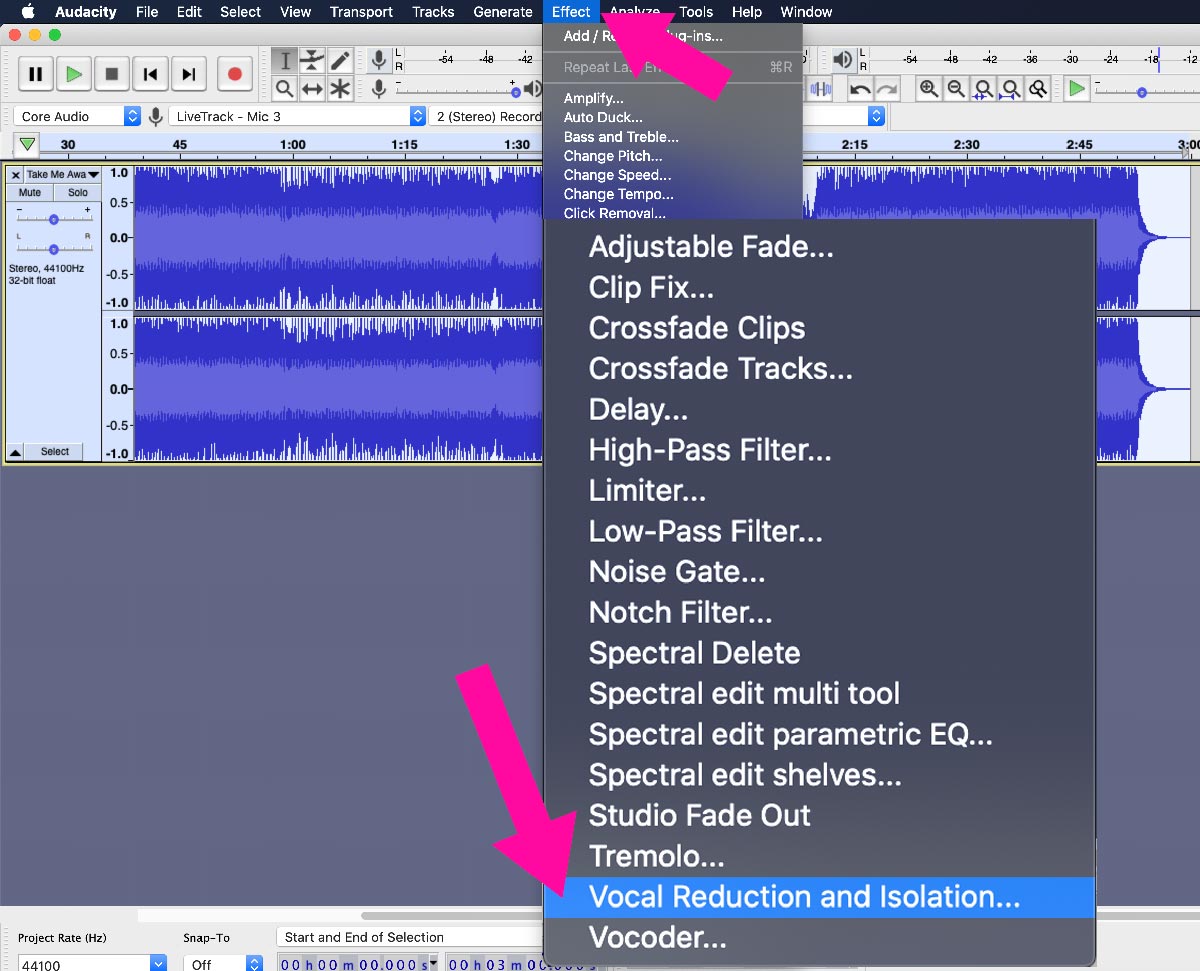
- Click on the “Effect” menu at the top of the Audacity window and select “Noise Reduction” from the drop-down menu.
- In the Noise Reduction window, you will find various sliders and options to adjust the settings. Leave the default settings as they are for now, as we will fine-tune them in the next step.
- Click on the “Preview” button to hear a preview of the effect on the selected portion of the audio track. This will help you gauge the impact of the noise reduction without making any permanent changes.
- If you are satisfied with the previewed result, click on the “OK” button to apply the noise reduction effect. If not, you can adjust the settings and preview again until you achieve your desired outcome.
The noise reduction effect analyzes the selected portion of the audio track and identifies frequencies that match the background music. It then applies a reduction to those frequencies, minimizing the presence of the background music. This process can significantly improve the clarity and focus of the primary audio.
It’s important to note that the effectiveness of the noise reduction effect will depend on various factors, such as the quality of the audio recording and the settings chosen. Additionally, applying the noise reduction effect to the entire background music track may not yield ideal results. This is why it’s essential to select specific portions of the track for noise reduction, focusing on sections where the background music is most prominent.
With the noise reduction effect applied, we can now move on to fine-tuning the settings to achieve the best possible result in the next step.
Step 4: Adjusting the Settings
After applying the noise reduction effect to the selected portion of the background music track, it’s time to fine-tune the settings to optimize the result. Adjusting the settings in Audacity allows us to customize the noise reduction effect to better match the specific characteristics of the background music. Follow these steps to adjust the settings:
- Select the portion of the audio track where you have applied the noise reduction effect.
- Click on the “Effect” menu and choose “Noise Reduction” to open the Noise Reduction window once again.
- Inside the Noise Reduction window, you will see various sliders and options to adjust the settings. These include “Noise Reduction,” “Sensitivity,” and “Frequency Smoothing.”
- Start by adjusting the “Noise Reduction” slider. Increasing the value will result in a more aggressive reduction of the background music. However, be cautious not to set it too high, as it may negatively impact the purity of the primary audio.
- Next, fine-tune the “Sensitivity” slider. This setting determines the threshold at which the noise reduction effect is applied. Increasing the sensitivity may help to target and reduce more specific instances of background music, but again, be mindful of potential artifacts in the primary audio.
- Lastly, adjust the “Frequency Smoothing” slider. This setting controls the degree of smoothing applied to the frequency response after noise reduction. Higher values result in a smoother response but may slightly impact the overall audio quality.
- Preview the effect by clicking the “Preview” button and listen carefully to the result. Make any necessary adjustments to the settings until you achieve the desired outcome.
- Once you are satisfied with the settings, click “OK” to apply the adjusted noise reduction effect to the selected portion of the background music track.
Remember that finding the right balance of settings is key to achieving the optimal result. It may require some trial and error, as the effectiveness of the noise reduction effect will depend on various factors such as the nature of the background music and the quality of the audio recording.
With the settings adjusted, we are now ready to preview and apply the effect in the next step. Don’t be afraid to experiment and iterate until you achieve the desired audio result.
Step 5: Previewing and Applying the Effect
After adjusting the noise reduction settings to your liking, it’s time to preview the effect and apply it to the entire background music track. This step allows you to fine-tune the result and ensure that the background music has been successfully reduced or removed. Follow these steps to preview and apply the effect:
- Select the entire background music track by clicking on it or using the selection tool.
- Click on the “Effect” menu and choose “Repeat Noise Reduction” from the drop-down menu. This will apply the noise reduction effect to the entire track with the same settings as before.
- After the effect is applied, click on the “Play” button in the Audacity toolbar to preview the edited track. Listen carefully to ensure that the background music has been significantly reduced or removed while preserving the quality of the primary audio.
- If you are satisfied with the result, proceed to the next step. Otherwise, you can undo the effect and make further adjustments to the settings if needed.
- If everything sounds great, it’s time to apply the effect to the entire background music track. You can do this by clicking on the audio track to select it and then choosing “Effect” from the menu followed by “Apply”.
- Once the effect is applied, you will notice a significant reduction in the presence of the background music throughout the track.
Previewing the effect and applying it to the entire background music track ensures consistency and a desirable outcome. By carefully listening to the edited track, you can identify any areas that may still require adjustments and fine-tune the settings accordingly.
Remember that removing background music completely may not always be achievable, but reducing it to a tolerable level can greatly improve the overall audio quality. Don’t be afraid to experiment, listen critically, and make necessary refinements until you achieve the desired result.
We are now ready to move on to the final step – exporting the edited audio file in the next section.
Step 6: Exporting the Edited Audio File
Once you are satisfied with the results of removing or reducing the background music, it’s time to export the edited audio file from Audacity. Exporting the audio file will allow you to use it in your desired multimedia projects or share it with others. Follow these steps to export the edited audio file:
- Click on the “File” menu in the top toolbar and select “Export” from the dropdown menu.
- Choose a location on your computer where you want to save the edited audio file. It’s recommended to create a new folder specifically for your project to keep things organized.
- Select a suitable file format for your edited audio file. Common formats such as MP3 or WAV are widely compatible and offer good audio quality.
- Enter a name for your edited audio file, ensuring it accurately reflects the contents and helps you identify it later.
- Click on the “Save” button to start the exporting process.
- Depending on the length of your audio file and the chosen file format, the export process may take a few moments. Be patient and wait for it to complete.
- Once the export is finished, navigate to the location where you saved the edited audio file to verify that it’s indeed there.
Congratulations! You have successfully removed or reduced the background music in the audio file using Audacity. The exported edited audio file is now ready to be used in your video, podcast, presentation, or any other multimedia project.
It’s important to note that saving your progress and exporting the edited audio file in a high-quality format is crucial to maintaining the integrity and fidelity of the audio. Take a moment to double-check the exported file and listen to it to ensure that the background music has been adequately removed or reduced without any artifacts or distortions.
With the edited audio file exported, you can now integrate it into your project and enjoy the enhanced listening experience with the background music minimized. Feel free to share your work with others and continue exploring the powerful capabilities of Audacity for all your audio editing needs.
Now, go ahead and unleash your creativity with the newly edited audio file!
Conclusion
Removing or reducing background music in Audacity is a valuable skill that can greatly enhance your audio projects. By following the steps outlined in this tutorial, you have learned how to effectively remove or reduce background music using Audacity’s noise reduction effect.
Throughout the process, we covered important steps such as importing the audio file, isolating the background music track, applying the noise reduction effect, adjusting the settings, previewing and applying the effect, and finally exporting the edited audio file. By carefully following these steps, you can achieve a cleaner, more focused audio experience where the primary audio takes center stage.
It’s important to remember that the success of removing or reducing background music depends on various factors, including the quality of the original recording, the characteristics of the background music, and the chosen settings. Patience and practice are key as you experiment with different settings and fine-tune the effect to achieve the desired outcome.
By utilizing the powerful tools and effects offered by Audacity, you can take control of your audio projects and create professional-grade results. Whether you’re editing videos, producing podcasts, or working on other multimedia endeavors, the ability to remove or reduce background music will give you the freedom to craft audio that meets your vision and objectives.
Remember to always save your work regularly and listen critically to the edited audio file to ensure that the background music has been effectively minimized while maintaining the quality of the primary audio.
Now that you have mastered the technique of removing background music in Audacity, it’s time to unleash your creativity and produce audio content that truly captivates your audience. Explore the possibilities, experiment, and continue honing your skills as an audio editing enthusiast.
Happy editing!