Home>Production & Technology>Music Video>How To Make A Music Video In Premiere Pro
Music Video
How To Make A Music Video In Premiere Pro
Modified: March 7, 2024
Learn how to create professional music videos in Premiere Pro! Step-by-step guide for editing, adding effects, and syncing audio. Master the art of music video production.
(Many of the links in this article redirect to a specific reviewed product. Your purchase of these products through affiliate links helps to generate commission for AudioLover.com, at no extra cost. Learn more)
Table of Contents
- Introduction
- Pre-production
- Planning your concept and storyboarding
- Gathering resources and preparing your footage
- Preparing your audio and music
- Production
- Importing your footage and audio files into Premiere Pro
- Setting up your project and sequence settings
- Organizing your footage in the project panel
- Editing and arranging your footage on the timeline
- Adding effects, transitions, and color grading
- Enhancing your audio and adding music
- Fine-tuning the timing and pacing of your video
- Exporting your music video in the desired format
- Conclusion
Introduction
Welcome to the wonderful world of music videos! Whether you’re an aspiring musician or a filmmaker, creating a music video can be an incredibly rewarding and exciting endeavor. Music videos not only provide a visual representation of your music, but they also have the power to captivate and engage your audience on a whole new level.
In this article, we will guide you through the process of making a music video using the popular video editing software, Adobe Premiere Pro. From pre-production to post-production, we’ll cover everything you need to know to create a visually stunning and engaging music video.
Premiere Pro is a versatile and powerful tool that allows you to edit, add effects, and manipulate your footage with ease. Whether you’re working with a professional camera or simply using your smartphone, Premiere Pro provides the necessary tools to bring your creative vision to life.
Before we dive into the technical aspects of creating a music video, it’s important to remember the essence of a music video: storytelling. A music video is not just a collection of random footage, but rather a visual narrative that complements and enhances your music.
Throughout this article, we’ll emphasize the importance of planning, organization, and creativity. We’ll guide you through the pre-production process, where you’ll learn how to develop a concept, create a storyboard, and gather the necessary resources for your shoot. Then, we’ll move on to the production phase, where you’ll import and organize your footage, edit and arrange it on the timeline, and add effects and transitions. Lastly, we’ll cover the post-production phase, where you’ll fine-tune the timing and pacing of your video, enhance your audio, and finally export your masterpiece.
So, if you’re ready to embark on this creative journey, let’s get started on how to make a music video using Premiere Pro!
Pre-production
Before you start shooting your music video, it’s crucial to spend time in the pre-production phase to ensure a smooth and successful production process. Pre-production involves planning and preparing all the necessary elements that will go into your music video.
The first step in pre-production is to develop a concept for your music video. Consider the mood and theme of your song and brainstorm ideas that will visually complement the music. Are you looking for a high-energy, fast-paced video, or do you want something more introspective and emotional? Take the time to discuss and storyboard your ideas, outlining key scenes, shots, and visual elements that will help tell your story.
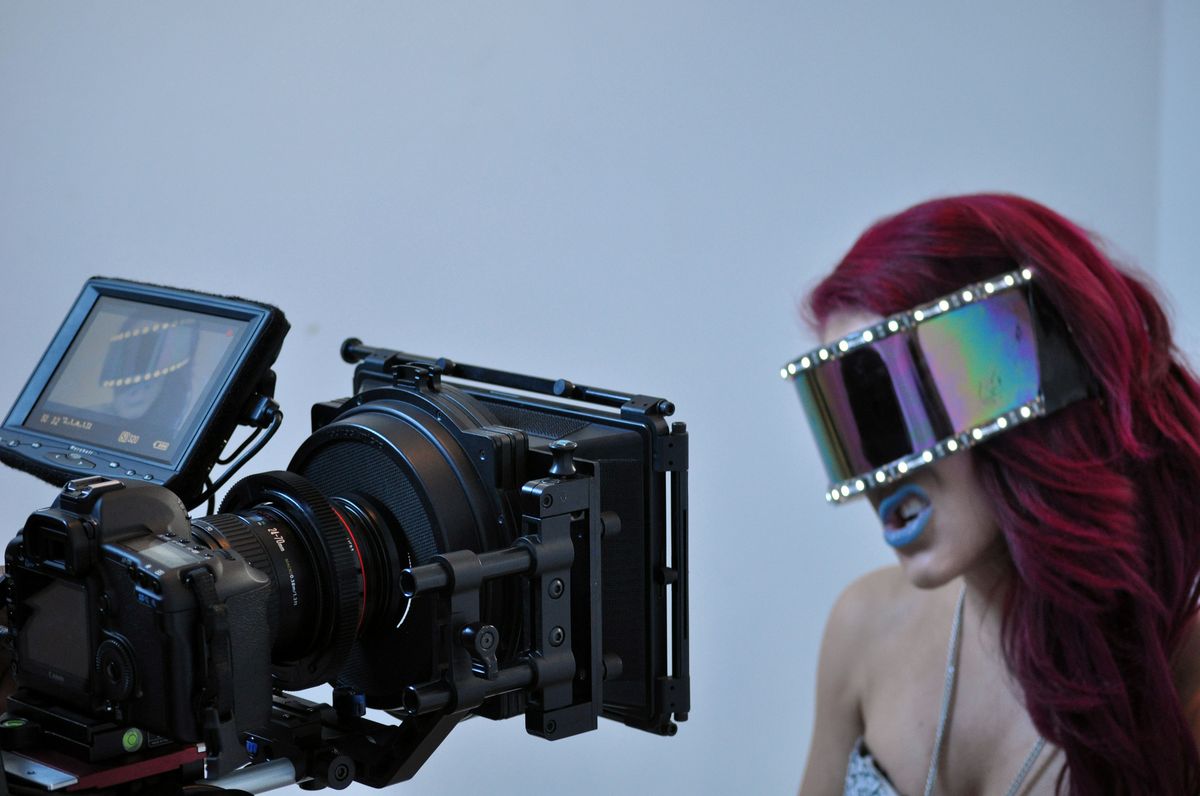
Gathering the necessary resources and preparing your footage is also a crucial part of pre-production. Decide on the equipment you’ll need for your shoot, such as cameras, lenses, and lighting. If you don’t have access to professional equipment, don’t worry – modern smartphones are capable of shooting high-quality video. Just make sure to stabilize your shots and consider investing in some affordable external microphones for better audio quality.
In addition to equipment, consider the location and props you’ll need for your video. Scout potential shooting locations that match your concept, whether it’s a rooftop, a beach, or a cozy living room. Make a list of props and costumes you’ll need and gather them before the shoot to save time and ensure everything is ready on the day of filming.
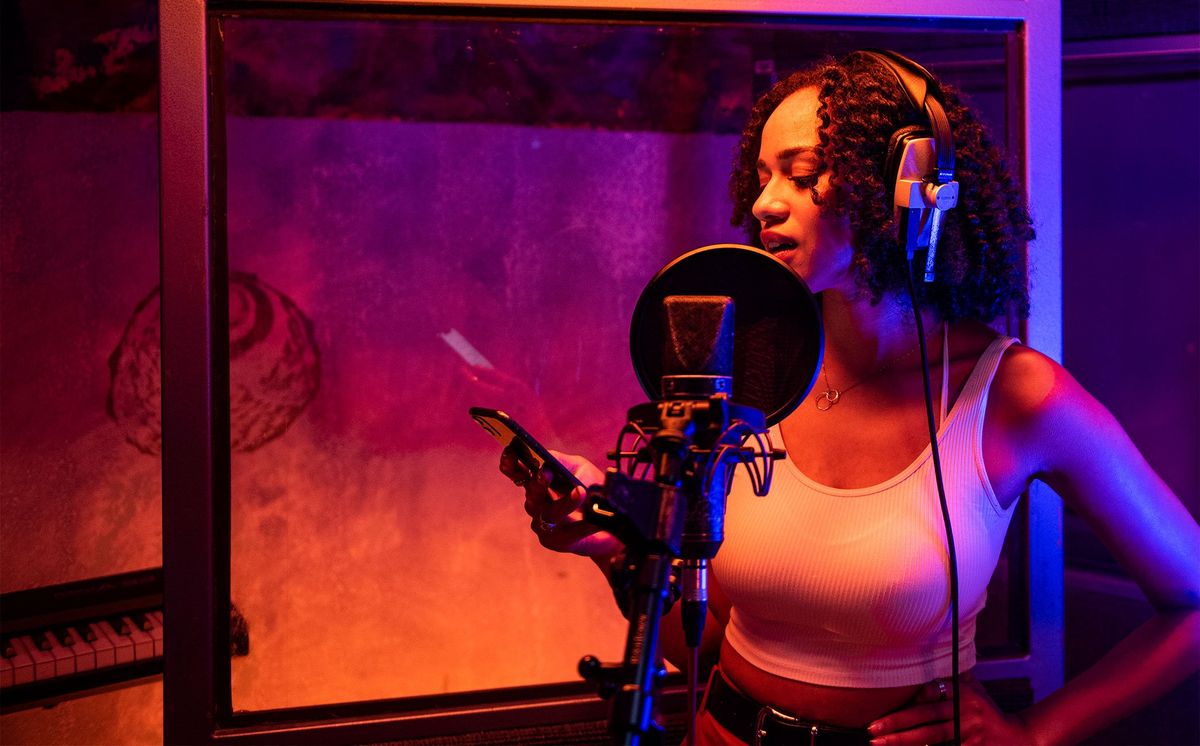
Pre-production is also the time to prepare your audio and music. If you don’t have a finished song yet, make sure to plan and record your audio before you start shooting. This will allow you to synchronize your visuals with the music during the editing process. Ensure that you have high-quality audio files and consider working with a sound engineer or music producer to achieve the best sound possible.
The pre-production phase is critical for ensuring a smooth and efficient shoot. Take the time to plan and prepare in advance, and you’ll save yourself headaches and frustrations down the line. Once you have everything in place, you’re ready to move into the production phase and start bringing your music video to life.
Planning your concept and storyboarding
One of the most important aspects of creating a music video is planning your concept and storyboarding. This is where you’ll flesh out your ideas and visually map out the structure of your video. Taking the time to plan and storyboard will not only help you stay organized during the shoot but also ensure that you capture the right shots to bring your vision to life.
Start by revisiting the lyrics and mood of your song, and brainstorm ideas that align with its themes and emotions. Consider the overall tone you want to convey – do you want your music video to be light-hearted, dramatic, or abstract? Think about the story or narrative you want to tell. It could be a literal interpretation of the lyrics or a more abstract visual representation.
Once you have a concept in mind, it’s time to create a storyboard. A storyboard is a series of drawings or sketches that outline the sequence of shots and scenes in your video. It allows you to plan camera angles, movements, and transitions, ensuring that you capture the right visuals to enhance your music.
When storyboarding, think about the pacing and flow of your video. Consider the dynamics of the song – are there any build-ups or drops that you can visually emphasize? Try to match the visuals with the music to create a cohesive and engaging experience for the viewer.
Storyboarding doesn’t require artistic perfection – simple sketches or even stick figures can be enough to communicate your vision. Focus on the composition of each shot, including any movement, camera angles, or special effects you want to incorporate. This will serve as a blueprint for your video shoot and guide you in capturing the necessary footage.
Additionally, consider any props, costumes, or locations you’ll need for your video and make note of them in your storyboard. This will help you plan and prepare for the shoot more efficiently.
Remember, a well-planned concept and storyboard will save you time and effort during the production phase. It will also provide a clear vision for your team or collaborators, ensuring that everyone is on the same page. So take the time to plan and storyboard, and watch as your music video comes to life!
Gathering resources and preparing your footage
Once you have your concept and storyboard in place, it’s time to gather the necessary resources and prepare your footage for the shoot. This crucial step ensures that you have everything you need to bring your music video to life and allows for a smoother and more efficient production process.
Firstly, consider the equipment you’ll need to capture your footage. Depending on your budget and the desired quality of your video, you may opt for professional cameras, lenses, and lighting equipment. However, if you don’t have access to professional gear, don’t let that discourage you. Modern smartphones can capture high-quality video, and there are many affordable options for supplementary equipment like stabilizers and external microphones that can greatly enhance the production value of your footage.
Next, think about the shooting locations and props that will complement your concept. Scout potential locations that match the mood and aesthetic you’re aiming for. Whether it’s a beautiful outdoor setting, a quirky indoor location, or a carefully designed set, ensure that you have permission to shoot there and consider any permits or legal requirements that may be necessary.
If your concept requires specific props or costumes, gather them before the shoot. Make a list and acquire or create the necessary items to ensure your vision comes to life. Pay attention to details and consider how each element will contribute to the overall look and feel of your music video.
Preparing your footage also involves familiarizing yourself with different shot types and camera techniques. Consider the various angles and movements that will visually enhance your video. Will you be incorporating wide shots, close-ups, or dynamic camera movements? Experiment with different techniques and explore how they can add visual interest and depth to your footage.
As part of the preparation process, it’s crucial to ensure that your camera settings are optimized for capturing high-quality video. Familiarize yourself with settings like resolution, frame rate, and white balance, and make adjustments based on your desired look. Check your camera’s battery levels and have spare batteries on hand to avoid interruptions during the shoot, and don’t forget to have enough memory cards or storage space for your footage.
By gathering the necessary resources and preparing your footage, you set yourself up for a successful shoot. Take the time to plan and organize, ensuring that you have all the tools you need to bring your concept to life. With everything in place, you’re ready for the next phase: production.
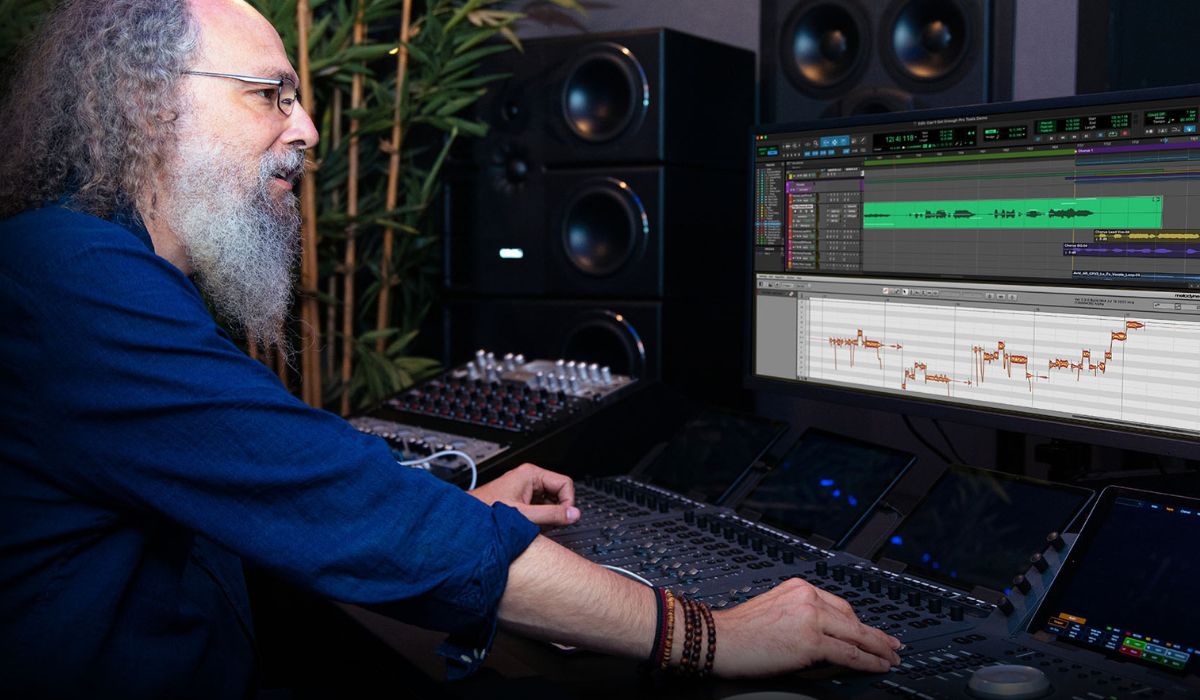
Preparing your audio and music
When it comes to creating a music video, the audio and music play a vital role in enhancing the overall experience. Preparing your audio and music before the production phase is crucial to ensure that your visuals align seamlessly with the sound.
If you haven’t already, make sure your song is finalized or at least in a near-final state. Take the time to perfect the mix and master of your music to achieve the best possible quality. If you’re working with a music producer or sound engineer, collaborate with them to fine-tune your audio and ensure it’s ready for the video. Your music should be the centerpiece of the video, so it’s essential to have a high-quality audio file.
Once your music is ready, consider the timing and synchronization of your visuals with the music. Analyze the structure of your song and identify key moments, such as the chorus, verse, or instrumental breaks. Use these sections as reference points when editing and arranging your footage on the timeline.
It’s also important to make sure you have the necessary rights and permissions for the music you’re using. If you’re using your own original music, this won’t be an issue. However, if you’re using copyrighted music, obtain the proper licenses or consider reaching out to the rights holder for permission. Using copyrighted music without proper authorization can lead to legal issues and potential takedown of your video.
If you’re looking for music to use in your video and don’t have your own original composition, there are various sources where you can find royalty-free or creative commons music. These platforms offer a wide range of genres and styles that you can legally use in your music video. Remember to properly credit the music in your video description or credits.
In addition to the music, consider any additional audio elements you’ll need, such as dialogue, voice-overs, or sound effects. Plan and prepare these elements in advance, ensuring that you have the necessary equipment (e.g., microphones) and recording environments to capture high-quality audio.
Lastly, think about the desired sound design for your music video. Will you be incorporating specific effects or enhancing the audio during the editing process? Take note of any ideas or desired soundscapes that will enhance the viewing experience for your audience.
By preparing your audio and music before the production phase, you’ll have a solid foundation on which to build your visual story. The synergy between the audio and visuals is what creates an impactful music video, so give proper attention to this aspect of your project. With your audio ready, you’re now equipped to move on to the exciting process of production.
Production
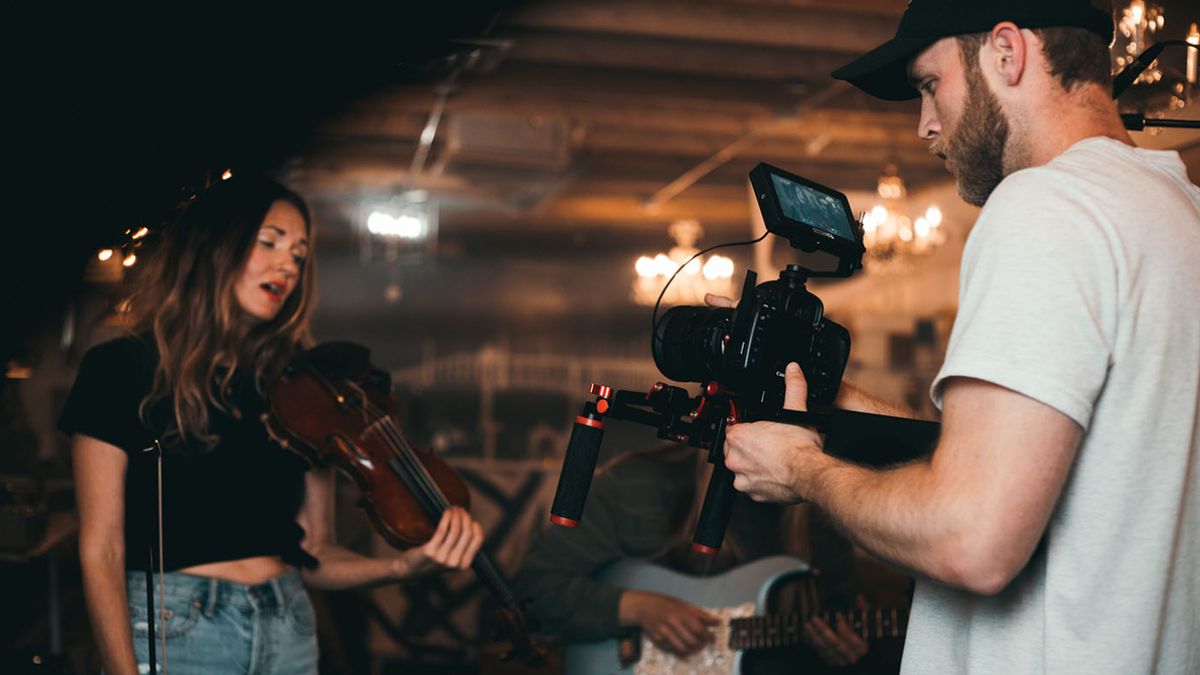
The production phase is where all your planning and preparation come together. It’s time to bring your concept to life and capture the footage that will make up your music video. During this phase, you’ll be working behind the camera, directing and capturing the visuals that will complement your audio and music.
The first step in the production phase is to import your footage into your chosen editing software, such as Adobe Premiere Pro. Make sure to organize your files in a logical and easily accessible way to avoid confusion during the editing process. This includes creating folders for different scenes or shots and labeling your files appropriately.
Next, set up your project and sequence settings in Premiere Pro to match the specifications of your footage. Ensure that your timeline is set to the desired resolution and frame rate, as this will affect the overall look and feel of your video.
Once your project is set up, it’s time to begin organizing your footage in the project panel. This involves arranging your files in a logical order and creating subclips if necessary. By organizing your footage in this way, you’ll have an easier time finding specific shots and scenes when it comes to editing.
Now, start editing and arranging your footage on the timeline. Refer back to your storyboard and concept to guide your decision-making process. Experiment with different shot combinations and transitions to create a visually engaging sequence. Consider the pacing and flow of your video, ensuring that the visuals complement the music and enhance the overall story.
In addition to editing your footage, you can also add effects, transitions, and color grading to enhance the visual appeal of your music video. Explore the various tools and features available in Premiere Pro to add texture, movement, and visual interest to your shots. However, use these enhancements sparingly and purposefully, ensuring they serve the overall vision and concept of your video.
While editing, pay attention to the synchronization of your visuals with the music. Align the visual cues with the beats, lyrics, or mood of the song to create a more impactful and cohesive experience for the viewer. Adjust the timing of your shots as necessary to create the desired effect.
Another important aspect of production is enhancing your audio and adding music to your video. Use Premiere Pro’s audio editing features to fine-tune the sound levels, apply effects, and ensure a harmonious balance between the audio and visuals. Import your music tracks and synchronize them with your footage, making precise cuts and adjustments to match the desired timing and flow.
Throughout the production phase, don’t be afraid to experiment and take creative risks. Each music video is an opportunity to explore new ideas and push the boundaries of your creativity. Trust your instincts and make choices that align with your vision and the emotions you want to evoke.
Once you’re satisfied with your editing and arrangement, it’s time to move on to the final phase: post-production. This is where you’ll fine-tune the timing and pacing of your video, enhance your audio, and export your music video in the desired format.
Embrace the excitement and energy of the production phase as you capture the visuals that will bring your music video to life. With careful planning and skillful execution, you’re one step closer to creating a captivating and memorable music video.
Importing your footage and audio files into Premiere Pro
Now that you’re in the production phase of creating your music video, it’s time to import your footage and audio files into Adobe Premiere Pro. Importing your files is a crucial step to ensure that you have all the necessary assets for editing and arranging your video.
To begin, open your Premiere Pro project and locate the Project panel. This panel acts as a central hub for organizing and managing your project assets. You can access it by selecting Window > Project from the top menu.
To import your footage, navigate to where your video files are saved on your computer. Click on the “Import” button in the Project panel or use the shortcut Command + I (Mac) or Ctrl + I (Windows). Select the video files you want to import and click “Import”. Premiere Pro supports a wide range of file formats, so you should have no trouble importing your footage regardless of the camera or device used to capture it.
Similarly, you can import your audio files into Premiere Pro by following the same steps. Click on the “Import” button, select the audio files you want to import, and click “Import”. Premiere Pro supports various audio file formats, including WAV, MP3, and AIFF.
Once your files are imported, they will appear in the Project panel. You can organize them into separate folders or bins for easier access and management by right-clicking in the Project panel and selecting “New Bin”. Name the bin accordingly and drag and drop the files into it to keep your project organized.
It’s important to note that Premiere Pro doesn’t actually copy your footage or audio files into the project file itself. Instead, it creates references or links to the original source files on your computer. This means that you can safely move or delete the files on your computer without affecting your Premiere Pro project. However, if you do move or rename any of the files, Premiere Pro will display a warning that it cannot find the file. In such cases, you can manually locate the missing file by right-clicking on it in the Project panel and selecting “Link Media”.
By importing your footage and audio files into Premiere Pro and organizing them in the Project panel, you’re ready to start editing and arranging your music video. Premiere Pro offers a user-friendly interface and a wide array of powerful tools to help you bring your vision to life. So take the time to import your files and get ready for the creative editing process ahead.
Setting up your project and sequence settings
Before you begin editing and arranging your footage in Adobe Premiere Pro, it’s essential to set up your project and sequence settings. Setting up the project correctly ensures that the editing environment matches your desired specifications and helps you maintain consistency throughout your music video.
To set up your project, open Premiere Pro and create a new project. Give your project a name and choose a location on your computer to save it. This will create a new project file that serves as a container for your video editing work.
Next, you need to determine the sequence settings. A sequence is a timeline where you will edit and arrange your footage. To create a new sequence, go to the File menu, select New > Sequence, or use the shortcut Command + N (Mac) or Ctrl + N (Windows).
In the New Sequence dialog box, you’ll have options to customize the settings based on your desired specifications. First, choose a preset that matches the resolution and frame rate of your footage. If you’re unsure about the settings, you can use the Easy Setup option to match the sequence settings to your footage automatically.
Additionally, consider the aspect ratio of your video. Common aspect ratios include 16:9 for widescreen videos, 4:3 for standard videos, and 1:1 for square videos (often used for social media platforms like Instagram). Select the appropriate aspect ratio based on your desired final output.
Another important setting to consider is the duration of the sequence. This determines the overall length of your music video. You can choose a specific duration in minutes and seconds or set it to match the duration of a selected video clip.
Once you have customized the sequence settings to match your footage, click OK to create the sequence. Your new sequence will appear in the Project panel, and its timeline will become the main workspace for editing and arranging your music video.
If you need to adjust the sequence settings after creating the sequence, you can go to the Sequence menu, select Sequence Settings, and make the necessary changes.
Setting up your project and sequence correctly is crucial to ensure that your editing environment aligns with your desired video specifications. It helps maintain consistency and streamline your editing process, making it easier to create a polished and professional music video.
Now that your project and sequence are set up, it’s time to start organizing and editing your footage on the timeline. So let’s dive in and bring your concept to life!
Organizing your footage in the project panel
As you start editing your music video in Adobe Premiere Pro, it’s crucial to have an organized workspace to efficiently manage your footage. The Project panel serves as the central hub for all your assets, allowing you to easily access and arrange your footage for seamless editing.
To organize your footage in the Project panel, you can create folders or bins that categorize your files. Right-click in the Project panel and select “New Bin” to create a new folder. Name the bin appropriately, such as “Scene 1” or “B-Roll Footage,” and drag and drop your footage into the bin.
Organizing your footage into bins helps you quickly locate specific shots or scenes during the editing process. It keeps your project neat and manageable, especially if you have a large amount of footage.
In addition to creating bins, you can also use labels and markers to further categorize and organize your footage. Right-click on a file in the Project panel and select “Label” to assign a color label to it. This can be useful for grouping related shots or differentiating between different types of footage, such as interviews, performance shots, or B-roll.
Furthermore, you can use markers to make notes or add annotations to specific points in your footage. To add a marker, navigate to the desired frame on the timeline or in the Source panel and press the “M” key on your keyboard. This allows you to mark important moments, such as key beats or visual cues in the music, to guide your editing decisions.
While organizing your footage, take advantage of Premiere Pro’s search and filtering options. The search bar at the top of the Project panel allows you to quickly find specific files by typing in keywords or file names. You can also use the filtering options to display only specific file types or labels, making it easier to locate and work with specific elements of your project.
Keep in mind that as you organize your footage in the Project panel, the changes only affect the organization within Premiere Pro, not the original files on your computer. Premiere Pro creates reference links to the original files rather than duplicating them. Therefore, you can continue organizing and modifying your project without worrying about affecting the original file structure on your computer.
By organizing your footage in the Project panel, you’ll save time and effort when it comes to editing and arranging your music video. A well-organized workspace allows for smoother navigation, improves productivity, and ensures that you can easily locate and utilize the right assets at the right time.
Now that your footage is organized, it’s time to start editing and arranging your music video on the timeline. Let your creativity flow as you bring your concept to life!
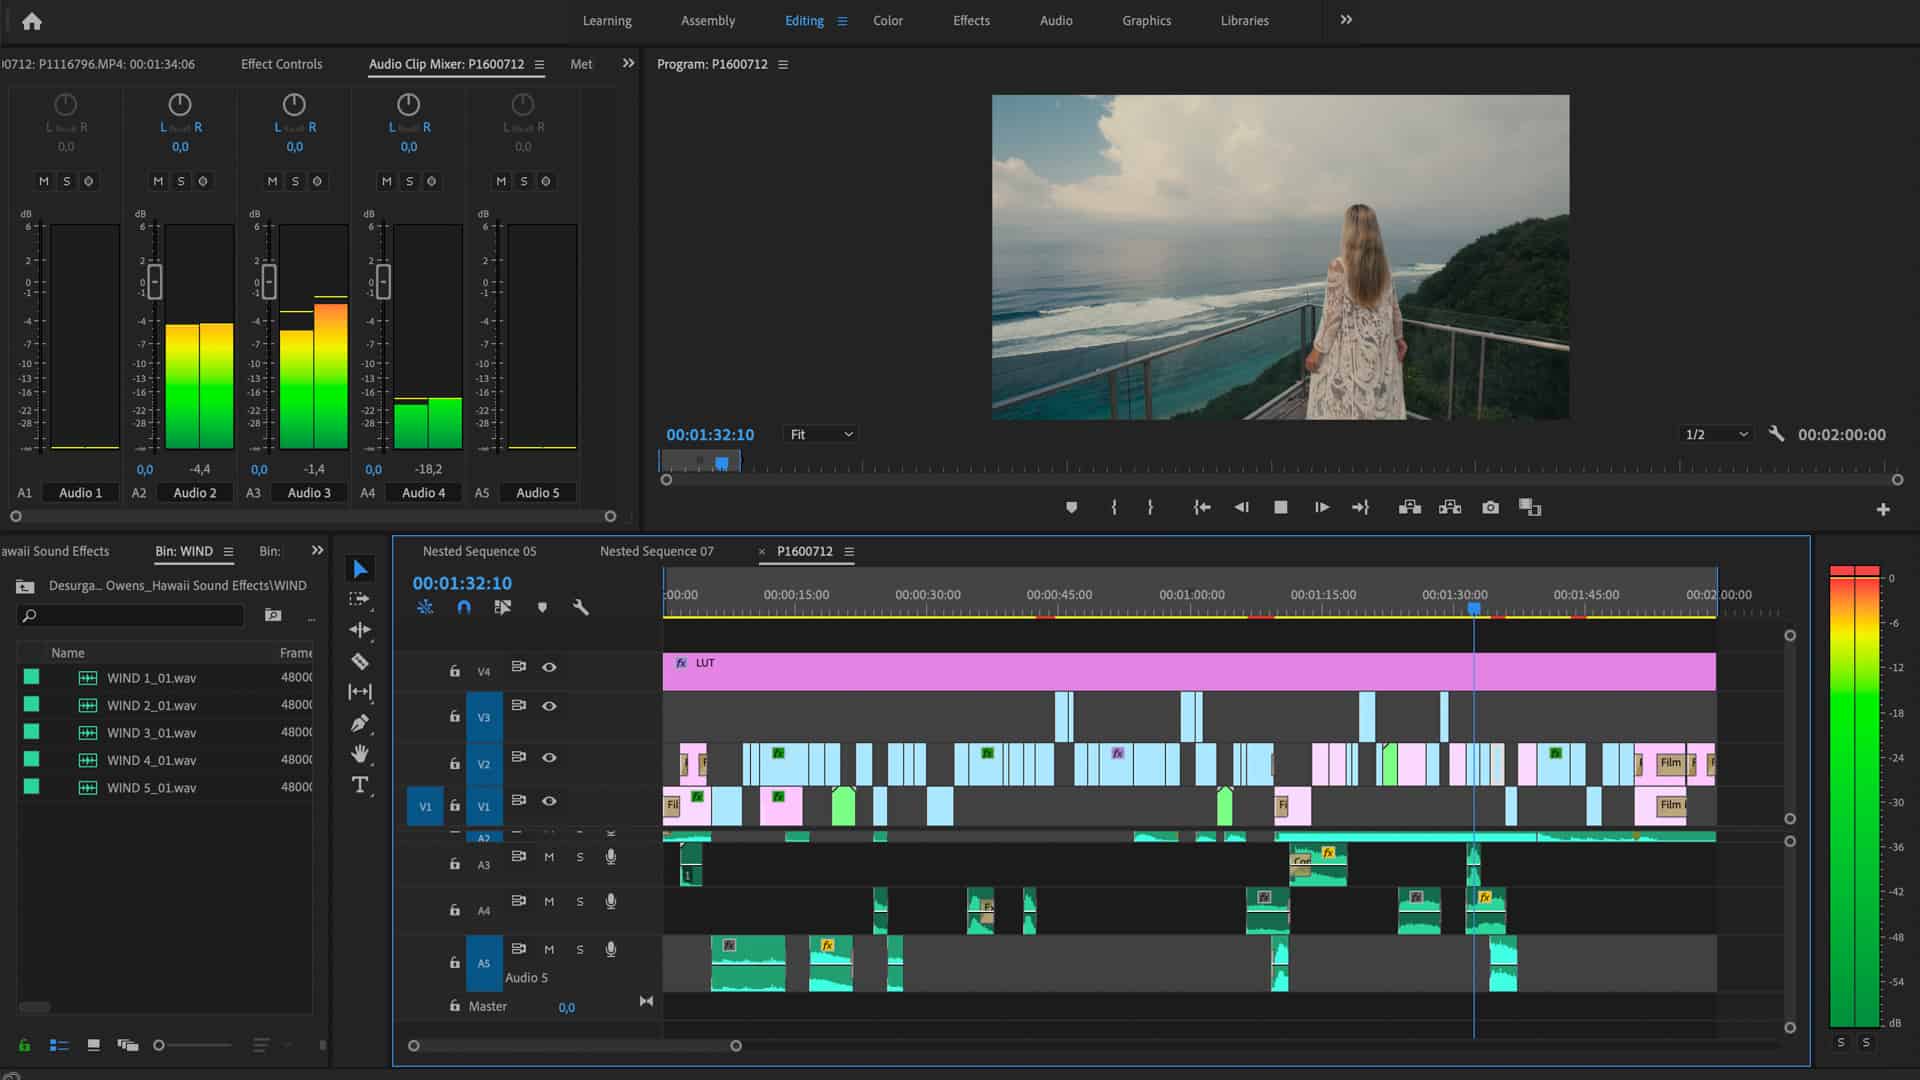
Editing and arranging your footage on the timeline
Once you have imported and organized your footage in Adobe Premiere Pro, it’s time to start editing and arranging your music video on the timeline. The timeline serves as a visual representation of your video’s structure and allows you to piece together the different shots and scenes to create a cohesive and engaging final product.
To begin editing, drag and drop your desired footage from the Project panel onto the timeline. You can arrange the clips in the order that best tells your story, aligning them with the structure and pacing of the music.
As you edit, pay attention to the flow and continuity of your shots. Ensure that transitions between shots are seamless and coherent. Use techniques such as cutting on motion or using cutaways to maintain visual interest and smooth transitions between different shots.
Experiment with different shot combinations to create engaging visuals. It’s crucial to strike a balance between variety and consistency to engage and captivate your audience. Incorporate a mix of wide shots, close-ups, and different camera angles to add depth and visual interest to your video.
In addition to editing the length and order of your shots, you can also trim and adjust individual clips on the timeline. Use the various editing tools in Premiere Pro to fine-tune the timing and duration of each shot. This includes features like trimming, cutting, and applying effects to enhance the visuals or correct any mistakes.
As you navigate the timeline, consider the synchronization of your footage with the music. Align visuals with the beats, lyrics, or emotional elements of the song to create a more impactful and immersive experience for your viewers. Adjust the timing of your shots as needed to create the desired effect.
While editing, it’s also essential to keep the overall structure and pacing of your video in mind. Pay attention to the ebb and flow of the music and ensure that your shots align with the desired mood and energy. Adjust the length and arrangement of shots to maintain a balanced and engaging progression throughout the video.
Alongside editing the footage, you can also enhance your video by adding effects, transitions, and color grading. Premiere Pro provides a wide range of editing tools and features to enhance the visual appeal of your shots. However, it’s important to use these enhancements tastefully and purposefully, ensuring they serve the overall vision and concept of your video.
Remember that editing is an iterative process, and it’s essential to review and refine your work. Take breaks, step back, and revisit your video to gain fresh perspectives and make necessary adjustments. Solicit feedback from trusted individuals who can provide constructive suggestions to help you improve the final product.
By editing and arranging your footage on the timeline, you’re defining the visual narrative of your music video. Let your creativity soar as you piece together the shots to create a compelling and cohesive story that complements your music.
With your footage expertly edited and arranged on the timeline, it’s time to add the finishing touches and enhance your audio and music. Let’s move on to the next phase: enhancing your audio and adding music.
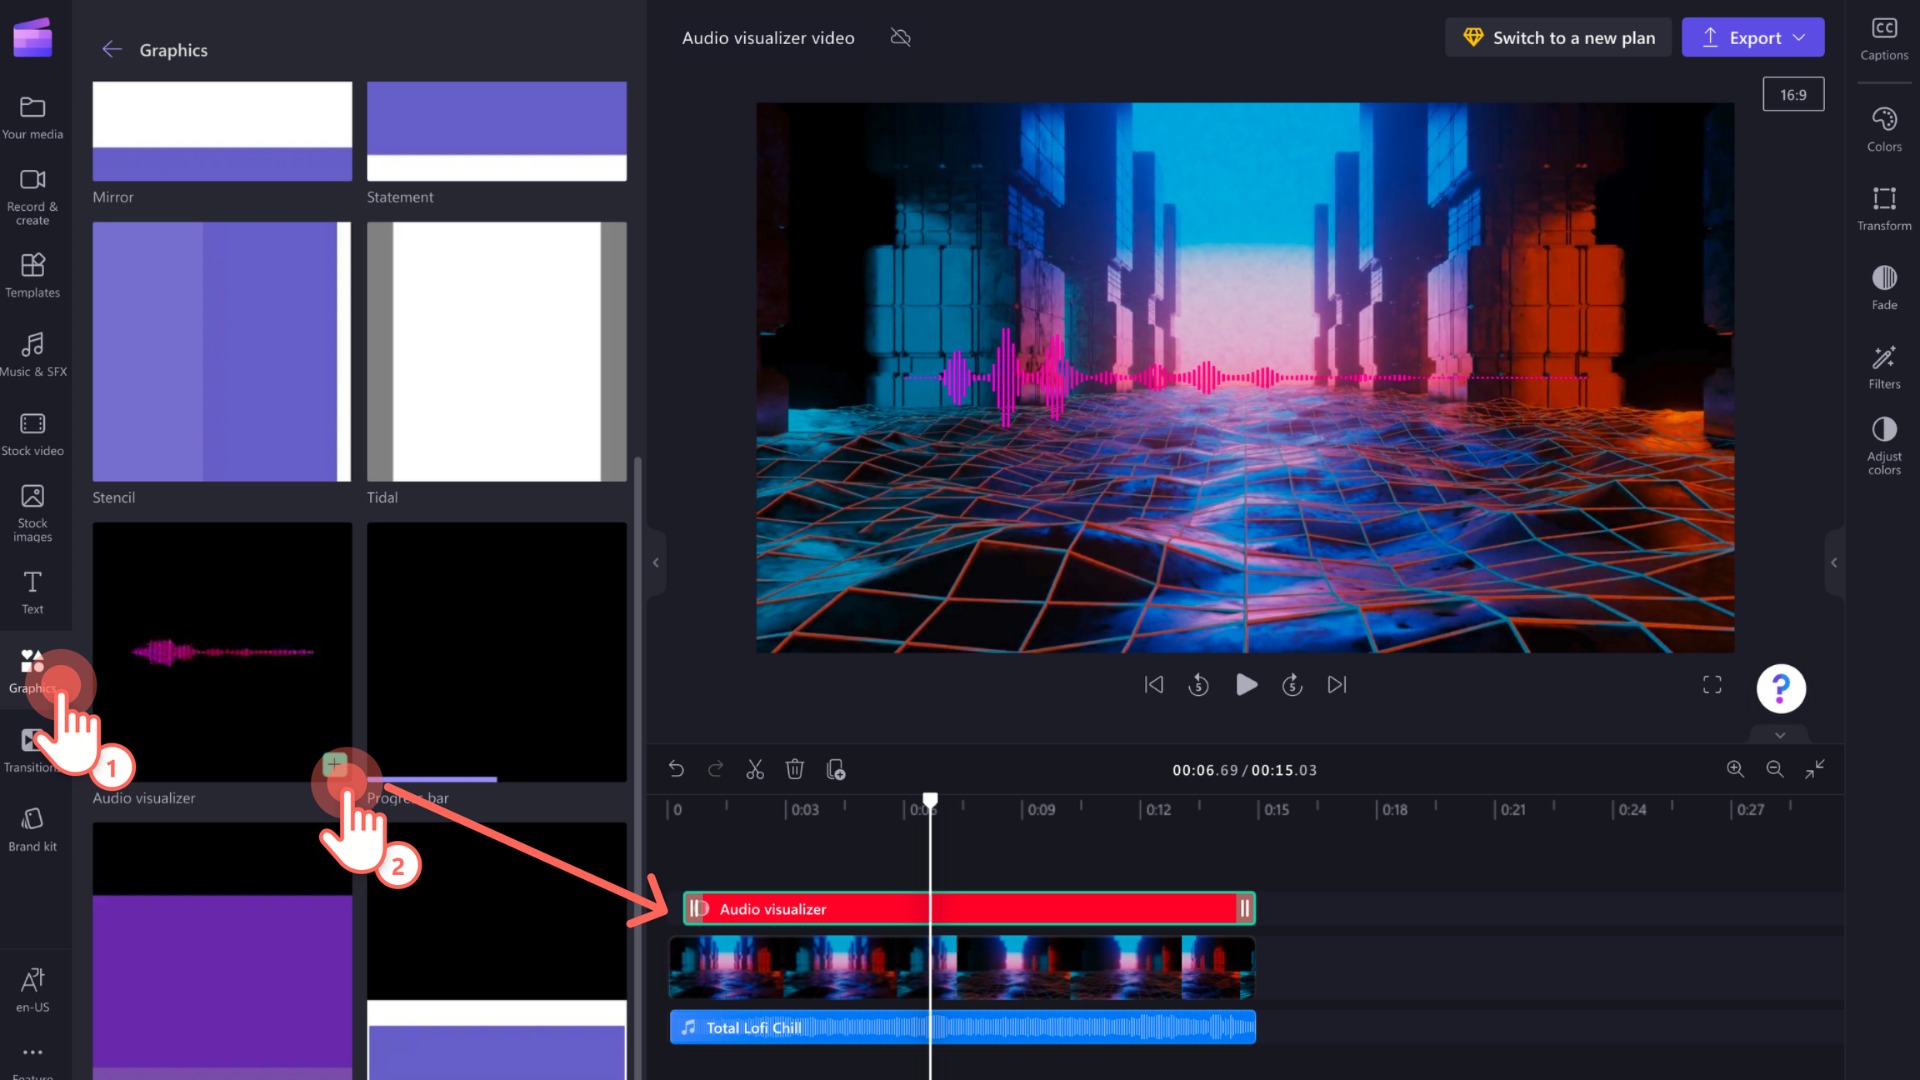
Adding effects, transitions, and color grading
Adding effects, transitions, and color grading can elevate the visual appeal of your music video, making it more engaging and professional-looking. Adobe Premiere Pro offers a wide range of tools and features that allow you to enhance your footage and create a visually captivating final product. Here’s how you can leverage these tools to take your music video to the next level.
Effects are powerful tools that allow you to manipulate and enhance your footage. Premiere Pro offers a vast library of effects, including filters, color correction, and special effects. You can experiment with effects to create a desired look or mood for specific shots or sequences. For instance, you can apply a vintage film effect, add a visual overlay, or adjust the lighting to create a distinct atmosphere. However, it’s important to use effects judiciously and ensure they enhance the story and aesthetics of your video without becoming overwhelming or distracting.
Transitions play a crucial role in maintaining visual continuity as you move between shots or scenes. Premiere Pro provides a variety of transitions, such as cuts, dissolves, wipes, and fades. Transitions can help smooth the visual flow, create a seamless transition between scenes, or add a stylistic touch. Experiment with different types of transitions and find those that enhance the overall pace and aesthetics of your music video. Remember to use transitions sparingly and purposefully to avoid distracting your audience from the main content of the video.
Color grading is the process of adjusting the color and tone of your footage to achieve a desired visual style or mood. It helps establish the overall look and feel of your music video while maintaining consistency across different shots. Premiere Pro offers powerful color grading tools, including the Lumetri Color panel, which allows you to adjust exposure, contrast, saturation, and other parameters. Explore different color grading techniques, from creating a warm and vibrant look to a gritty and desaturated aesthetic, to enhance the emotional impact of your music video. Ensure that your color grading choices align with the themes, emotions, and overall concept of your video.
When applying effects, transitions, and color grading, it’s crucial to maintain a cohesive visual style throughout your music video. Consistency in these elements helps create a unified viewing experience and strengthens the impact of your video. Consider creating a visual style guide or referencing specific scenes or shots to ensure that your effects and grading choices align with the overall vision of your music video.
Remember to regularly review your work and adjust your effects, transitions, and color grading as needed. Take breaks and consult others for feedback to gain fresh perspectives and ensure that your choices enhance the storytelling and aesthetics of your video.
By skillfully incorporating effects, transitions, and color grading, you can transform your music video into a visually captivating and professional-looking piece of art. With your visuals now enhanced, it’s time to focus on perfecting the audio and music. Let’s proceed to the next phase: fine-tuning the timing and pacing of your video.
Enhancing your audio and adding music
An impactful music video not only relies on visually striking visuals but also on high-quality audio. Enhancing your audio and adding music to your video is a crucial step to ensure that the sound complements and enhances the overall viewing experience. Here’s how you can take your audio to the next level in Adobe Premiere Pro.
Firstly, it’s essential to fine-tune your audio to achieve the best quality. In Premiere Pro, you can use the audio editing tools to adjust the levels, apply effects, and clean up any unwanted noise or imperfections. It’s important to have a consistent audio level throughout your music video, ensuring that the vocals and any accompanying audio elements are clear and balanced.
If you’re looking to enhance the audio further, consider adding effects to create a specific mood or atmosphere. Premiere Pro offers a range of audio effects, including reverb, EQ, and compression. Experiment with these effects to add depth, texture, and impact to your audio. However, remember to use them in moderation and consider how they contribute to the overall tone and feel of your video.
In addition to improving the audio quality, adding music is a vital component of any music video. The right music can elevate the emotional impact and help tell the story you want to convey. If you’re a musician and have already composed your own music, you can import your tracks directly into Premiere Pro. This allows you to synchronize the visuals with your music, ensuring that they flow seamlessly together.
If you don’t have original music, you can explore royalty-free music libraries or licensed music to find a suitable track for your video. Premiere Pro lets you import audio files and align them with your visuals on the timeline, making it easy to synchronize music with your shots. Ensure that the chosen music aligns with the overall theme, mood, and energy of your video.
When adding music, consider the timing and pacing of your video. Align significant moments in the music with specific visual cues or transitions to create a stronger connection between the audio and visuals. You may need to make adjustments to the timing of your footage or make precise cuts to match the desired synchronization.
While adding music, maintain a balance between the audio levels of the music and any other audio elements, such as vocals or dialogue. Ensure that the music doesn’t overpower the rest of the audio but rather enhances the overall experience and storytelling of your music video.
Finally, remember to consider any legal requirements when using music in your video. If you choose copyrighted music, ensure that you have the necessary licenses or permissions to avoid any copyright issues. Additionally, credit the music appropriately in your video description or credits to give recognition to the artist or composer.
By enhancing your audio and carefully selecting music that resonates with your video, you can create a powerful and emotionally captivating music video. With the audio now perfected, it’s time to focus on fine-tuning the timing and pacing of your video to create a seamless and engaging experience. Let’s move on to the next phase: fine-tuning the timing and pacing of your video.
Fine-tuning the timing and pacing of your video
As you near the completion of your music video in Adobe Premiere Pro, it’s crucial to fine-tune the timing and pacing to create a seamless and engaging experience for your viewers. The timing of your shots, the pacing of the edits, and the overall flow of the video greatly impact its impact and effectiveness. Here’s how you can perfect the timing and pacing of your music video.
Start by reviewing your edited video on the timeline. Pay attention to the flow and rhythm of the shots and how they align with the music. Look for any sections that may feel too long or too short, and identify areas where adjustments can be made to enhance the overall pacing.
As you fine-tune the timing, consider the key moments in the music that you want to emphasize with your visuals. These moments might align with powerful lyrics, dynamic musical changes, or important beats. Align your shots or transitions with these key moments to create a more impactful connection between the audio and visuals.
Experiment with the duration of your shots to find the right balance. Some shots may benefit from being longer to convey a particular emotion or story element, while others may need to be trimmed for a more concise and energetic feel. Use Premiere Pro’s trimming tools to make precise adjustments and refine the timing of your shots.
In addition to trimming, consider the transitions between shots. Smooth and well-timed transitions can help maintain the flow and engagement of your video. Experiment with different types of transitions, such as cuts, dissolves, or wipes, to find the most appropriate transition for each shot change.
While fine-tuning the timing and pacing, consider the overall narrative arc of your music video. Strive to create a coherent and compelling story that engages your viewers from beginning to end. Ensure that the pace of your video matches the energy and emotion of the music, creating a harmonious relationship between the two.
Don’t be afraid to take breaks and step away from your project to gain fresh perspectives. Revisit your video after a short break to see if the timing and pacing still feel right or if any further adjustments are needed. Seek feedback from others to gain different viewpoints and insights that can help refine the timing and pacing of your video.
Lastly, keep in mind the duration of your video. Consider the attention span of your audience and aim to create a engaging experience within a suitable length. Ensure that every second of your video serves a purpose and contributes to the overall impact.
By fine-tuning the timing and pacing of your music video, you can create a more immersive and captivating viewing experience. Take the time to carefully edit and adjust the timing of your shots and transitions, aligning them with the music and storytelling. With the timing and pacing perfected, you’re almost ready to export and share your completed music video with the world.
Exporting your music video in the desired format
After putting in all the hard work and creativity to create your music video in Adobe Premiere Pro, it’s time to export the final product in the desired format. Exporting your music video allows you to save it as a standalone file that can be easily shared, uploaded, or played on various platforms. Here’s how you can export your music video to ensure the best quality and compatibility.
To begin the exporting process, go to the File menu and select Export, then choose Media. Alternatively, you can use the shortcut Ctrl + M (Windows) or Command + M (Mac).
In the Export Settings window, you’ll have various options to customize the export settings for your music video. First, select the output format. Popular options include MP4, MOV, and AVI. Choose a format that is widely supported to ensure compatibility across different devices and platforms.
Next, consider the resolution and aspect ratio for your music video. If you shot your footage in high-resolution, such as 4K, you may want to export your video in that resolution to preserve the quality. However, keep in mind that higher resolutions result in larger file sizes, which may affect upload and playback times. Adjust the resolution based on your specific needs and the platforms where you will be sharing your video.
Additionally, take note of the frame rate for your export. Premiere Pro typically matches the frame rate of your sequence, but you can adjust it if necessary. Common frame rates include 24 fps for a cinematic look and 30 fps for smoother playback on digital platforms.
Consider the bitrate for your video as well. Higher bitrates result in better video quality but also larger file sizes. If you’re uploading your music video to an online platform, check their recommended bitrate or file size limit to ensure optimal playback without sacrificing quality.
Other settings to consider include audio options such as sample rate and bitrate. Make sure these settings align with the quality of your audio and the desired output format.
After adjusting the export settings, choose the destination folder where you want to save the exported video file. Give your video a clear and descriptive filename to make it easily identifiable.
Finally, click Export to initiate the export process. Depending on the length and complexity of your music video, this process may take some time. Once finished, you’ll have a standalone video file ready for sharing, uploading, or further distribution.
Remember to test your exported music video on different devices and platforms to ensure the quality and compatibility. Check for any issues with playback, audio sync, or visual artifacts that may have occurred during the export process.
By exporting your music video in the desired format, you can showcase your creative work to the world. Preserve the integrity of your video, optimize the settings for the intended platform, and ensure the best possible viewing experience for your audience.
Congratulations! You’ve successfully completed the journey of making a music video from start to finish. Share your creation with pride and get ready to make a lasting impact!
Conclusion
Creating a music video is an exciting and fulfilling endeavor that allows you to combine your passion for music and visual storytelling. Throughout this article, we’ve explored the step-by-step process of making a music video using Adobe Premiere Pro, from pre-production to exporting the final product. We’ve discussed the importance of planning, organizing your footage, editing, and enhancing your audio and visuals.
During the pre-production phase, we emphasized the significance of developing a concept, storyboarding, and gathering the necessary resources. This stage lays the foundation for a successful shoot, ensuring that you have a clear vision for your music video.
In the production phase, we covered importing and organizing your footage, setting up your project and sequence settings, and creatively editing and arranging your shots on the timeline. It’s during this phase that your concept comes to life as you piece together the visuals, synchronizing them with your music.
We then explored the importance of enhancing your audio and adding music to your video. By fine-tuning the audio and selecting the right music, you can create a more immersive and powerful experience for viewers.
Additionally, we discussed the significance of adding effects, transitions, and color grading to enhance the visual appeal of your music video. These elements help create a cohesive and engaging visual style that complements the music and storytelling.
Furthermore, we covered the crucial step of fine-tuning the timing and pacing of your video. By paying attention to the flow, rhythm, and synchronization with the music, you can create an impactful and engaging viewing experience.
Finally, we concluded with the process of exporting your music video in the desired format. This step ensures that your video is compatible with different devices and platforms, allowing you to share your creative work with others.
Remember, creating a music video is a creative journey that requires time, dedication, and attention to detail. Stay true to your vision, embrace the editing process, and seek feedback from others to continually refine your video.
Now, armed with the knowledge and skills gained from this article, it’s time to embark on your own unique music video project. Embrace your creativity, tell your story, and let your music shine through the power of visuals. Good luck, and enjoy the process of making your music video a reality!