Home>Production & Technology>Stereo>How To Change Stereo In Car
Stereo
How To Change Stereo In Car
Modified: January 22, 2024
Learn how to change the stereo in your car easily and efficiently. Upgrade your audio system with step-by-step instructions on installing a new stereo.
(Many of the links in this article redirect to a specific reviewed product. Your purchase of these products through affiliate links helps to generate commission for AudioLover.com, at no extra cost. Learn more)
Table of Contents
Introduction
Upgrading the stereo system in your car can greatly enhance your driving experience. Whether you’re looking for better sound quality, more modern features, or simply want to add some style to your vehicle, changing the stereo is a popular modification for car enthusiasts. While the process may seem daunting at first, with the right tools and a bit of knowledge, you can easily replace your old stereo with a new one.
Before diving into the step-by-step process, it’s important to understand the benefits of changing your car’s stereo. A new stereo can offer improved audio quality, allowing you to enjoy your favorite music with greater clarity and depth. Additionally, newer models come equipped with advanced features like Bluetooth connectivity, USB ports, and even touchscreen displays, making it easier to connect your devices and control your audio system.
Changing the stereo in your car also gives you the opportunity to customize the look and feel of your vehicle’s interior. With a wide range of designs and colors available, you can choose a stereo that matches your personal style and complements the overall aesthetics of your car. This can instantly give your car a fresh and modern look, upgrading not only the sound but also the appearance of your vehicle.
Before you begin the process of changing your car stereo, it’s important to gather the necessary tools and materials. Having everything you need on hand will make the installation smoother and more efficient. In the next section, we’ll cover what you need to gather before starting the process.
Step 1: Gathering Required Tools and Materials
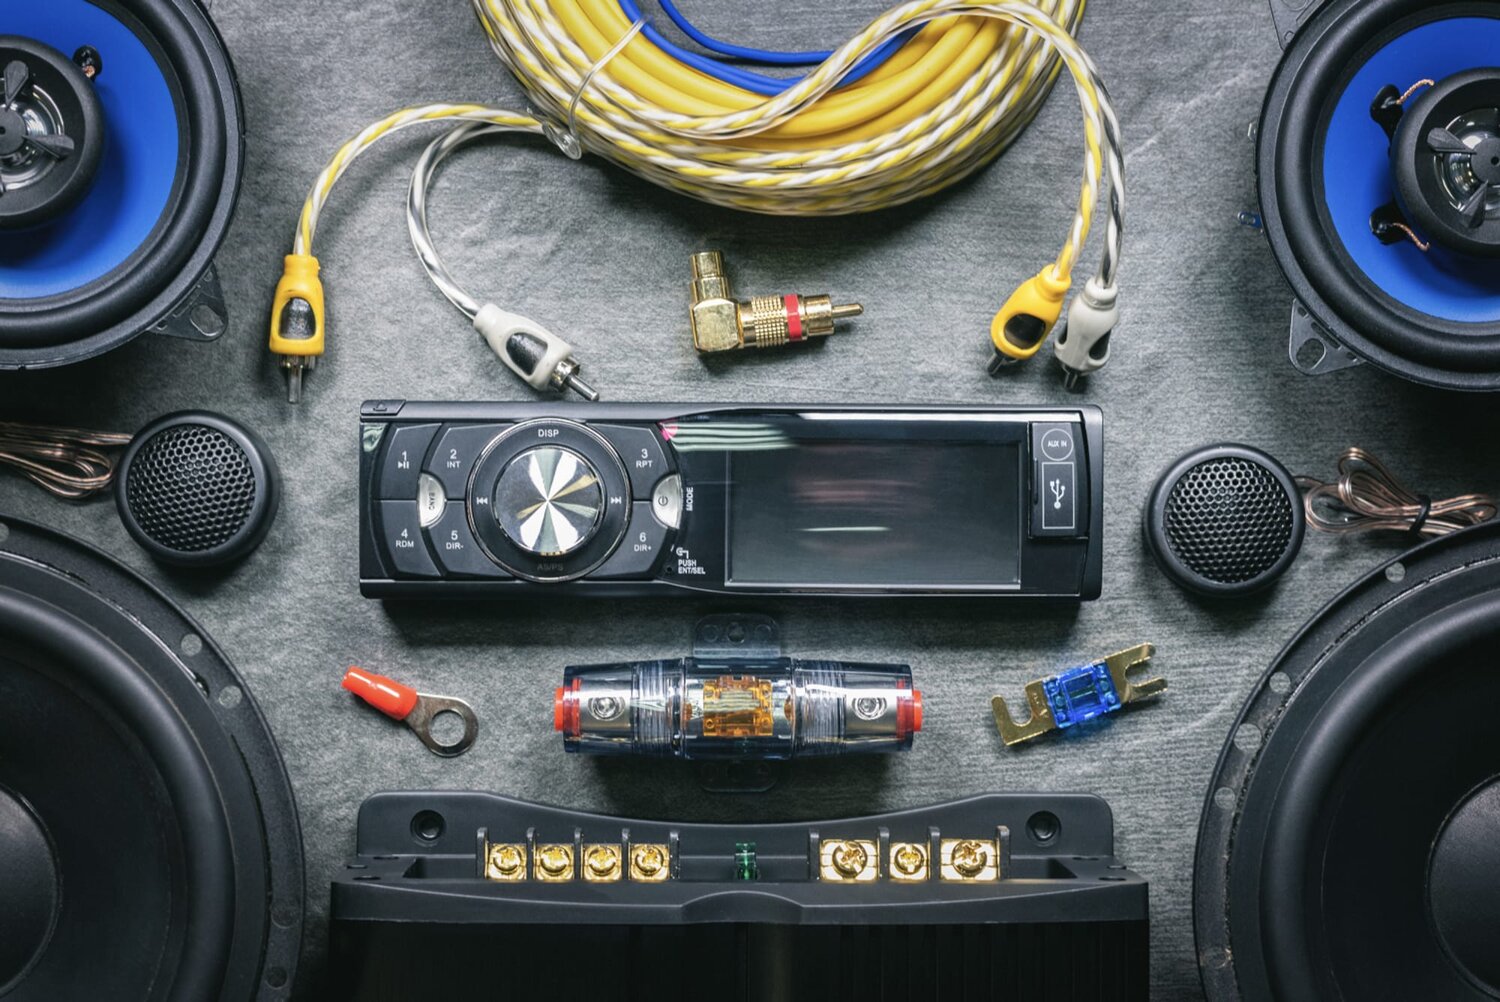
Before you begin the process of changing your car stereo, you’ll need to gather a few essential tools and materials. Here’s a list of what you’ll need:
- Stereo installation kit: This kit includes the necessary brackets, wiring harness adapters, and trim pieces specific to your car model. It ensures a proper fit and facilitates the installation process.
- Wire crimping tool: This tool is used to connect the wiring harness of the new stereo to the existing wires in your car.
- Panel removal tools: These tools are designed to safely remove the panels and trim pieces in your car’s interior without causing any damage.
- Screwdrivers: You’ll need both flathead and Phillips screwdrivers to remove any screws or bolts holding the old stereo in place.
- Electrical tape: This is used to secure the wire connections and prevent any potential shorts.
- Wire cutters: These are necessary for trimming any excess wire during the installation process.
Additionally, make sure you have a new stereo unit that is compatible with your car model. Consider the features you want, such as Bluetooth connectivity, USB ports, or CD player, and choose a stereo that meets your preferences. It’s also important to check the dimensions of the new stereo to ensure it will fit properly in your car’s dashboard.
Once you have gathered all the necessary tools and materials, you’re ready to move on to the next step: removing the old stereo from your car’s dashboard. This is where the real fun begins!
Step 2: Removing the Old Stereo
Now that you have all the required tools and materials, it’s time to remove the old stereo from your car’s dashboard. Here’s a step-by-step guide to help you through the process:
- Start by disconnecting the negative terminal of your car’s battery to ensure safety and prevent electrical issues.
- Using the panel removal tools, gently pry off the trim pieces surrounding the stereo. Be careful not to scratch or damage any parts of the dashboard.
- Once the trim pieces are removed, you’ll usually see screws or bolts holding the stereo in place. Use the screwdrivers to carefully remove these screws. Keep them in a safe place as you’ll need them later.
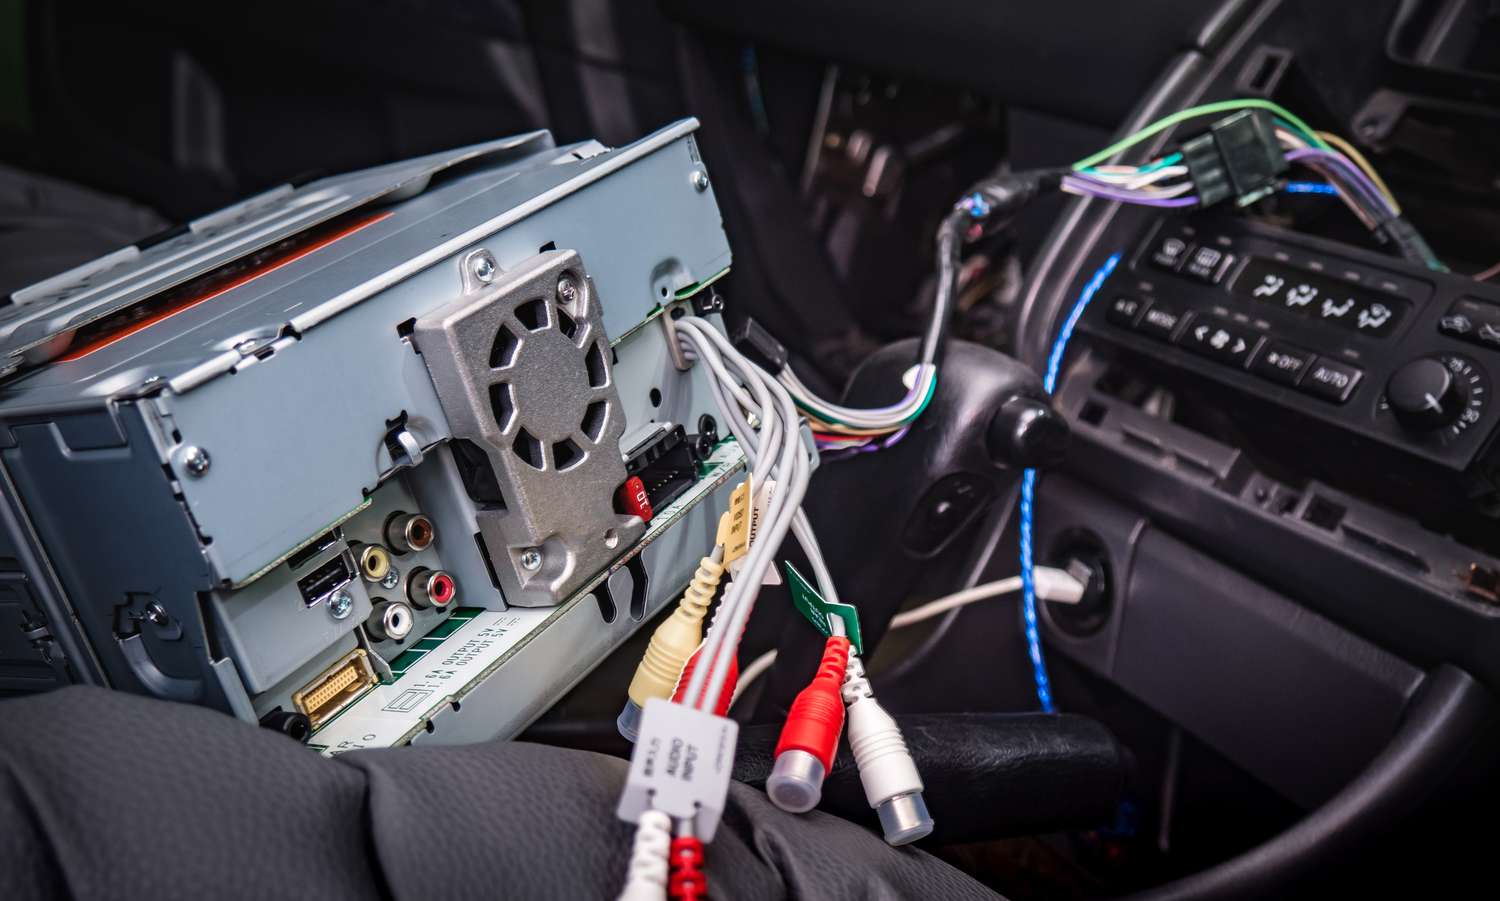
- With the screws removed, carefully slide the old stereo out of the dashboard. Be mindful of any connected wires or cables attached to the back of the stereo.
- If there are any wire harnesses connected to the back of the stereo, disconnect them by gently pressing the release tabs and pulling them apart.
- Once the old stereo is completely disconnected, set it aside for disposal or future use.
Remember to handle the old stereo and its components with care to avoid causing any damage. If you encounter any difficulties during the removal process, refer to your car’s user manual or search for specific instructions related to your car model online.
With the old stereo removed, you’re now ready to move on to the next step: disconnecting the wiring. This is a crucial step in the installation process, so take your time and follow the instructions carefully.
Step 3: Disconnecting the Wiring
Now that you have successfully removed the old stereo from your car’s dashboard, it’s time to disconnect the wiring. This step requires precision and attention to detail to ensure a smooth transition to the new stereo. Here’s how to disconnect the wiring:
- Start by identifying the wiring harness that is connected to the back of the old stereo. This harness is typically a cluster of wires with a plastic connector.
- Locate the release tabs on the connector and press them down. Gently pull the connector away from the stereo to disconnect it. Be careful not to pull on the wires themselves, as this can cause damage.
- If there are any other connections or cables attached to the old stereo, such as antenna cables or auxiliary inputs, disconnect them as well. Some connections may require pressing release tabs or unscrewing connectors.
- Once all the wiring is disconnected from the old stereo, set it aside for disposal or future use.
It’s essential to handle the wiring with care, as any damage to the wires or connectors can lead to electrical issues or a malfunctioning audio system. Take your time and be gentle when disconnecting the wiring to avoid any potential problems.
Now that you have successfully disconnected the wiring from the old stereo, you’re ready to move on to the exciting part: installing the new stereo. This is where you’ll see your car’s audio system transform with modern features and improved sound quality.
Step 4: Installing the New Stereo
With the old stereo removed and the wiring disconnected, it’s time to install the new stereo. Follow these steps to ensure a proper and secure installation:
- Begin by carefully reading the instructions included with your new stereo. Familiarize yourself with the layout and connections on the back of the stereo.
- If necessary, attach any mounting brackets or trim pieces included in your stereo installation kit to the new stereo. These components will help secure the stereo in your car’s dashboard.
- Gently slide the new stereo into the empty stereo slot in your car’s dashboard. Make sure it fits securely and aligns properly with the surrounding trim.
- Once the new stereo is in place, reconnect any wiring harnesses, antenna cables, or other cables that were disconnected from the old stereo. Ensure that each connection is secure and properly aligned.
- If your new stereo requires additional connections, such as GPS modules or auxiliary inputs, follow the instructions provided with the stereo to connect them.
- Double-check all connections to ensure they are secure and that no loose wires are hanging free.
It’s important to be gentle and mindful of the connections while installing the new stereo. Avoid pulling or yanking on wires, as this can cause damage or poor connectivity. Take your time to ensure everything is properly connected before moving on to the next step.
You’re now one step closer to enjoying a new and improved stereo system in your car. The next step is to connect the wiring, where you’ll bring the audio system to life. Stay excited!
Step 5: Connecting the Wiring
With the new stereo securely installed in your car’s dashboard, it’s time to connect the wiring and bring your audio system to life. Follow these steps to ensure a successful connection:
- Start by identifying the wiring harness adapter that matches both your car’s wiring harness and the wiring harness of the new stereo. These adapters are designed to simplify the connection process.
- Connect the corresponding wires from the car’s wiring harness adapter to the wires on the new stereo’s wiring harness. Ensure that the connections are secure and properly aligned, and use a wire crimping tool to crimp the wires together if necessary.
- If your car has separate wires for power, ground, and speaker connections, ensure that each wire is connected to the appropriate terminal on the new stereo. Refer to the wiring diagrams provided with the stereo and your car’s documentation to ensure correct wiring.
- Once all the wiring connections are made, double-check that everything is secure and properly aligned. Use electrical tape to wrap the wire connections, providing insulation and preventing any potential shorts.
- Now is a good time to test the functionality of the new stereo. Reconnect the negative terminal of your car’s battery, turn on the ignition, and power up the stereo to ensure that it is functioning properly. Test various features and audio sources to ensure everything is working as expected.
- If the stereo is functioning correctly, proceed to the final step. If not, double-check the wiring connections and consult the troubleshooting section of the stereo’s user manual.
It’s important to take your time during the wiring connection process to ensure accuracy. Double-check each connection and consult the wiring diagrams as needed to avoid any issues or malfunctions. Once everything is working correctly, you’re ready for the final step: testing the new stereo.
Step 6: Testing the New Stereo
After successfully connecting the wiring, it’s time to test your new stereo and ensure that everything is functioning as expected. Follow these steps to perform a thorough test:
- Turn on the ignition and power up the new stereo. Make sure it powers on properly and that the display is functional.
- Test the functionality of all the different features and controls on the new stereo. This includes adjusting the volume, changing radio stations, exploring different audio sources (such as CDs or USB devices), and testing any other special features or settings.
- Pay close attention to the audio quality of the new stereo. Notice if there is any distortion, imbalance, or loss of clarity in the sound. Adjust the equalizer settings if necessary to achieve better audio performance.
- If your new stereo has Bluetooth connectivity, pair it with your smartphone or another compatible device. Test the Bluetooth functionality by playing audio wirelessly from your device through the car’s speakers.
- Check the operation of any additional features that the new stereo offers, such as hands-free calling, voice control, or navigation (if applicable).
- Continuously monitor the stereo for any signs of abnormal behavior or malfunctions, such as sudden shutdowns, glitches, or inconsistent functionality.
If you encounter any issues during the testing process, refer to the troubleshooting section in the stereo’s user manual or consult with a professional. It’s important to address any problems promptly to ensure that the new stereo operates optimally.
Once you’ve confirmed that the new stereo is working correctly and meets your expectations, congratulations! You have successfully changed the stereo in your car. Enjoy the enhanced audio experience and the features that your new stereo brings to your vehicle.
Before concluding, take a moment to reflect on the process and the knowledge you’ve gained. Changing a car stereo can be a rewarding DIY project that not only improves your driving experience but also allows you to customize your vehicle’s interior. Remember, if you ever need to make any adjustments or modifications in the future, you now have the skills and know-how to do so.
Conclusion
Changing the stereo in your car can be a rewarding and enjoyable project that enhances your driving experience. By following the step-by-step process outlined in this guide, you can easily replace your old stereo with a new one and enjoy improved sound quality, modern features, and a refreshed aesthetic in your vehicle.
Throughout the installation process, proper preparation and attention to detail are key. Gathering the necessary tools and materials, removing the old stereo, disconnecting the wiring, installing the new stereo, connecting the wiring, and testing the system are all important steps that ensure a successful stereo replacement.
Remember, it’s crucial to handle the wiring connections with care and refer to the wiring diagrams provided with your new stereo and car’s documentation. Taking your time, following instructions, and double-checking all connections will help avoid any issues or malfunctions.
Once your new stereo is installed and tested, you can enjoy the benefits it brings to your car. Whether that’s improved sound quality, access to modern features like Bluetooth connectivity and touchscreen controls, or simply a fresh look in your car’s interior, your upgraded stereo system will elevate your driving experience.
If you ever need to make adjustments or modifications to your stereo system in the future, you now have the knowledge and skills to do so confidently. However, if you prefer professional assistance, don’t hesitate to consult a car audio specialist or technician.
Now, go ahead and enjoy your newly installed stereo system. Turn up the volume, listen to your favorite music, and experience the joy of a personalized and upgraded audio system in your car. Happy driving!