Home>Production & Technology>Stereo>How To Upgrade Stereo In Car

Stereo
How To Upgrade Stereo In Car
Modified: March 8, 2024
Upgrade the stereo in your car with our step-by-step guide. Enhance your audio experience on the road with our expert tips and recommendations.
(Many of the links in this article redirect to a specific reviewed product. Your purchase of these products through affiliate links helps to generate commission for AudioLover.com, at no extra cost. Learn more)
Table of Contents
Introduction
Welcome to our comprehensive guide on how to upgrade the stereo in your car. If you’re tired of listening to muffled music or dealing with outdated technology, upgrading your car stereo can drastically improve your audio experience on the road. Whether you’re a music enthusiast or simply crave better sound quality, replacing your old stereo system with a new one is a worthwhile investment.
Upgrading your car stereo not only enhances the audio quality but also adds modern features and functionalities to your vehicle. Imagine being able to connect your smartphone seamlessly, enjoy hands-free calling, and even access your favorite streaming apps on the go. With advancements in technology, today’s car stereos offer a wide range of features that can transform your driving experience.
Before embarking on your stereo upgrade journey, it’s important to assess your current stereo system, research and choose the right replacement, and gather the necessary tools and supplies. Then, you’ll move on to disconnecting the old stereo and installing the new one. Finally, you’ll wire and connect the new stereo, test and adjust it, and troubleshoot any common issues that may arise.
Whether you’re a DIY enthusiast or a first-timer, this guide will provide you with step-by-step instructions to help you navigate the process smoothly. So, let’s dive in and begin the journey to a better audio experience in your car!
Assessing Your Current Stereo System
Before starting the process of upgrading your car stereo, it’s essential to assess your current system. Understanding its strengths, weaknesses, and limitations will help you make informed decisions regarding the new stereo you choose. Here are a few key aspects to consider during this assessment:
- Sound Quality: Pay attention to the overall sound quality your current stereo system produces. Is it clear and balanced, or do you notice distortion or muffled tones? Identifying any audio issues will help you understand what improvements you need in your upgraded system.
- Features and Technology: Take note of the features and technology your current stereo system lacks. Are you missing Bluetooth connectivity, USB ports, or smartphone integration? Assessing the technological gaps will guide you towards choosing a new stereo with the features you desire.
- Compatibility: Check the compatibility of your current stereo with newer models and technologies. Ensure that the new stereo you choose is compatible with your car’s wiring harness, speakers, and any other accessories you plan to keep. This will prevent complications during the installation process.
- Appearance and Fit: Consider the physical appearance and fit of your current stereo unit. Evaluate if it matches the aesthetics of your car’s interior and if there is enough space for a larger or differently shaped stereo. This will help you select a new stereo that blends seamlessly with your vehicle’s design.
- Budget: Determine your budget for the stereo upgrade. Consider how much you’re willing to invest in the new system, including any additional accessories or installation costs. Having a clear budget in mind will help you narrow down your options and make a more focused decision.
By thoroughly assessing your current stereo system, you’ll have a better understanding of your specific needs and preferences. This knowledge will guide you in the next step of researching and choosing a new stereo that aligns with your requirements. So, take the time to evaluate your current system and get ready to take your car audio experience to the next level!
Researching and Choosing a New Stereo
Once you’ve assessed your current stereo system, it’s time to dive into the exciting process of researching and choosing a new stereo. With countless options available in the market, it’s important to narrow down your choices based on your specific needs and preferences. Here are some key factors to consider during your research:
- Compatibility: Ensure that the new stereo you choose is compatible with your car’s make, model, and year. Check for compatibility with your existing wiring harness, speakers, and any other accessories you plan to keep. This will ensure a smooth and hassle-free installation process.
- Features: Consider the features you desire in your new stereo system. Do you want Bluetooth connectivity for hands-free calling and music streaming? Are USB ports or an auxiliary input important to you? Make a list of must-have features and prioritize them to find a stereo that meets your requirements.
- Sound Quality: Look for a stereo that offers excellent sound quality with balanced and clear audio. Consider the power output, equalizer settings, and any sound enhancement technologies that the stereo offers. Read reviews and specifications to ensure that the audio quality meets your expectations.
- User Interface: Pay attention to the user interface of the stereo. Look for an intuitive and user-friendly interface that allows easy navigation through menus and settings. Consider the size and visibility of the display and the placement of buttons and knobs for convenient access while driving.
- Brand Reputation: Research the reputation of the brands you are considering. Look for well-established brands known for their reliability, quality, and customer support. Reading customer reviews and seeking recommendations from trusted sources can help you gauge the reputation of different brands.
- Budget: Set a budget for your new stereo system and stick to it. Consider the price range that meets your requirements and avoids overspending. Compare prices from different retailers and online platforms to ensure that you are getting the best value for your money.
By researching and considering these factors, you can narrow down your options and make an informed decision about the best stereo for your car. Take your time to read reviews, compare specifications, and evaluate your choices based on your budget and needs. Once you’ve chosen the perfect stereo, you’ll be one step closer to enjoying an upgraded audio experience in your car!
Gathering the Necessary Tools and Supplies
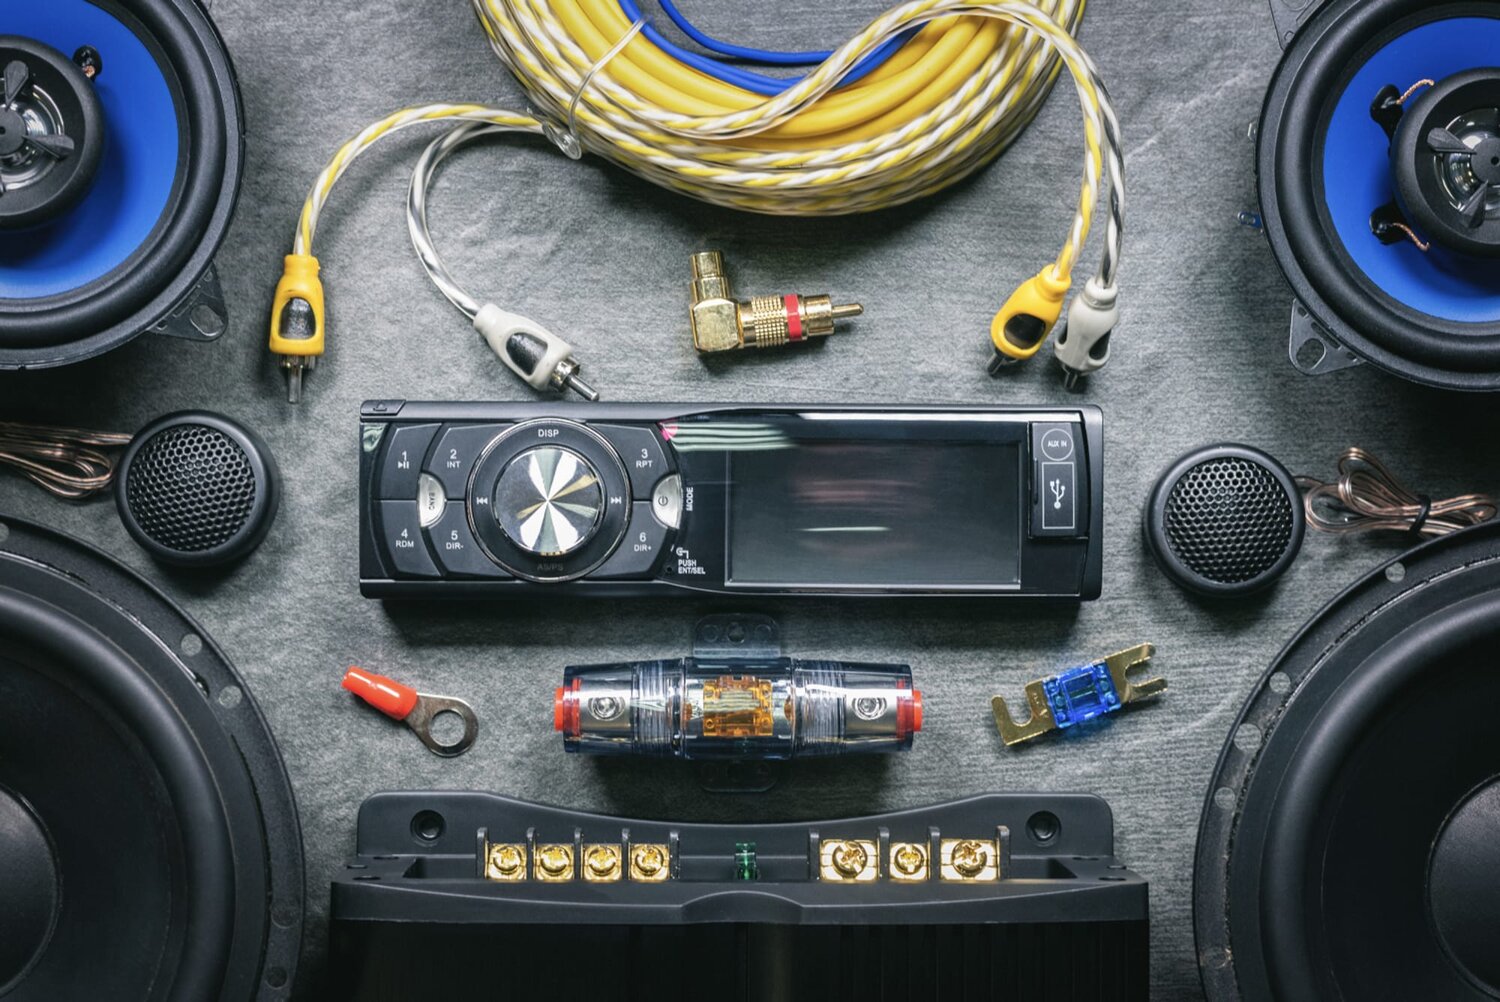
Before you begin the process of upgrading your car stereo, it’s important to gather all the necessary tools and supplies. Having everything ready in advance will make the installation process smoother and more efficient. Here are the essential tools and supplies you’ll need:
- Stereo Wiring Harness: Purchase a stereo wiring harness that is compatible with your car’s make, model, and year. This will simplify the installation process by allowing you to connect the new stereo to your car’s existing wiring without any cutting or splicing.
- Dash Kit: Get a dash kit that is specifically designed for your car’s make and model. The dash kit will help you seamlessly install the new stereo into your car’s dashboard, ensuring a secure and professional fit.
- Wire Cutters and Strippers: These tools will be necessary for cutting and stripping the wires when connecting the new stereo to the wiring harness. Make sure you have wire cutters and strippers suitable for the gauge of your car’s wiring.
- Screwdrivers and Trim Removal Tools: Depending on your car’s make and model, you may need various screwdrivers and trim removal tools to remove the existing stereo and access the mounting points. Ensure you have the right types and sizes of tools for your specific car.
- Tape or Wire Connectors: You’ll need tape or wire connectors to secure and insulate the connections between the new stereo and the wiring harness. Choose high-quality connectors that provide a secure and reliable electrical connection.
- Electrical Tape: Electrical tape will come in handy for securing and protecting the wires and connectors. Use it to wrap the exposed parts of the connections to prevent any short circuits or electrical issues.
- Panel Removal Tools: If your car has panels or trim pieces that need to be removed to access the stereo, consider acquiring panel removal tools. These tools will help you remove the panels without damaging delicate surfaces.
- Owner’s Manual and Stereo Manual: Keep the owner’s manual of your car handy for reference and any specific instructions regarding the stereo installation. Additionally, read and familiarize yourself with the manual of the new stereo for any brand-specific installation steps.
Ensure that you have all the necessary tools and supplies before you begin the installation process. This will save you time and prevent any unnecessary delays or frustration along the way. With everything ready, you’ll be well-prepared to tackle the task of upgrading your car stereo.
Disconnecting the Old Stereo
Now that you have gathered all the necessary tools and supplies, it’s time to disconnect the old stereo from your car. Follow these steps to ensure a smooth and safe disconnection process:
- Gather Information: Refer to the owner’s manual of your car and the stereo manual, if available, to familiarize yourself with the specific instructions for disconnecting the old stereo. Understanding the wiring and connections will make the process easier.
- Disconnect the Battery: Before working on any electrical components, it is crucial to disconnect the negative battery terminal. This will prevent any electrical shorts or damage during the process. Use a wrench or pliers to loosen the nut and remove the negative (-) cable from the battery terminal.
- Remove the Trim and Panels: If needed, use the appropriate panel removal tools to carefully pry off any trim or panels that obstruct access to the stereo unit. Be cautious not to damage any delicate surfaces in the process.
- Unscrew and Remove the Stereo: Locate the screws or bolts that secure the stereo unit in place. Use the appropriate screwdriver or socket wrench to loosen and remove them. Carefully pull the stereo unit out of the dashboard, ensuring that no wires are still connected.
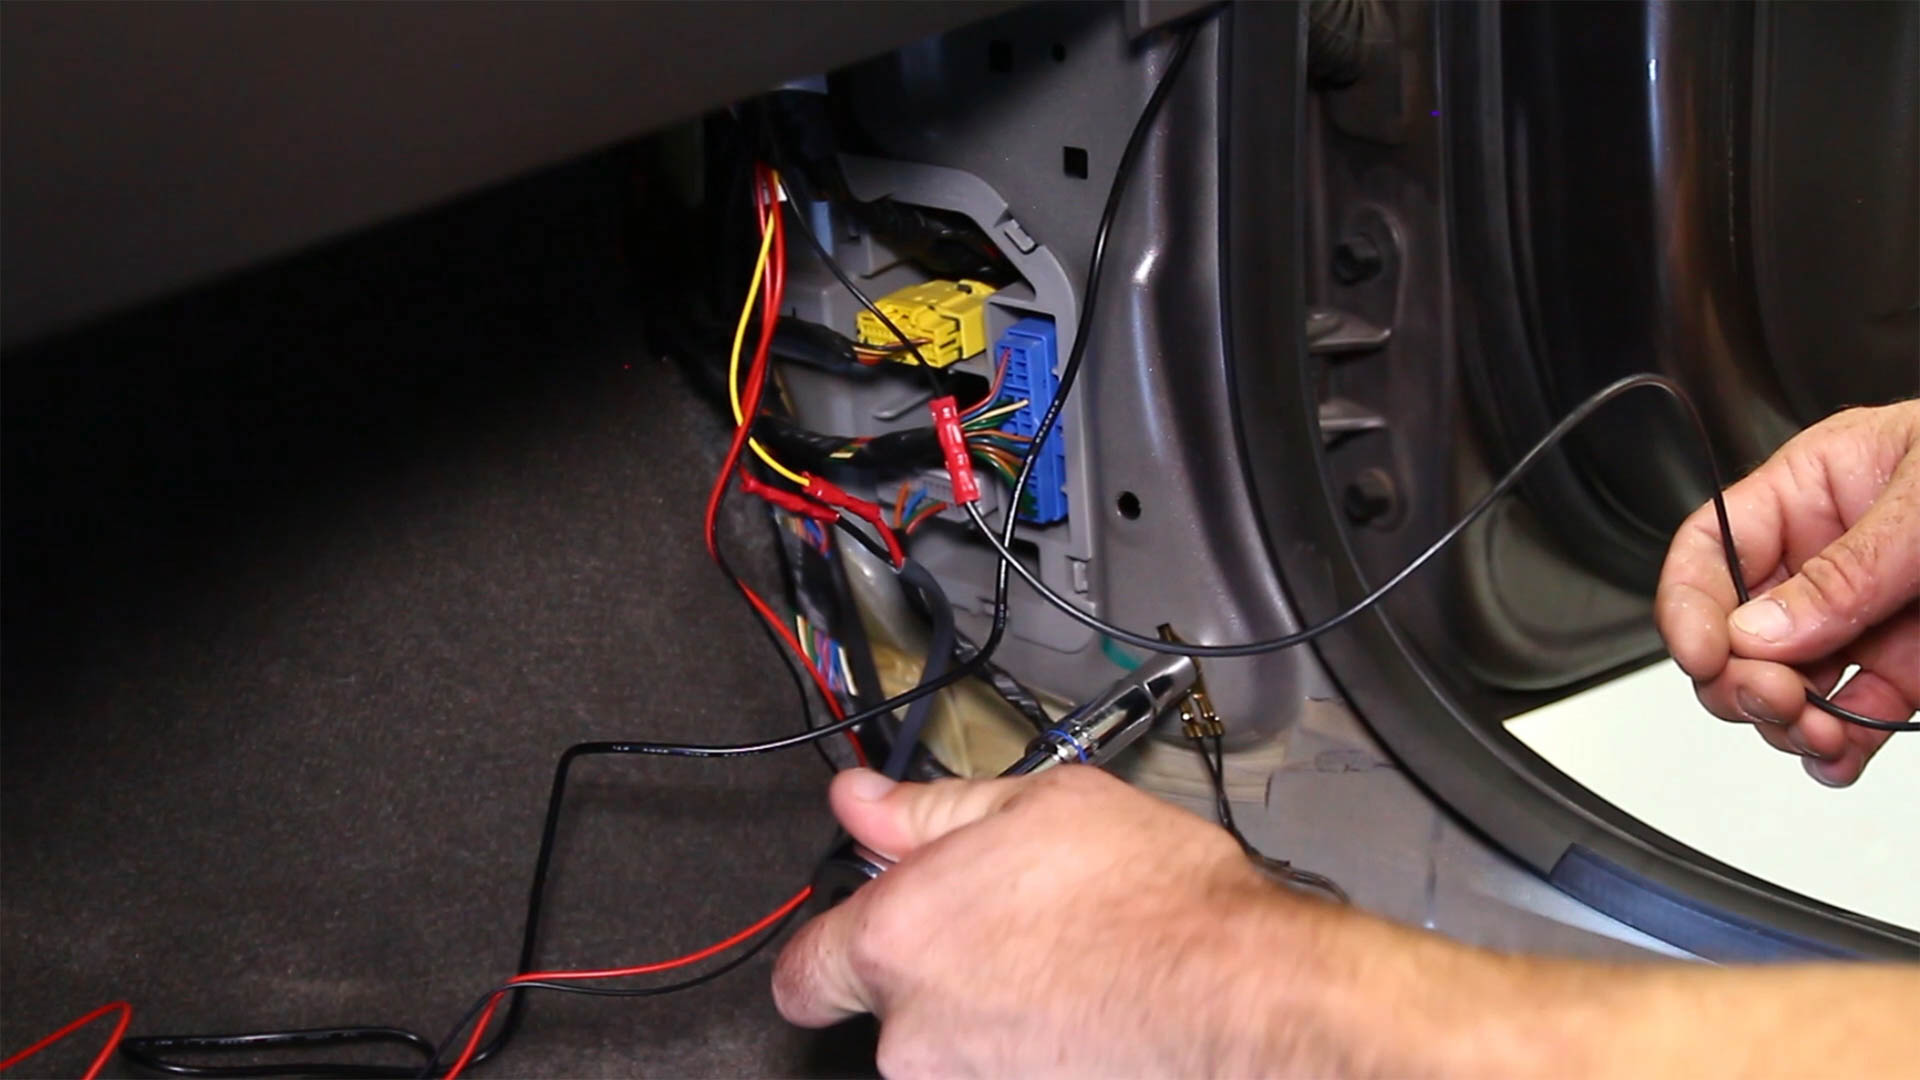
- Disconnect the Wiring Harness: Identify the wiring harness connected to the back of the old stereo. Depress any locking tabs or release mechanisms to disconnect the harness. If there are multiple harnesses, ensure that you disconnect all of them.
- Remove Additional Connectors: Some stereos may have additional connectors, such as antenna wires or multimedia cables. Disconnect these connectors if they are present, being mindful of any locking mechanisms or clips.
During the disconnection process, handle the stereo unit and wiring with care to avoid any damage. Keep in mind that different car models may have variations in the process, so referring to your car’s manual is essential. Take pictures or make notes of the wiring connections for future reference when installing the new stereo.
With the old stereo successfully disconnected, you are ready to move on to the exciting part: installing your brand new car stereo.
Installing the New Stereo
With the old stereo disconnected, it’s time to install your brand new car stereo. Follow these steps to ensure a successful installation:
- Prepare the Dash: Check that the dashboard is clean and free from any debris or residue left from the old stereo. Remove any brackets or mounting plates from the new stereo and attach them according to the instructions provided.
- Connect the Wiring Harness: Take the stereo wiring harness you purchased and connect it to the corresponding wiring harness of the new stereo. Match the wire colors and make sure all connections are secure. Use electrical tape or wire connectors to insulate and protect the connections.
- Mount the Stereo: Carefully slide the new stereo into the mounting brackets or dash kit prepared earlier. Make sure it fits snugly and aligns properly with the dashboard. Use the screws or bolts provided with the mounting kit to secure the stereo in place.
- Reconnect Additional Connectors: If there are any additional connectors, such as antenna wires or multimedia cables, connect them to the corresponding ports on the new stereo. Ensure that all connections are secure and properly locked in place.
- Reattach Trim and Panels: If you had to remove any trim or panels to access the old stereo, carefully reattach them, making sure they fit securely. Use gentle pressure to snap them back into place and double-check that they are aligned correctly.
Once the new stereo is securely installed, it’s important to give it a final visual inspection to ensure everything looks neat and in place. Check that all wiring connections are secure and that no wires are pinched or obstructing any mechanisms.
Before proceeding to the next step of wiring and connecting the stereo, it’s a good idea to test it briefly to ensure it powers on and functions correctly. Reconnect the negative battery cable to the battery terminal and turn on the ignition. Verify that the new stereo powers up and that audio plays through the speakers.
With the new stereo successfully installed and tested, you’re now ready to move on to the next step of wiring and connecting the various components of the stereo system.
Wiring and Connecting the New Stereo
After installing the new stereo, the next step is to wire and connect the various components of the stereo system. Ensure a successful installation by following these steps:
- Connect the Wiring Harness: Take the wiring harness connected to the new stereo and plug it into the corresponding harness in your car. Match the wire colors and make sure all connections are secure. Use electrical tape or wire connectors to insulate and protect the connections.
- Connect the Antenna: Connect the antenna wire from your car to the antenna input on the new stereo. Ensure a snug and secure connection to maintain a strong signal.
- Connect the Speakers: Identify the speaker wires from your car’s harness. Match them to the corresponding wires on the new stereo’s harness or use the provided speaker wire connections. Connect each speaker wire to its respective terminal, ensuring a secure and proper connection.
- Connect Additional Components: If you have any additional components, such as amplifiers or subwoofers, follow the respective instructions and connect them to the appropriate ports on the new stereo. Ensure that all connections are secure and properly routed.
- Secure and Organize Wires: Use zip ties or wire clips to secure and organize the wiring behind the stereo and inside the dashboard. This will prevent any loose wires from interfering with the functionality of the stereo or causing potential hazards.
While making the connections, double-check that all wires are properly connected and insulated. Ensure that there are no loose ends or exposed wires that could cause electrical issues or shorts.
Once all the connections have been made and secured, it’s time to test the stereo. Reconnect the negative battery cable to the battery terminal and turn on the ignition. Test all the features of the new stereo, including audio playback, Bluetooth connectivity, and any other functionalities.
If everything is working correctly, proceed with adjusting the settings of your new stereo to optimize the sound quality and adjust any personal preferences. Refer to the stereo’s manual for specific instructions on how to access and adjust the various settings.
Now that the new stereo is properly connected and functioning, you can enjoy the enhanced audio experience as you hit the road!
Testing and Adjusting the Stereo
Once you have wired and connected the new stereo in your car, it’s crucial to test and fine-tune the audio settings to ensure optimal performance. Follow these steps to effectively test and adjust your stereo:
- Audio Playback: Play a variety of audio sources through your new stereo, such as CDs, radio stations, or streaming music. Listen carefully to different genres of music to evaluate the sound quality, clarity, and balance of the audio.
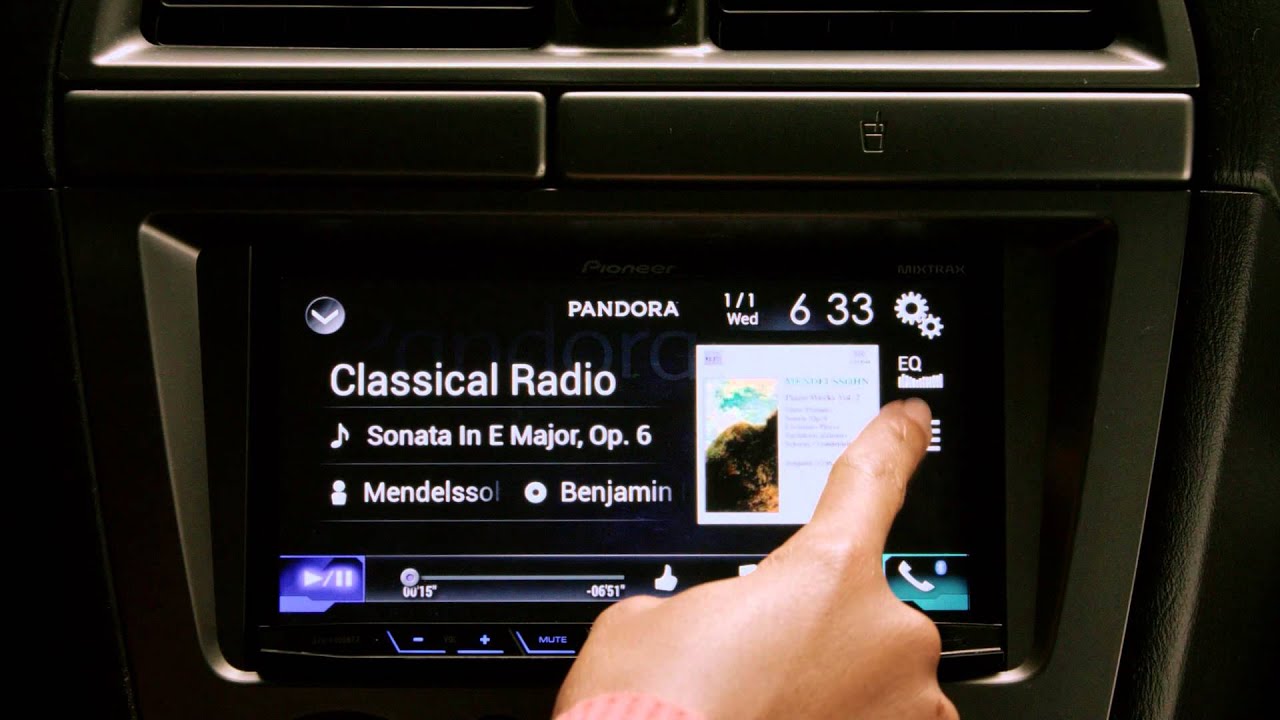
- Equalizer and Tone Controls: Adjust the equalizer and tone controls on the stereo to customize the audio to your preferences. Experiment with different EQ presets or manually adjust the bass, mid-range, and treble levels to achieve your desired sound.
- Balance and Fade Settings: Fine-tune the balance and fade settings to ensure that the sound is evenly distributed among the speakers in your car. Adjust the balance between the left and right speakers and the fade between the front and rear speakers until you achieve a well-balanced and immersive sound experience.
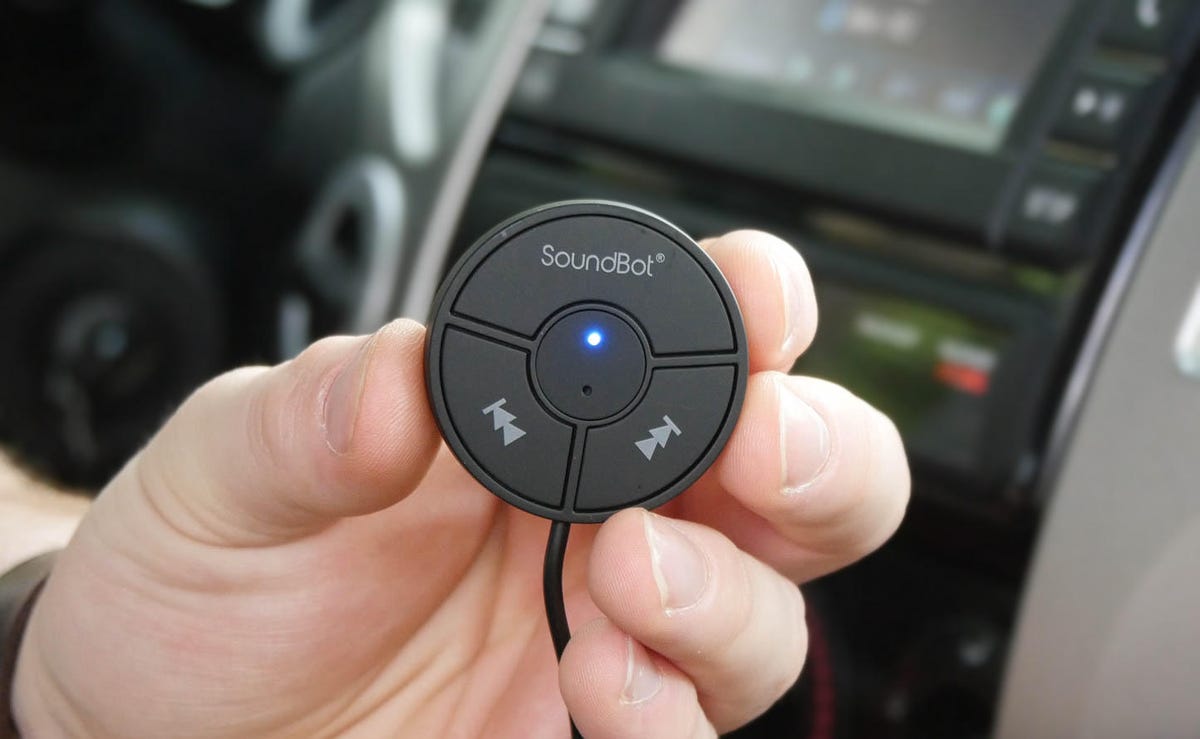
- Bluetooth Connectivity: Test the Bluetooth connectivity feature of your new stereo by pairing it with your smartphone or other Bluetooth-enabled devices. Make and receive phone calls, play music wirelessly, and ensure a seamless connection and functionality.
- Volume Control: Adjust the volume levels to ensure that it reaches a satisfactory level without any distortion or clipping. Keep in mind the maximum volume levels recommended for safe driving and avoid excessively high volumes that may damage your speakers.
- Additional Features: Explore and experiment with any other features or functionalities offered by your new stereo, such as USB or auxiliary inputs, media playback options, or voice control. Familiarize yourself with these features and ensure they operate as expected.
During the testing phase, note any areas where the sound quality may be lacking or in need of improvement. Pay attention to any settings or adjustments that can enhance your audio experience and tailor it to your preferences.
Make necessary adjustments as you go along, taking into account different types of music, audio sources, and personal preferences. Don’t hesitate to spend some time fine-tuning the settings to achieve the best audio quality possible.
By thoroughly testing and adjusting your new stereo, you can optimize the audio performance and enjoy a more immersive and enjoyable driving experience.
Troubleshooting and Common Issues
While upgrading your car stereo can greatly enhance your audio experience, it’s important to be aware of potential troubleshooting and common issues that may arise during or after the installation process. Here are some common problems you may encounter and how to address them:
- No Power: If your new stereo doesn’t power on, check the wiring connections to ensure they are secure and correctly connected. Verify that the fuse in the stereo or the car’s fuse box is intact. If everything seems fine, consult the stereo’s manual and user forums to troubleshoot further.
- Speaker Issues: If you’re experiencing poor or distorted sound quality from specific speakers, check the wiring connections to ensure they are secure and properly connected. Check the balance and fade settings to ensure they are properly adjusted. If the issue persists, there may be a problem with the speakers themselves.
- Bluetooth Connectivity Problems: If you’re having trouble connecting your phone or experiencing frequent disconnections, ensure that the Bluetooth pairing process was correctly followed. Make sure your phone’s Bluetooth is enabled and that you’re within range. If the problem persists, consult the stereo’s manual or customer support for assistance.
- Static or Interference: If you’re hearing static, hissing, or interference in the audio, check the wiring connections to ensure they are secure and free from any loose connections. Ensure that all ground connections are properly connected and that there are no loose or exposed wires near the stereo or speakers.
- Incompatibility Issues: If you’ve chosen a stereo that is not compatible with your car’s wiring or features, you may encounter various issues. Before purchasing a new stereo, ensure compatibility with your car’s make, model, and year. Consult the stereo’s manual or reach out to customer support for guidance if you encounter compatibility problems.
If you encounter any issues during the installation or usage of your new stereo, don’t hesitate to consult the stereo’s manual or seek assistance from customer support. Additionally, online forums and car audio communities can provide valuable insights and solutions to common problems.
Remember to approach troubleshooting with patience, and take your time to identify and resolve any issues. With the proper troubleshooting steps and guidance, you’ll be able to overcome common problems and enjoy the full benefits of your upgraded car stereo.
Conclusion
Congratulations on successfully upgrading the stereo in your car! By following the steps outlined in this guide, you have transformed your audio experience on the road and gained access to modern features and improved sound quality. Here’s a recap of what we covered:
We started by assessing your current stereo system, helping you identify its strengths, weaknesses, and compatibility issues. Then, we delved into the process of researching and choosing a new stereo that meets your specific needs and preferences.
Once you gathered the necessary tools and supplies, we guided you through the process of disconnecting the old stereo and installing the new one. We discussed how to wire and connect the new stereo, meticulously ensuring a proper and secure connection.
Next, we explored the importance of testing and adjusting the stereo. We provided tips on how to fine-tune the audio settings, optimize the sound quality, and utilize the various features of your new system.
Finally, we addressed common troubleshooting issues that may arise during or after the installation process. By being aware of these potential problems and solutions, you’re better equipped to overcome any challenges that may come your way.
Remember, upgrading your stereo system not only enhances your audio experience but also adds value and enjoyment to your daily drives. With your new stereo, you can now enjoy crisp and clear sound, seamless connectivity, and an immersive audio experience that will make your journeys all the more enjoyable.
If you ever need further assistance or run into any additional questions or concerns, don’t hesitate to consult the resources provided with your stereo or seek guidance from professionals in the car audio field.
Now, sit back, relax, and enjoy the incredible sound quality and feature-rich experience that your new car stereo brings!