Home>Production & Technology>Stereo>How To Connect Factory Backup Camera To Aftermarket Stereo
Stereo
How To Connect Factory Backup Camera To Aftermarket Stereo
Published: November 26, 2023
Learn how to connect your factory backup camera to an aftermarket stereo and enhance your car audio experience. Upgrade your stereo system with ease!
(Many of the links in this article redirect to a specific reviewed product. Your purchase of these products through affiliate links helps to generate commission for AudioLover.com, at no extra cost. Learn more)
Table of Contents
- Introduction
- Understanding the Factory Backup Camera System
- Required Tools and Materials
- Step 1: Preparing the Aftermarket Stereo
- Step 2: Locating the Factory Backup Camera Wiring
- Step 3: Connecting the Backup Camera Wiring to the Aftermarket Stereo
- Step 4: Testing the Connection
- Step 5: Properly Securing and Mounting the Aftermarket Stereo
- Conclusion
Introduction
Welcome to our comprehensive guide on how to connect a factory backup camera to an aftermarket stereo. If you’re looking to upgrade your car’s audio system while still maintaining the functionality of your factory backup camera, you’ve come to the right place. This step-by-step tutorial will walk you through the process, ensuring a seamless integration between your existing backup camera and the new aftermarket stereo.
Many modern vehicles are equipped with built-in backup camera systems to improve safety and make parking easier. These systems typically display the camera feed on the car’s factory-installed stereo head unit. However, if you decide to upgrade your stereo to an aftermarket model with enhanced features and improved sound quality, you may be concerned about losing the functionality of your backup camera.
Fortunately, with the right tools and knowledge, you can successfully connect your factory backup camera to the new aftermarket stereo without any issues. By following the steps outlined in this guide, you’ll be able to enjoy the benefits of both the upgraded audio system and the convenience of your existing backup camera.
Before we delve into the step-by-step instructions, it’s important to note that the process of connecting a factory backup camera to an aftermarket stereo may vary depending on the make and model of your vehicle, as well as the specific aftermarket stereo you’ve chosen. Therefore, it’s always recommended to consult the user manuals of both your car’s factory backup camera system and the aftermarket stereo for any model-specific instructions or recommendations.
Now that we’ve covered the basics, let’s begin our journey to connect your factory backup camera to an aftermarket stereo. Don’t worry if you’re not a seasoned DIY enthusiast – we’ll guide you every step of the way to ensure a successful installation.
Understanding the Factory Backup Camera System
Before diving into the process of connecting your factory backup camera to an aftermarket stereo, it’s essential to have a solid understanding of how the factory backup camera system works. This knowledge will help you identify the necessary connections and ensure a successful integration with the new stereo.
A typical factory backup camera system consists of several key components:
- Camera: The camera, usually mounted on the rear bumper or tailgate, captures the live video feed of the area behind the vehicle.
- Wiring: The camera is connected to the vehicle’s electrical system through a series of wires. These wires transfer power and transmit the camera’s video feed to the head unit.
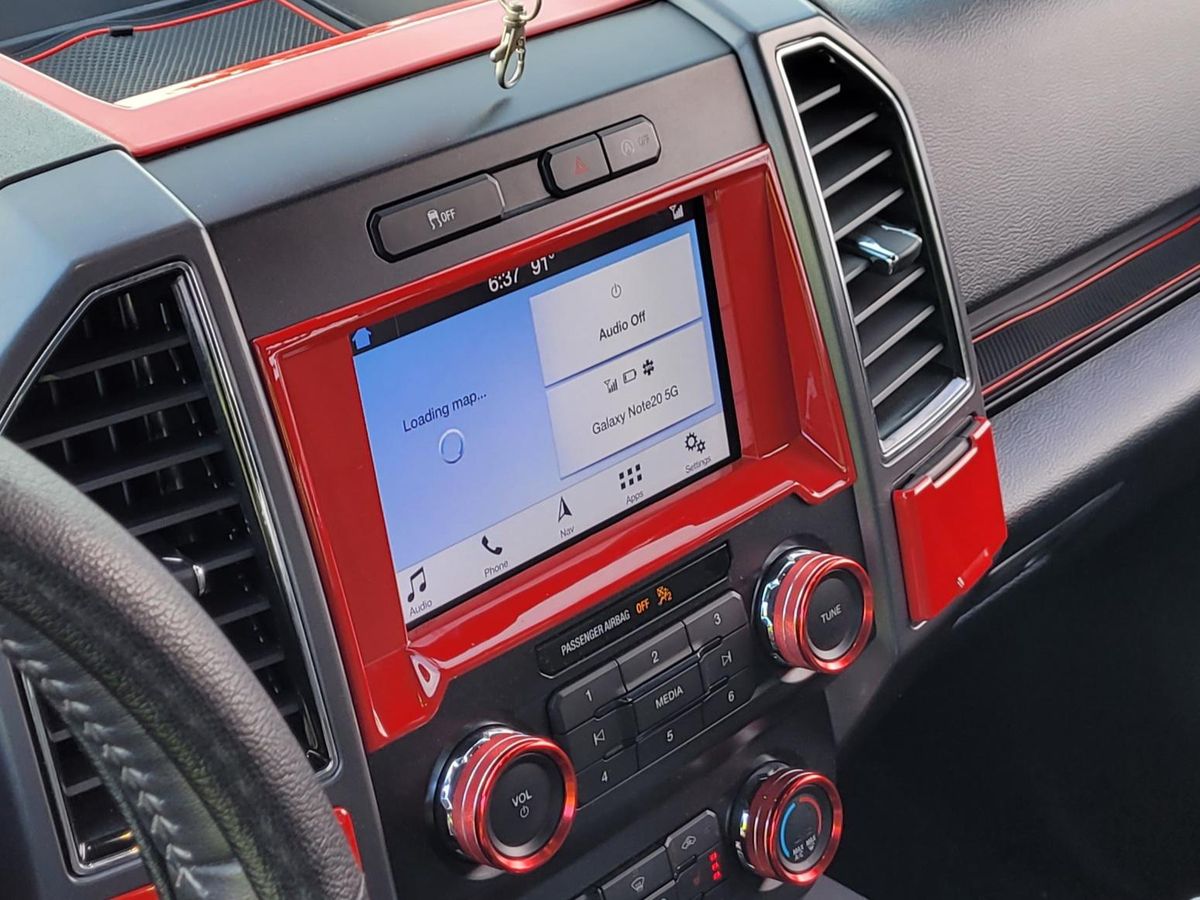
- Head unit: The head unit, also known as the stereo or infotainment system, receives the camera’s video feed and displays it on the screen when the vehicle is in reverse gear.
When you purchase an aftermarket stereo, it’s important to understand that it may not have the same plug-and-play compatibility with the factory backup camera system as the original head unit. This is because different manufacturers may have their own proprietary wiring configurations.
To overcome this incompatibility, you will need to identify the specific wiring connections required to integrate the factory backup camera with the aftermarket stereo. This typically involves locating the wiring harness that is responsible for transmitting the camera’s video feed and power supply to the head unit.
In some cases, the aftermarket stereo may come with its own wiring harness that is compatible with the factory backup camera system. If this is the case, you can simply connect the existing camera wiring to the corresponding wires on the aftermarket stereo’s harness.
However, if there is no direct compatibility, you may need to use additional wiring adapters or splice the wires together to establish the necessary connections. This requires careful attention to detail and following the instructions provided by the aftermarket stereo manufacturer or an installation guide specific to your vehicle model.
Now that you have a clear understanding of the factory backup camera system, the next step is to gather the required tools and materials to perform the installation. Let’s proceed to the next section to learn more.
Required Tools and Materials
Before you begin connecting your factory backup camera to an aftermarket stereo, it’s important to gather all the necessary tools and materials. Having everything ready beforehand will save you time and ensure a smooth installation process. Here’s a list of the tools and materials you will need:
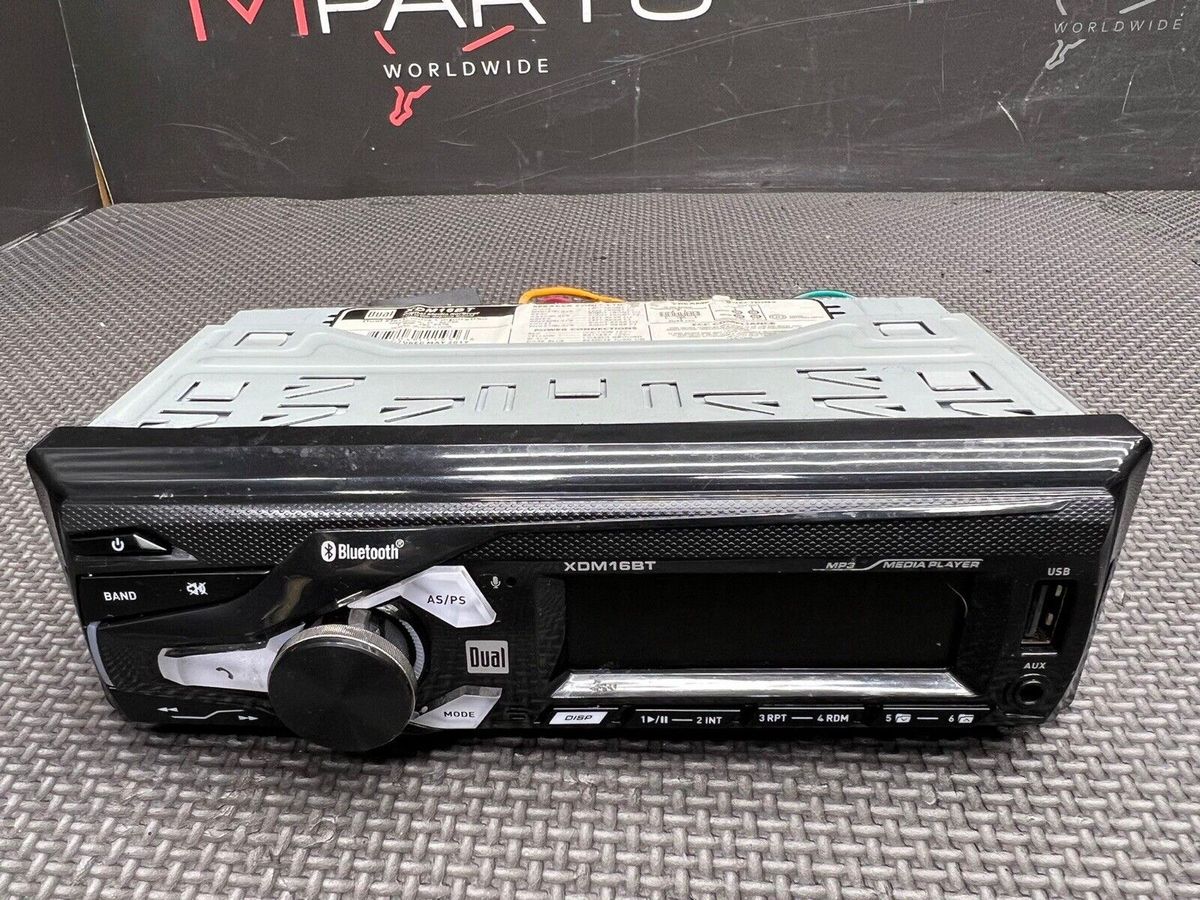
- Aftermarket stereo: Make sure you have already purchased the aftermarket stereo that you want to install in your vehicle. Ensure that it is compatible with your specific vehicle make and model.
- Factory backup camera wiring harness: You may need a wiring harness that is compatible with your specific vehicle’s backup camera system. This will help simplify the installation process and ensure proper connections.
- Wire crimping tool: A wire crimping tool will be needed to securely connect the wires together. This tool allows for a strong and reliable connection without the need for soldering.
- Wire strippers: Wire strippers are essential for removing the insulation from the wire ends before making connections. They ensure a clean and proper connection between wires.
- Electrical tape: Electrical tape is used to insulate and protect the connections from moisture, dust, and other potential hazards.
- Zip ties or cable management clips: These will help keep the wiring neat and organized, preventing any potential damage or interference.
- Trim removal tools: Depending on your vehicle, you may need trim removal tools to safely remove the dashboard panels and access the stereo wiring.
- User manuals: Make sure to have the user manuals for both your factory backup camera system and the aftermarket stereo. These will provide valuable information and specific instructions for your particular setup.
It’s important to note that the specific tools and materials required may vary depending on your vehicle make and model, as well as the aftermarket stereo you’ve chosen. Therefore, it’s always recommended to consult the user manuals and guides provided by the manufacturers for any model-specific instructions or recommendations.
Now that you have everything you need, it’s time to move on to the next section where we’ll guide you through preparing the aftermarket stereo for the installation process.
Step 1: Preparing the Aftermarket Stereo
Before you can connect your factory backup camera to the aftermarket stereo, it’s crucial to prepare the stereo for installation. This step involves familiarizing yourself with the stereo’s wiring connections and making any necessary adjustments.
Here’s a breakdown of the key tasks involved in preparing the aftermarket stereo:
- Read the user manual: Begin by carefully reading the user manual that comes with your aftermarket stereo. This will provide you with important information about the wiring connections and any specific requirements for your particular stereo model.
- Identify the wiring harness: Locate the wiring harness that is included with the aftermarket stereo. This harness will likely have a variety of wires, each with a specific function. Take note of any wires labeled for backup camera connections.
- Match wires with the factory backup camera: Compare the wires on the aftermarket stereo’s harness with the wiring coming from your factory backup camera. Look for matching wire colors or labels. It’s important to ensure the compatibility between the wires, as they need to be connected properly for the camera to work with the stereo.
- Modify the wiring harness (if necessary): In some cases, the aftermarket stereo may not have a direct plug-and-play connection for the factory backup camera. If this is the case, you may need to modify the wiring harness to create the necessary connections. This could involve splicing wires or using additional wiring adapters. Refer to the user manual or consult a professional if you’re unsure about how to proceed.
- Secure loose connections: Take the time to ensure that all connections on the aftermarket stereo’s harness are secure. Use a wire crimping tool or proper connectors to attach the wires together. Loose connections can lead to poor performance or malfunction of the backup camera system.
By properly preparing the aftermarket stereo, you’ll be one step closer to successfully connecting your factory backup camera. In the next section, we’ll guide you through locating the factory backup camera wiring in your vehicle.
Step 2: Locating the Factory Backup Camera Wiring
Now that you have prepared the aftermarket stereo, the next step is to locate the factory backup camera wiring in your vehicle. Finding this wiring is crucial to establish the necessary connections and ensure the proper functioning of the backup camera with the new stereo.
Here’s a step-by-step guide on how to locate the factory backup camera wiring:
- Consult the vehicle’s user manual: Start by referring to the user manual of your vehicle. The manual may provide specific instructions on the location of the backup camera wiring or offer valuable insights into the wiring diagram.
- Inspect the rear of the vehicle: Look for any visible wiring or connectors in the vicinity of your vehicle’s rear bumper or tailgate. The backup camera wiring is often routed along with other wiring or follows a dedicated path towards the rear of the vehicle.
- Remove interior trim panels: In some cases, accessing the factory backup camera wiring may require removing interior trim panels. These panels are typically found inside the vehicle, near the rear. Consult your vehicle’s user manual or search online for specific instructions on removing interior trim panels.
- Follow the wiring from the head unit: Trace the wiring harness that is connected to the factory-installed head unit or stereo. The backup camera wiring often runs from the head unit to the rear of the vehicle. By following this harness, you can locate the point where it connects to the backup camera wiring.
- Identify the factory backup camera connector: Look for a connector, usually with multiple wires, that is specifically labeled for the backup camera. This connector is where the camera’s wiring is joined with the vehicle’s electrical system. It may be located near the rear of the vehicle or inside the trunk area.
It’s important to exercise caution when working with interior trim panels or any electrical wiring. If you’re unsure about any step or encounter any difficulties, it’s always recommended to consult a professional or seek guidance from an experienced installer.
Once you have successfully located the factory backup camera wiring, you’re ready to move on to the next section, where we’ll guide you through connecting the backup camera wiring to the aftermarket stereo.
Step 3: Connecting the Backup Camera Wiring to the Aftermarket Stereo
With the factory backup camera wiring located, it’s time to connect it to your aftermarket stereo. This step is crucial in ensuring that the backup camera can communicate properly with the new stereo and display the camera feed when needed. Follow these steps to establish the necessary connections:
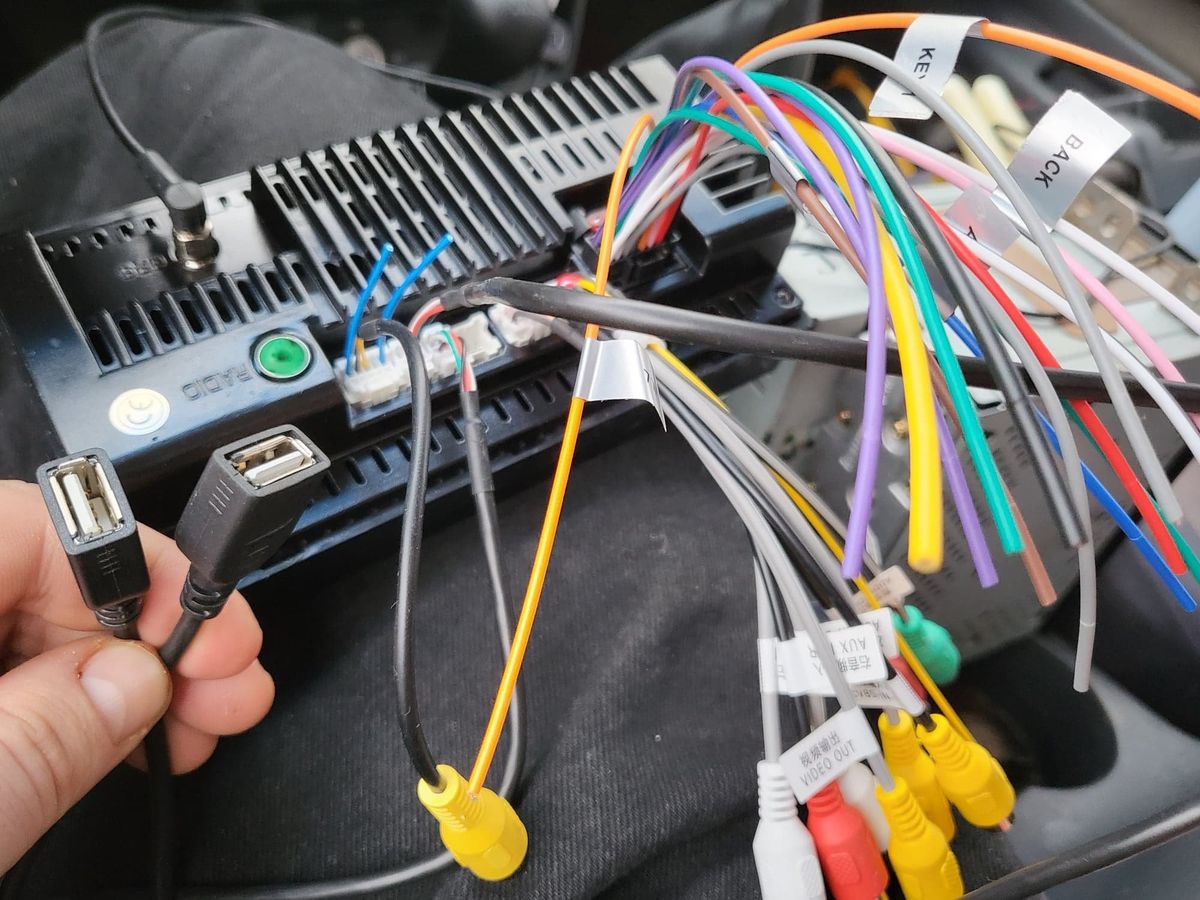
- Identify the backup camera wires: Depending on your specific setup, the backup camera wiring may consist of several wires, including power, ground, video signal, and possibly audio. Identify each wire and make note of its function to ensure a proper connection.
- Prepare the aftermarket stereo’s wiring harness: Refer to the user manual or wiring diagram of your aftermarket stereo to locate the backup camera wires on its harness. Match these wires with the corresponding wires from the factory backup camera to establish the correct connections.
- Make the connections: Use wire strippers to remove a small portion of the insulation from each wire, both on the factory backup camera wiring and the aftermarket stereo’s harness. Connect each wire using wire connectors or crimping them together. Ensure that each connection is secure and properly insulated with electrical tape to prevent any short circuits or loose connections.
- Double-check the connections: Once all the connections are made, take a moment to review and double-check each one. Ensure that all wires are securely connected and that there are no crossed or loose connections. Any mistake at this stage could result in a non-functioning or poorly performing backup camera system.
It’s important to note that the specific wiring connections may vary depending on your vehicle make and model, as well as the aftermarket stereo you’ve chosen. Always refer to the user manuals, wiring diagrams, and any additional guides provided by the manufacturers for accurate and model-specific instructions.
With the backup camera wiring successfully connected to the aftermarket stereo, you can now move on to the next step, which involves testing the connection to ensure proper functionality. Let’s proceed to the next section to learn more.
Step 4: Testing the Connection
After connecting the backup camera wiring to the aftermarket stereo, it’s important to test the connection to ensure that everything is functioning correctly. This step will help you identify any potential issues or errors in the installation process. Follow these steps to perform a thorough test:
- Start the vehicle: Turn on the ignition and start the vehicle. Ensure that the aftermarket stereo powers on and functions properly.
- Engage the reverse gear: Put your vehicle in reverse gear. This step is crucial as the factory backup camera system is designed to activate when the vehicle is in reverse. By engaging the reverse gear, you can test if the camera feed appears on the aftermarket stereo’s screen.
- Check the camera feed: Monitor the aftermarket stereo’s screen for the live camera feed. If the connection is successful, you should see a clear and accurate video feed from the factory backup camera. Pay attention to any distortion, flickering, or abnormalities in the image quality, as they may indicate a problem with the wiring or the compatibility between the factory camera and the aftermarket stereo.
- Test additional features (if applicable): Some backup camera systems have additional features, such as distance guidelines or audio alerts. Test these features to ensure they are functioning as expected.
- Make adjustments if needed: If you encounter any issues or notice any problems during the test, double-check all the connections and make necessary adjustments. Ensure that the wiring is properly connected, secure, and insulated. Refer to the user manuals or consult a professional for guidance if you need assistance.
It’s important to perform a comprehensive test to ensure that the backup camera and aftermarket stereo are working harmoniously. A successful test will give you peace of mind, knowing that you have successfully connected the factory backup camera to the new stereo.
Once you are satisfied with the test results and the backup camera functionality, you can now proceed to the final step, which involves properly securing and mounting the aftermarket stereo. Let’s move on to the next section to learn more.
Step 5: Properly Securing and Mounting the Aftermarket Stereo
After successfully connecting the factory backup camera to the aftermarket stereo and ensuring that everything is functioning properly, it’s time to secure and mount the stereo in your vehicle. This step is crucial to ensure the stability and longevity of the installation. Follow these steps for proper securing and mounting:
- Disconnect the power: Before proceeding with securing the aftermarket stereo, make sure to disconnect the power source. This will prevent any electrical mishaps during the installation process.
- Mounting brackets and dash kit: If your aftermarket stereo comes with mounting brackets or a dash kit, follow the instructions provided to properly attach these components. These brackets and kits are designed to stabilize and secure the stereo in the vehicle’s dashboard.
- Secure the stereo: Once the mounting brackets or dash kit is properly attached, carefully slide the aftermarket stereo into the stereo compartment in the dashboard. Ensure that the stereo is aligned correctly and securely fastened to the mounting brackets or dash kit.
- Reconnect the wires: Reconnect the power and any other relevant wiring to the aftermarket stereo. Make sure to double-check each connection to ensure a proper and secure fit.
- Test the functionality: After the aftermarket stereo is securely mounted, reconnect the power source and test its functionality. Ensure that all the features, including the factory backup camera, are working as expected.
- Properly route and secure wiring: Carefully route and secure any loose wiring to avoid interference with other components in the vehicle. Use zip ties or cable management clips to keep the wiring neat and organized.
- Reassemble the interior: If any interior trim panels were removed during the installation process, reassemble them by following the reverse procedure of their removal. Take your time to ensure each panel is properly fitted and secured, preventing any rattling or loose parts.
Properly securing and mounting the aftermarket stereo is essential to prevent it from becoming loose or dislodged during vehicle operation. A secure installation ensures a stable and reliable performance from both the stereo and the factory backup camera system.
Congratulations! You have successfully connected your factory backup camera to the aftermarket stereo and securely mounted the stereo in your vehicle. Enjoy the improved audio quality and the convenience of the backup camera system as you drive.
Remember, if you encounter any issues or are unsure about any step during the installation process, it’s always recommended to consult the user manuals or seek assistance from a professional to ensure a proper and safe installation.
We hope this guide has been helpful to you. Safe travels!
Conclusion
Congratulations on successfully connecting your factory backup camera to an aftermarket stereo! By following the step-by-step instructions outlined in this guide, you have ensured a seamless integration between your existing backup camera system and the upgraded audio capabilities of the aftermarket stereo. Now, you can enjoy enhanced sound quality and a convenient backup camera display while driving.
Throughout this process, it’s important to remember that the specific steps and requirements may vary depending on your vehicle make and model, as well as the aftermarket stereo you’ve chosen. Always refer to the user manuals and any additional guides provided by the manufacturers to ensure accurate and model-specific instructions.
By understanding the factory backup camera system, gathering the necessary tools and materials, preparing the aftermarket stereo, locating the factory backup camera wiring, connecting the wiring, testing the connection, and properly securing and mounting the aftermarket stereo, you have completed a comprehensive installation process. Your attention to detail and careful execution will lead to a successful integration of the backup camera and stereo.
Remember to perform a thorough test to verify the functionality of the backup camera and the aftermarket stereo after the installation. This step will give you peace of mind and allow you to address any potential issues or errors in the wiring connections.
If at any point during the installation process you are unsure or need assistance, don’t hesitate to consult the user manuals, seek guidance from a professional installer, or reach out to customer support for the aftermarket stereo manufacturer.
Enjoy the benefits of your newly connected backup camera and upgraded audio system. Drive with confidence, knowing that you have successfully completed the installation and have maximized the functionality of your vehicle’s features.
Thank you for reading this comprehensive guide. We hope it has been helpful and informative. Safe travels!