Home>Devices & Equipment>Radio>How To Wire An Aftermarket Radio

Radio
How To Wire An Aftermarket Radio
Published: November 11, 2023
Learn how to properly wire an aftermarket radio in your vehicle for improved sound quality and enhanced entertainment. Step-by-step instructions and tips for a successful installation.
(Many of the links in this article redirect to a specific reviewed product. Your purchase of these products through affiliate links helps to generate commission for AudioLover.com, at no extra cost. Learn more)
Table of Contents
- Introduction
- Tools and Materials Needed
- Step 1: Gather Information on Your Car’s Wiring System
- Step 2: Disconnect the Battery
- Step 3: Remove the Factory Radio
- Step 4: Prepare the Wiring Harness Adapter
- Step 5: Connect the Wiring Harness Adapter to the Aftermarket Radio
- Step 6: Connect the Antenna Adapter
- Step 7: Mount the Aftermarket Radio and Reinstall the Dash Panel
- Step 8: Connect the Battery and Test the Radio
- Conclusion
Introduction
Radio is a timeless and powerful medium that has been entertaining and informing listeners for decades. Whether you’re a fan of talk shows, music, news, or sports, radio has something for everyone. And with the advent of aftermarket radios, you now have the freedom to customize your car’s audio system to your liking.
Installing an aftermarket radio in your car not only allows you to enjoy a wider range of features and enhanced sound quality but also gives you the opportunity to add your personal touch to your vehicle. However, the process of wiring an aftermarket radio may seem daunting to some. But fear not, as this comprehensive guide will take you through the step-by-step process of how to wire an aftermarket radio, making it a breeze for even the least tech-savvy individuals.
In this article, we will discuss the tools and materials needed for the installation, as well as the step-by-step procedure to ensure a smooth and successful installation. By the end of this guide, you’ll be able to enjoy your favorite radio stations and audio content in your car with your brand new aftermarket radio.
Tools and Materials Needed
Before you begin the installation process, it’s essential to gather all the necessary tools and materials. This will ensure that you have everything on hand and ready to use, saving you time and frustration. Here’s a list of tools and materials you’ll need:
- Aftermarket radio
- Wiring harness adapter
- Antenna adapter
- Wire connectors or crimping tool
- Wire cutter/stripper
- Screwdrivers (Phillips and flathead)
- Trim removal tool
- Electrical tape
- Zip ties
- Flashlight (optional but helpful for better visibility)
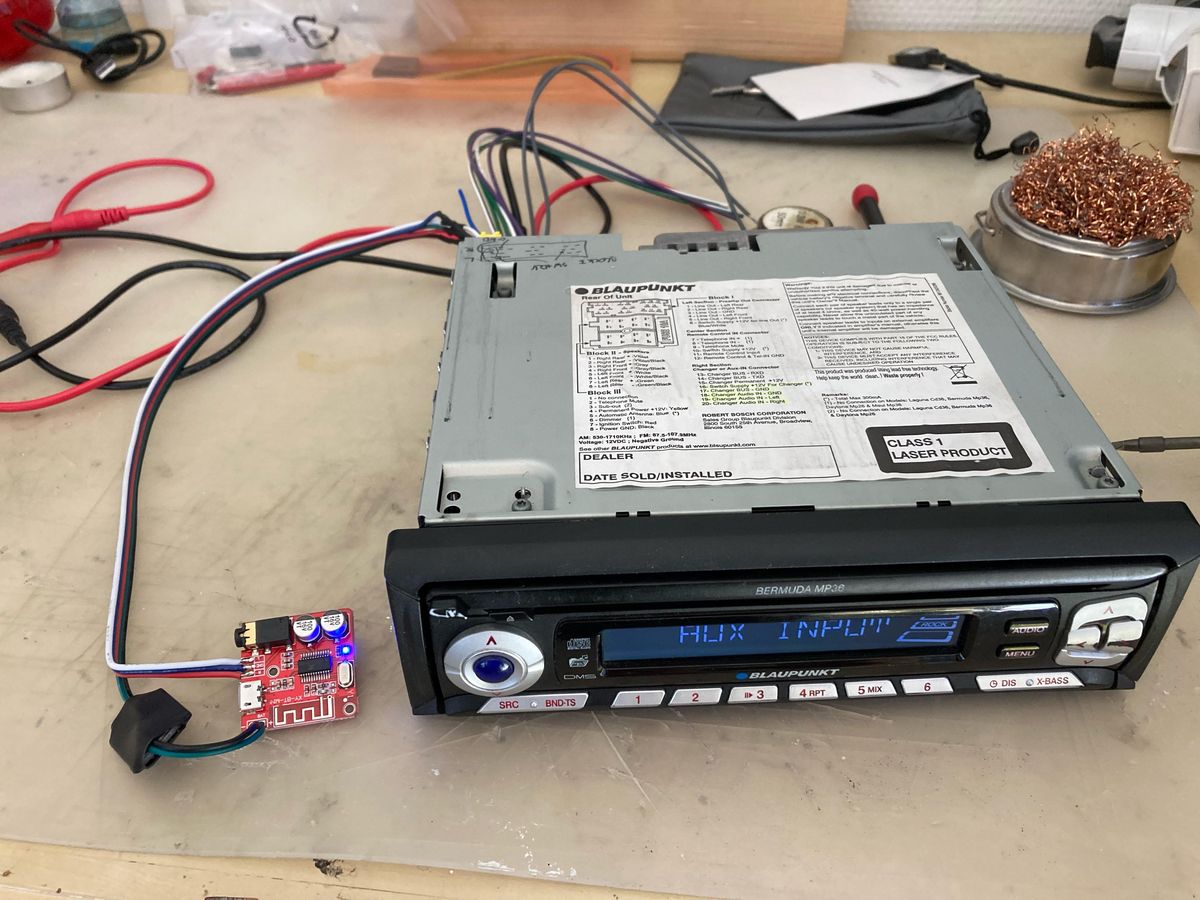
The aftermarket radio is the heart of the installation. Make sure to choose one that is compatible with your car’s make and model, and consider the features you desire, such as Bluetooth connectivity, USB ports, or satellite radio.
The wiring harness adapter is a crucial component that bridges the gap between your car’s existing wiring system and the new aftermarket radio. It eliminates the need for cutting or splicing the factory wires, making the installation process more straightforward and reversible if needed.
The antenna adapter ensures that your car’s antenna can connect properly to the aftermarket radio, allowing you to receive radio signals without any interference.
Wire connectors or a crimping tool will be needed to secure the connections between the wiring harness adapter and the aftermarket radio’s wiring. They provide a reliable and durable connection.
A wire cutter/stripper is essential for preparing the wires by cutting off excess length and stripping the insulation for a clean connection.
Phillips and flathead screwdrivers are commonly used in car installations for removing screws and securing the aftermarket radio in place.
A trim removal tool is useful for gently removing panels and trim pieces without causing any damage to your car’s interior.
Electrical tape is used to insulate and protect connections from moisture and potential short circuits.
Zip ties can be handy for organizing and securing the wiring to prevent any loose wires or rattling.
Having a flashlight on hand can assist in better visibility, especially in darker areas of your car’s interior.
By gathering these tools and materials, you’ll be well-prepared to tackle the installation process with confidence and ease.
Step 1: Gather Information on Your Car’s Wiring System
Before you start the installation process, it’s essential to gather information about your car’s wiring system. This knowledge will help you understand how the factory radio is connected and how to properly install the aftermarket radio.
Here are some key pieces of information you need to gather:
- Car’s make, model, and year: Different cars have different wiring configurations, so knowing the specifics of your car is crucial.
- Radio wiring diagram: Find the wiring diagram for your specific car model. It will provide details on the wire color codes and functions of each wire in the factory radio harness.
- Factory radio compatibility: Determine if your car has any special features that are integrated with the factory radio, such as steering wheel controls or an amplified audio system. This information will help you select the appropriate wiring harness adapter.
You can find the required information in a few ways:
- Car manual: Many car manuals include wiring diagrams and information about the factory radio.
- Online resources: Websites and forums dedicated to car audio enthusiasts often have wiring diagrams and compatibility information for various car models.
- Professional assistance: If you’re unsure or prefer expert guidance, you can consult a professional car audio installer who can provide you with the necessary information.
Once you have gathered all the information, familiarize yourself with the wiring diagram and take note of the wire color codes and their respective functions. This will aid you in connecting the wiring harness adapter to the aftermarket radio correctly.
Gathering information on your car’s wiring system ensures that you have a solid understanding of how everything is connected and how to proceed with the installation process. It helps to avoid any potential mishaps or confusion, making the entire process smoother and more successful.
Step 2: Disconnect the Battery
Before you begin working on your car’s electrical system, it’s crucial to disconnect the battery to prevent any electrical mishaps or damage. Here’s how to safely disconnect the battery:
- Find the battery location: The battery is typically located in the engine bay or in the trunk of your car. Refer to your car’s manual if you’re unsure.
- Identify the battery terminals: The battery has two terminals – positive (+) and negative (-). These are usually labeled or color-coded.
- Put on safety gloves and goggles: Safety should always be a priority. Wear protective gloves and goggles to safeguard yourself from any acid or electrical hazards.
- Disconnect the negative terminal: Using a wrench or socket, loosen the nut on the negative terminal and remove the negative cable from the battery. Move the cable aside to ensure it doesn’t accidentally come into contact with the battery terminal.
- Disconnect the positive terminal: Repeat the same process for the positive terminal. Loosen the nut and remove the positive cable from the battery.
Once both terminals have been disconnected, you can proceed with the installation process without the risk of electrical shock or short circuits.
It’s important to note that disconnecting the battery will likely reset certain settings in your car, such as radio presets, clock, and trip odometer. Take note of any settings you want to retain and be prepared to reprogram them later.
Remember, when connecting the battery after the installation, always start with the positive terminal and then connect the negative terminal. This ensures a safe and proper reconnection.
By disconnecting the battery, you eliminate any electrical power to the system, ensuring a safer working environment and protecting your car’s electrical components from potential damage during the installation process. Safety first!
Step 3: Remove the Factory Radio
In this step, you will remove the factory radio from your car’s dashboard. Follow these steps to remove the factory radio:
- Gather the necessary tools: Ensure you have the appropriate screwdrivers and trim removal tools ready for this step.
- Locate the mounting screws: Examine the factory radio to identify the mounting screws that secure it in place. These screws are usually located at the corners or sides of the radio.
- Remove the screws: Use the appropriate screwdriver to carefully remove the mounting screws. Put them in a safe place, as you will need them later to secure the aftermarket radio.
- Use a trim removal tool: Insert a trim removal tool or a flathead screwdriver covered with a cloth or tape, and gently pry off the trim panel surrounding the factory radio. Be cautious not to force it to avoid damaging the panel or the dashboard.
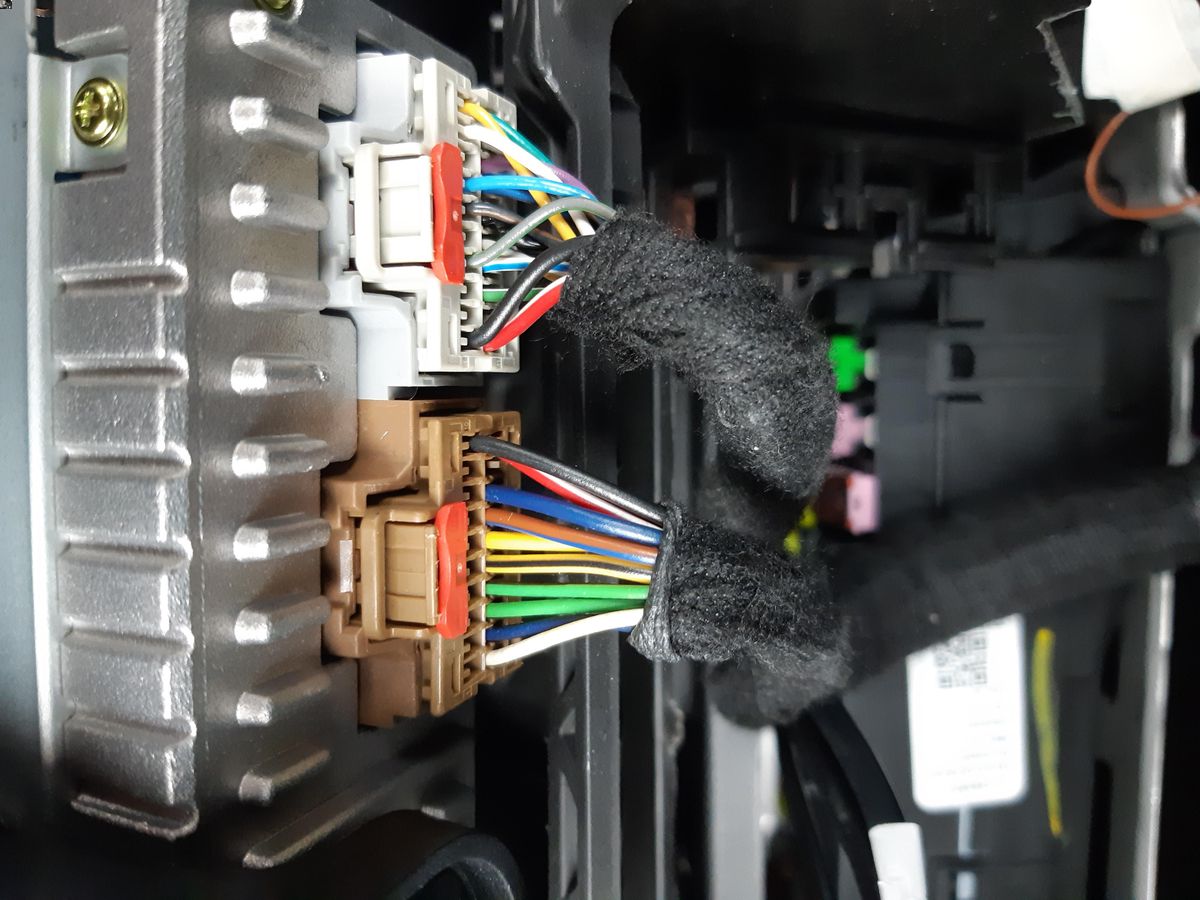
- Disconnect the wiring harness and antenna: Once the trim panel is removed, you will see the wiring harness and antenna connected to the factory radio. Detach the wiring harness connector by pressing down on the clip or releasing the locking tab. Similarly, disconnect the antenna by carefully pulling out the connector.
- Remove the factory radio: With the mounting screws, trim panel, wiring harness, and antenna disconnected, you can now slide the factory radio out of the dash. Be cautious not to pull or twist any wires that may still be connected.
It’s important to note that some cars may have additional steps or variations in the removal process. Always refer to your car’s manual or consult online resources specific to your car’s make and model for detailed instructions.
By removing the factory radio, you’ve cleared the way for the installation of the aftermarket radio. Keep the factory radio and its mounting screws in a safe place, as you may need them if you wish to reinstall it in the future.
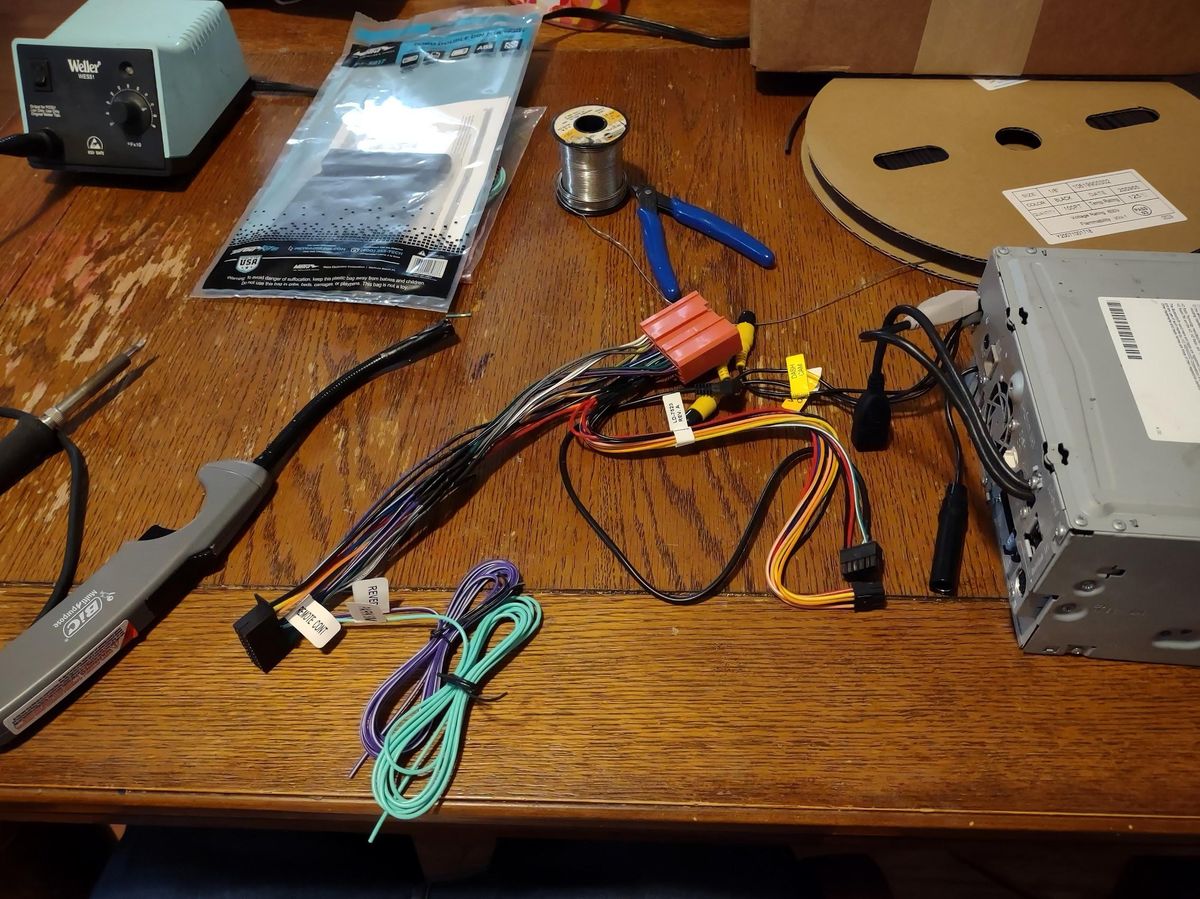
Step 4: Prepare the Wiring Harness Adapter
In this step, you will prepare the wiring harness adapter that will allow you to connect the aftermarket radio to your car’s existing wiring system. Follow these steps to prepare the wiring harness adapter:
- Unbox the wiring harness adapter: Start by unboxing the wiring harness adapter. Familiarize yourself with the different connectors and wires that are included.
- Match the wire colors: Refer to the wiring diagram for your car’s make and model, and identify the wire color codes for the factory radio harness. Match these wire colors to the corresponding wires on the wiring harness adapter.
- Strip the wires: Using a wire cutter/stripper, strip a small portion of insulation from the ends of each wire on the wiring harness adapter. This will expose the bare wire for proper connection.
- Connect the wires: Connect each wire from the wiring harness adapter to its corresponding wire on the aftermarket radio’s harness. There are different methods you can use to make these connections:
- Wire connectors: Twist the bare wires from the wiring harness adapter and aftermarket radio harness together, and secure them using wire connectors. This will provide a reliable and insulated connection.
- Crimping: Use a crimping tool to crimp the wires from the wiring harness adapter and aftermarket radio harness together. This creates a secure and sturdy connection.
- Soldering: For a more permanent and professional-level connection, you can choose to solder the wires together. This requires soldering skills and equipment.
Choose the method that matches your skill level and preference, ensuring a secure and reliable connection between the wiring harness adapter and the aftermarket radio.
- Insulate the connections: Once the wires are connected, use electrical tape or heat shrink tubing to insulate and protect each connection. This will prevent any short circuits and ensure a reliable electrical connection.
By preparing the wiring harness adapter, you are one step closer to completing the installation of the aftermarket radio. Taking the time to properly match and connect the wires will ensure a seamless integration and functionality with your car’s wiring system.
Step 5: Connect the Wiring Harness Adapter to the Aftermarket Radio
In this step, you will connect the wiring harness adapter to the aftermarket radio, ensuring a seamless integration between the two. Follow these steps to properly connect the wiring harness adapter:
- Identify the wiring harness connector: Locate the wiring harness connector on the aftermarket radio. It is usually a rectangular-shaped connector at the rear of the radio.
- Insert the wiring harness adapter: Take the wiring harness adapter that you prepared in the previous step and plug it into the wiring harness connector on the aftermarket radio. Ensure that it is securely and firmly connected.
- Double-check the connections: Once the wiring harness adapter is connected to the aftermarket radio, double-check that all the wires are properly matched and connected. Verify that no wires are loose or exposed, as this can lead to electrical issues or malfunction.
- Secure the connection: Depending on the aftermarket radio model, you may need to use a mounting bracket or screws provided with the radio to secure the connection between the wiring harness adapter and the radio. Follow the manufacturer’s instructions to ensure a secure and stable installation.
It’s important to note that some aftermarket radios may have specific wiring configurations or additional connectors. Refer to the instruction manual that came with your aftermarket radio for detailed guidance on connecting the wiring harness adapter.
By connecting the wiring harness adapter to the aftermarket radio, you ensure that both systems are properly integrated, allowing for seamless operation and functionality. This step brings you closer to enjoying your newly installed aftermarket radio in your car.
Step 6: Connect the Antenna Adapter
In this step, you will connect the antenna adapter to ensure proper reception of radio signals with your aftermarket radio. Follow these steps to connect the antenna adapter:
- Locate the antenna input on the aftermarket radio: Look for the antenna input at the rear of the aftermarket radio. It is typically a small, round connector labeled “Antenna” or “AM/FM.”
- Identify the antenna adapter: Retrieve the antenna adapter included with your aftermarket radio installation kit. It should have a connector that matches the antenna input on the radio and a plug that fits the factory antenna connector in your car.
- Connect the antenna adapter: Take the antenna adapter and insert the plug into the factory antenna connector in your car. Make sure it fits snugly and securely.
- Connect the antenna adapter to the aftermarket radio: Plug the antenna adapter connector into the antenna input on the rear of the aftermarket radio. Ensure a firm connection to prevent any signal loss or interference.
It’s important to note that some antenna adapters may require an additional step of switching between an AM and FM antenna connection. Refer to the instructions provided with the antenna adapter to determine if this step applies to your specific adapter.
Once the antenna adapter is connected, you can be confident that your aftermarket radio will properly receive radio signals, allowing you to enjoy your favorite AM/FM stations without any interference.
Remember to tuck away any excess wiring and secure it with zip ties or tape to maintain a clean and organized installation. This will prevent any loose wires or rattling noise when driving.
Connecting the antenna adapter ensures optimal reception and allows you to fully enjoy the radio functionality of your aftermarket radio in your car.
Step 7: Mount the Aftermarket Radio and Reinstall the Dash Panel
In this step, you will mount the aftermarket radio securely in your car’s dashboard and reinstall the dash panel for a clean and finished look. Follow these steps to complete this process:
- Position the aftermarket radio: Carefully slide the aftermarket radio into the opening in the dashboard. Align it properly so that the radio’s mounting holes align with the screw holes or brackets in the dashboard.
- Secure the aftermarket radio: Once the radio is properly positioned, use the mounting screws that you removed earlier to secure the aftermarket radio to the dashboard. Ensure that the screws are tightened enough to hold the radio securely in place, but be careful not to overtighten and damage the radio or dashboard.
- Reinstall the dash panel: Take the trim panel that you removed in step 3 and align it with the dashboard. Gently press it back into place, ensuring that all the clips and tabs are properly engaged. Use moderate pressure to avoid damaging the trim or dashboard. If any screws were removed from the dash panel during the initial removal, reattach them as necessary.
- Test the radio and controls: Before fully securing the dash panel, briefly reconnect the car’s battery to test the functionality of the aftermarket radio and any integrated controls, such as steering wheel controls. Ensure that all functions, including audio output, display, and any additional features, are working as expected.
- Disconnect the battery and make final adjustments: Once the radio is confirmed to be working correctly, disconnect the car’s battery again to prevent any accidental electrical issues during the final steps. Use this opportunity to make any final adjustments to the aftermarket radio’s position or the dash panel alignment if needed.
- Secure the dash panel: Reconnect the car’s battery one last time, starting with the positive terminal followed by the negative terminal. Finally, fully secure the dash panel by reattaching any screws or clips that hold it in place.
By mounting the aftermarket radio securely and reinstalling the dash panel, you ensure that the radio is securely fixed in the dashboard and that the overall appearance is clean and professional.
Once the dash panel is fully secured, take a moment to appreciate your new aftermarket radio installation before moving on to the final step.
Step 8: Connect the Battery and Test the Radio
In this final step, you will reconnect the car’s battery and test the functionality of the newly installed aftermarket radio. Follow these steps to complete the installation process:
- Reconnect the battery: Start by connecting the positive terminal of the battery, followed by the negative terminal. Tighten the terminal nuts securely but be careful not to overtighten.
- Power on the radio: Turn on the ignition to supply power to the car’s electrical system. Then, power on the aftermarket radio to test its functionality. It should light up and be ready for use.
- Test the radio functions: Take a moment to familiarize yourself with the radio’s controls and features. Test the audio output by tuning in to different radio stations or playing music from a connected device. Ensure that the volume, tone controls, and other features are working properly.
- Check for any issues: Pay attention to any issues such as poor reception, distorted sound, or any malfunctioning controls. Double-check all connections and ensure that the wiring harness adapter and antenna adapter are securely connected.
- Adjust and fine-tune: If you notice any issues or unsatisfactory performance, make any necessary adjustments. This might involve repositioning the antenna adapter, checking the wiring connections, or adjusting the radio settings.
- Reprogram settings and presets: If needed, reprogram any settings or presets that were lost during the battery disconnection. This may include setting the clock, tuning radio stations, or adjusting other features to your preference.
Take the time to thoroughly evaluate the functionality and performance of the aftermarket radio. Ensure that it meets your expectations and that all controls and features are working correctly.
If everything is functioning as desired, congratulations! You have successfully installed and tested your new aftermarket radio. Enjoy the enhanced audio experience and the features that come with it.
If any issues persist, refer to the installation manual or seek professional assistance to troubleshoot and resolve the problem.
Conclusion
Congratulations on successfully completing the installation of your aftermarket radio! By following the step-by-step guide outlined in this article, you have transformed your car’s audio system and have been rewarded with enhanced features and improved sound quality. Now, you can enjoy your favorite radio stations and audio content with a personalized touch.
Throughout the installation process, you learned how to gather information on your car’s wiring system, disconnect the battery, remove the factory radio, prepare the wiring harness adapter, connect the wiring harness adapter to the aftermarket radio, connect the antenna adapter, mount the aftermarket radio, reinstall the dash panel, and finally, connect the battery and test the radio.
Remember, safety is paramount during any electrical work. Be sure to disconnect the battery before starting the installation and take your time to ensure all connections are secure and properly insulated. If you encounter any difficulties or are unsure about any step, consult your car’s manual or seek professional assistance.
With your new aftermarket radio installed, you can now enjoy a customized audio experience tailored to your preferences. Whether you’re a music enthusiast, news junkie, or sports fan, your new radio will provide a wide range of features and options to elevate your driving experience.
Don’t forget to explore the various settings and options offered by your aftermarket radio. Adjust the equalizer settings, experiment with the audio controls, and explore the compatibility with external devices such as smartphones or MP3 players.
Lastly, should you ever wish to revert to your factory radio, keep it and its components in a safe place. This allows for easy reinstallation, whether for resale purposes or if you decide to change your car later on.
Enjoy the countless hours of entertainment and information that your new aftermarket radio will bring to your driving experience. Safe travels and happy listening!