Home>Devices & Equipment>Radio>How To Remove Aftermarket Radio
Radio
How To Remove Aftermarket Radio
Published: November 16, 2023
Learn how to remove an aftermarket radio easily with our step-by-step guide. Upgrade your car's audio system by following our expert tips and tricks.
(Many of the links in this article redirect to a specific reviewed product. Your purchase of these products through affiliate links helps to generate commission for AudioLover.com, at no extra cost. Learn more)
Table of Contents
- Introduction
- Step 1: Gather the necessary tools
- Step 2: Disconnect the car battery
- Step 3: Remove the trim panel
- Step 4: Unmount the aftermarket radio
- Step 5: Disconnect the wiring harness
- Step 6: Remove the radio from the dash
- Step 7: Install the original radio or a new aftermarket radio
- Step 8: Reconnect the wiring harness
- Step 9: Reattach the trim panel
- Step 10: Reconnect the car battery
- Conclusion
Introduction
Welcome to our guide on how to remove an aftermarket radio from your vehicle. Whether you’re looking to reinstall the original radio or replace it with a new aftermarket one, this step-by-step tutorial will walk you through the process.
Aftermarket radios are a popular choice among car owners who want to upgrade their audio systems or add modern features to their vehicles. However, there may come a time when you no longer need or want the aftermarket radio, and you wish to revert to the original factory radio or install a different aftermarket unit.
Removing an aftermarket radio may seem daunting, especially if you don’t have experience with car electronics. However, with the right tools and instructions, it can be a straightforward process. By following the steps in this guide, you’ll be able to remove the aftermarket radio safely and efficiently, allowing you to either reinstall the original radio or proceed with a new upgrade.
Before we begin, it’s important to note that the specific steps and procedures may vary depending on your vehicle’s make and model, as well as the type of aftermarket radio installed. Be sure to consult your vehicle’s owner manual and any supplementary instructions provided with your aftermarket radio for more accurate information. Additionally, if you’re uncomfortable working with car electronics, it’s always wise to seek professional assistance to avoid any potential damage to your vehicle.
Now, let’s get started with step 1: gathering the necessary tools.
Step 1: Gather the necessary tools
Before you begin removing the aftermarket radio from your vehicle, it’s essential to gather all the necessary tools and equipment to ensure a smooth and efficient process. Here are the tools you’ll need:
1. Screwdrivers: Different types of screwdrivers may be required, depending on the mounting method of your aftermarket radio. Common types include Phillips head and flathead screwdrivers.
2. Trim removal tools: These tools are specially designed to help remove the trim panel without causing any damage to the surrounding areas. They are typically made of plastic or nylon to prevent scratches.
3. Pliers: Pliers may be needed to disconnect certain wiring connections or secure wiring harnesses during the removal process. They can provide a better grip and make the task easier.
4. Wire strippers: If you need to strip wires or connect new wiring harnesses, wire strippers will be necessary. Make sure to select the appropriate size for the gauge of your vehicle’s wires.
5. Electrical tape: Having electrical tape on hand is essential for securing wire connections and preventing any potential shorts or damage.
6. Flashlight: A flashlight will come in handy, especially when working in tight spaces or areas with limited visibility.
7. Gloves: It’s always a good idea to wear gloves to protect your hands from any sharp edges or electrical components during the removal process.
Before you proceed, ensure that you have all the necessary tools readily available. This will help save time and prevent any frustration during the removal process. Once you have gathered the tools, you are ready to move on to step 2: disconnecting the car battery.
Step 2: Disconnect the car battery
Prior to removing the aftermarket radio, it’s crucial to disconnect the car battery to prevent electrical shocks and potential damage to the vehicle’s electrical system. Follow these steps to safely disconnect the car battery:
- Locate the car battery: The car battery is typically located under the hood of the vehicle, usually on one side of the engine bay. Refer to your vehicle’s owner manual if you’re unsure about the exact location.
- Park the vehicle in a safe location: Ensure that the vehicle is parked in a well-ventilated area, away from any sources of ignition or heat.
- Turn off the engine: Before working on the battery, make sure the engine is turned off and the ignition key is removed from the vehicle.
- Put on safety gloves: Wear safety gloves to protect your hands from any potential contact with battery acid or harmful substances.
- Identify the battery terminals: The car battery has two terminals – a positive terminal (+) marked with a plus sign and a negative terminal (-) marked with a minus sign. They are typically covered with plastic or rubber terminal covers.
- Disconnect the negative terminal: Using an appropriate size wrench or pliers, loosen the nut on the negative terminal (-) and remove the cable from the battery. Ensure that the cable is moved away from the battery to avoid accidental contact.
- Disconnect the positive terminal: Similarly, loosen the nut on the positive terminal (+) and remove the cable from the battery. Move it away from the battery as well.
By disconnecting the car battery, you eliminate the risk of electrical shock and ensure a safe working environment while removing the aftermarket radio. With the car battery disconnected, you can proceed to step 3: removing the trim panel.
Step 3: Remove the trim panel
Now that the car battery is safely disconnected, it’s time to remove the trim panel surrounding the aftermarket radio. The trim panel is typically secured with clips or screws, depending on your vehicle’s make and model. Follow these steps to remove the trim panel:
- Identify the clips or screws: Take a look at the edges or corners of the trim panel to locate any visible clips or screws. Clips are commonly found on the sides of the panel, while screws may be positioned on the top or bottom.
- Use trim removal tools: Insert a trim removal tool or a flathead screwdriver covered with a cloth or tape between the trim panel and the dashboard. Gently pry the panel away from the dashboard, applying even pressure to release the clips or loosen the screws.
- Work your way around the panel: Starting from one side, carefully move along the trim panel, repeating the prying process to release each clip or unscrew each screw. Be cautious not to rush or use excessive force, as you may damage the trim or surrounding components.
- Continue until the trim panel is loose: Once all the clips are released or screws are unscrewed, the trim panel should be loose. Slowly pull the panel away from the dashboard, being mindful of any attached wiring harnesses or connectors. If necessary, unplug the connectors to fully remove the trim panel.
By successfully removing the trim panel, you’ve gained access to the aftermarket radio and its mounting mechanism. This allows you to proceed with the next steps of removing the radio itself. Keep the trim panel in a safe place, as you will need to reattach it after the radio removal process is complete. Now, it’s time to move on to step 4: unmounting the aftermarket radio.
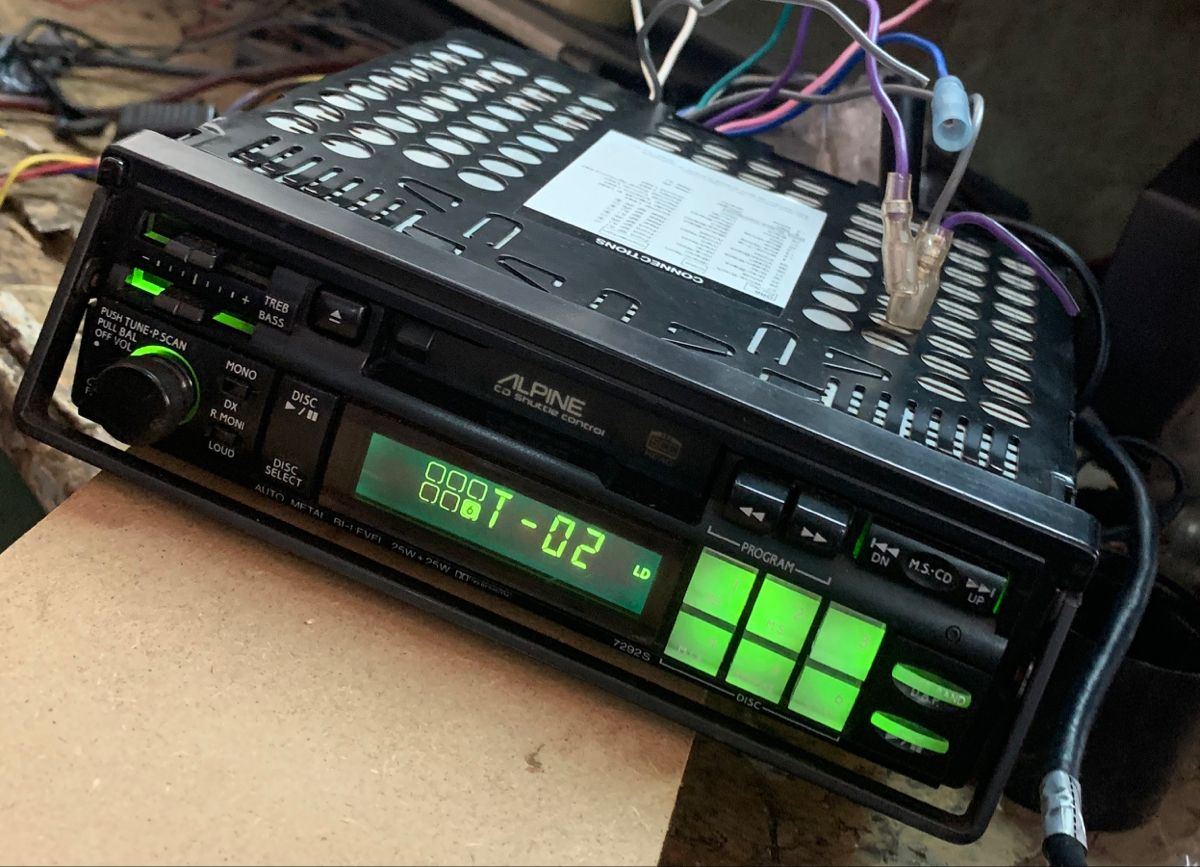
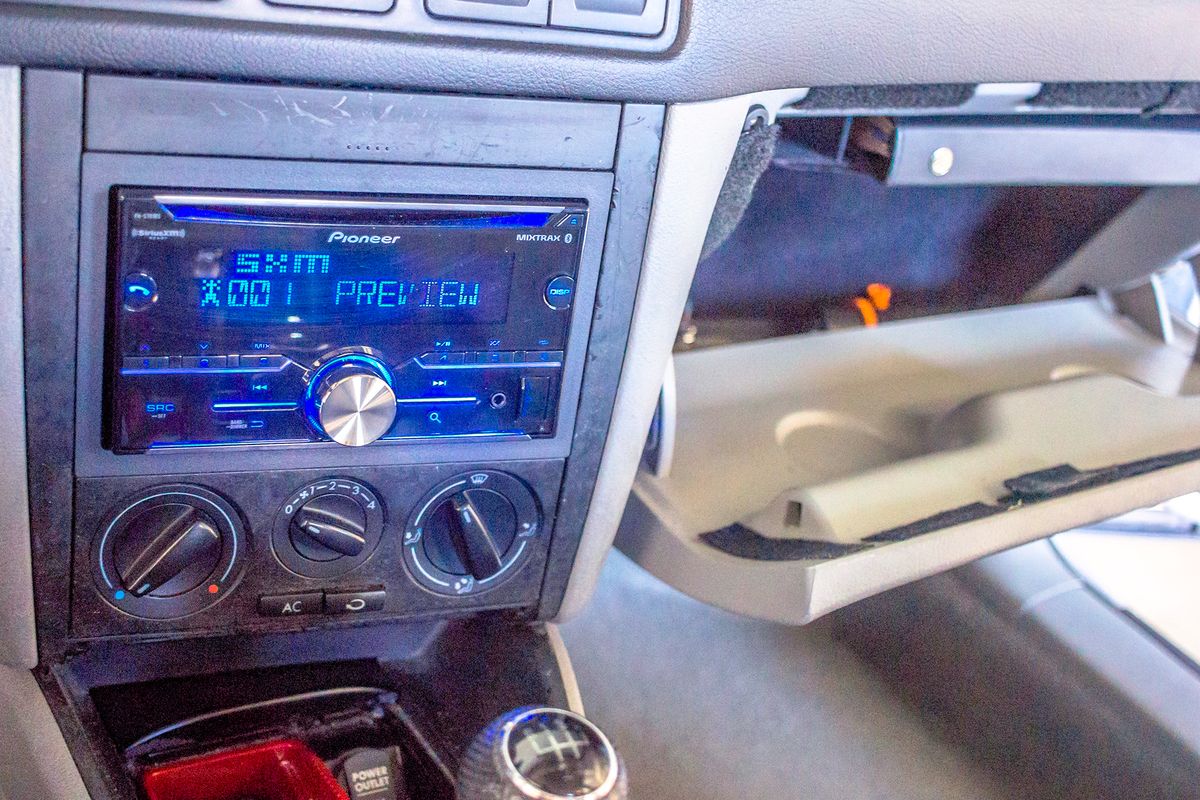
Step 4: Unmount the aftermarket radio
With the trim panel removed, you can now proceed to unmount the aftermarket radio from its current position. The method of mounting can vary depending on the specific aftermarket radio and installation. Follow these steps to unmount the radio:
- Identify the mounting brackets or screws: Inspect the sides or back of the aftermarket radio to locate the mounting brackets or screws. These brackets or screws secure the radio to the dashboard.
- Remove the mounting brackets or screws: Use a screwdriver or the appropriate tool to remove the mounting brackets or screws. Keep in mind that certain radios may require specific types of screwdrivers, such as Phillips head or Torx drivers. Carefully loosen and remove the brackets or screws, setting them aside for later use.
- Release any additional mounting clips: Some aftermarket radios may have additional mounting clips that secure them to the dashboard. Check the radio for any clips and carefully release them to loosen the radio’s grip.
- Gently pull the radio forward: After removing the brackets, screws, and clips, you can start loosening the radio from its position. Slowly and carefully pull the radio forward, ensuring that no wires or harnesses connected to the rear are being strained or damaged.
By following these steps, you can safely unmount the aftermarket radio and prepare it for disconnection from the wiring harness. Be cautious not to force or yank the radio abruptly, as it may result in damage to the dashboard or wiring connections. With the radio unmounted, you’re now ready to proceed to step 5: disconnecting the wiring harness.
Step 5: Disconnect the wiring harness
With the aftermarket radio unmounted, it’s time to disconnect the wiring harness that connects it to the vehicle’s electrical system. The wiring harness consists of a series of wires and connectors that transmit audio signals and power between the radio and the vehicle. Follow these steps to disconnect the wiring harness:
- Identify the wiring harness: Locate the wiring harness connected to the back of the aftermarket radio. It will consist of a bundle of wires and connectors.
- Release any locking mechanisms: Some wiring harnesses may have locking mechanisms, such as tabs or clips. Carefully inspect the connectors and release any locking mechanisms by pressing, sliding, or squeezing them. This will release the connectors from the radio.
- Disconnect the wiring harness: With the locking mechanisms released, gently pull apart the connectors to disconnect the wiring harness from the radio. Take care not to pull on the wires themselves, as this can damage the connections or the wires themselves.
Depending on the specific aftermarket radio and installation, there may be additional connectors or adapters present. These can include antenna connectors, steering wheel control adapters, or additional audio inputs. Ensure that all connectors are properly disconnected before proceeding to the next step.
By successfully disconnecting the wiring harness, you have severed the electrical connection between the aftermarket radio and the vehicle’s electrical system. This allows you to safely remove the radio from the dashboard. Now, it’s time to move on to step 6: removing the radio from the dash.
Step 6: Remove the radio from the dash
Now that the wiring harness is disconnected, you can proceed with removing the aftermarket radio from the dashboard. Follow these steps to safely remove the radio:
- Support the radio: Place one hand behind the radio to support it while removing the mounting brackets or screws with the other hand. This will prevent the radio from falling or being damaged during the removal process.
- Slide the radio out: Carefully slide the radio out of the opening in the dashboard. As you do so, be mindful of any wires or cables that may still be connected to the radio and ensure they do not get snagged or damaged.
- Set the radio aside: Once the radio is completely out of the dash, set it aside in a safe place. It’s a good idea to place it on a soft surface to avoid any scratches or damage.
It’s important to note that some aftermarket radio installations may require the removal of additional components, such as mounting brackets or adapters, before the radio can be fully removed from the dashboard. Ensure that all necessary components and connections are properly disconnected and removed before proceeding.
By effectively removing the aftermarket radio from the dashboard, you have completed a significant step in the removal process. Now, you can proceed to either reinstall the original factory radio or install a new aftermarket radio. In the next steps, we will cover both scenarios. Follow step 7 if you are reinstalling the original radio, or skip to step 8 if you are installing a new aftermarket radio.
Step 7: Install the original radio or a new aftermarket radio
At this stage, you have successfully removed the aftermarket radio from the vehicle. Now, you have the option to either reinstall the original factory radio or install a new aftermarket radio. Follow these steps based on your preference:
If reinstalling the original factory radio:
- Retrieve the original radio: Locate the original factory radio that was removed prior to installing the aftermarket radio. Ensure that it is in good working condition and all necessary components, such as antenna cables and mounting brackets, are intact.
- Align the radio: Carefully align the original radio with the opening in the dashboard. Take note of any guides or slots that help position the radio correctly.
- Slide the radio in: Slide the original radio back into the dashboard, making sure it fits snugly. Pay attention to any cable connections or wiring harnesses that need to be properly routed.
- Secure the radio: Use the original mounting brackets, screws, or clips to secure the radio in place. Tighten them just enough to hold the radio securely, but avoid over-tightening.
- Reconnect the wiring harness: Reconnect the original wiring harness to the back of the radio, ensuring that all the connectors are properly aligned and securely plugged in.
If installing a new aftermarket radio:
- Choose a compatible radio: Follow the manufacturer’s instructions and recommendations to select a compatible aftermarket radio for your vehicle. Consider features such as audio quality, connectivity options, and compatibility with your vehicle’s wiring.
- Prepare the new radio: Familiarize yourself with the new aftermarket radio and any additional components that may be required for installation, such as mounting brackets or adapters.
- Align the radio: Carefully align the new radio with the opening in the dashboard. Take note of any guides or slots that help position the radio correctly.
- Slide the radio in: Slide the new radio into the dashboard, making sure it fits securely. Be mindful of any cable connections or wiring harnesses that need to be properly routed.
- Secure the radio: Use the supplied mounting brackets, screws, or clips to secure the new radio in place. Follow the manufacturer’s instructions for proper installation.
- Connect the wiring harness: Connect the wiring harness of the new radio to the corresponding wires in your vehicle. Ensure that the connections are secure and properly matched.
By successfully installing either the original factory radio or a new aftermarket radio, you have completed the final step in the process. Now, you can proceed to reconnect the wiring harness and reassemble the trim panel. Continue to follow the remaining steps to ensure a complete and professional installation.
Step 8: Reconnect the wiring harness
Now that the original factory radio or a new aftermarket radio is securely in place, it’s time to reconnect the wiring harness. The wiring harness is responsible for connecting the radio to the vehicle’s electrical system and audio components. Follow these steps to reconnect the wiring harness:
- Retrieve the wiring harness: Locate the wiring harness that was disconnected during the removal process. Check that all connectors and wires are in proper condition with no signs of damage or wear.
- Match the connectors: Align the connectors of the wiring harness with the corresponding connectors on the back of the radio. Ensure that they are properly aligned and match in shape and size.
- Connect the wiring harness: Push the connectors together firmly until you hear or feel a click, indicating that they are securely connected. Be careful not to force the connections, as this could damage the connectors or wiring.
- Secure the wiring: Use zip ties, electrical tape, or any other suitable method to secure the wiring harness, preventing it from interfering with other components or moving parts.
It’s crucial to double-check that all the connections are secure and properly matched. Improperly connected or loose connections can result in malfunctioning or no audio output from the radio.
With the wiring harness successfully reconnected, you are one step closer to completing the installation process. Now, let’s move on to step 9: reattaching the trim panel to give your installation a professional and finished look.
Step 9: Reattach the trim panel
After completing the wiring harness connection, it’s time to reattach the trim panel to give your radio installation a polished and finished appearance. Follow these steps to successfully reattach the trim panel:
- Inspect the trim panel: Before reattaching the trim panel, inspect it for any signs of damage or wear. Ensure that all clips, screws, or mounting points are intact and in good condition.
- Position the trim panel: Line up the trim panel with the dashboard opening and the radio. Make sure it is correctly aligned and positioned to fit snugly without any gaps or misalignments.
- Press the trim panel in place: Begin by gently pressing the trim panel against the dashboard, ensuring that any clips or mounting points engage properly. Apply even pressure as you work your way around the panel, ensuring it is securely in place.
- Secure any screws or clips: If your trim panel requires screws or clips for additional support, carefully insert and tighten them according to the manufacturer’s instructions. Be cautious not to overtighten or strip the screws.
- Test the trim panel: Once the trim panel is secured, give it a gentle tug to ensure it is firmly attached to the dashboard. Shake the panel lightly to check for any loose or rattling parts.
Reattaching the trim panel not only provides a visually appealing finish to your radio installation but also helps protect the internal components of the dashboard and provides a seamless look to your vehicle’s interior.
With the trim panel securely in place, you’re almost done with the radio installation process. The final step, step 10, is to reconnect the car battery and ensure that everything functions properly. Let’s move on to step 10:
Step 10: Reconnect the car battery
Now that you’ve successfully reattached the trim panel, it’s time to wrap up the radio installation process by reconnecting the car battery. Follow these steps to safely reconnect the car battery:
- Locate the car battery: Refer to your vehicle’s owner’s manual to locate the car battery. It is typically housed in the engine compartment.
- Put on safety gloves: As a precautionary measure, put on safety gloves to protect your hands during the battery reconnection process.
- Connect the positive terminal: Take the positive cable (usually marked with a (+) sign) and align it with the positive terminal of the battery. Ensure that the cable end is free from corrosion or debris. Slide the cable onto the positive terminal and tighten the nut or clamp securely.
- Connect the negative terminal: Similarly, take the negative cable (usually marked with a (-) sign) and align it with the negative terminal of the battery. Slide the cable onto the negative terminal and tighten the nut or clamp securely.
- Double-check the connections: Make sure that both the positive and negative terminal connections are tight and secure. Give them a slight tug to ensure they are firmly in place.
With the car battery successfully reconnected, the radio installation process is now complete. Congratulations! It’s time to test your newly installed radio and ensure that all functions are working correctly.
Turn on the ignition and test the radio for audio output, verify that all the buttons and features are functioning as expected, and check for any error messages on the display. If everything is in working order, you can now enjoy your enhanced audio experience or new features provided by the radio.
Remember, if you encounter any issues during the installation process or are unsure about any step, it’s always recommended to seek professional assistance to ensure a proper and safe installation. Enjoy your new radio and the improved audio experience in your vehicle!
Should you ever need to remove or replace the radio again in the future, you can refer back to this guide to help you through the process.
Conclusion
Congratulations! You have successfully learned how to remove an aftermarket radio from your vehicle. Whether you decided to revert to the original factory radio or install a new aftermarket one, following the step-by-step instructions provided in this guide has allowed you to safely and effectively complete the process.
Removing an aftermarket radio may have seemed like a daunting task initially, but with the right tools, knowledge, and patience, you were able to disconnect the wiring harness, unmount the radio from the dash, and reattach the trim panel. By reconnecting the car battery, you ensured that all components are properly powered, and the radio is fully functional.
Remember, each vehicle and aftermarket radio installation may have its own unique nuances, so always consult your vehicle’s owner’s manual and any supplementary instructions provided with your aftermarket radio for more accurate information. If you ever feel unsure or uncomfortable working with car electronics, it is best to seek professional assistance to avoid any damage to your vehicle.
Now that you have completed the radio removal process, you can enjoy the satisfaction of a successful installation or proceed with the next steps in your vehicle customization journey. Whether you’re upgrading your audio system or exploring new features, you now have the knowledge to confidently navigate the world of car radios.
Thank you for following our guide, and we hope this information has been valuable in your quest to remove an aftermarket radio from your vehicle. Safe travels and enjoy your improved audio experience!