Home>Devices & Equipment>Car Audio>How To Install Car Audio System
Car Audio
How To Install Car Audio System
Modified: January 22, 2024
Learn how to install a car audio system in your vehicle. Upgrade your sound quality with our step-by-step guide and expert tips.
(Many of the links in this article redirect to a specific reviewed product. Your purchase of these products through affiliate links helps to generate commission for AudioLover.com, at no extra cost. Learn more)
Table of Contents
- Introduction
- Step 1: Gather the necessary tools and equipment
- Step 2: Disconnect the car battery
- Step 3: Remove the existing audio system
- Step 4: Prepare the car for installation
- Step 5: Install the head unit
- Step 6: Connect the wiring harness
- Step 7: Install the speakers
- Step 8: Install the amplifier
- Step 9: Connect the power cable
- Step 10: Test and adjust the audio system
- Conclusion
Introduction
Car audio systems play a vital role in enhancing your driving experience. Whether you’re a music aficionado or simply enjoy some background tunes while cruising, a well-installed car audio system can transform your journeys into immersive and enjoyable adventures. From crystal-clear sound quality to thumping bass, a car audio system can bring your favorite songs to life.
Installing a car audio system may seem daunting, but with the right tools, equipment, and a little know-how, it can be a rewarding DIY project. Not only can you save money by installing the system yourself, but you also have the freedom to choose the components that best suit your preferences and budget.
In this comprehensive guide, we will walk you through the step-by-step process of installing a car audio system. From removing the existing audio system to connecting the wiring harness and installing speakers and amplifiers, we will cover all the necessary aspects to help you achieve a professional and high-quality installation.
Before we delve into the installation process, it’s essential to note that car audio systems can vary in complexity and components. We will provide general instructions applicable to most installations, but it’s always recommended to refer to the specific instructions provided by the manufacturers of the components you choose to install in your car.
Now, let’s dive in and begin the journey of transforming your car into a concert on wheels.
Step 1: Gather the necessary tools and equipment
Before you begin installing your car audio system, it’s crucial to gather all the necessary tools and equipment. Having everything ready beforehand will save you time and ensure a smooth installation process. Here are the essential tools and equipment you’ll need:
- Wire cutters and strippers: These will help you cut and strip the wires, allowing for proper connections.
- Screwdrivers: You’ll need different types of screwdrivers to remove and install components in your car.
- Socket wrench set: This will be necessary to remove and secure bolts and nuts.
- Pliers: Pliers are handy for various tasks such as removing clips and connectors.
- Tape measure: You’ll use this to measure space and ensure proper fitment of components.
- Electrical tape: Electrical tape is crucial for insulating and securing wire connections.
- Wire connectors: These connectors help you join wires securely without the need for soldering.
- Heat shrink tubing: Heat shrink tubing provides an extra layer of insulation for wire connections.
- Panel removal tools: These tools make it easier to remove panels without damaging them.
- Amplifier installation kit: If you’re installing an amplifier, make sure to have a kit that includes power and ground wires, fuse holder, RCA cables, and speaker wires.
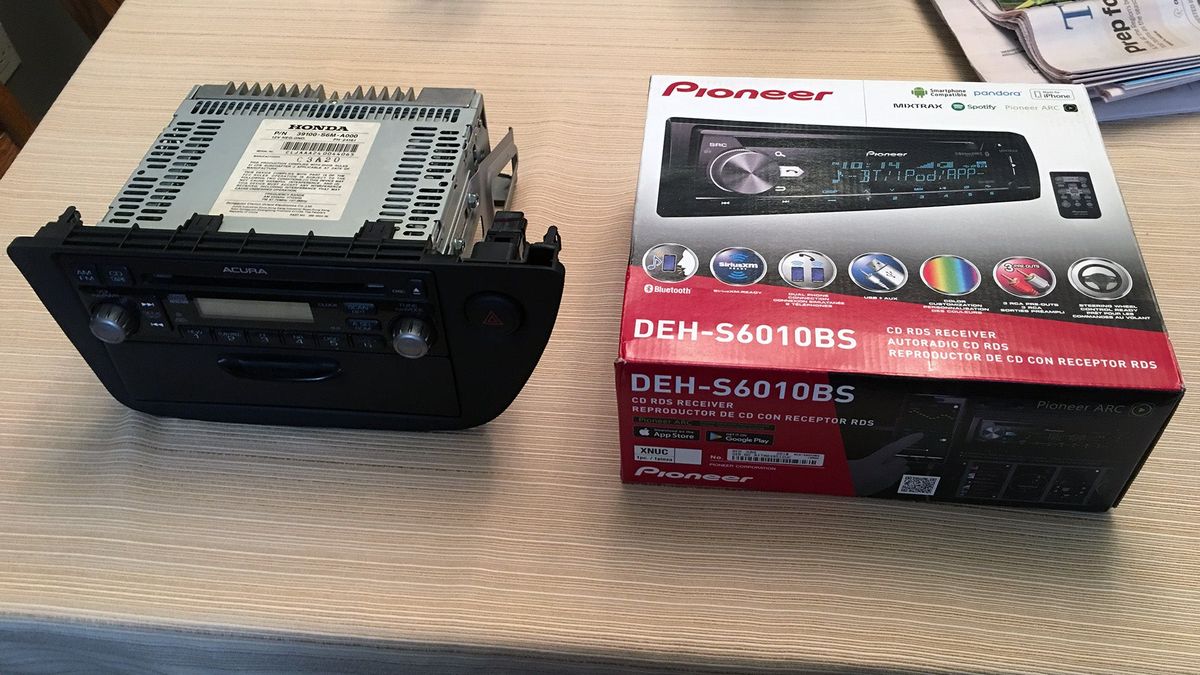
Additionally, it’s important to ensure you have the necessary components for your specific car audio system, including:
- Head unit: This is the central control unit of the car audio system and replaces the factory stereo.
- Speakers: Depending on your preferences, you may choose to upgrade your factory speakers for improved sound quality.
- Amplifier: If you want to enhance the power and clarity of your audio system, an amplifier is essential.
- Wiring harness: A wiring harness is required to connect the head unit to the car’s wiring system.
- Speaker wire: This is necessary for connecting the speakers to the amplifier or head unit.
- Power cable: If you’re installing an amplifier, you’ll need a power cable to connect it to the car’s battery.
By gathering all the necessary tools and equipment before you start the installation process, you’ll ensure a hassle-free experience and a successful outcome.
Step 2: Disconnect the car battery
Before you begin working on your car audio system, it’s crucial to disconnect the car’s battery. This step is essential for safety reasons and to prevent any electrical accidents or damage to the audio components.
To disconnect the car battery, follow these steps:
- Locate the car battery: The car battery is typically located in the engine bay or trunk. Refer to your car’s owner manual if you’re unsure about its location.
- Turn off the ignition: Ensure that the car’s ignition is turned off before proceeding further.
- Remove the negative cable: Using a wrench or socket, loosen the nut on the negative (-) terminal of the battery. Once loosened, carefully remove the negative cable from the terminal.
- Secure the negative cable: To prevent accidental contact and reconnection, secure the negative cable away from the battery terminal. You can use electrical tape or cable ties to hold it in place.
- Verify disconnection: Double-check that the negative cable is securely disconnected and cannot make contact with the battery terminal.
By disconnecting the car battery before starting the installation process, you eliminate the risk of electrical shocks and short circuits. It also allows you to work on the audio system without the car’s electrical system interfering.
Do not overlook this crucial step, as failure to disconnect the car battery can result in damaged equipment or harm to yourself. Ensure the battery remains disconnected throughout the entire installation process until all the wiring and connections are complete.
With the car battery disconnected, you can now proceed with safely removing the existing audio system in the next step.
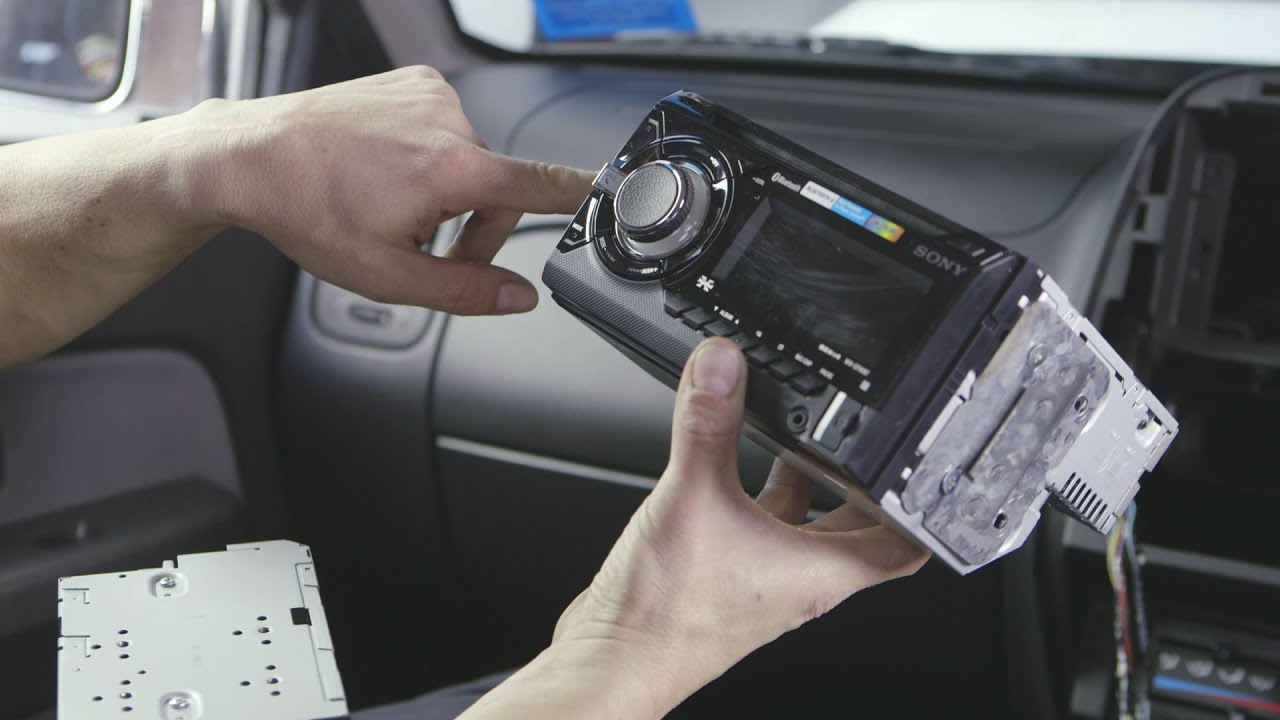
Step 3: Remove the existing audio system
Now that the car battery is safely disconnected, it’s time to remove the existing audio system from your vehicle. This step may involve removing the factory stereo, speakers, and any associated wiring or brackets.
Follow these steps to remove the existing audio system:
- Remove the trim panel: Start by removing the trim panel that surrounds the stereo. Use a panel removal tool or a flat-head screwdriver wrapped in a cloth to avoid scratching the trim. Gently pry the panel away from the dashboard to release the clips securing it in place.
- Unscrew the factory stereo: Once the trim panel is removed, you’ll likely see screws or bolts holding the factory stereo in place. Use the appropriate screwdriver or socket to unscrew them and remove the stereo from its mounting bracket.
- Disconnect the wiring harness: Carefully pull the factory stereo forward to access the wiring harness at the back. Depress any release tabs or buttons on the harness connectors and disconnect them from the stereo.
- Remove the speakers: If you’re also replacing the factory speakers, remove them by unscrewing any mounting screws or bolts. Disconnect the wiring harness or speaker connectors from each speaker before removing them completely.
- Inspect and clean: Take the opportunity to inspect the wiring and brackets for any damage or wear. Clean the installation area to ensure a smooth and secure fit for the new audio components.
As you remove each component, take note of the connectors, brackets, and wiring configuration. This will help when installing the new audio system later on. It’s also a good idea to keep the factory components and wiring in case you ever want to revert to the original audio system in the future.
By properly removing the existing audio system, you create a clean slate for installing your new car audio components. With the old system removed, you’re now ready to prepare your car for the installation in the next step.
Step 4: Prepare the car for installation
With the old audio system removed, it’s time to prepare your car for the installation of the new components. This step involves assessing the installation area, making any necessary modifications, and ensuring proper fitment of the new audio system.
Follow these steps to prepare your car for the installation:
- Check the installation area: Examine the space where the new head unit and speakers will be installed. Ensure that there is enough clearance and that the new components will fit properly without interfering with other car functions or obstructing airflow.
- Modify the mounting area: If the mounting area requires modification to accommodate the new components, use appropriate tools to trim and shape it. This may involve cutting plastic, removing metal brackets, or using adapter kits for a proper fit.
- Secure wiring and connections: Before installing the new components, ensure that all wiring and connections are secure and in good condition. Check for any loose or damaged wires and repair or replace them as necessary.
- Consider sound insulation: If desired, this is an opportune time to enhance the audio experience by adding sound insulation material to doors, floors, or other areas prone to vibrations or external noise. Sound insulation can improve sound quality and reduce unwanted rattles or vibrations.
- Plan the component placement: Determine where you want to position the new head unit, speakers, and amplifier. Consider factors such as visibility, accessibility, and audio performance when deciding the optimal placement for each component.
By preparing your car for the installation, you ensure a proper and secure fit for the new audio components. Taking the time to assess the installation area and make any necessary modifications will result in a professional-looking installation and better overall audio performance.
Now that your car is prepared, you’re ready to proceed with the installation of the head unit in the next step.
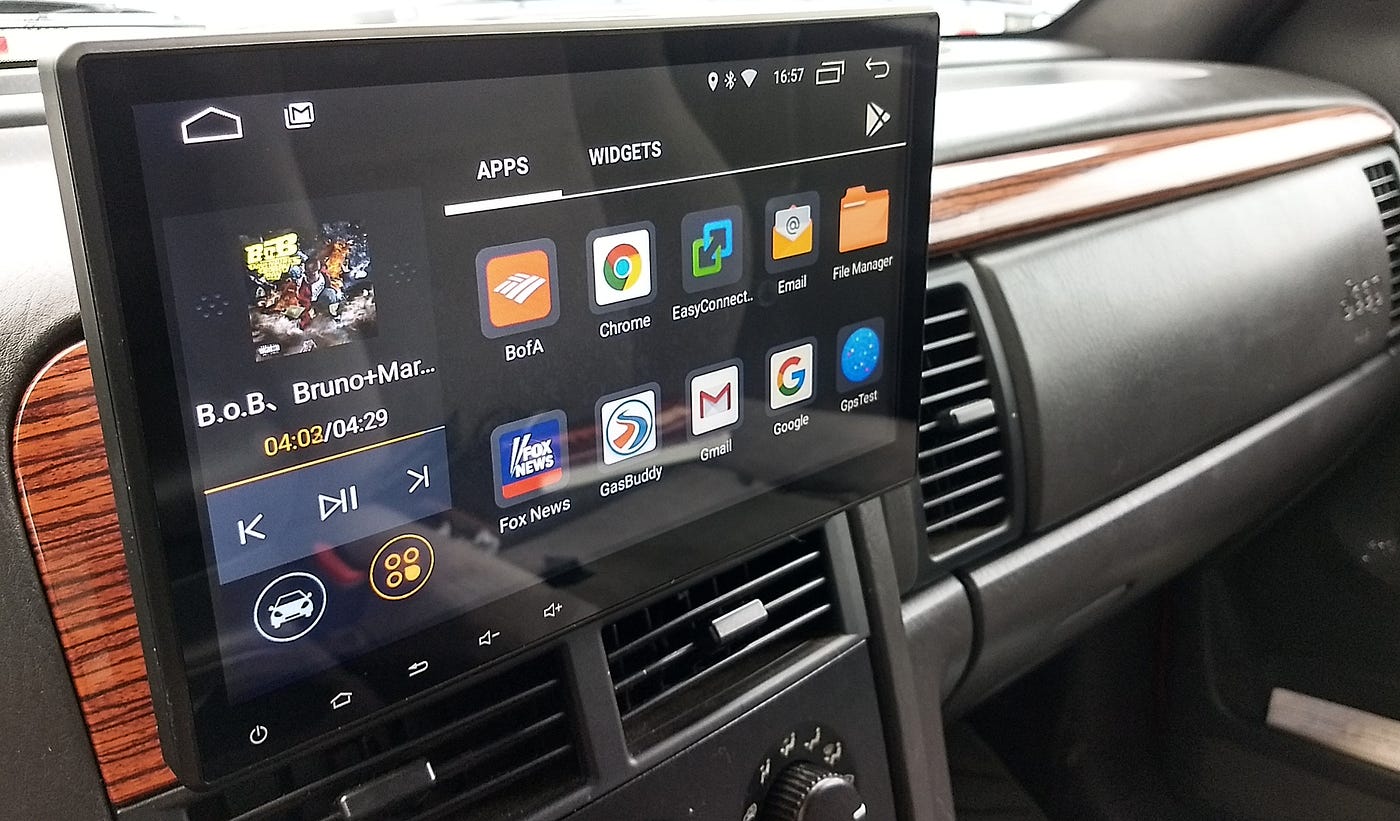
Step 5: Install the head unit
The head unit, also known as the car stereo or receiver, is the central control unit of the audio system. Installing the head unit is a crucial step in the car audio installation process, as it will allow you to control and navigate through your audio sources.
Follow these steps to install the head unit:
- Prepare the wiring harness: Connect the wiring harness adapter to the wiring harness of the new head unit. Ensure that the color-coded wires are properly matched and securely connected.
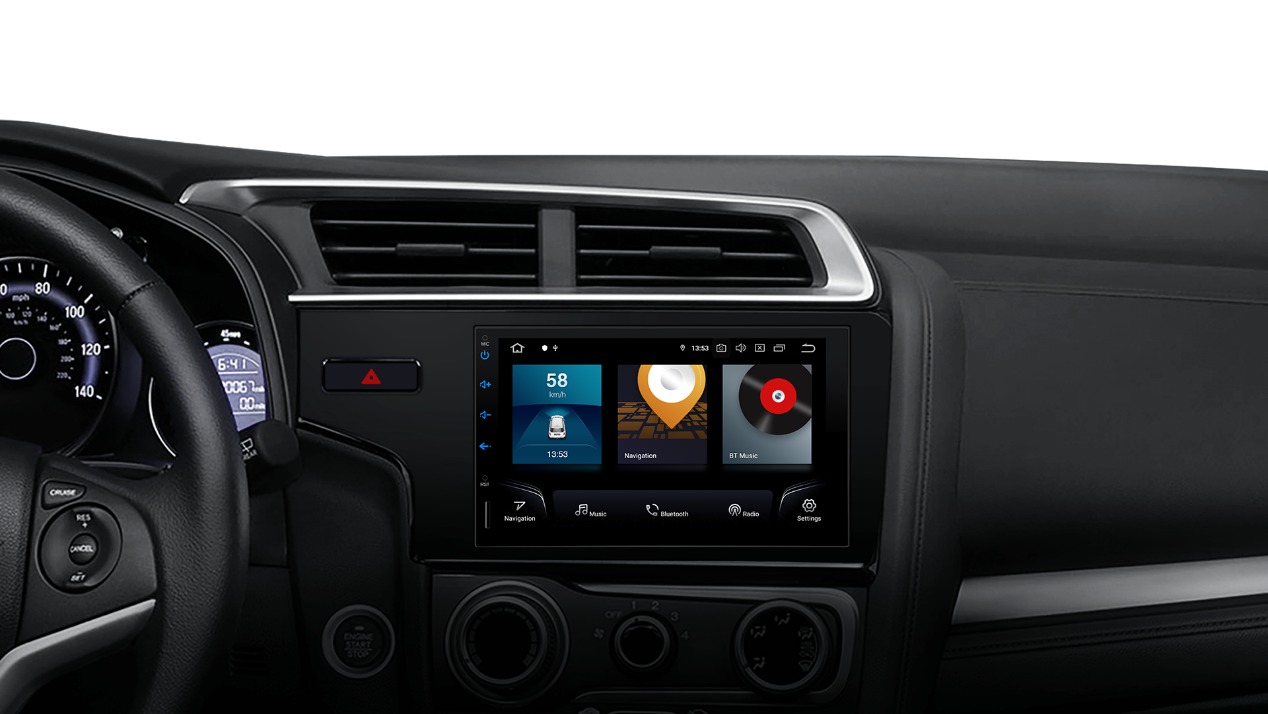
- Slide the head unit into the installation area: Carefully insert the head unit into the mounting bracket or cavity of your car’s dashboard. Make sure the unit is aligned and level with the surrounding surfaces.
- Secure the head unit: Once the head unit is in position, use the appropriate screws or mounting brackets to secure it in place. Follow the manufacturer’s instructions for proper installation and tightening.
- Connect the wiring harness: Plug the wiring harness adapter into the factory wiring harness of your car. Ensure a firm connection and listen for a click or any locking mechanism to ensure a secure fit.
- Double-check connections: Verify that all the connections from the head unit are secure and properly matched with the corresponding wires. Ensure there are no loose connections or exposed wires.
- Test the head unit: Before proceeding with the remaining installation steps, turn on the head unit to ensure it powers up and functions correctly. Test the basic features such as AM/FM radio, CD player, or Bluetooth connectivity to verify proper operation.
Proper installation of the head unit is essential for seamless operation and optimal audio performance. Double-checking all the connections and conducting a functional test will help identify any issues early on and ensure a successful installation.
With the head unit securely installed, you’re now one step closer to enjoying your new car audio system. In the next step, we will discuss how to connect the wiring harness to the appropriate components.
Step 6: Connect the wiring harness
Connecting the wiring harness is a crucial step in the car audio installation process as it ensures proper communication and power distribution between the head unit and the rest of the audio system components. With the head unit installed, you can now proceed to connect the wiring harness.
Follow these steps to connect the wiring harness:
- Identify the wiring harness connections: The wiring harness adapter you previously prepared should have a set of wires with corresponding colors and labels.
- Connect the power wires: Match the power wire from the wiring harness adapter to the power wire of the head unit. Typically, the power wire is red. Connect them by twisting the corresponding wires together and secure them using wire connectors or soldering for a solid connection. Repeat this process for the ground wire, usually black.
- Connect the speaker wires: Match the speaker wires from the wiring harness adapter to the corresponding wires on the head unit. These wires are usually color-coded, with positive (+) and negative (-) indicators. Connect them by twisting the corresponding wires together and secure them using wire connectors or soldering.
- Connect other wires: Depending on the features of your audio system, there may be additional wires such as those for antenna, remote turn-on, or steering wheel controls. Consult the wiring diagram provided with your equipment and connect the corresponding wires from the wiring harness adapter to the appropriate connections on the head unit.
- Tape or insulate the connections: Once all the wires are securely connected, use electrical tape or heat shrink tubing to insulate and protect the connections. This prevents any short circuits or exposed wires.
Remember to refer to the user manual or wiring diagrams for your specific head unit and wiring harness adapter to ensure correct connections. If you’re unsure about any wire connections, consult a professional or seek guidance from experienced car audio enthusiasts.
With the wiring harness properly connected, your head unit is now fully integrated into the car’s electrical system. In the next steps, we will cover the installation of speakers and amplifiers to complete your car audio system.
Step 7: Install the speakers
The speakers are an integral component of your car audio system, responsible for delivering crisp and clear sound. Installing new speakers can significantly enhance your listening experience. Follow these steps to properly install the speakers:
- Choose the speaker placement: Select the locations where you want to install the speakers. Depending on your car’s configuration, you may have speaker slots in the doors, the rear deck, or the dashboard.
- Prepare the speaker openings: If necessary, remove the speaker grilles or panels to access the speaker openings. Use a screwdriver or a panel removal tool to gently pry them open.
- Mount the speakers: Align the speakers with the openings in your car. Use the provided screws or mounting brackets to secure them in place. Make sure they are oriented correctly, with the tweeters positioned for optimal sound projection.
- Connect the speaker wires: Attach the speaker wires from the head unit or amplifier to the corresponding terminals on the speakers. Match the positive (+) and negative (-) connections to ensure proper phasing and sound quality.
- Secure and insulate the connections: Once the connections are made, secure them by tightening the terminal screws or using crimp connectors. To protect the connections from moisture and ensure insulation, cover them with electrical tape or heat shrink tubing.
- Reinstall speaker grilles or panels: Place the speaker grilles or panels back in their original positions. Ensure they are securely fastened to prevent any rattling or vibration.
When installing the speakers, pay attention to the recommended power ratings and impedance levels to ensure compatibility with your head unit or amplifier. It’s also important to position the speakers for optimal sound imaging and balance within the car’s interior.
Take your time to properly install and secure the speakers, as this will contribute to the overall audio performance. Once the speakers are installed, you can proceed to the next step – installing the amplifier.
Step 8: Install the amplifier
An amplifier is a vital component in a car audio system, as it boosts the audio signal from the head unit and provides power to the speakers. Installing an amplifier can significantly enhance the sound quality and volume of your system. Follow these steps to properly install the amplifier:
- Choose the amplifier location: Select a suitable location in your car to mount the amplifier. Common locations include the trunk, under a seat, or in the rear cargo area. Ensure it is a well-ventilated and secure location.
- Prepare the installation area: Clear the selected area and clean it to remove any debris or obstructions. Consider using rubber grommets or foam pads to minimize vibrations and rattling.
- Mount the amplifier: Use the appropriate mounting brackets or screws to secure the amplifier in place. Ensure it is firmly attached and will not move or shift during driving.
- Connect the power cable: Run the power cable from the battery to the amplifier location. Use appropriate grommets to protect the cable where it passes through metal or plastic panels. Connect the power cable to the amplifier’s power input terminal.
- Connect the ground cable: Run a separate ground cable from the amplifier to a solid grounding point in the car. Ensure the connection is secure and free from corrosion or paint that may inhibit proper grounding.
- Connect the remote turn-on wire: Connect the remote turn-on wire from the head unit to the amplifier’s remote input terminal. This wire signals the amplifier to turn on when the head unit is powered.
- Connect the speaker wires: Run speaker wires from the amplifier to each speaker in your system. Match the positive (+) and negative (-) terminals on the amplifier to the corresponding terminals on the speakers.
- Secure and insulate the connections: Ensure all connections to the amplifier are secure and tightened properly. Use crimp connectors or soldering for a strong and reliable connection. Insulate the connections with electrical tape or heat shrink tubing.
- Double-check all connections: Before powering on the system, double-check all the connections to ensure they are correctly aligned and securely fastened.
Installing an amplifier requires careful consideration of power requirements, wiring configurations, and proper grounding. It’s recommended to consult the amplifier’s manual or seek professional assistance if you’re unsure about any aspect of the installation process.
With the amplifier securely installed and connected, your car audio system is now ready to be powered up and tested. In the next step, we will cover how to connect the power cable to the battery for the amplifier.
Step 9: Connect the power cable
Connecting the power cable is a crucial step when installing an amplifier in your car audio system. The power cable provides the necessary electrical supply from the car’s battery to the amplifier. Follow these steps to properly connect the power cable:
- Determine the power cable length: Measure the distance from the amplifier’s installation location to the car’s battery. Add a few extra feet to ensure you have enough length for routing.
- Choose the appropriate power cable: Select a power cable with the correct gauge (thickness) based on the amplifier’s power requirements. Be sure to consult the amplifier’s manual or specifications for the recommended gauge.
- Disconnect the negative battery terminal: Use the appropriate wrench or socket to loosen and remove the nut from the negative (-) battery terminal. Set the cable aside, ensuring it does not make contact with the terminal.
- Route the power cable: Starting from the battery, route the power cable along the vehicle’s existing wiring harness or through designated cable channels. Avoid sharp edges, hot surfaces, and moving parts to prevent potential damage to the cable.
- Protect the power cable: Use rubber grommets or heat-resistant tubing to protect the power cable where it passes through metal or plastic panels. This will prevent any damage or short circuits caused by friction or contact with sharp edges.
- Connect the power cable to the battery: Strip the insulation from the end of the power cable and connect it to the positive (+) terminal of the car battery. Tighten the nut securely to ensure a solid connection.
- Reconnect the negative battery terminal: Take the previously disconnected negative battery cable and connect it to the negative (-) terminal of the car battery. Tighten the nut securely to complete the reconnection.
- Double-check the connections: Ensure that all connections are secure and tightened properly. Take a moment to inspect the power cable routing to ensure it is properly positioned and protected throughout its path.
It’s important to select the appropriate gauge power cable for your amplifier to ensure proper power distribution and prevent overheating or voltage drops. Incorrectly sized power cables can negatively impact the performance and safety of your audio system.
With the power cable securely connected to the battery, the amplifier in place, and all connections double-checked, you’re now ready to move on to the final step of testing and adjusting your car audio system.
Step 10: Test and adjust the audio system
Now that you’ve completed the installation of your car audio system, it’s time to test and fine-tune the sound to ensure optimal performance. Follow these steps to test and adjust your audio system:
- Power on the system: Turn on your car’s ignition and power up the audio system. Ensure that all components, including the head unit, amplifier, and speakers, are receiving power.
- Set the balance and fade: Adjust the balance and fade settings on your head unit to ensure that the sound is evenly distributed across all speakers. This step ensures a balanced soundstage and eliminates any muffled or distorted audio.
- Tune the equalizer: If your head unit has an equalizer, use it to fine-tune the audio frequencies according to your preference. Adjust the bass, midrange, and treble settings to achieve the desired sound quality.
- Check speaker phase and polarity: Verify that all speakers are in phase by playing a test tone or music with distinct left and right audio channels. Ensure that the sound from each speaker is in sync and aligned with the appropriate channel.
- Adjust amplifier gains: Set the gain controls on the amplifier to match the input signal from the head unit. This helps prevent distortion and ensures the amplifier is operating efficiently without overpowering the speakers.
- Listen and make adjustments: Play various types of music and audio tracks to evaluate the sound quality across different genres. Adjust the equalizer, balance, fade, and amplifier gains as needed to achieve the desired audio experience.
- Test all audio sources: Test the functionality of all audio sources, such as radio, CD player, Bluetooth, or auxiliary inputs. Ensure that each source is working correctly and producing clear, distortion-free sound.
- Listen for any abnormalities: Pay attention to any buzzing, rattling, or intermittent noise. Investigate and resolve any issues with speaker connections, wiring, or grounding to ensure a seamless listening experience.
Take your time during the testing and adjusting process to achieve the best possible sound quality. Experiment with different music genres and audio tracks to fully assess the performance of your car audio system.
Don’t hesitate to make further adjustments and refinements over time as you become more familiar with your new audio system and your personal audio preferences.
Congratulations! With the installation complete and the audio system thoroughly tested and adjusted, you can now enjoy your favorite music with enhanced clarity, power, and depth during your car journeys.
Conclusion
Installing a car audio system can be a rewarding DIY project that enhances your driving experience with high-quality sound. By following the step-by-step guide provided in this article, you’ve learned how to install a car audio system from start to finish.
From gathering the necessary tools and equipment to disconnecting the car battery, removing the old audio system, and preparing the car for installation, you’ve gained the knowledge and skills to confidently tackle the installation process.
By installing a new head unit, connecting the wiring harness, installing speakers, and adding an amplifier, you’ve transformed your car into a personal concert venue on wheels. The meticulous attention to detail throughout the installation ensures optimal performance and safety.
Finally, the testing and adjusting process allows you to fine-tune the sound, ensuring a well-balanced audio experience that suits your preferences. Whether you enjoy thumping bass, crisp highs, or immersive surround sound, your newly installed car audio system will deliver audio that brings your favorite music to life.
Remember, practice and patience are key when it comes to car audio installations. If you encounter any challenges or feel unsure about certain steps, don’t hesitate to seek professional assistance or guidance from experienced car audio enthusiasts.
Now that you have the knowledge and know-how to install a car audio system, it’s time to enjoy the rich and immersive sound experience on your future journeys. Get ready to turn up the volume and let the music be your companion on the road!