Home>Production & Technology>Stereo>How To Clean Stereo Receiver
Stereo
How To Clean Stereo Receiver
Modified: January 22, 2024
Learn how to effectively clean your stereo receiver and maintain its optimal performance. Discover step-by-step instructions and expert tips to keep your stereo system in top condition.
(Many of the links in this article redirect to a specific reviewed product. Your purchase of these products through affiliate links helps to generate commission for AudioLover.com, at no extra cost. Learn more)
Table of Contents
Introduction
Having a stereo receiver is a great way to enjoy high-quality audio in your home. Whether you use it to listen to music, watch movies, or play video games, it’s important to keep your stereo receiver clean and well-maintained for optimal performance.
Over time, dust, dirt, and debris can accumulate on the exterior and interior of the receiver, which can affect its functionality and sound quality. Regular cleaning not only improves the appearance of your stereo, but also extends its lifespan and ensures it continues to deliver the best audio experience.
In this guide, we will walk you through the step-by-step process of cleaning your stereo receiver. From preparing the necessary tools and materials to safely disconnecting and reconnecting the device, we will cover everything you need to know to keep your stereo receiver in top condition.
So, grab your cleaning supplies and let’s dive into the world of stereo receiver maintenance!
Tools and Materials Needed
Before you begin cleaning your stereo receiver, it’s important to gather the necessary tools and materials. Here’s what you’ll need:
- Microfiber cloth: This soft and lint-free cloth is ideal for cleaning delicate surfaces without scratching or leaving residue.
- Cotton swabs: These small, absorbent swabs are perfect for reaching into tight spaces and cleaning small areas.
- Compressed air canister: This handy tool allows you to blow away dust and debris from hard-to-reach areas without coming into contact with sensitive components.
- Mild cleaning solution: Use a gentle, non-abrasive cleaning solution diluted with water to clean the exterior surfaces of your stereo receiver.
- Isopropyl alcohol: This alcohol-based solution is effective for removing stubborn dirt or residue from control knobs and connectors. Use it sparingly and avoid contact with sensitive electronic parts.
- Painter’s tape: This low-tack tape is useful for covering sensitive areas on your stereo receiver to protect them from moisture or cleaning solutions.
- Soft brush: A clean and soft brush, such as a paintbrush or makeup brush, can be used to gently remove dust and debris from vents and other hard-to-reach areas.
Make sure you have all the necessary tools and materials ready before you begin cleaning your stereo receiver. This will ensure a smooth and efficient cleaning process, and help prevent any damage to your valuable audio equipment.
Step 1: Power Off and Disconnect
Before you start cleaning your stereo receiver, it’s essential to turn off the power and disconnect it from any power source. This step ensures your safety and prevents any potential damage to the device.
To power off your stereo receiver, locate the power button on the front panel or remote control and press it. Make sure the device is completely powered off before proceeding to the next step.
Next, locate the power cord at the back of the stereo receiver and unplug it from the electrical outlet. If your receiver is connected to other audio or video devices, such as speakers or a television, carefully disconnect the cables and cords.
Remember to handle the cords and cables gently to avoid any unnecessary strain or damage. If you’re unsure which cables to disconnect, refer to the user manual or consult an expert to guide you through the process.
Once you have power off and disconnected your stereo receiver, you can proceed with the cleaning process confidently without the risk of electrical shock or interference.
It’s important to note that some stereo receivers have built-in batteries or capacitor banks that provide power to certain components even when the device is powered off. In such cases, consult the user manual or contact the manufacturer to properly disable these power sources before proceeding with the cleaning.
Now that you have safely powered off and disconnected your stereo receiver, it’s time to move on to the next step: removing dust and debris to ensure optimal performance and longevity.
Step 2: Remove Dust and Debris
After powering off and disconnecting your stereo receiver, the next step is to remove any dust and debris that may have accumulated on the exterior and interior surfaces. Dust can affect the performance and appearance of your device, so it’s important to clean it regularly.
Start by taking a microfiber cloth and gently wiping down the exterior of the stereo receiver. Pay attention to areas that are prone to dust accumulation, such as ventilation grilles, control knobs, and buttons. Use a gentle touch and make sure to cover all sides of the device.
If there are stubborn areas where dust is difficult to remove with a cloth, you can use a soft brush, such as a clean paintbrush or makeup brush, to gently dislodge the dust. Be careful not to apply excessive force or use a brush with coarse bristles, as this could scratch or damage the surface.
Next, remove the cover or casing of the stereo receiver, if possible, to access the interior components. Use compressed air canister to blow away dust and debris from hard-to-reach areas, such as circuit boards, connectors, and internal fans. Hold the canister upright and use short bursts of air to avoid excessive pressure or cold air on delicate components.
Take extra caution when cleaning sensitive electronic parts, such as capacitors or transistors, as excessive pressure or contact could cause damage. If needed, use a cotton swab lightly moistened with isopropyl alcohol to gently clean these components or hard-to-reach areas.
Once you have removed the dust from the exterior and interior of your stereo receiver, take a moment to inspect the device for any loose debris or foreign objects. If you notice anything that shouldn’t be there, carefully remove it with tweezers or a soft brush. Avoid using any sharp or pointed objects that could cause damage.
Cleaning your stereo receiver regularly will not only improve its overall performance but also prevent dust and debris from clogging internal components and causing overheating. With the dust removed, your device will be ready for the next step: cleaning the exterior surfaces.
Step 3: Clean the Exterior
With the dust and debris removed from both the interior and exterior of your stereo receiver, it’s time to focus on cleaning the exterior surfaces. This step will not only enhance the appearance of your device but also ensure its longevity.
Start by preparing a mild cleaning solution by diluting a small amount of a gentle, non-abrasive cleaning solution in water. Avoid using harsh chemicals or abrasive cleaners, as they can damage the finish or markings on your stereo receiver.
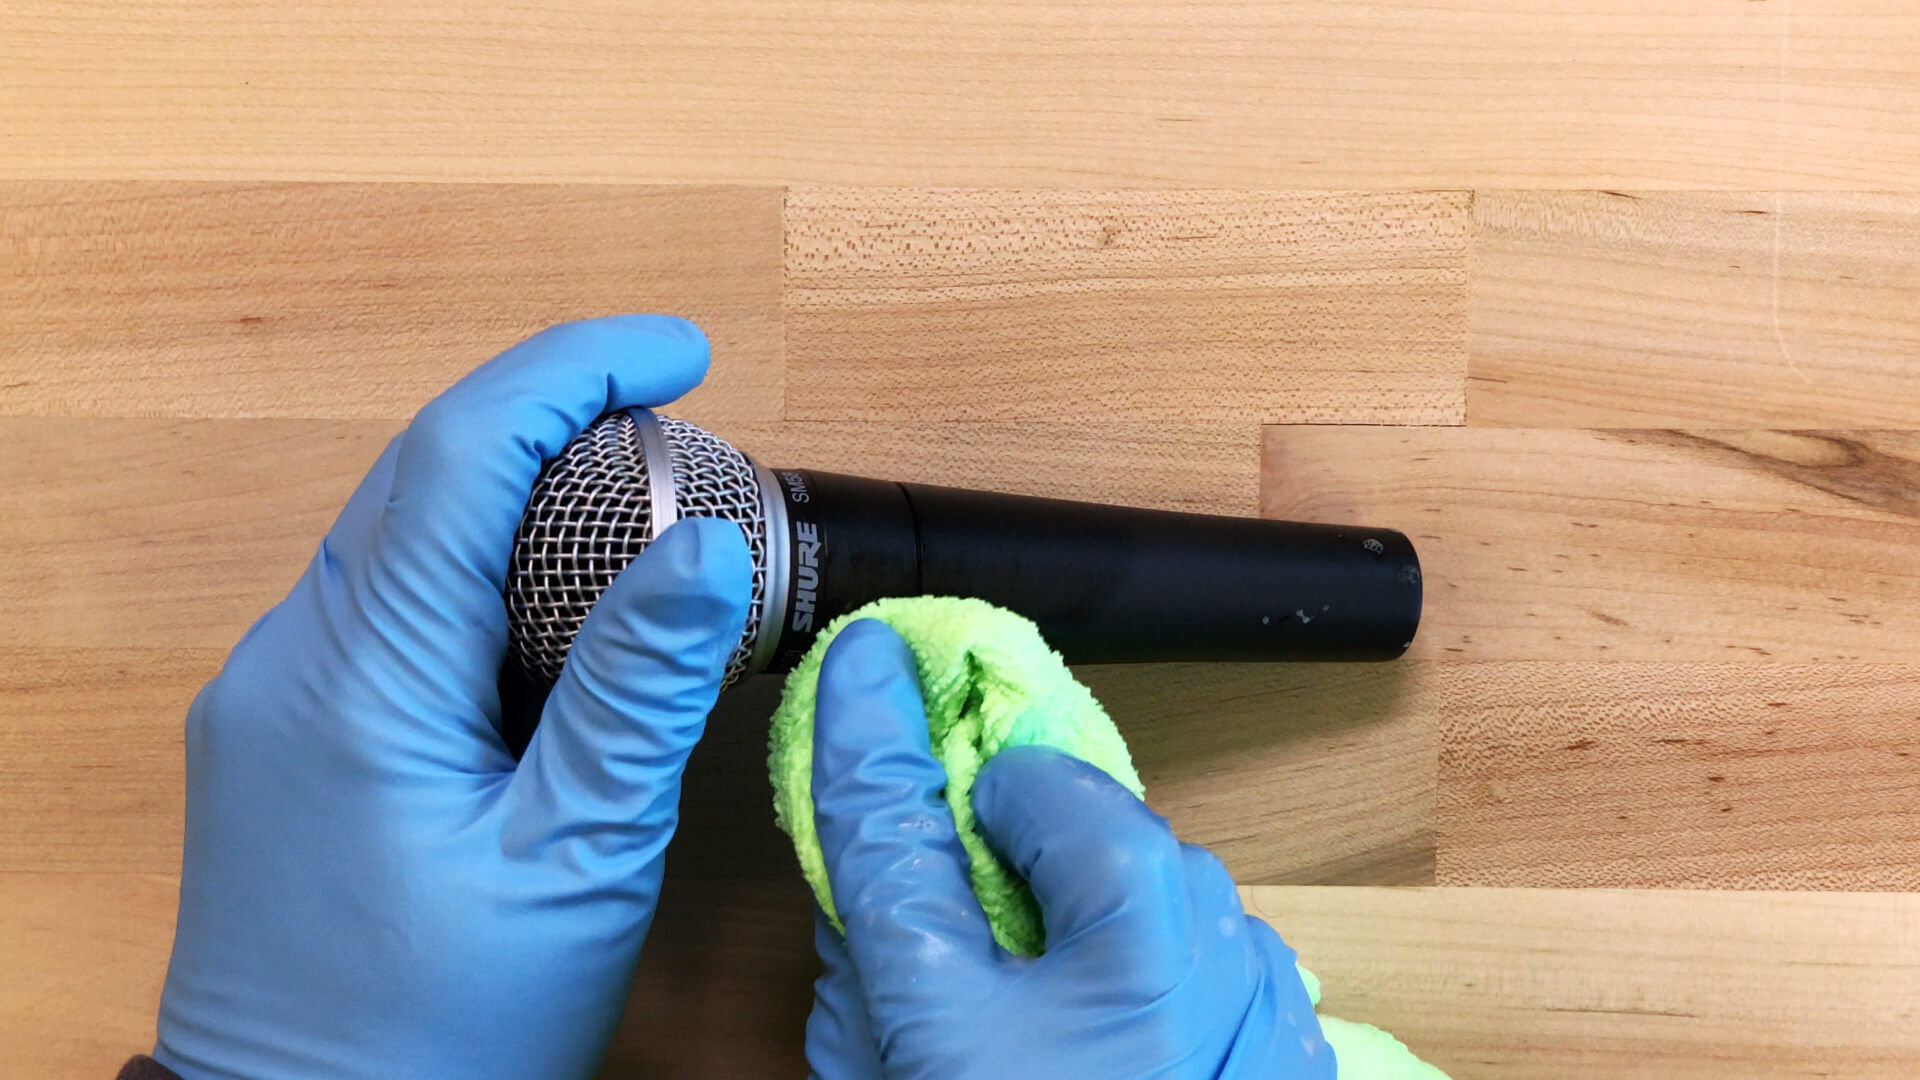
Dip a clean microfiber cloth into the cleaning solution, wring out any excess liquid, and gently wipe down the exterior surfaces of the stereo receiver. Pay special attention to areas that may be prone to fingerprints, smudges, or dirt, such as control knobs, buttons, and the front panel.
If there are stubborn stains or marks that the cleaning solution alone cannot remove, dampen a cotton swab with the cleaning solution and carefully rub the affected areas. Be cautious not to apply excessive pressure or use excessive liquid, as this can seep into the device and damage the internal components.
For areas with more intricate details or hard-to-reach spots, such as buttons or vents, use a cotton swab or a clean soft brush to gently clean them. Take your time and be thorough, ensuring you clean every nook and cranny.
As you clean, periodically check the microfiber cloth for dirt and grime buildup. If it becomes dirty, rinse it out with water or replace it with a fresh cloth to prevent spreading dirt onto cleaned surfaces.
Once you have thoroughly cleaned the exterior surfaces, use a dry microfiber cloth to wipe away any excess moisture. This step helps prevent streaks and water spots from forming on the device.
Remember, never spray cleaning solution directly onto the stereo receiver, as it can seep into sensitive components and cause damage. Always apply the solution to a cloth or cotton swab first, and then wipe the surfaces.
With the exterior surfaces of your stereo receiver now clean, it’s time to move on to the next step: cleaning the controls and knobs to ensure smooth functionality.
Step 4: Clean the Controls and Knobs
The controls and knobs of your stereo receiver are essential for adjusting settings and volume levels. Regular cleaning of these components ensures smooth operation and prevents any buildup of dirt or grime that may affect their functionality. Follow these steps to clean the controls and knobs:
- Start by dampening a clean microfiber cloth with a mild cleaning solution. Make sure to wring out any excess liquid to avoid dripping onto the receiver.
- Gently wipe down the control knobs and buttons, making sure to remove any dirt or fingerprints. Take care to clean between the crevices and around the edges of the knobs.
- If there are stubborn stains or dirt that the cloth alone cannot remove, use a cotton swab lightly moistened with isopropyl alcohol. Rub the affected areas gently until the stains or dirt are lifted.
- Be cautious not to use excessive force or press too hard on the controls and knobs, as this can cause damage. Pay attention to the materials and finishes of the knobs to determine the appropriate level of pressure.
- Once you have cleaned the controls and knobs, use a dry microfiber cloth to wipe away any excess moisture. This step ensures that the knobs and buttons are dry before they are used again.
Take your time to thoroughly clean each control and knob, ensuring they are free from dirt and grime. Regular cleaning not only keeps them looking pristine but also ensures their longevity, allowing you to enjoy precise control of your stereo receiver.
When cleaning the controls and knobs, it’s important to avoid using excessive moisture or cleaning solutions that may seep into the device. Additionally, be cautious around any digital displays or sensitive areas and avoid any contact with liquids.
With the controls and knobs of your stereo receiver now clean, you’re ready to move on to the next step: cleaning the connections to maintain optimal audio quality.
Step 5: Clean the Connections
The connections of your stereo receiver play a crucial role in transmitting audio signals to and from various devices, such as speakers, auxiliary inputs, and video sources. Over time, these connections can accumulate dirt, dust, or oxidation, which can degrade the audio quality. Follow these steps to clean the connections:
- Start by inspecting the connections at the back of your stereo receiver. Look for any visible dirt, dust, or debris that may be present.
- If you notice any buildup, use a dry microfiber cloth or a soft brush to gently remove the loose dirt or debris. Be careful not to apply excessive pressure or force, as this may damage the connector pins.
- To clean the connector pins more thoroughly, use a cotton swab lightly moistened with isopropyl alcohol. Gently rub the pins in a back-and-forth motion to remove any oxidation or grime. Avoid saturating the swab with alcohol to prevent liquid from seeping into the receiver.
- If you have visible corrosion on the connector pins, use a pencil eraser to gently rub the affected areas. The abrasiveness of the eraser can help remove the corrosion without damaging the pins.
- After cleaning the connection pins, use a dry cotton swab or microfiber cloth to remove any remaining moisture. Ensure that the connections are completely dry before reconnecting any devices.
When cleaning the connections, it’s important to exercise caution and avoid using excessive force. Additionally, be mindful of the connectors’ delicate nature and avoid bending or damaging them during cleaning.
By regularly cleaning the connections of your stereo receiver, you can ensure optimal audio quality and prevent any issues related to poor signal transmission. Clean connections lead to crisp sound reproduction and a more enjoyable audio experience.
Now that the connections are clean, it’s time to move on to the next step: cleaning the vents to maintain proper airflow and prevent overheating.
Step 6: Clean the Vents
The vents of your stereo receiver play a crucial role in maintaining proper airflow and preventing the device from overheating. Over time, these vents can become clogged with dust, hindering the cooling capabilities of the receiver. Follow these steps to clean the vents:
- Start by visually inspecting the vents on your stereo receiver. Look for any visible dust or debris that may be blocking the airflow.
- Use a soft brush, such as a clean paintbrush or makeup brush, to gently remove the dust from the vents. Brush in a sweeping motion to loosen the particles and allow them to fall away from the receiver.
- If the dust is stubborn or hard to reach, use a can of compressed air to blow away the debris. Hold the canister upright and use short bursts of air to prevent excessive pressure and cold air from reaching the internal components.
- Pay special attention to the fins of the vents, as they can accumulate dust between their narrow spaces. Use a cotton swab or a soft brush to gently clean these areas.
- Take care not to press too hard or use excessive force, as this can damage the fins or push the dirt further into the receiver. Be thorough and ensure that all visible dust and debris are removed from the vents.
Cleaning the vents of your stereo receiver is essential for maintaining proper airflow, preventing overheating, and ensuring optimal performance. A clean and unobstructed ventilation system allows the receiver to cool down effectively, prolonging its lifespan and preventing any audio issues that may arise from overheating.
Now that the vents are clean, it’s time to move on to the final step: reconnecting and powering on your stereo receiver to enjoy the crisp sound it delivers.
Step 7: Reconnect and Power On
After completing the cleaning process for your stereo receiver, it’s time to reconnect the cables and power it back on. Following these steps will ensure a seamless transition and allow you to enjoy the optimal performance of your device:
- Carefully reconnect the cables and cords to their respective ports on the back of the stereo receiver. Make sure to match the correct inputs and outputs, following the labels or color-coding if available.
- Double-check that all connections are secure and properly seated in their respective sockets. A loose connection can result in distorted sound or a loss of audio signal.
- If you have used painter’s tape to cover any sensitive areas during the cleaning process, remove the tape gently to avoid leaving any residue or damaging the surface of the receiver.
- Once all the connections are in place, plug the power cord back into the electrical outlet. Ensure that the power cord is securely inserted and that there are no loose connections.
- Turn on the power to your stereo receiver using either the power button on the front panel or the remote control. Wait for the device to fully power on before attempting to use it.
- Test the audio functionality of your stereo receiver by playing some music or testing various inputs. Ensure that the volume control and other knobs are functioning properly.
- If you notice any issues with the sound quality or functionality, double-check the connections and consult the user manual or contact technical support if necessary.
By carefully reconnecting and powering on your stereo receiver, you give it the opportunity to deliver the high-quality audio experience it was designed for. Taking the time to ensure the proper setup and functionality after cleaning ensures a seamless transition back to enjoying your favorite music, movies, or games.
With the reconnection and power-on process completed, your stereo receiver is now clean, refreshed, and ready for you to enjoy crisp and immersive sound once again.
Finally, don’t forget to establish a regular cleaning schedule to keep your stereo receiver in excellent condition and prolong its lifespan. This will ensure that you continue to enjoy optimal audio performance for years to come.
Conclusion
Cleaning your stereo receiver is a vital aspect of its maintenance and ensures that it continues to deliver optimal audio performance. By following the step-by-step guide outlined in this article, you can effectively clean and maintain your stereo receiver without compromising its functionality or appearance.
Starting with the power-off and disconnection process, you can safely clean both the exterior and interior of your device, removing dust and debris that can accumulate over time. Taking extra care when cleaning delicate controls and knobs helps maintain smooth operation and prolong the lifespan of these components.
Regularly cleaning the connections and vents of your stereo receiver further enhances its performance by ensuring proper signal transmission and preventing overheating. With clean and unobstructed connections and ventilation, you can enjoy crisp, clear, and uninterrupted sound quality.
Remember, as you clean your stereo receiver, use the appropriate tools and materials such as microfiber cloth, cotton swabs, compressed air, mild cleaning solution, and isopropyl alcohol. Follow safety guidelines and avoid using excessive force or liquid that could damage the sensitive electronic components.
By incorporating regular cleaning into your audio system maintenance routine, you can enjoy an enhanced audio experience and prolong the lifespan of your stereo receiver. Plus, a well-maintained stereo receiver adds an aesthetic appeal to your audio setup.
So, take the time to clean your stereo receiver and create an immersive and enjoyable audio environment. Your ears will thank you for the exceptional sound quality, and your stereo receiver will thank you for the care and attention you give it.