Home>Devices & Equipment>Earbuds>How To Connect Sharper Image Earbuds
Earbuds
How To Connect Sharper Image Earbuds
Published: December 19, 2023
Learn how to connect your Sharper Image earbuds effortlessly! Our step-by-step guide will help you pair your earbuds with any device.
(Many of the links in this article redirect to a specific reviewed product. Your purchase of these products through affiliate links helps to generate commission for AudioLover.com, at no extra cost. Learn more)
Table of Contents
Introduction
Earbuds have become one of the most popular accessories for music lovers and tech enthusiasts alike. With their compact size and wireless functionality, they offer a convenient and immersive audio experience. Sharper Image earbuds are known for their sleek design, advanced features, and superior sound quality. Whether you’ve just purchased a pair of Sharper Image earbuds or you’re considering getting one, this article will guide you through the process of connecting them to your device.
Connecting your Sharper Image earbuds is a straightforward process, but it can vary depending on the specific model and the device you’re using. In general, you’ll need to ensure compatibility, turn on the earbuds, activate Bluetooth on your device, pair the earbuds with your device, and test the connection. This article will provide you with step-by-step instructions to help you connect your Sharper Image earbuds with ease.
Before we dive into the detailed steps, it’s important to note that each Sharper Image earbud model might have slight variations in the connection process. It’s always recommended to consult the user manual that came with your earbuds for specific instructions. Now, let’s get started with the first step: checking compatibility.
Step 1: Check the Compatibility
Before attempting to connect your Sharper Image earbuds, it’s essential to ensure that they are compatible with your device. Most Sharper Image earbuds are designed to work with a wide range of devices, including smartphones, tablets, laptops, and other Bluetooth-enabled devices. However, it’s always a good idea to double-check for compatibility to avoid any potential issues.
Start by examining the packaging or the user manual of your earbuds. Look for any specific compatibility requirements or recommendations mentioned by the manufacturer. This could include information about device operating systems, Bluetooth versions, or any other specific features that are required for seamless connectivity.
If you no longer have the packaging or the user manual, you can visit the official Sharper Image website or contact their customer support for detailed compatibility information. Additionally, you can research online forums or tech communities to see if anyone has successfully connected your specific model of Sharper Image earbuds to the device you have.
Remember that ensuring compatibility is vital as it will help you avoid any frustration or disappointment if your earbuds are not supported by your device. Once you have confirmed compatibility, you can proceed to the next step of turning on your earbuds.
Step 2: Turn on the Earbuds
After confirming compatibility, the next step is to turn on your Sharper Image earbuds. The power button or switch is usually located on either one of the earbuds or on a separate control panel, depending on the model you have.
To turn on the earbuds, locate the power button and press it. You may need to hold the button for a few seconds until you see a LED light indicating that the earbuds are now powered on. The LED light might flash or remain steady, depending on the model.
Keep in mind that some Sharper Image earbuds have automatic pairing mode, which means they will enter pairing mode as soon as they are turned on. In this case, you can move on to the next step of activating Bluetooth on your device.
If your earbuds do not automatically enter pairing mode, you can manually activate it by following the instructions in the user manual. Typically, this involves holding the power button for an extended period until the LED light starts flashing rapidly, indicating that the earbuds are in pairing mode.
It’s worth noting that the specific process of turning on your Sharper Image earbuds may vary depending on the model you have. Therefore, it’s important to refer to the user manual for detailed instructions on how to power on your particular earbuds.
With your Sharper Image earbuds powered on, you’re now ready to move on to the next step of activating Bluetooth on your device.
Step 3: Activate Bluetooth on Your Device
Before you can connect your Sharper Image earbuds to your device, you’ll need to ensure that Bluetooth is activated and ready to pair. Most devices, including smartphones, tablets, and laptops, have built-in Bluetooth capabilities.
To activate Bluetooth on your device, follow these general steps:
- Open the settings menu on your device.
- Look for the “Bluetooth” option and tap or click on it.
- Toggle the Bluetooth switch to turn it on.
The exact steps to activate Bluetooth may vary slightly depending on the operating system and device you’re using. For example, on an iPhone, you can access Bluetooth settings by swiping up from the bottom of the screen to open the Control Center and tapping on the Bluetooth icon. On an Android device, you may find the Bluetooth option under the “Connections” or “Wireless & Networks” settings.
Once Bluetooth is activated on your device, it will start scanning for nearby Bluetooth devices, including your Sharper Image earbuds. It’s important to keep the earbuds within a reasonable range of your device during the connection process.
Now that Bluetooth is activated on your device, you’re ready to move on to the next step of pairing your Sharper Image earbuds.
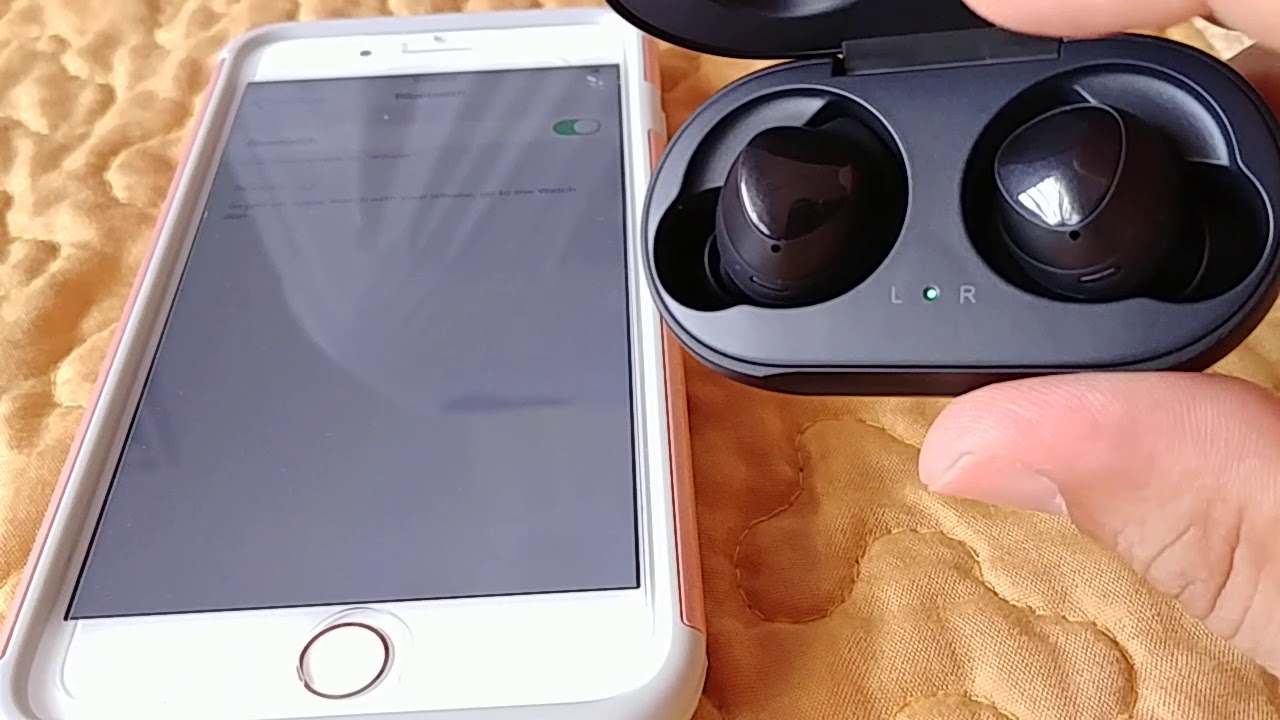
Step 4: Pair the Earbuds with Your Device
With Bluetooth activated on your device, it’s time to pair your Sharper Image earbuds. The pairing process establishes a wireless connection between your earbuds and your device, allowing you to enjoy your favorite music, podcasts, or audio content.
To pair your Sharper Image earbuds with your device, follow these general steps:
- Make sure your Sharper Image earbuds are in pairing mode. If not, refer to the user manual for instructions on how to put them in pairing mode.
- On your device, go to the Bluetooth settings menu.
- Look for the list of available devices and select your Sharper Image earbuds from the list.
- Wait for a few seconds while your device establishes a connection with the earbuds.
- You might be prompted to enter a passkey or PIN code. If required, refer to the user manual for the correct passkey or PIN code. In most cases, the default passkey is either “0000” or “1234”.
- Once the pairing process is complete, you should see a notification or indication on your device that the earbuds are successfully connected.
It’s important to note that the specific steps for pairing your Sharper Image earbuds may vary depending on the model you have and the device you’re using. Always refer to the user manual for detailed instructions or consult the official Sharper Image website for any specific pairing guidelines.
Once your Sharper Image earbuds are successfully paired with your device, you can move on to the next step of testing the connection and enjoying your audio experience.
Step 5: Test the Connection
After successfully pairing your Sharper Image earbuds with your device, it’s time to test the connection to ensure everything is working properly. Testing the connection will help you verify that the audio is streaming seamlessly and that the earbuds are functioning as expected.
To test the connection of your Sharper Image earbuds, follow these steps:
- Play some audio on your device, such as music or a podcast.
- Ensure that the volume on your device is turned up and that the audio is not muted.
- Listen for the audio coming through your Sharper Image earbuds.
- Move around and test the range of the earbuds to see if the connection remains stable.
- If the audio is clear and uninterrupted, congratulations! Your connection is successful. Enjoy your audio experience with your Sharper Image earbuds.
- If you experience any issues, such as crackling sound, audio dropout, or connectivity problems, refer to the troubleshooting steps in the next section to address common issues.
Remember that connectivity can be affected by various factors, such as environmental interference or distance from the device. If you encounter any issues with the connection, try moving closer to your device, ensuring there are no physical obstructions, or restarting both your earbuds and the device before troubleshooting further.
By testing the connection, you can confirm that your Sharper Image earbuds are paired correctly and functioning properly, allowing you to fully enjoy your audio content.
Step 6: Troubleshooting Common Issues
While connecting and using Sharper Image earbuds is typically a seamless experience, you may encounter some common issues along the way. Here are a few troubleshooting tips for addressing these issues:
1. No Sound or Low Sound:
- Ensure that the volume on both the earbuds and your device is turned up.
- Check if the earbuds are fully inserted in your ears for a proper seal.
- Clean the earbuds’ speakers or sound outlets from any debris or earwax buildup.
2. Connectivity Problems:
- Make sure your device’s Bluetooth is enabled and within the earbuds’ range.
- Turn off Bluetooth on other nearby devices to avoid interference.
- Reset the earbuds by turning them off and on again, then attempt to reconnect.
- Try unpairing and re-pairing the earbuds with your device.
3. Battery Drain or Short Battery Life:
- Charge the earbuds fully before use, following the instructions in the user manual.
- Decrease the volume or use the earbuds’ power-saving modes, if available.
- Avoid leaving the earbuds in extremely hot or cold environments.
If these troubleshooting tips do not resolve your issues, refer to the user manual for further instructions or contact Sharper Image’s customer support for assistance. They will be able to provide specific guidance based on your specific earbud model and issue.
Remember, patience and persistence are key when troubleshooting. It’s important to systematically go through the steps and eliminate potential causes until you find a resolution.
By following the troubleshooting steps, you can overcome common issues and ensure a smooth and enjoyable experience with your Sharper Image earbuds.
Conclusion
Connecting your Sharper Image earbuds to your device is a simple process that allows you to enjoy high-quality audio without the hassle of tangled wires. By following the steps outlined in this article, you can connect your earbuds seamlessly and start immersing yourself in your favorite music, podcasts, and more.
Remember to first check the compatibility of your earbuds with your device to ensure a smooth connection. Then, turn on your earbuds and activate Bluetooth on your device. Pair the earbuds with your device by following the specific instructions for your model, and test the connection to verify that the audio is streaming smoothly.
If you encounter any issues during the connection process or while using the earbuds, refer to the troubleshooting tips provided to address common problems. Should further assistance be required, consult the user manual or contact Sharper Image customer support for personalized guidance.
With your Sharper Image earbuds successfully connected, you can now enjoy the convenience and immersive audio experience they provide. Whether you’re working out, commuting, or simply relaxing at home, let your earbuds transport you to a world of crisp and clear sound.
So go ahead and enhance your audio experience with Sharper Image earbuds. Connect them to your device, tune in to your favorite content, and enjoy the freedom of wireless, high-quality sound.