Home>Devices & Equipment>Earbuds>How To Connect Earbuds To Android
Earbuds
How To Connect Earbuds To Android
Modified: January 22, 2024
Learn how to easily connect your earbuds to your Android device. Step-by-step guide to ensure a seamless audio experience.
(Many of the links in this article redirect to a specific reviewed product. Your purchase of these products through affiliate links helps to generate commission for AudioLover.com, at no extra cost. Learn more)
Table of Contents
- Introduction
- Step 1: Check if your earbuds are compatible with Android devices
- Step 2: Ensure your Android device has Bluetooth capabilities
- Step 3: Activate Bluetooth on your Android device
- Step 4: Put your earbuds in pairing mode
- Step 5: Pair your earbuds with your Android device
- Step 6: Test the connection and adjust settings if necessary
- Conclusion
Introduction
Welcome to the world of earbuds! These tiny, wireless headphones have revolutionized the way we listen to music, make phone calls, and enjoy audio on the go. With their compact size and advanced features, earbuds have become a must-have accessory for smartphone users, including those with Android devices.
If you’re new to the world of earbuds or have recently purchased a pair, you may be wondering how to connect them to your Android device. Fortunately, the process is quite simple and only requires a few steps. In this article, we will guide you through the process of connecting your earbuds to your Android device, so you can start enjoying your favorite tunes or take calls hands-free.
Before we dive into the steps, it’s important to note that earbuds come in various models and brands, each with its own connectivity options. The most common method of connecting earbuds to an Android device is through Bluetooth technology. This wireless communication protocol allows for seamless connectivity between your earbuds and your device, providing you with a hassle-free audio experience.
So, if you’re ready to unleash the potential of your earbuds and pair them with your Android device, let’s get started with the step-by-step process. Whether you’re using AirPods, Galaxy Buds, JBL, Sony, or any other popular earbud brand, these instructions will help you establish a stable connection and unlock the full audio capabilities of your device.
Step 1: Check if your earbuds are compatible with Android devices
Before you begin the pairing process, it’s essential to ensure that your earbuds are compatible with Android devices. While most earbuds are designed to work with both iOS and Android devices, there may be certain models that are specifically optimized for one platform.
To check if your earbuds are compatible with Android, you can refer to the user manual or visit the manufacturer’s website for detailed information. Look for any specific compatibility requirements or recommendations mentioned by the manufacturer.
If you’re unable to find clear information, don’t worry. Most modern earbuds support Bluetooth connectivity, which is universally compatible with Android devices. Bluetooth technology allows for wireless connections between your earbuds and your Android device, ensuring seamless audio playback and call functionality.
To confirm Bluetooth compatibility, check if your earbuds mention Bluetooth connectivity on the packaging or in the product description. Additionally, ensure that your earbuds are in good working condition and have sufficient battery power for the pairing process.
If you’re still unsure about the compatibility of your earbuds with Android devices, you can reach out to the manufacturer’s customer support for guidance. They will be able to provide you with the necessary information and assistance to ensure a smooth and successful pairing process.
Once you have confirmed the compatibility of your earbuds with Android devices, you’re ready to move on to the next step and prepare your Android device for the pairing process.
Step 2: Ensure your Android device has Bluetooth capabilities
Before you can connect your earbuds to your Android device, it’s important to ensure that your device has Bluetooth capabilities. Bluetooth is the wireless technology that enables devices to communicate and establish connections with each other.
Most Android smartphones and tablets come with built-in Bluetooth functionality, but it’s always a good idea to double-check if your specific device supports it. To check if your Android device has Bluetooth capabilities, follow these steps:
- Open the Settings app on your Android device. You can usually find the Settings app in your app drawer or by swiping down from the top of the screen and tapping on the gear icon.
- Scroll down and look for the “Bluetooth” option. Tap on it to open the Bluetooth settings.
- If you see a toggle switch or an “On/Off” button next to Bluetooth, it means that your device has Bluetooth capabilities and it is currently enabled.
- If Bluetooth is not listed or you see an error message, it means that your device does not have Bluetooth capabilities. In this case, you won’t be able to connect your earbuds wirelessly. However, you may still be able to use wired earbuds or explore alternative connection options like USB or AUX.
If your Android device has Bluetooth capabilities, make sure to keep it enabled during the pairing process. This will allow your device to discover and connect to your earbuds seamlessly.
Now that you’ve confirmed that your Android device has Bluetooth capabilities, you’re ready to move on to the next step and activate Bluetooth on your device.
Step 3: Activate Bluetooth on your Android device
Once you’ve confirmed that your Android device has Bluetooth capabilities, the next step is to activate Bluetooth on your device. Activating Bluetooth will allow your Android device to search for and pair with your earbuds.
Here’s how to activate Bluetooth on your Android device:
- Open the Settings app on your Android device.
- Scroll down and look for the “Bluetooth” option. Tap on it to open the Bluetooth settings.
- Toggle the Bluetooth switch to the “On” position. You may also see an “On/Off” button that you can tap to enable Bluetooth.
Once Bluetooth is enabled on your Android device, you will see a list of nearby Bluetooth devices that your device is searching for. At this point, you’re ready to put your earbuds in pairing mode.
Note: The process of activating Bluetooth may vary slightly depending on the version of Android and the device manufacturer. If you’re unable to find the Bluetooth settings or encounter any difficulties, refer to the user manual or the support section on the manufacturer’s website for specific instructions.
Now that Bluetooth is activated on your Android device, it’s time to move on to the next step and put your earbuds in pairing mode.
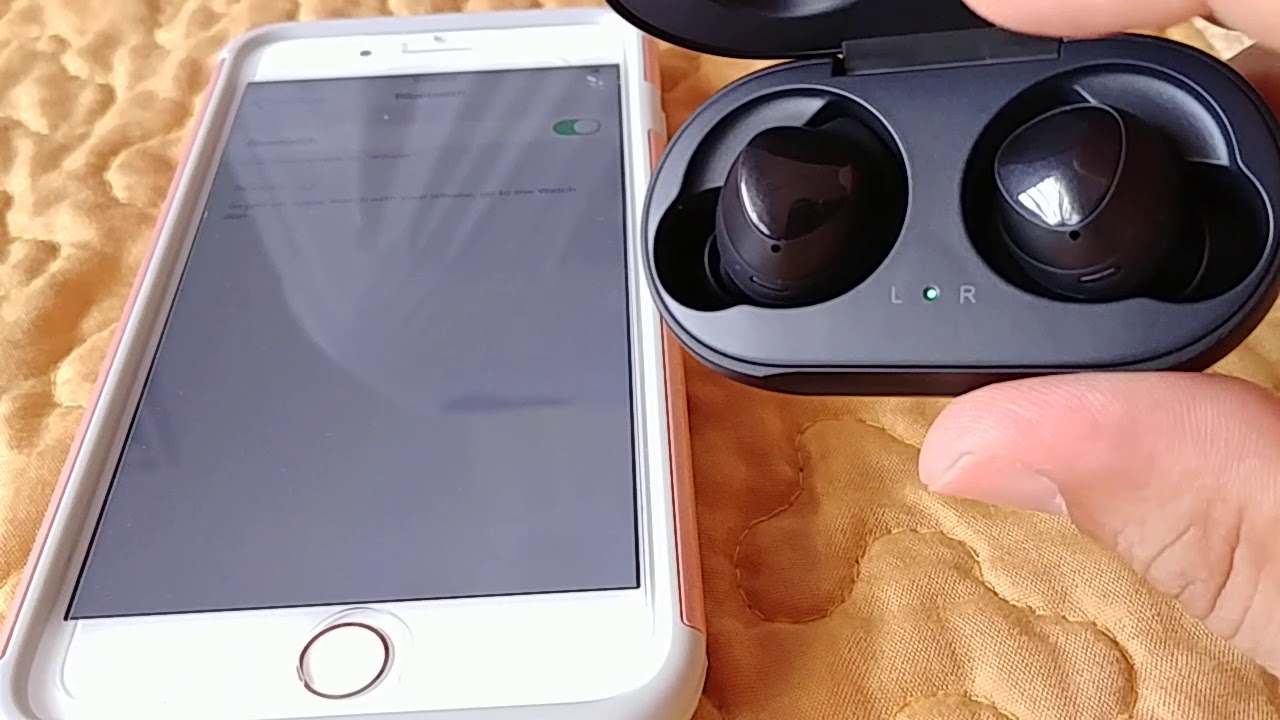
Step 4: Put your earbuds in pairing mode
Before you can connect your earbuds to your Android device, you need to put them in pairing mode. Pairing mode enables your earbuds to be discovered by your Android device and establish a connection. The method to activate pairing mode may vary depending on the earbud model, so it’s important to consult the user manual or follow the manufacturer’s instructions. However, here are some general steps:
- Ensure that your earbuds are charged and turned on.
- Refer to the user manual or manufacturer’s instructions to determine how to activate pairing mode for your specific earbud model. Typically, this involves pressing and holding a specific button or a combination of buttons on the earbuds.
- Look for LED lights or indicators on the earbuds that indicate they are in pairing mode. The lights may flash or change color to signify that the earbuds are ready to be paired.
- Some earbuds may announce or make a sound to indicate that they are in pairing mode.
It’s important to note that the duration for which your earbuds remain in pairing mode may vary. Some earbuds may automatically exit pairing mode after a specific time if no device is connected. To ensure a smooth pairing process, it’s best to initiate the pairing process on your Android device shortly after activating pairing mode on your earbuds.
Once your earbuds are in pairing mode, you’re ready to proceed to the next step and pair them with your Android device.
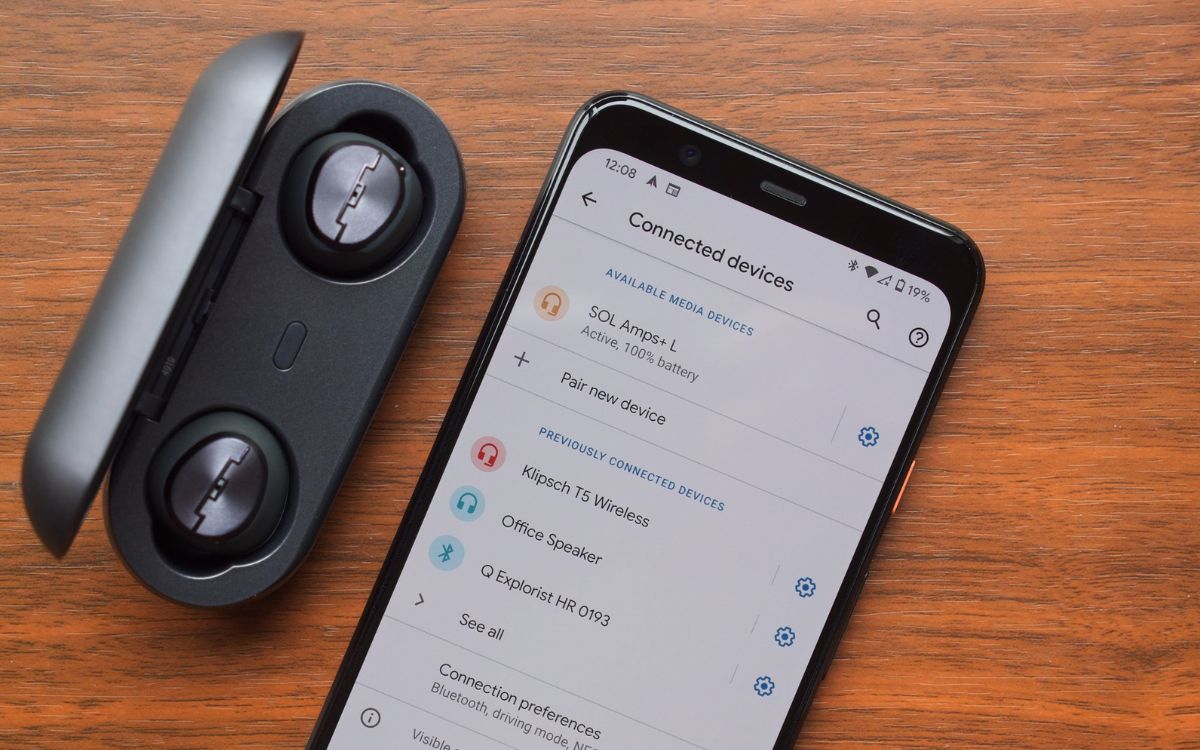
Step 5: Pair your earbuds with your Android device
Now that your earbuds are in pairing mode, it’s time to connect them to your Android device. The process of pairing may vary slightly depending on the Android device and earbud model, but the general steps are as follows:
- Open the Settings app on your Android device and go to the Bluetooth settings.
- Your Android device will start scanning for nearby Bluetooth devices. Wait for your earbuds to appear in the list of available devices.
- Once your earbuds are detected, tap on their name or icon in the Bluetooth devices list. This will initiate the pairing process.
- Follow any on-screen prompts or instructions that appear on your Android device. This may include confirming a passcode or PIN to establish the connection.
- Wait for the pairing process to complete. Once the connection is established, you will see a notification or indicator on your Android device confirming the successful pairing with your earbuds.
After pairing, your earbuds should be connected to your Android device, and you can start using them for audio playback or calls. Note that some earbuds may have additional steps or require you to install a companion app for full functionality. Refer to the user manual or manufacturer’s instructions for any specific setup requirements.
In case your earbuds fail to connect or do not appear in the Bluetooth devices list, make sure they are still in pairing mode and try the pairing process again. It’s also a good idea to keep your earbuds and Android device in close proximity during the pairing process to ensure a stable connection.
Congratulations! You have successfully paired your earbuds with your Android device. Now, let’s move on to the final step and test the connection as well as adjust any necessary settings.
Step 6: Test the connection and adjust settings if necessary
After successfully pairing your earbuds with your Android device, it’s important to test the connection and make any necessary adjustments to ensure optimal audio quality and performance. Here are some steps you can follow:
- Play some audio on your Android device, such as a song or a video, and make sure the sound is coming through your earbuds. If you don’t hear any sound, check the volume settings on both your Android device and your earbuds. Adjust them accordingly.
- Test the audio quality by listening to different genres of music and paying attention to the clarity, balance, and depth of the sound. If you notice any issues or lack of desired audio performance, you may need to adjust the equalizer settings on your Android device or through a companion app that came with your earbuds.
- If your earbuds come with additional features, such as active noise cancellation or ambient sound mode, explore and adjust these settings to suit your preferences. These features can enhance your listening experience and provide more control over your audio environment.
- During calls or voice commands, ensure that the microphone on your earbuds is functioning properly. Test this by making a call or using voice commands and asking the recipient if your voice is clear and easily understandable.
- Take some time to familiarize yourself with any touch controls or buttons on your earbuds. These controls may allow you to play/pause music, skip tracks, answer calls, or activate your voice assistant. Review the user manual or manufacturer’s instructions for a detailed guide on these controls.
By testing the connection and adjusting the settings, you can ensure an optimized audio experience with your earbuds and make the necessary tweaks to suit your preferences.
If you encounter any difficulties during this step or if your earbuds are not functioning as expected, refer to the user manual, visit the manufacturer’s support website, or reach out to their customer support for assistance.
With everything set up and the connection tested, you’re now ready to enjoy the convenience and freedom that your earbuds provide. Whether you’re listening to music, taking calls, or immersing yourself in your favorite podcasts, your earbuds will enhance your audio experience on your Android device.
Conclusion
Congratulations on successfully connecting your earbuds to your Android device! By following the simple steps outlined in this guide, you’ve unlocked the full potential of your earbuds and can now enjoy a wireless and immersive audio experience on your Android device.
Remember to always check the compatibility of your earbuds with Android devices before initiating the pairing process. Activate Bluetooth on your Android device and put your earbuds in pairing mode. Pair your earbuds with your Android device and test the connection to ensure optimal audio quality.
Additionally, feel free to explore the settings and features of your earbuds to personalize your audio experience. Whether it’s adjusting the equalizer settings, utilizing active noise cancellation, or utilizing touch controls, you have the flexibility to tailor your audio experience to your preferences.
If you encounter any issues or have further questions, don’t hesitate to consult the user manual provided by the manufacturer or reach out to their customer support for assistance. They will be able to provide you with the necessary guidance to troubleshoot any connectivity or functionality issues.
Now that you’re equipped with the knowledge to connect your earbuds to your Android device, enjoy the freedom and convenience of wireless audio. Dive into your favorite playlists, immerse yourself in podcasts, and stay connected with hands-free calling – all with the convenience and portability of your earbuds.
Happy listening!