Home>Devices & Equipment>Earbuds>How To Connect To Jabra Earbuds

Earbuds
How To Connect To Jabra Earbuds
Published: November 14, 2023
Learn how to easily connect to Jabra earbuds and enjoy wireless audio wherever you go. Find step-by-step instructions and troubleshooting tips for a seamless experience.
(Many of the links in this article redirect to a specific reviewed product. Your purchase of these products through affiliate links helps to generate commission for AudioLover.com, at no extra cost. Learn more)
Table of Contents
Introduction
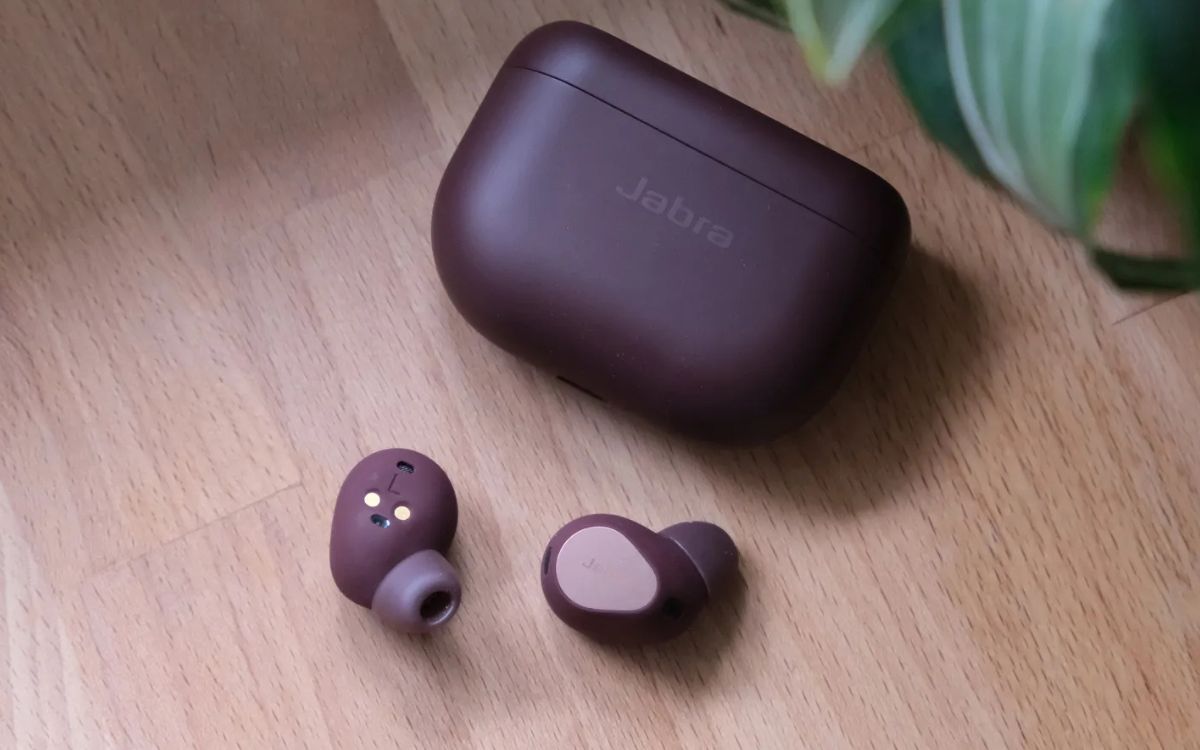
Jabra earbuds have gained popularity in recent years for their impressive audio quality, sleek design, and advanced features. Whether you’re using Jabra wireless earbuds for music, calls, or both, they provide a seamless audio experience on the go.
If you’re new to Jabra earbuds or have just purchased a pair, you may be wondering how to connect them to your device. In this article, we’ll guide you through the step-by-step process of connecting your Jabra earbuds to ensure you can start enjoying your favorite tunes or taking calls with ease.
Before we dive into the details, it’s important to note that the exact steps may vary slightly depending on the model of your Jabra earbuds and the device you’re connecting them to. However, the general process remains the same, and we’ll provide you with the necessary information to help you connect your Jabra earbuds successfully.
So, whether you’re using Jabra Elite, Jabra Elite Active, or Jabra Elite Sport, let’s explore the steps to connect your Jabra earbuds and unlock the world of immersive audio.
Step 1: Check compatibility
Before you start the connection process, it’s essential to ensure that your Jabra earbuds are compatible with the device you want to connect them to. Most Jabra earbuds are designed to work with a wide range of devices, including smartphones, tablets, laptops, and smart TVs. However, it’s always a good idea to check for compatibility to avoid any unexpected issues.
Start by checking the specifications of your Jabra earbuds and cross-referencing them with the device’s compatibility requirements. You can find this information on the Jabra website, product packaging, or user manual. Look for details such as Bluetooth version requirements and supported operating systems.
If your device meets the compatibility criteria, you’re all set to proceed with the connection process. However, if there are any discrepancies, you may need to explore alternative options or consider upgrading your device.
It’s worth mentioning that some Jabra earbuds come with additional features and functionalities that are optimized for specific devices or platforms. For example, certain models may offer advanced integration with voice assistants like Siri or Google Assistant, or provide enhanced controls when paired with specific apps. Take these features into account when checking compatibility to ensure you can make the most of your Jabra earbuds.
Step 2: Charge your Jabra earbuds
Before you begin the connection process, it’s essential to make sure your Jabra earbuds have enough battery power. Most Jabra earbuds come with a charging case that provides additional battery life and serves as a storage case. Here’s how to charge your Jabra earbuds:
- Locate the charging case for your Jabra earbuds. It typically has a lid that opens to reveal the charging slots.
- Take the Jabra earbuds and place them carefully into the corresponding slots in the charging case. Ensure they are properly aligned and securely seated.
- Close the lid of the charging case.
- Connect the charging case to a power source using the provided USB cable. You can use a wall adapter, computer USB port, or any other compatible power source.
- Allow the Jabra earbuds to charge for the recommended duration. The LED indicators on the charging case will usually indicate the charging status of the earbuds.
- Once the Jabra earbuds are fully charged, disconnect the charging case from the power source.
It’s important to note that the charging time may vary depending on the specific model of your Jabra earbuds. Refer to the user manual or product documentation for the recommended charging duration.
Ensuring that your Jabra earbuds are adequately charged not only allows for a seamless connection process but also ensures you can enjoy extended listening or talk time without interruption. So, make it a habit to keep your Jabra earbuds charged and ready for use whenever you need them.
Step 3: Turn on Bluetooth on your device
Before you can connect your Jabra earbuds to your device, you need to ensure that Bluetooth is enabled on your device. Bluetooth is a wireless technology that allows for seamless communication between devices, making it essential for connecting your Jabra earbuds.
The process of enabling Bluetooth may vary slightly depending on the operating system and device you’re using. However, the general steps are as follows:
- Access the settings menu on your device. This is typically represented by a gear icon on the home screen or in the app drawer.
- Look for the “Bluetooth” or “Connections” option within the settings menu. It may be located under the “Wireless and Networks” section.
- Tap on the “Bluetooth” option to enable it. On some devices, you may need to toggle a switch or slide a button to turn on Bluetooth.
- Once Bluetooth is enabled, your device will start scanning for available Bluetooth devices in the vicinity.
It’s important to keep in mind that the steps to enable Bluetooth may vary depending on your device’s operating system, such as Android, iOS, Windows, or macOS. Refer to the user manual or online resources specific to your device if you encounter any difficulties.
After you’ve successfully enabled Bluetooth on your device, you’re one step closer to connecting your Jabra earbuds. The next step is to put your Jabra earbuds in pairing mode, which we’ll explore in the next section.
Step 4: Put your Jabra earbuds in pairing mode
Putting your Jabra earbuds into pairing mode allows them to be discovered by your device and establish a Bluetooth connection. The exact method to enter pairing mode may vary depending on the Jabra earbud model you’re using. Here’s a general guide:
- Start by removing the Jabra earbuds from the charging case, if they’re not already.
- Ensure that the Jabra earbuds are powered off. If they are on, press and hold the power button until they turn off.
- Refer to the instructions for your specific Jabra earbud model to determine the pairing mode. This typically involves pressing and holding a specific button or a combination of buttons on the earbuds.
- While holding the designated button(s), the LED status light on the Jabra earbuds should start flashing. This indicates that the earbuds are now in pairing mode and ready to be discovered by your device.
It’s important to follow the instructions provided with your Jabra earbuds to ensure you enter the correct pairing mode. Each model may have its unique process, so double-check the user manual or visit the Jabra website for accurate instructions.
Once the Jabra earbuds are in pairing mode, it’s time to move on to the next step and connect them to your device. We’ll cover that in the following section.
Step 5: Connect to Jabra earbuds on your device
Now that your Jabra earbuds are in pairing mode, it’s time to connect them to your device. The steps to connect may slightly differ depending on the operating system and device you’re using. Here’s a general guide:
- Access the Bluetooth settings on your device. This is typically found in the settings menu, similar to the process in Step 3.
- Your device should now display a list of available Bluetooth devices. Look for the name or model number of your Jabra earbuds in the list.
- Tap on the name of your Jabra earbuds to initiate the connection process.
- Your device may prompt you to enter a passcode or confirm a numeric code to establish the connection. Follow the on-screen instructions, if requested.
- Wait for your device to establish a Bluetooth connection with the Jabra earbuds. This may take a few moments.
- Once the connection is established, you’ll typically see a notification or indication on both your device and the Jabra earbuds.
It’s important to note that the exact steps and user interface may vary depending on your device and operating system. Follow the on-screen instructions and prompts to ensure a successful connection.
Once the Jabra earbuds are connected to your device, you’re ready to enjoy your favorite music, make calls, or engage in any other audio activities wirelessly.
In the next step, we’ll cover how to test the connection to ensure everything is working as expected.
Step 6: Test the connection
After successfully connecting your Jabra earbuds to your device, it’s crucial to test the connection to ensure that everything is working correctly. Here’s how you can test the connection:
- Start playing a music track or a video on your device.
- Ensure that the audio output is directed to your Jabra earbuds. Most devices allow you to select the audio output source in the settings or by tapping on the audio icon.
- Listen to the audio playback through your Jabra earbuds. Pay attention to the sound quality, clarity, and volume levels to ensure they meet your expectations.
- If you’re using your Jabra earbuds for calls, make a test call to ensure that the microphone and speaker are working correctly. Listen for clear audio and test the microphone by speaking and checking if the other person can hear you clearly.
- Try using different functions, such as volume control buttons, play/pause, or skip tracks, to make sure the controls on your Jabra earbuds are functioning properly.
If you encounter any audio issues, such as distorted sound, low volume, or connectivity interruptions, there are a few troubleshooting tips you can try:
- Ensure that your Jabra earbuds are fully charged.
- Keep your device within the recommended Bluetooth range of your Jabra earbuds.
- Reset the Bluetooth connection between your device and the Jabra earbuds, following the steps outlined in the user manual.
- Update the firmware of your Jabra earbuds to the latest version, if available.
If the issues persist, it may be beneficial to contact Jabra customer support for further assistance in resolving the problem.
Once you have confirmed that the connection, audio quality, and controls are working as expected, you can now enjoy your Jabra earbuds to their fullest potential.
Troubleshooting tips
While connecting and using Jabra earbuds is generally a seamless experience, you may occasionally encounter some issues. Here are a few troubleshooting tips to help you resolve common problems:
- Ensure Bluetooth is enabled: Double-check that Bluetooth is turned on both on your device and your Jabra earbuds. If either one is not enabled, you may have difficulty establishing a connection.
- Restart your devices: Sometimes, a simple restart can resolve connectivity issues. Power off your device and Jabra earbuds, then turn them back on and try reconnecting.
- Reset the earbuds: If you’re facing persistent problems, try resetting your Jabra earbuds. Consult the user manual or Jabra website for instructions on how to perform a reset, as the process may vary based on the specific model.
- Move closer to the device: If the connection is weak or intermittent, try moving your Jabra earbuds closer to the device you’re connecting to. The distance between the earbuds and the Bluetooth device can affect the connectivity.
- Clear device pairing history: If you’ve previously paired your Jabra earbuds with multiple devices, it’s possible that conflicting connections are causing issues. Clear the pairing history on both your Jabra earbuds and the device, and then try reconnecting.
- Update firmware: Check if there are any updates available for your Jabra earbuds’ firmware. Updating to the latest firmware version can often fix bugs and improve performance.
- Try on another device: If you’re still experiencing problems, try connecting your Jabra earbuds to another compatible device. This will help determine if the issue is specific to your device or the earbuds themselves.
- Contact customer support: If none of the above troubleshooting steps work, reach out to Jabra’s customer support for further assistance. They have dedicated support staff who can provide guidance and troubleshooting specific to your Jabra earbud model.
By following these troubleshooting tips, you’ll be equipped to overcome common issues and enjoy a seamless experience with your Jabra earbuds.
Conclusion
Connecting your Jabra earbuds to your device is a relatively simple process that allows you to experience high-quality audio and the convenience of wireless technology. By following the steps outlined in this guide, you can connect your Jabra earbuds successfully and enjoy an immersive audio experience.
Remember to check compatibility between your Jabra earbuds and your device to ensure they are compatible. Charging your Jabra earbuds is essential for uninterrupted usage, so make sure they are fully charged before connecting. Enabling Bluetooth on your device and putting your Jabra earbuds in pairing mode are the crucial steps in establishing the connection.
Once connected, it’s vital to test the connection by playing music or making a call to ensure that the audio quality is excellent and that the controls are functioning as expected. Should you encounter any issues, refer to the troubleshooting tips provided to resolve common problems.
Overall, Jabra earbuds offer a fantastic audio experience, whether you’re using them for music, calls, or other audio-related activities. With their sleek design, advanced features, and ease of use, Jabra earbuds are a popular choice for many users.
So go ahead, follow the steps outlined in this guide, and start enjoying the wireless freedom and exceptional sound quality that Jabra earbuds have to offer!

