Home>Devices & Equipment>Radio>How To Build A Crystal Radio

Radio
How To Build A Crystal Radio
Modified: January 22, 2024
Learn how to build a crystal radio from scratch and enjoy listening to your favorite radio stations. Discover the step-by-step guide to assembling a functional radio with our expert tips and tricks.
(Many of the links in this article redirect to a specific reviewed product. Your purchase of these products through affiliate links helps to generate commission for AudioLover.com, at no extra cost. Learn more)
Table of Contents
Introduction
Welcome to the fascinating world of crystal radios! If you are a radio enthusiast or someone curious about electronics, building your own crystal radio can be an incredibly rewarding experience. Not only does it provide a hands-on understanding of the principles behind radio transmission and reception, but it also allows you to enjoy picking up local AM radio stations with just a handful of basic components.
In this article, we will guide you through the process of building a crystal radio from scratch. From gathering the necessary materials to constructing the circuit and tuning capacitor, we will cover each step in detail to ensure that you not only build a functional radio but also acquire knowledge about the underlying concepts.
A crystal radio works on the principle of using a crystal detector to convert radio frequency signals into audio signals that can be heard through a connected earphone. Unlike modern radios that require power sources and complex circuitry, crystal radios are powered solely by the radio waves they receive. This simplicity, combined with their ability to operate without batteries or external power, makes crystal radios an ideal project for beginners.
By building your own crystal radio, you will gain insights into radio frequency, electromagnetic waves, and circuitry. It will also give you a chance to explore the art of tuning and understanding how antennas and ground connections play a crucial role in signal reception.
So, if you’re ready to embark on a journey into the world of radio waves and electronics, let’s gather the materials needed to build your very own crystal radio!
Understanding Crystal Radios
Before diving into the process of building a crystal radio, it’s important to have a basic understanding of how they work. Crystal radios are simple devices that allow you to tune in to AM radio stations without requiring an external power source.
The key component of a crystal radio is the crystal detector, also known as a diode or a cat’s whisker. This component is responsible for converting the radio frequency signals into audio signals that can be heard through the earphone. The crystal detector makes use of the phenomenon known as rectification, which involves the conversion of alternating current (AC) to direct current (DC).
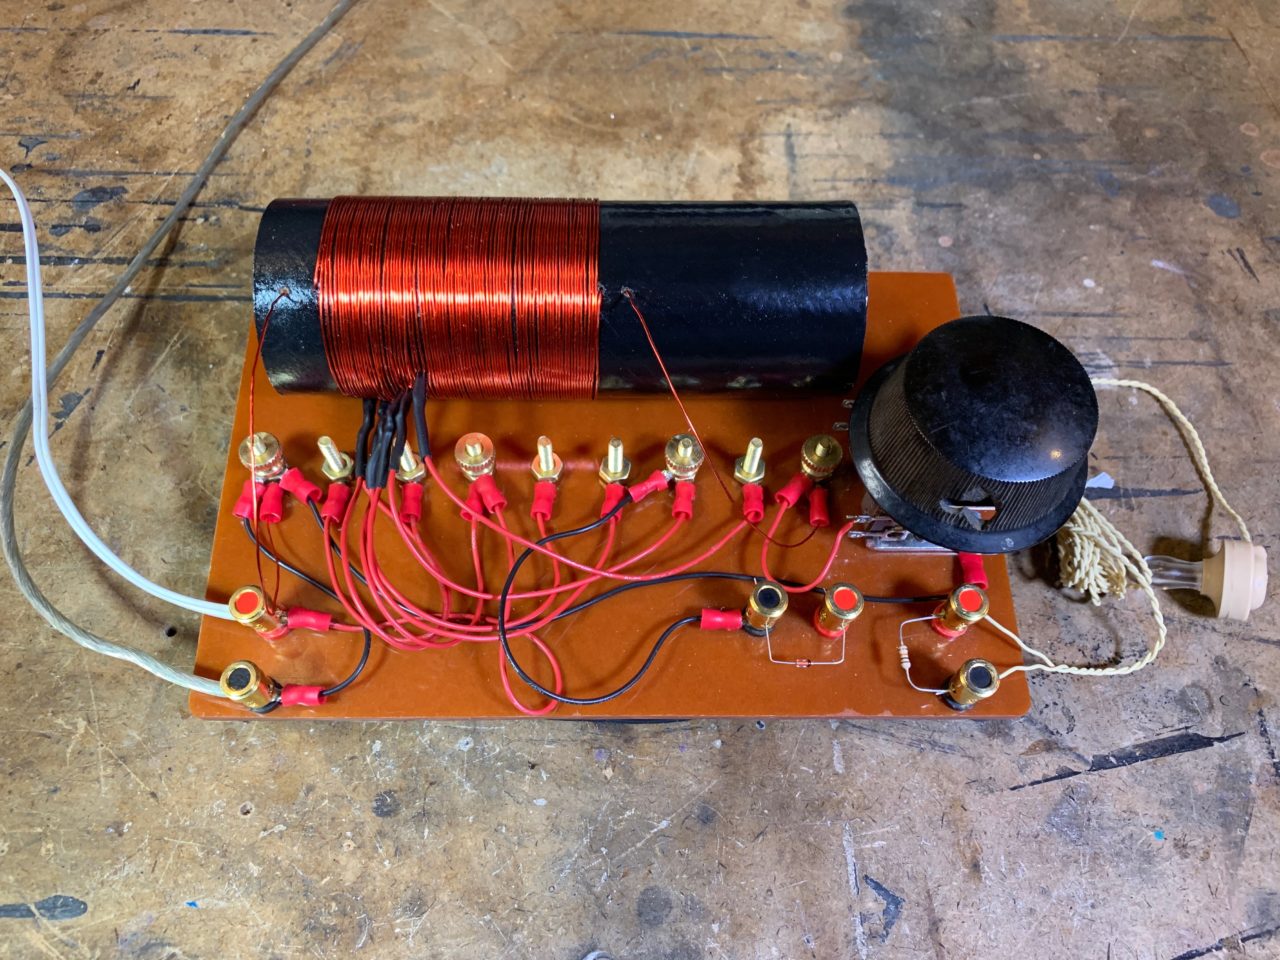
When the radio frequency signals are picked up by the antenna, they are sent to the tuning circuit, which consists of an inductor and a variable capacitor. The inductor, also known as a coil, is responsible for picking up the radio waves and transferring them to the crystal detector. The variable capacitor is used to tune in to different frequencies by adjusting the capacitance.
Once the radio frequency signals reach the crystal detector, they are converted to audio signals. The crystal detector consists of a crystal, such as a piece of galena or a semiconducting material, and a thin wire called a cat’s whisker. The cat’s whisker makes intermittent contact with the crystal, allowing it to rectify the alternating current and produce a varying direct current, which corresponds to the audio signal.
The audio signals produced by the crystal detector are then amplified and sent to an earphone, which allows you to hear the sound. The amplification is accomplished through the resonance of the tuning circuit, which boosts the strength of the audio signal.
One important aspect of crystal radios is the need for an antenna and a ground connection. The antenna picks up the radio waves, while the ground connection serves as a reference point for the radio signals and improves reception. Without a proper antenna and ground connection, the crystal radio will not be able to pick up the desired radio stations effectively.
Now that you have a grasp of the basics of crystal radios, it’s time to gather the necessary materials and start building your own radio circuit. Let’s move on to the next section to learn more!
Gathering the Necessary Materials
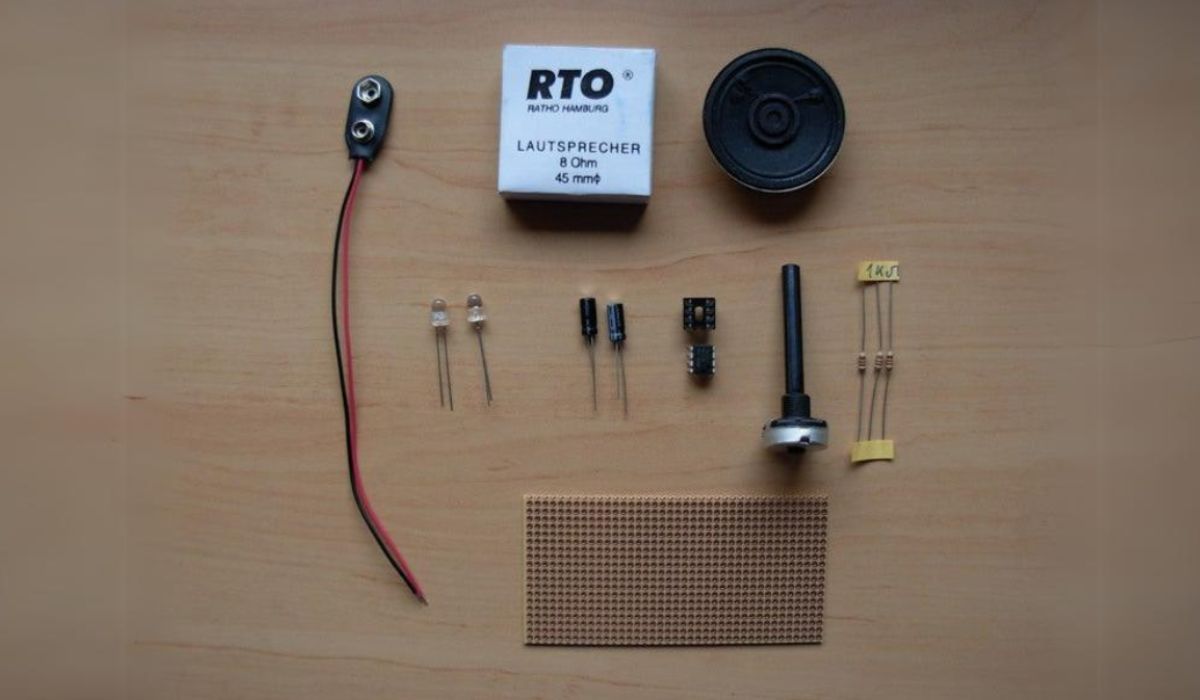
Building a crystal radio requires a few essential components that can easily be obtained from electronics or hobby stores. Before starting the construction process, make sure you have the following materials on hand:
- Radio Coil: This is a spool of wire wound into a coil. It serves as an inductor in the tuning circuit and can be purchased or hand-wound using enamel wire.
- Variable Capacitor: The variable capacitor allows you to tune in to different radio frequencies. Look for ones specifically designed for crystal radios that have a range of capacitance suitable for AM radio.
- Crystal Detector: The crystal detector is the heart of the crystal radio. It can be a natural mineral crystal, such as galena or pyrite, or a semiconductor diode like germanium or silicon. You may also need a cat’s whisker (a fine wire) to make contact with the crystal.
- Earphone: An earphone is essential for listening to the audio signals produced by the crystal radio. Look for high-impedance earphones that are compatible with crystal radio circuits.
- Antenna: A wire antenna is necessary to capture the radio signals. It can be a long piece of insulated wire, preferably at least 10 meters in length, which will act as an efficient receiver for AM radio frequencies.
- Ground Connection: A good ground connection is vital for optimal reception. You can use a metal rod driven into the ground or connect to a metal water pipe to provide a low impedance path for the radio signals.
- Connecting Wires: You’ll need some insulated wires to connect the different components of the crystal radio circuit.
While these are the basic materials required for building a crystal radio, you can also explore additional components such as a signal strength meter or a headphone adapter for enhanced functionality.
Once you have gathered all the necessary components, you are ready to start constructing the radio circuit. In the next section, we will guide you through the step-by-step process of building a crystal radio from scratch.
Building the Radio Circuit
Now that you have gathered all the necessary materials, it’s time to start building the radio circuit for your crystal radio. Follow these steps to construct the circuit:
- Prepare the Radio Coil: If you’re using a pre-wound radio coil, skip this step. Otherwise, take the enamel wire and wind it tightly around a cylindrical object, such as a pen or a PVC pipe, leaving about 10 centimeters of wire on each end.
- Connect the Components: Take one end of the coil wire and connect it to one terminal of the variable capacitor. Connect the other end of the coil wire to the crystal detector. Connect one terminal of the earphone to the other terminal of the crystal detector.
- Construct the Tuning Capacitor: Connect the other terminal of the variable capacitor to one terminal of the antenna. Connect the other terminal of the antenna to the ground connection.
- Complete the Circuit: Connect the remaining terminal of the earphone to the ground connection. Ensure that all connections are secure and well-insulated.
It’s important to note that the exact layout and configuration of the crystal radio circuit may vary depending on the design and components you’re using. You can refer to online resources or images for visual guidance specific to your setup.
Once you have constructed the radio circuit, double-check all the connections to ensure they are properly secured. Carefully examine the circuit for any loose wires or potential short circuits. Taking the time to ensure a clean and well-constructed circuit will greatly improve the performance of your crystal radio.
In the next sections, we will guide you through constructing the antenna, installing the ground connection, and connecting the earphone. These steps are crucial in maximizing the performance and reception of your crystal radio. Let’s move on to the next section to learn more!
Constructing the Antenna
The antenna is a vital component of your crystal radio as it allows you to capture radio signals and transfer them to the tuning circuit. Follow these steps to construct an effective antenna:
- Choose a Suitable Location: Look for a location in your house or outdoors where you can set up your antenna. Ideally, it should be as high and as far away as possible from any electrical or metal obstructions.
- Select the Antenna Wire: Use a long piece of insulated wire, preferably at least 10 meters in length. The wire can be made of copper or aluminum and should be thick enough to resist bending or breaking.
- Mount the Antenna: Fix one end of the wire securely to a non-metallic support, such as a wooden pole or PVC pipe. Stretch the wire taut and secure the other end of the wire using a similar method.
- Extend the Antenna: If you have the space, you can extend the length of the antenna by using additional wire. Make sure to connect the wire securely to the existing antenna wire.
- Position the Antenna: Raise the antenna as high as possible, ensuring it is straight and elevated. Away from any electrical devices or metal structures that could interfere with the signal reception.
Remember to keep safety in mind while constructing and positioning the antenna. Be cautious when working at heights or using ladders, and avoid areas with overhead power lines.
Once you have constructed and positioned your antenna, you’re ready to move on to the next step: installing the ground connection. The ground connection is crucial for eliminating noise and improving the overall reception quality of your crystal radio. Read on to learn how to install the ground connection in the next section.
Installing the Ground Connection
The ground connection is an essential part of your crystal radio setup as it helps create a reference point for the radio signals and improves reception. Follow these steps to install the ground connection for your crystal radio:
- Choose a Grounding Method: There are several methods you can use to establish a good ground connection. One option is to drive a metal rod into the ground outside your house and connect it to the ground terminal of your crystal radio circuit. Alternatively, you can connect the ground wire to a metal water pipe or a metal stake driven into the earth.
- Create a Ground Wire: Take a piece of insulated wire and strip off the insulation from both ends. The length of the ground wire will depend on the distance between your crystal radio circuit and the grounding point.
- Connect the Ground Wire: Attach one end of the ground wire securely to the ground terminal of your crystal radio circuit. If you are using a metal rod, loop the other end of the wire around the rod and secure it tightly. If you are connecting to a metal water pipe, ensure a tight connection with a pipe clamp.
- Grounding Tips: To improve the effectiveness of your ground connection, make sure the wire is firmly attached and has a good electrical contact. Keep the wire as straight as possible and avoid any sharp bends or kinks.
Establishing a proper ground connection will help reduce unwanted noise and interference, resulting in clearer and stronger radio signals. It is an essential step in maximizing the performance of your crystal radio.
With the antenna and ground connection in place, you are now ready to move on to the next step: assembling the tuning capacitor. The tuning capacitor allows you to select different frequencies and fine-tune your crystal radio. Continue reading to learn how to assemble the tuning capacitor in the next section.
Assembling the Tuning Capacitor
The tuning capacitor is a critical component of your crystal radio as it allows you to select different frequencies and fine-tune the reception. Follow these steps to assemble the tuning capacitor:
- Gather the Components: The tuning capacitor consists of two sets of metal plates, separated by an insulating material. Make sure you have the metal plates and the insulating material ready.
- Prepare the Insulating Material: Cut the insulating material into rectangular strips that are slightly wider than the metal plates. The insulating material can be a plastic sheet, cardboard, or even a strip of non-conductive tape.
- Arrange the Metal Plates: Take one set of the metal plates and lay them out in a parallel arrangement, leaving a small gap between each plate. Repeat this process with the other set of metal plates. The number of plates in each set will depend on the specific tuning capacitor you are using.
- Insert the Insulating Material: Place the insulating material strips in between the metal plates, ensuring that they are centered and evenly spaced. The insulating material will prevent the metal plates from coming into contact with each other.
- Secure the Metal Plate Sets: Clamp or fasten the metal plate sets together, holding the insulating material securely in place. Make sure the arrangement is stable and the metal plates are aligned.
- Connect the Tuning Capacitor: Connect one set of metal plates to the variable capacitor in your crystal radio circuit. The other set of metal plates should be connected to the antenna. Ensure proper insulation and secure connections.
Once you have assembled the tuning capacitor, you can adjust the capacitance by rotating the variable capacitor’s shaft. This allows you to tune in to different frequencies and find the optimal reception for your crystal radio.
With the tuning capacitor in place, you are one step closer to completing your crystal radio. In the next section, we will guide you through connecting the earphone, the final component necessary to hear the audio signals produced by your radio. Let’s move on!
Connecting the Earphone
The earphone is the final component in your crystal radio setup that allows you to hear the audio signals produced by the radio circuit. Follow these steps to connect the earphone:
- Identify the Earphone Terminals: Take a close look at your earphone and identify the two terminals. Most earphones have a small red or white dot on one of the terminals to indicate the positive or signal terminal.
- Locate the Crystal Detector: Find the crystal detector in your radio circuit. It is typically connected to one end of the variable capacitor.
- Connect the Earphone: Attach the positive terminal of the earphone to the terminal of the crystal detector. The negative terminal of the earphone should be connected to a ground point, such as the ground terminal of your crystal radio circuit.
- Check for Proper Connections: Ensure that all connections are securely made and that there is no loose or exposed wire. A loose connection can affect the quality of the audio signal and result in poor sound quality.
Once you have connected the earphone, make sure it is positioned comfortably and securely in your ears. Adjust the volume to a comfortable level and prepare to enjoy the sounds of your crystal radio in action.
Now that you have completed the construction of your crystal radio, it’s time to test and adjust it to ensure optimal performance. In the next section, we will guide you through the testing and adjusting process to help you fine-tune your crystal radio for the best reception. Let’s proceed to the next section!
Testing and Adjusting the Crystal Radio
After completing the construction of your crystal radio, it’s time to test and adjust it to ensure optimal performance and reception. Follow these steps to test and fine-tune your crystal radio:
- Tune in to a Station: Turn on your crystal radio and adjust the tuning capacitor to find a radio station. Start with lower frequencies and gradually increase until you hear a station clearly.
- Adjust the Antenna: If the reception is weak or you are hearing static, try repositioning the antenna. Experiment with different orientations and elevations to achieve the best signal strength.
- Check the Ground Connection: If you’re experiencing interference or poor reception, check the ground connection. Ensure that it is properly connected and secure. Consider experimenting with different grounding methods to improve reception.
- Experiment with the Crystal Detector: If you are not satisfied with the clarity or volume of the audio signal, you can experiment with different types of crystal detectors or adjust the position of the cat’s whisker on the crystal. Be cautious and delicate when making adjustments to avoid damaging the crystal or disrupting the connection.
- Make Small adjustments: Fine-tuning a crystal radio requires patience and small adjustments. Try rotating the tuning capacitor slowly, moving the antenna slightly, or repositioning the crystal detector to find the best reception.
- Take Note of Best Settings: Once you have found a station with good reception, make note of the specific settings. This will help you quickly tune in to the same station again in the future.
Remember that crystal radios are sensitive to environmental factors and may require adjustments from time to time. Interference from nearby electronic devices, changes in atmospheric conditions, or even the time of day can affect the performance of your crystal radio. Don’t be afraid to experiment and make small adjustments as needed.
Enjoy the process of fine-tuning your crystal radio and exploring the different radio stations you can pick up. Now, you are ready to sit back, relax, and enjoy the wonder of radio waves with your homemade crystal radio.
Conclusion
Congratulations on successfully building your very own crystal radio! By embarking on this journey, you have gained a deeper understanding of radio frequency, electromagnetic waves, and basic circuitry principles. You have learned how the different components, such as the crystal detector, tuning capacitor, antenna, and earphone, work together to enable the reception of AM radio signals.
Building a crystal radio is not just a fun and hands-on project but also a great way to explore the world of radio waves and electronics. It has offered you the opportunity to dive into the intricacies of tuning, antenna positioning, and grounding, all while experiencing the joys of picking up local radio stations without the need for batteries or external power.
Through the process of testing and adjusting your crystal radio, you have honed your skills in problem-solving and critical thinking. The ability to fine-tune the reception, experiment with different components, and optimize your crystal radio’s performance is a valuable skill that can be applied to future electronic projects.
Remember, crystal radios are just the beginning of your exploration into the vast world of radio technology. As you continue to develop your knowledge and skills, you can venture into more complex radio designs and even explore digital broadcasting and satellite communication.
We hope this guide has provided you with the necessary information and inspiration to build your crystal radio successfully. Whether you enjoy the soothing melodies of music or the captivating stories from talk radio, your crystal radio will continue to provide you with hours of entertainment and learning.
So, get ready to tune in and experience the wonders of radio transmission with your very own homemade crystal radio.

