Home>Devices & Equipment>Subwoofer>How To Make Fiberglass Subwoofer Enclosures

Subwoofer
How To Make Fiberglass Subwoofer Enclosures
Published: January 20, 2024
Learn how to create durable and custom fiberglass subwoofer enclosures with our step-by-step guide. Enhance your audio experience with expert tips and techniques for optimizing subwoofer performance.
(Many of the links in this article redirect to a specific reviewed product. Your purchase of these products through affiliate links helps to generate commission for AudioLover.com, at no extra cost. Learn more)
Table of Contents
Introduction:
In the world of audio enthusiasts, having a powerful and immersive sound system is a top priority. Whether you’re into music, movies, or gaming, a subwoofer is an essential component that can take your audio experience to the next level. The deep, rumbling bass provided by a subwoofer adds depth and richness to the overall sound, making it an absolute must-have for any audio setup.
While there are pre-made subwoofer enclosures available in the market, building your own fiberglass subwoofer enclosure can offer several advantages. It allows for customization, ensuring that the enclosure fits perfectly in your desired space or vehicle. Additionally, fiberglass enclosures are known for their durability, lightweight properties, and excellent sound insulation, making them a popular choice among audiophiles.
In this guide, we will take you through the step-by-step process of creating your own fiberglass subwoofer enclosure. From planning and design to the finishing touches, we’ll cover everything you need to know to make a high-quality enclosure that will complement your audio system.
Before we dive into the construction process, let’s take a look at the materials and tools you will need:
- Fiberglass cloth
- Fiberglass resin
- MDF board (medium-density fiberboard)
- Wood screws
- Masking tape
- Sanding tools (sandpaper, sanding block)
- Primer
- Spray paint
- Protective gear (gloves, goggles, mask)
- Measuring tape
- Marker or pencil
Once you have gathered these materials and tools, you’re ready to move on to the planning and design phase.
Materials and Tools Needed:
Before you embark on the journey of building your own fiberglass subwoofer enclosure, it’s important to ensure that you have all the necessary materials and tools at your disposal. Here’s a list of what you’ll need:
Materials:
- Fiberglass Cloth: This is the main material that will be used to reinforce the structure of the enclosure. Fiberglass cloth is a flexible and strong fabric that, when combined with resin, forms a sturdy and durable composite.
- Fiberglass Resin: Resin is a crucial component in the fiberglassing process. It acts as a binder, holding the fibers of the fiberglass cloth together and forming a solid, rigid surface. Make sure to choose a high-quality resin that is compatible with the fiberglass cloth you are using.
- MDF Board (Medium-Density Fiberboard): MDF board will serve as the base material for the enclosure. It is a sturdy and dense material that is easy to work with and provides excellent sound insulation. Choose an MDF board of appropriate thickness and size for your desired enclosure dimensions.
- Wood Screws: These will be used to secure the MDF panels together and create a solid structure. Opt for screws that are appropriate in length and thickness for your specific project.
- Masking Tape: This will be used to create temporary molds for the enclosure and seal any gaps during the fiberglassing process.
- Sanding Tools: To achieve a smooth and even surface, you will need various sanding tools such as sandpaper and a sanding block. These will be used to shape the enclosure and smooth out any rough edges.
- Primer: Before applying the final finish to the enclosure, it is essential to apply a primer to ensure better adhesion and a more polished final result. Choose a primer that is suitable for the type of finish you prefer.
- Spray Paint: This will be used to add color and aesthetics to the enclosure. Select a spray paint that is compatible with the primer and provides a durable and visually appealing finish.
- Protective Gear: Safety should always be a top priority when working with fiberglass and other construction materials. Wear gloves, goggles, and a mask to protect yourself from any potential hazards.
- Measuring Tape and Marker or Pencil: These basic tools will help you accurately measure and mark the dimensions on the MDF board and other components.
Having all of these materials readily available will ensure a smooth and efficient construction process. Now that you have gathered everything you need, let’s move on to the planning and design phase.
Planning and Design:
Before you start building your fiberglass subwoofer enclosure, careful planning and design are crucial for a successful outcome. Taking the time to plan and measure will help ensure that the enclosure fits your specific requirements and achieves the desired sound quality. Here are the key steps to follow during the planning and design phase:
1. Determine Your Space:
First, assess the available space where the subwoofer enclosure will be installed. Consider factors such as the dimensions, shape, and location of the space to determine the appropriate size and shape for your enclosure. Take into account any constraints, such as vehicle trunk space or available room in your home audio setup.
2. Determine Desired Frequency Range:
Consider the type of music or audio content you primarily listen to and decide on the desired frequency range for your subwoofer. Different enclosures have varying capabilities when it comes to producing low-frequency bass, so understanding your preferences will guide your design choices.
3. Choose Enclosure Type:
There are several types of subwoofer enclosures, each with its own characteristics and benefits. The most common types include sealed enclosures, ported enclosures, and bandpass enclosures. Research each type and select the one that best suits your desired sound and space constraints.
4. Sketch Your Design:
Using the measurements of your available space, sketch a design of the enclosure. Consider the shape, dimensions, and internal volume required for your chosen enclosure type. This will serve as a blueprint for constructing the enclosure.
5. Calculate Enclosure Volume:
Once you have a design sketch, use an enclosure volume calculator specific to your chosen enclosure type to determine the optimal internal volume. The volume is important for achieving the desired sound quality and bass response.
6. Consider Speaker Placement:
Take into account the placement of the subwoofer driver within the enclosure. The position and orientation of the driver can significantly impact the sound output. Consult the driver manufacturer’s recommendations for optimal placement.
By following these planning and design steps, you will be well-prepared to begin constructing your subwoofer enclosure. With a clear vision in mind, you can move on to the next phase of the build – building the enclosure itself.
Building the Enclosure:
Now that you have completed the planning and design phase, it’s time to start constructing your fiberglass subwoofer enclosure. Follow these steps to build the basic structure of the enclosure:
1. Prepare the MDF Panels:
Using the measurements and dimensions from your design sketch, cut the MDF panels accordingly. You will need panels for the front, back, sides, and top/bottom of the enclosure. Ensure that the panels are cut precisely and fit together snugly.
2. Assemble the Panels:
Using wood screws and a screwdriver, assemble the MDF panels to form the basic structure of the enclosure. Start by attaching the front panel to the sides, then attach the back panel. Finally, secure the top/bottom panel to complete the box-like structure.
3. Reinforce the Joints:
To strengthen the joints and minimize vibrations, you can reinforce them by applying wood glue along the seams before screwing the panels together. This will ensure a solid and sturdy enclosure.
4. Test the Fit:
Once the basic structure is assembled, test the fit of the subwoofer driver and any necessary ports or openings. Make any adjustments if needed to ensure a proper fit and alignment.
5. Seal Any Gaps:
Inspect the enclosure for gaps or holes and seal them with wood filler or silicone caulk. This will prevent any air leaks that could affect the sound quality.
6. Let the Structure Dry:
Allow the enclosure to dry and set for a few hours before moving on to the next step. This will ensure that the structure is stable and ready for the fiberglass reinforcement.
With the basic structure of the enclosure built, you are ready to move on to the next phase – reinforcing the enclosure with fiberglass. This step will provide additional strength to the enclosure and prepare it for the final finishing touches.
Reinforcing the Enclosure:
Now that you have built the basic structure of your subwoofer enclosure, it’s time to reinforce it with fiberglass. This process will add strength and rigidity to the enclosure, ensuring that it can withstand the vibrations and pressure generated by the subwoofer. Follow these steps to reinforce your enclosure:
1. Prepare the Fiberglass Cloth:
Cut the fiberglass cloth into manageable pieces that can be easily applied to the enclosure. Ensure that the pieces are slightly larger than the areas they will cover to allow for overlapping and proper adhesion.
2. Mix the Fiberglass Resin:
Follow the manufacturer’s instructions to mix the fiberglass resin. Typically, this involves combining the resin with a catalyst in the recommended ratio and stirring it thoroughly. Wear protective gloves and work in a well-ventilated area when handling resin.
3. Apply the Fiberglass Resin:
Using a brush or roller, apply a thin layer of fiberglass resin onto the surface of the enclosure. Make sure to cover the entire area that will be reinforced with fiberglass cloth.
4. Place the Fiberglass Cloth:
Take a piece of the fiberglass cloth and press it onto the wet resin, ensuring that it adheres to the surface of the enclosure. Smooth out any air bubbles or wrinkles using a brush or roller. Continue applying more resin and layering the fiberglass cloth until the entire area is covered.
5. Repeat for Multiple Layers:
If desired, repeat the process of applying resin and fiberglass cloth to create multiple layers. Adding more layers will provide additional strength and durability to the enclosure.
6. Trim Excess Fiberglass:
Once the layers of fiberglass are applied and the resin has cured, use a utility knife or scissors to trim any excess fiberglass cloth that extends beyond the edges of the enclosure.
7. Allow the Fiberglass to Cure:
Leave the enclosure in a well-ventilated area and allow the fiberglass resin to cure fully. Follow the manufacturer’s instructions for the recommended curing time, as it may vary depending on the brand and environmental conditions.
By reinforcing the enclosure with fiberglass, you are ensuring its structural integrity and enhancing its ability to handle the powerful bass produced by the subwoofer. After the fiberglass has cured, it’s time to move on to the next step: sanding and smoothing the surface of the enclosure.
Sanding and Smoothing the Surface:
Once the fiberglass reinforcement has cured on your subwoofer enclosure, it’s important to sand and smooth the surface to achieve a professional and polished finish. Follow these steps to prepare the enclosure for the final stage of finishing:
1. Gather the Necessary Tools:
Before starting the sanding process, gather the required tools, including sandpaper of varying grits (ranging from coarse to fine), a sanding block, and a dust mask to protect yourself from the dust.
2. Begin with Coarse Grit Sandpaper:
Using a piece of coarse grit sandpaper, gently sand the surface of the enclosure. This will help remove any rough edges, bumps, or imperfections caused by the fiberglass reinforcement. Be sure to sand evenly and apply light pressure to avoid damaging the fiberglass layer.
3. Move to Finer Grits:
Once the rough surface has been smoothed out, progress to finer grit sandpaper. Gradually work your way through the various grits, using a sanding block to maintain an even surface. This will help refine the texture and remove any remaining inconsistencies on the enclosure.
4. Check for Smoothness:
Periodically check the surface of the enclosure for smoothness by running your hand over it. If you feel any rough spots or uneven areas, continue sanding with finer grit sandpaper until the surface feels uniformly smooth.
5. Clean and Remove Dust:
After sanding, clean the enclosure thoroughly to remove any sanding residue and dust. Use a damp cloth or gentle vacuum cleaner to ensure a clean surface for the next steps of the finishing process.
6. Inspect and Touch Up:
Take a close look at the surface of the enclosure to inspect for any remaining imperfections or areas that may require touch-ups. If necessary, use a putty or filler specifically designed for fiberglass to fill in minor gaps or blemishes.
7. Final Sanding:
Perform a final sanding with a very fine grit sandpaper to ensure the smoothest possible surface. This step will prepare the enclosure for the application of primer and paint.
Through proper sanding and smoothing, you can achieve a flawless surface on your subwoofer enclosure. The next step is to move on to applying the fiberglass primer to prepare for the finishing touch, which will give your enclosure its desired look and protection.
Applying the Fiberglass:
After sanding and smoothing the surface of your subwoofer enclosure, it’s time to apply the fiberglass primer. This step is crucial for providing a protective layer and preparing the surface for the final finish. Follow these steps to ensure a successful fiberglass application:
1. Gather the Necessary Materials:
Before starting, gather the required materials, including fiberglass primer, a paint sprayer or brush, a mixing container, and protective gear such as gloves, goggles, and a mask.
2. Read and Follow the Manufacturer’s Instructions:
Read the instructions provided with the fiberglass primer to understand the proper mixing ratio and application method. Ensure that you are working in a well-ventilated area and have taken the necessary safety precautions.
3. Prepare the Primer Mixture:
Using the mixing container, combine the fiberglass primer and other additives or catalysts according to the instructions. Thoroughly mix the components until they are well-blended.
4. Apply the Primer:
Using a paint sprayer or brush, apply a thin and even coat of the fiberglass primer onto the surface of the enclosure. Work methodically, covering one section at a time. Avoid applying too much primer to prevent drips or runs.
5. Allow the Primer to Dry:
Refer to the instructions for the recommended drying time of the primer. Allow the primer to dry completely before moving on to the next step. This will ensure a smooth and even foundation for the final finishing coat.
6. Sand the Primer Layer:
After the primer has dried, lightly sand the surface with a fine grit sandpaper to smooth out any imperfections or rough spots. This will provide a smooth surface for painting and further improve the appearance of the enclosure.
7. Clean the Surface:
Thoroughly clean the enclosure to remove any dust or debris from sanding. Use a damp cloth or gentle vacuum cleaner to ensure a clean and dust-free surface for the final finish. Allow the enclosure to dry completely before proceeding.
By properly applying the fiberglass primer, you are not only preparing the surface for the final finish but also adding an extra layer of protection to the enclosure. Once the primer is dry and the surface is clean, you are ready for the final step – applying the desired finish to showcase your personal style.
Removing the Mold:
After the fiberglass has cured and the enclosure is reinforced and primed, the next step is to remove the mold that was used during the construction process. Removing the mold requires careful handling to ensure the integrity of the fiberglass enclosure. Follow these steps to safely and effectively remove the mold:
1. Loosen the Mold:
Gently tap or pry around the edges of the mold with a rubber mallet or a plastic tool to loosen it from the enclosure. Take your time and be cautious to avoid damaging the fiberglass or the enclosure’s surface.
2. Wiggle and Rotate:
Once the mold is loosened, gently wiggle and rotate it to further release it from the enclosure. Gradually work your way around the mold until it becomes loose enough to be removed.
3. Lift the Mold:
Carefully lift the mold away from the enclosure, keeping an eye out for any areas that may still be stuck. If necessary, use a plastic tool or your fingers to gently separate the mold from any stubborn spots without applying excessive force.
4. Clean and Inspect:
After removing the mold, take a moment to clean any debris or residue that may have accumulated on the enclosure. Use a soft cloth or sponge dampened with water or a mild cleaning solution to gently wipe away any dirt or excess mold release agent. Inspect the surface for any imperfections or areas that may need touch-ups.
5. Touch Up if Required:
If you notice any imperfections or areas that need refinement, such as rough edges or minor blemishes, now is the time to address them. Use appropriate materials and techniques to touch up and refine the surface as needed, ensuring that the final look is clean and smooth.
6. Let the Enclosure Settle:
Allow the enclosure to settle and acclimate to its final form for a couple of days before moving forward with the finishing touches. This will help ensure that the structure is stable and any touch-ups have adequately adhered.
By carefully removing the mold, you are unveiling the true form of your fiberglass enclosure. With the mold removed, you are now ready to apply the final finishing touches and bring your subwoofer enclosure project to completion.
Finishing Touches:
With the mold removed and the fiberglass enclosure in its final form, it’s time to add the finishing touches to complete the project. The finishing stage involves adding the desired visual aesthetic to the enclosure, making it not only sound great but also look great. Follow these steps to add the final touches:
1. Apply Primer:
If you haven’t already applied a primer during the earlier steps, now is the time to prime the enclosure. Use a primer specifically designed for the chosen finish, whether it’s paint, vinyl wrap, or another type of coating. Apply the primer to create a smooth and uniform base for the final finish.
2. Choose the Finish:
Consider the overall aesthetic you want to achieve and choose a finish that matches your style. Options include painting the enclosure with a color that complements your audio setup or wrapping it in a decorative vinyl material. Research various finishes and select the one that best suits your preferences.
3. Apply the Finish:
Follow the manufacturer’s instructions for the chosen finish and apply it to the enclosure. Whether it’s paint or vinyl wrap, make sure to apply thin, even layers to avoid drips, runs, or bubbles. Take your time and use proper techniques to achieve the desired appearance.
4. Allow Drying or Curing:
Once the finish is applied, allow it to dry or cure according to the manufacturer’s instructions. This step is important to ensure that the finish adheres properly and achieves its optimal appearance. Be patient and give the enclosure sufficient time to fully dry or cure.
5. Fine-Tune the Installation:
While the finishing touches mainly focus on the aesthetics, it’s also important to fine-tune the installation of the subwoofer. Double-check the alignment and secure mounting of the subwoofer driver, ensuring that it is positioned correctly for optimal sound output.
6. Test and Enjoy:
After completing the finishing touches, it’s time to test your subwoofer enclosure and enjoy the enhanced audio experience it provides. Play your favorite music or movies and appreciate the deep and immersive bass that your custom-built enclosure delivers.
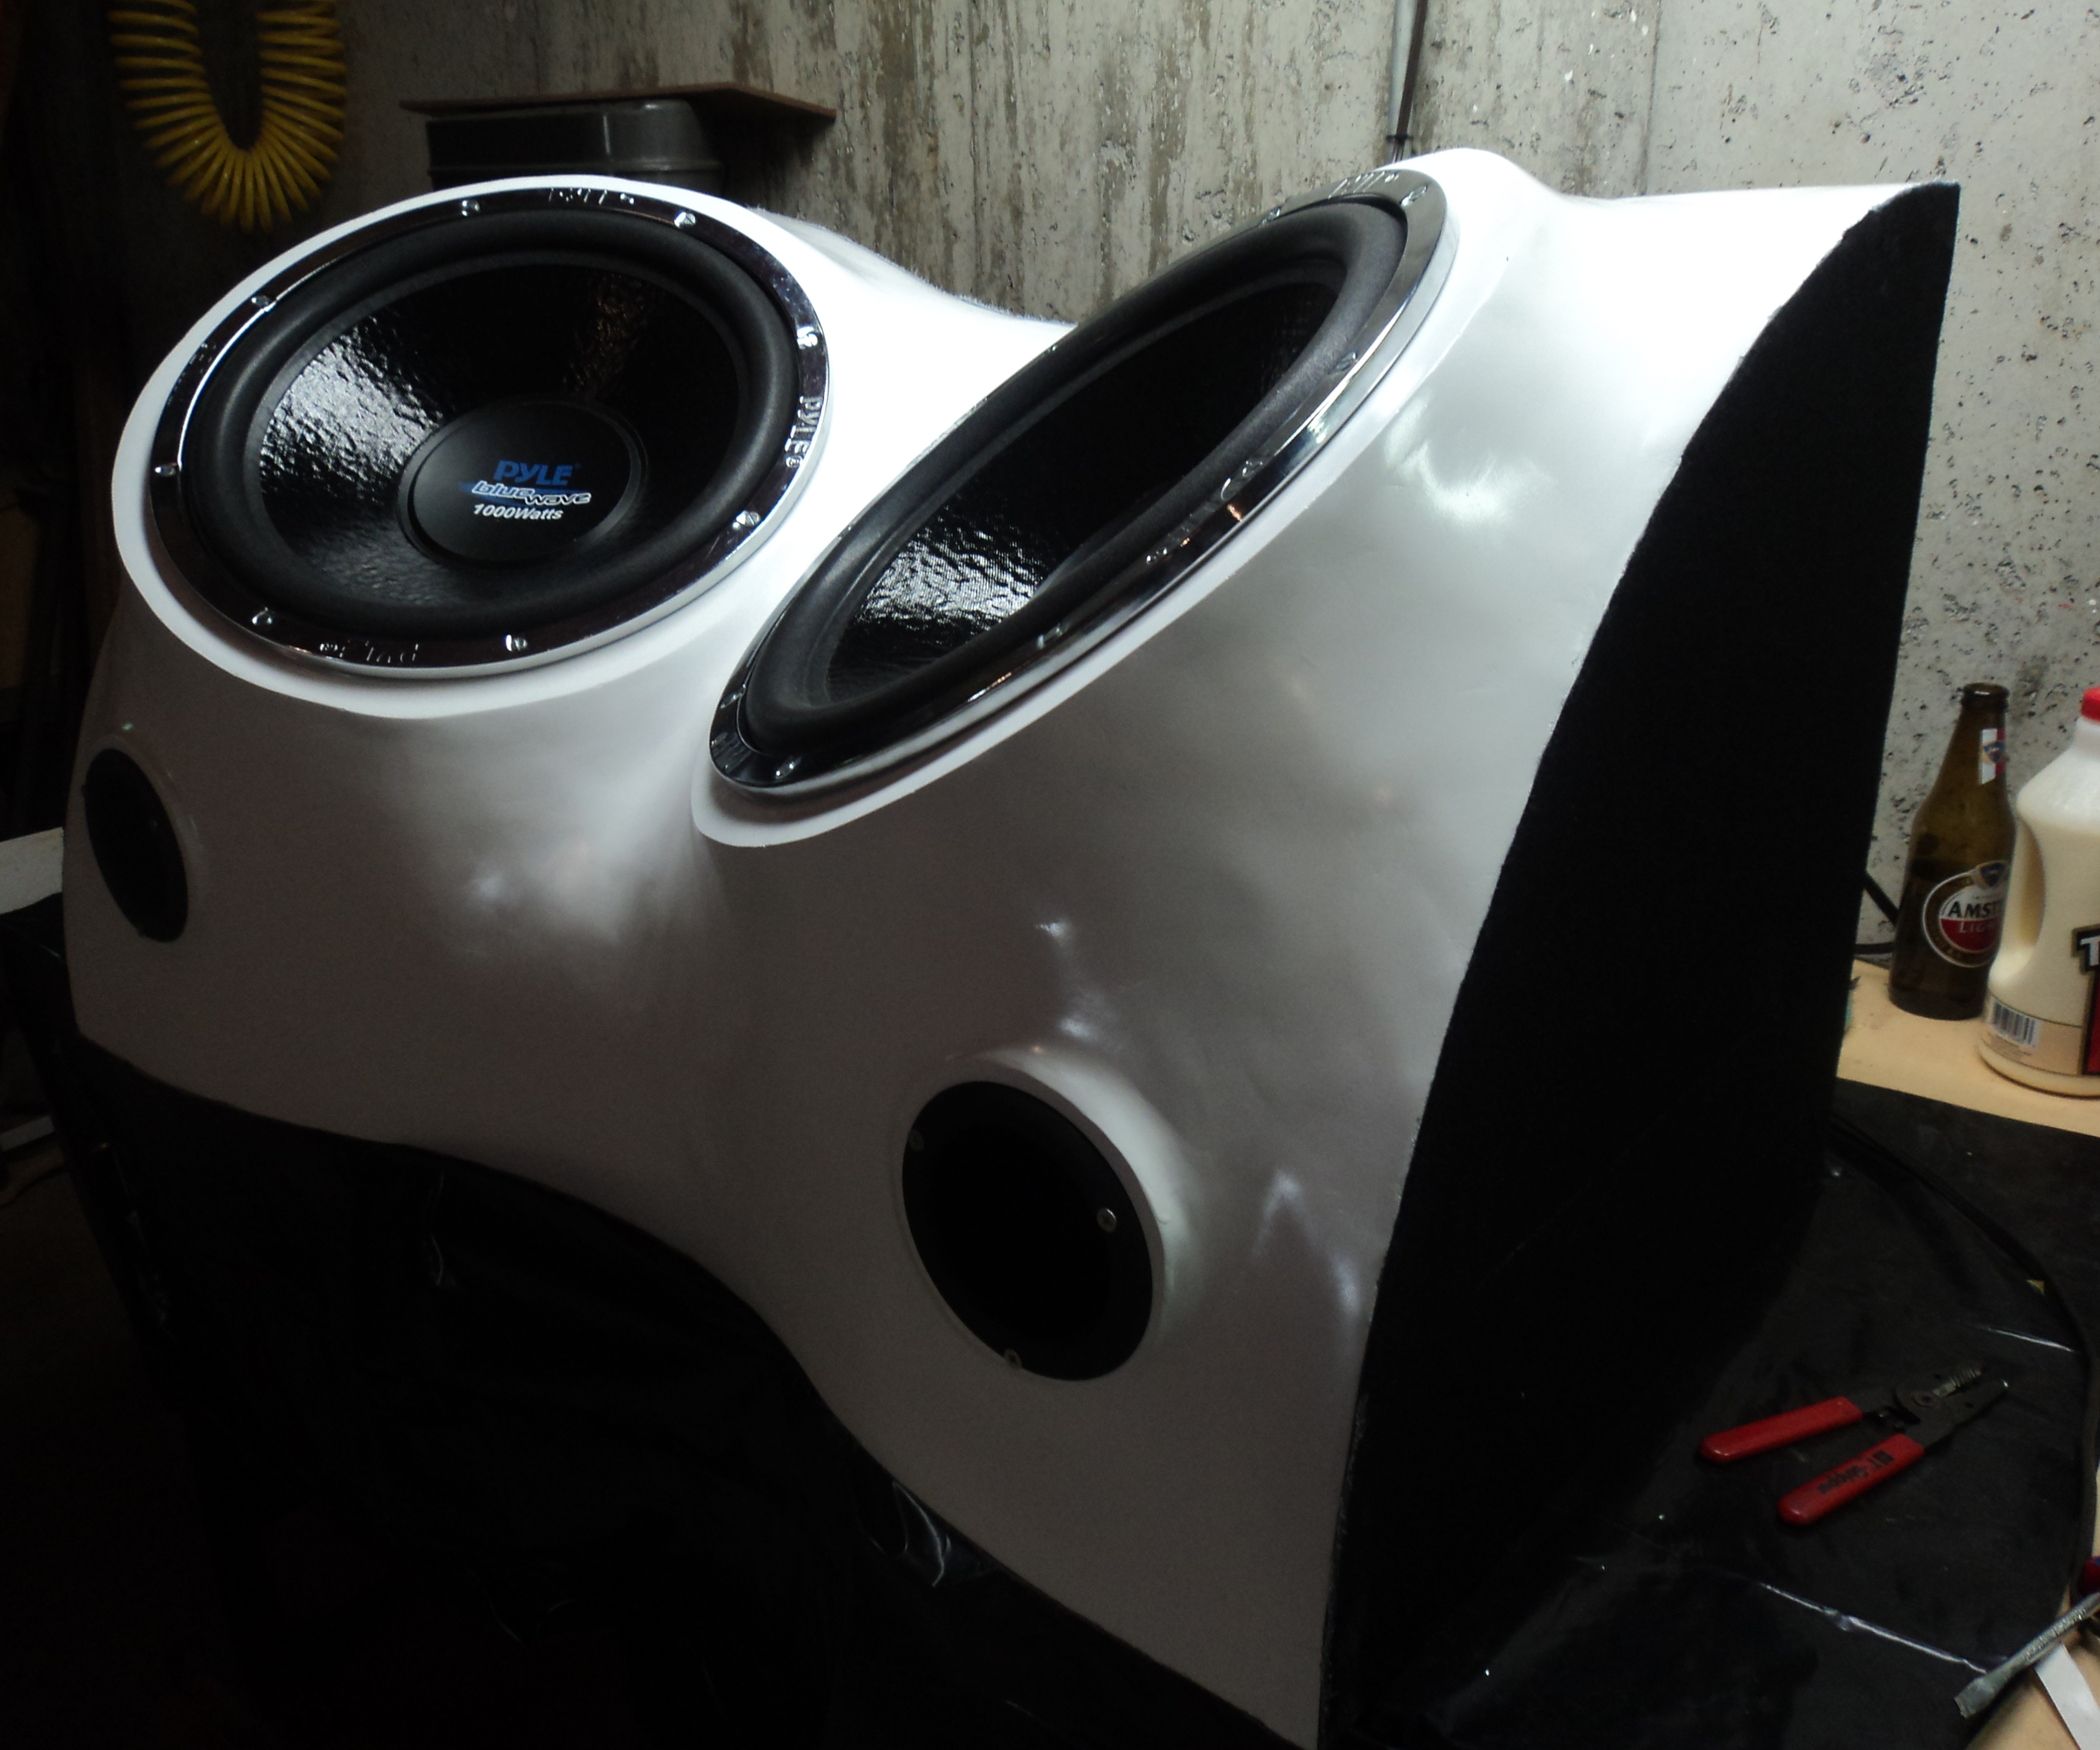
With the finishing touches complete, you can proudly showcase your subwoofer enclosure as a visual and auditory masterpiece. The time and effort invested in building and refining the enclosure have resulted in a personalized, high-quality addition to your audio setup.
Conclusion:
Congratulations on completing your journey of building a fiberglass subwoofer enclosure! By following the steps outlined in this guide, you have successfully created a custom enclosure that not only enhances the performance of your subwoofer but also showcases your personal style and craftsmanship.
Throughout the process, you learned about the materials and tools needed, the importance of planning and design, and the steps involved in building, reinforcing, sanding, removing the mold, and applying the final finish to the enclosure. Each step played a crucial role in creating a durable, high-quality, and visually appealing enclosure.
Not only can you enjoy the deep, rumbling bass that your subwoofer now produces, but you can also take pride in the fact that you constructed it with your own hands. Your customized fiberglass subwoofer enclosure is a reflection of your passion for audio and your dedication to achieving the best possible sound experience.
Remember to always adhere to safety precautions and consult manufacturer guidelines and recommendations throughout the construction process. Building a fiberglass subwoofer enclosure requires patience, attention to detail, and a commitment to quality, but the end result is well worth the effort.
Now it’s time to sit back, relax, and enjoy the immersive and powerful sound that your custom-built subwoofer enclosure brings to your audio system. Whether you use it for music, movies, or gaming, the deep bass created by your subwoofer enclosure will undoubtedly enhance your overall audio experience and make every listening session more immersive and enjoyable.
Thank you for embarking on this DIY journey with us. We hope that this guide has provided you with the knowledge and inspiration to create a subwoofer enclosure that exceeds your expectations. Happy listening!


