Home>Devices & Equipment>Subwoofer>How To Recone A Subwoofer
Subwoofer
How To Recone A Subwoofer
Published: January 22, 2024
Learn how to recone a subwoofer and restore its powerful sound with our step-by-step guide. Improve your subwoofer performance and save money with our expert tips and techniques.
(Many of the links in this article redirect to a specific reviewed product. Your purchase of these products through affiliate links helps to generate commission for AudioLover.com, at no extra cost. Learn more)
Table of Contents
- Introduction
- What is Reconing?
- When to Recone a Subwoofer
- Understanding the Parts of a Subwoofer
- Materials and Tools Needed
- Step 1: Removing the Damaged Cone
- Step 2: Cleaning the Voice Coil Gap
- Step 3: Installing the New Cone
- Step 4: Aligning and Centering the Coil
- Step 5: Gluing the Surround and Spider
- Step 6: Reassembling the Subwoofer
- Step 7: Testing the Reconed Subwoofer
- Common Mistakes to Avoid
- Conclusion
Introduction
Welcome to our comprehensive guide on how to recone a subwoofer. If you’re a audio enthusiast or someone who enjoys DIY projects, understanding how to recone a subwoofer can be a valuable skill to have. Over time, subwoofers can endure wear and tear, resulting in damaged cones or voice coils that affect the sound quality. Reconing a subwoofer involves replacing the damaged parts to restore its optimal functionality.
Reconing a subwoofer may seem like a daunting task, but with the right knowledge and tools, it can be a rewarding experience. In this guide, we will walk you through the step-by-step process of reconing a subwoofer, from removing the damaged cone to testing the reconed subwoofer.
Before we delve into the details, it’s important to understand that reconing a subwoofer requires some technical expertise and patience. If you’re not confident in your skills or if your subwoofer is under warranty, it’s best to consult a professional or the manufacturer for repairs. However, if you’re up for the challenge and willing to learn, let’s dive into the world of reconing subwoofers!
What is Reconing?
Reconing is the process of replacing the damaged components of a subwoofer to restore its optimal performance. Subwoofers are designed to handle low-frequency sounds with high power, which puts a significant strain on the internal components.
Over time, the voice coil, cone, surround, or spider of a subwoofer may experience wear and tear. This can lead to issues such as distortion, rattling, or even complete failure of the subwoofer. Reconing allows you to replace these damaged parts, extending the lifespan of your subwoofer and maintaining its excellent sound quality.
Reconing a subwoofer involves various steps, including removing the damaged cone, cleaning the voice coil gap, installing a new cone, aligning and centering the coil, gluing the surround and spider, and finally reassembling the subwoofer. Each step requires precision and attention to detail to ensure a successful recone.
It’s important to note that not all subwoofers can be reconed. Some lower-end or budget subwoofers may not have recone kits available, or the cost of reconing may exceed the price of a new subwoofer. If you’re considering reconing a subwoofer, it’s essential to do research and determine if it’s a viable option for your specific model.
Reconing a subwoofer can be a cost-effective alternative to purchasing a new one, especially if you have a high-quality subwoofer or if you’re passionate about audio and want to learn more about its inner workings. So, if you’re ready to take on the challenge, let’s move on to understanding the different parts of a subwoofer.
When to Recone a Subwoofer
Knowing when to recone a subwoofer is crucial in maintaining its optimal performance and preventing further damage. Here are a few common signs that indicate it’s time to recone your subwoofer:
- Distorted or Muffled Sound: If your subwoofer produces distorted, muffled, or unclear sound, it could be a sign of a damaged cone or voice coil. Reconing the subwoofer can help restore its original sound quality.
- Rattling or Vibrating Noises: If you hear rattling or vibrating noises coming from your subwoofer, it may indicate loose or damaged components. Reconing can help eliminate these unwanted noises and vibrations.
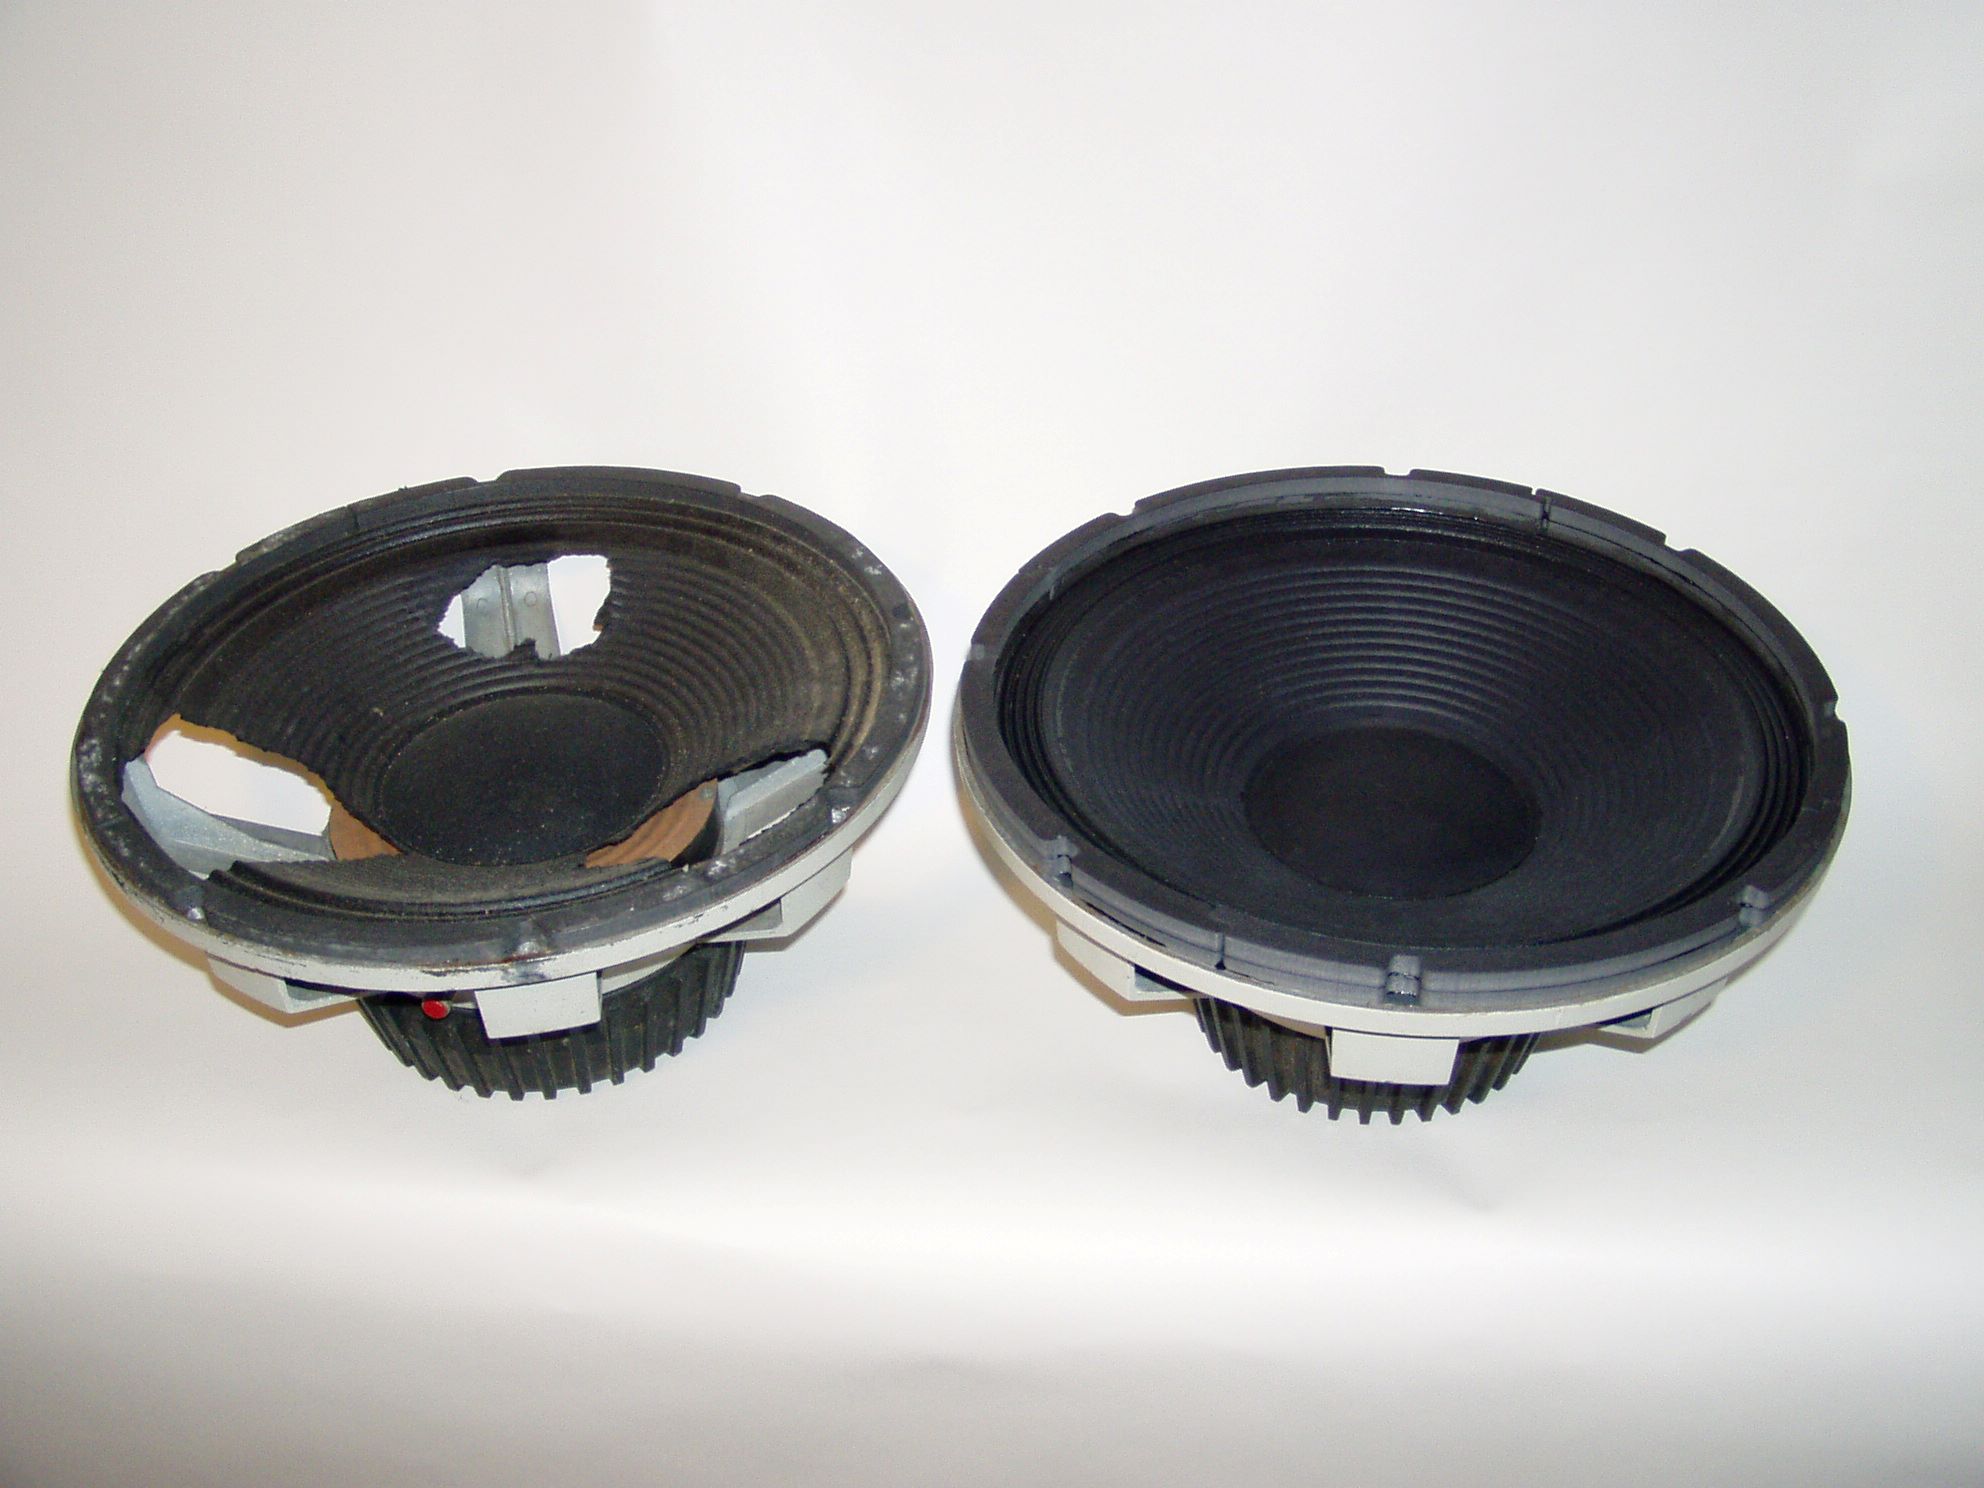
- Visible Damage to the Cone: If you see tears, holes, or other visible damage on the cone of your subwoofer, it’s a clear indication that it needs reconing. These damages can affect the subwoofer’s performance and should be addressed promptly.
- Inconsistent Performance: If your subwoofer’s performance varies significantly or if it stops working altogether, it may be due to a faulty voice coil or other internal components. Reconing can help resolve these issues and restore consistent performance.
It’s important to note that not all issues with a subwoofer require reconing. In some cases, simple repairs or adjustments may be sufficient to fix the problem. However, if the damage is extensive or if you’ve tried other troubleshooting methods without success, reconing may be the best course of action.
If you’re unsure about whether your subwoofer needs reconing, it’s recommended to consult a professional or reach out to the manufacturer for guidance. They can provide expert advice based on the specific model and condition of your subwoofer.
Now that we understand when to recone a subwoofer, let’s move on to the next section, where we’ll explore the different parts of a subwoofer in more detail.
Understanding the Parts of a Subwoofer
Before we dive into the process of reconing a subwoofer, it’s important to have a basic understanding of its different components. Here are the key parts you should be familiar with:
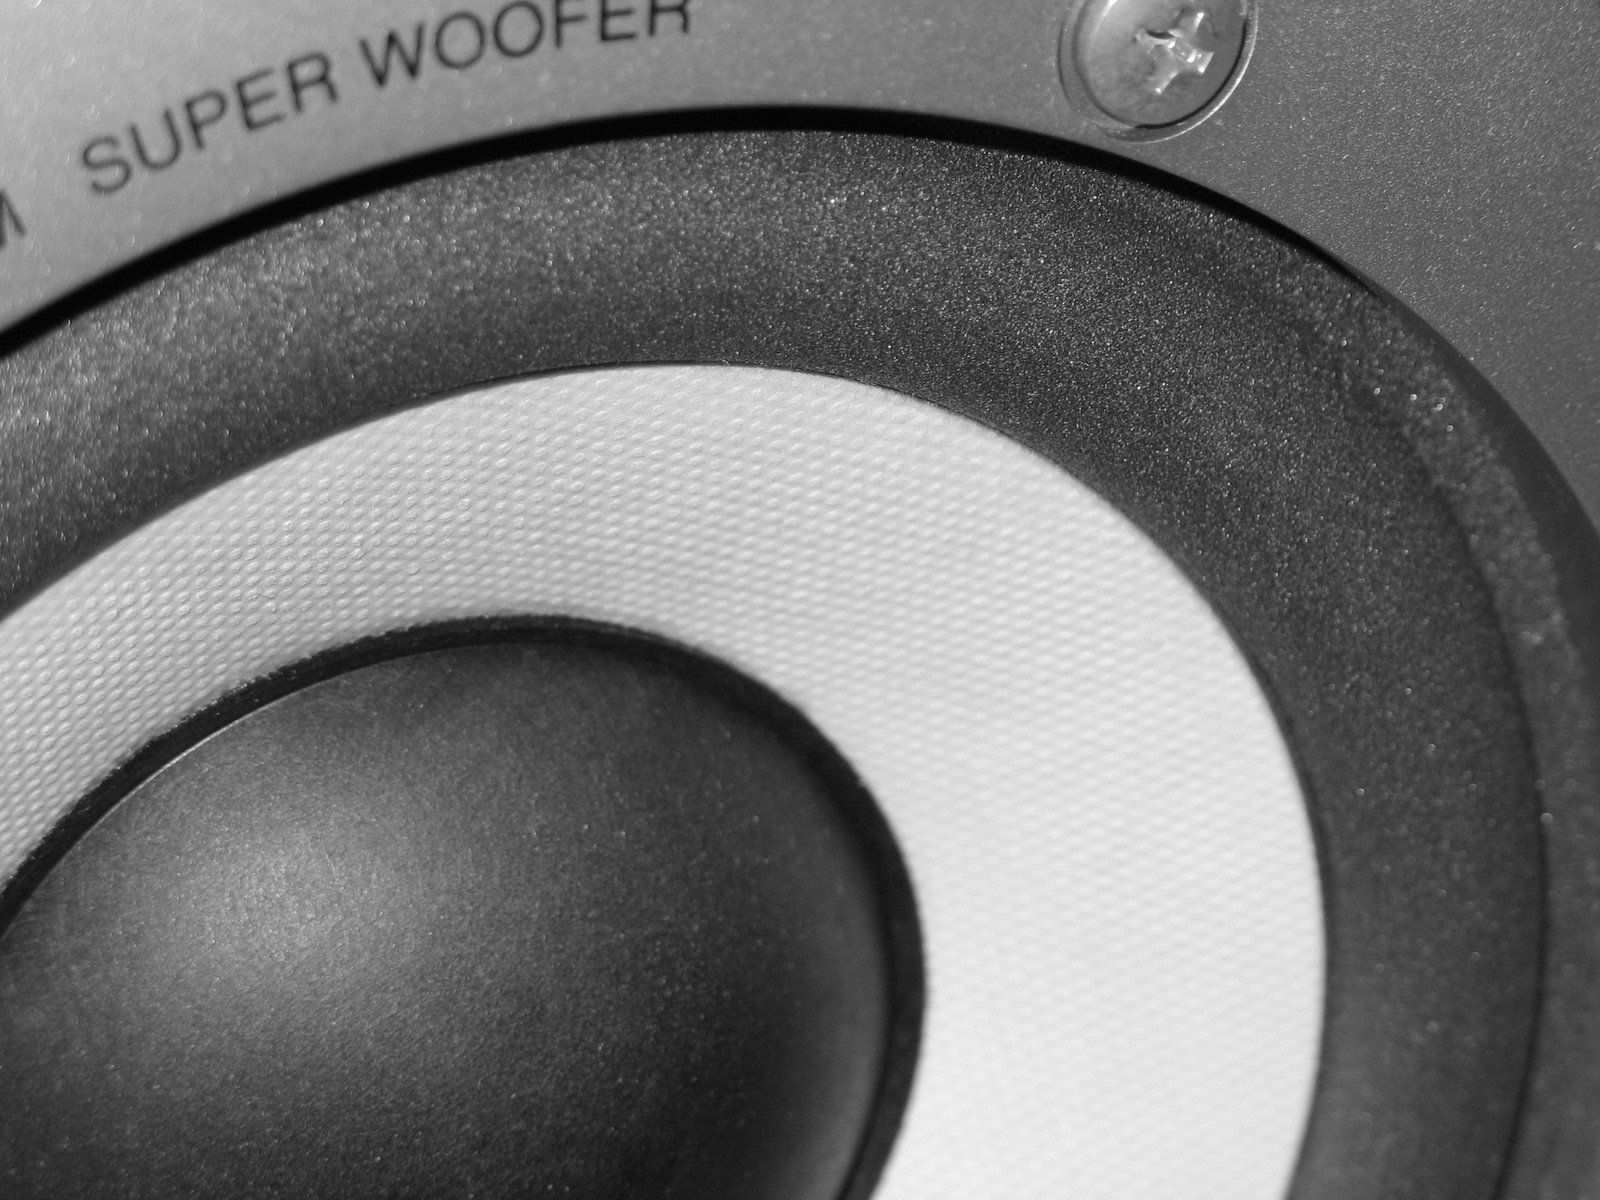
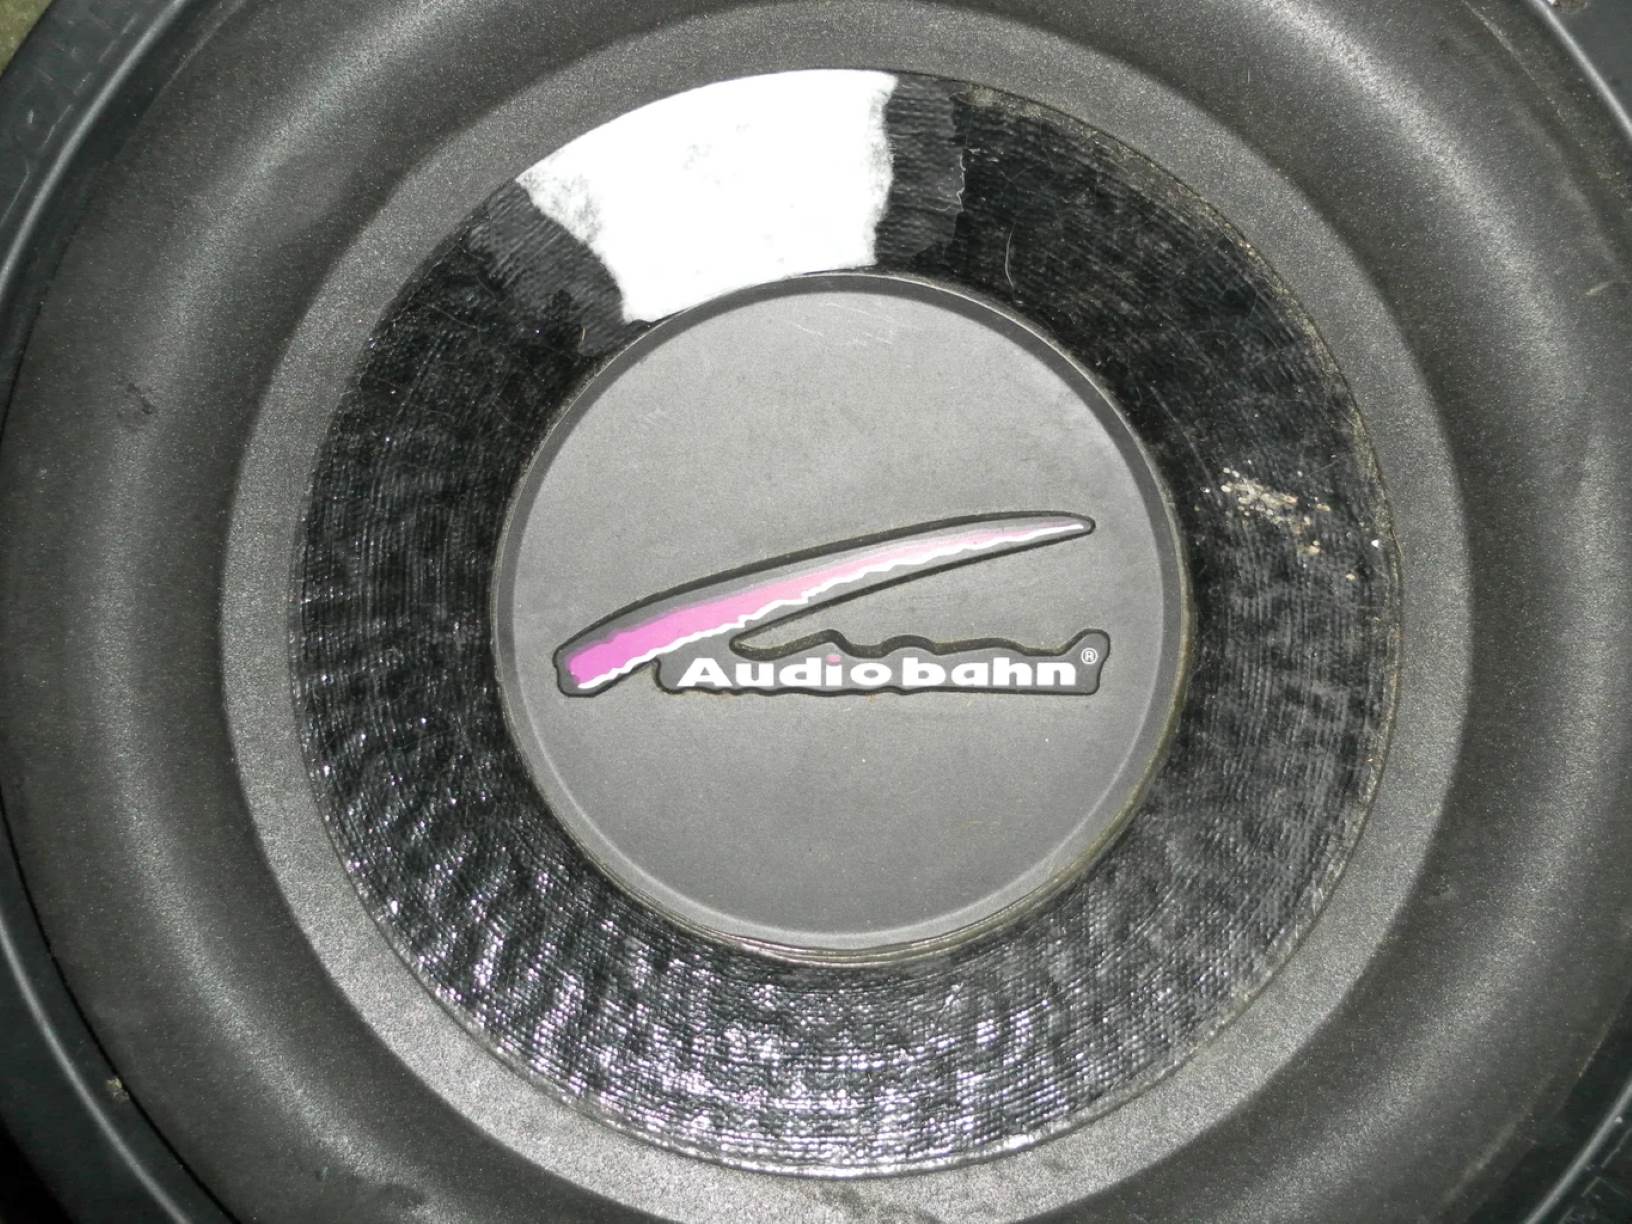
- Cone: The cone is the visible, cone-shaped diaphragm that moves air to produce sound. It is usually made of materials like paper, polypropylene, or aluminum.
- Voice Coil: The voice coil is a wire coil that is attached to the back of the cone. It is responsible for generating an electromagnetic field when current flows through it, which interacts with the magnet to produce sound.
- Magnet: The magnet provides the necessary magnetic field for the voice coil to move and create sound. It is typically a permanent magnet made of materials like ferrite or neodymium.
- Surround: The surround is a flexible ring that attaches the outer edge of the cone to the subwoofer’s frame. It allows the cone to move freely and maintain proper alignment while providing stability.
- Spider: The spider, also known as the suspension, is a flexible component that connects the voice coil to the subwoofer’s frame. It helps to center and control the movement of the voice coil, allowing it to move linearly.
- Frame: The frame, also called the basket, is the rigid structure that holds all the components of the subwoofer together. It provides support and stability.
These are the fundamental components of a subwoofer, and each plays a vital role in producing high-quality sound. Understanding their functions and how they work together will help you navigate the reconing process more effectively.
Now that we’re familiar with the parts of a subwoofer, let’s move on to the next section, where we’ll discuss the materials and tools you’ll need for reconing.
Materials and Tools Needed
Before you start reconing your subwoofer, it’s important to gather all the necessary materials and tools. Here’s a list of what you’ll need:
- Recone Kit: A recone kit contains all the components needed to replace the damaged parts of your subwoofer, including a new cone, voice coil, surround, spider, and adhesive. Make sure to choose a recone kit that is compatible with your specific subwoofer model.
- Screwdriver Set: A set of screwdrivers in various sizes will be useful for removing screws and disassembling the subwoofer.
- Nose Pliers: Nose pliers will come in handy for removing or adjusting small components, such as the voice coil or terminal connections.
- Tweezers: Tweezers are useful for handling small and delicate parts during the reconing process.
- Scissors: You’ll need a pair of scissors to trim the excess cone material and ensure a proper fit.
- Heat Gun or Hair Dryer: A heat gun or hair dryer can be used to soften adhesive and make it easier to remove old components.
- Adhesive: You’ll need adhesive specifically designed for reconing subwoofers to securely bond the new cone, surround, and spider to the subwoofer frame.
- Rubbing Alcohol: Rubbing alcohol can be used to clean the voice coil gap and remove any dirt or debris.
- Repair Guide or Instructions: It’s always helpful to have a repair guide or follow specific reconing instructions provided by the manufacturer or included in the recone kit.
Having these materials and tools ready beforehand will make the reconing process smoother and more efficient.
Now that you’re equipped with the necessary materials and tools, let’s move on to the step-by-step process of reconing a subwoofer.
Step 1: Removing the Damaged Cone
The first step in reconing a subwoofer is to remove the damaged cone. This process requires careful handling to prevent further damage to the subwoofer. Here’s a step-by-step guide:
- Disconnect the Subwoofer: Start by disconnecting the subwoofer from the power source and any audio equipment it is connected to. This will ensure your safety during the reconing process.
- Remove the Subwoofer from the Enclosure: If your subwoofer is mounted inside an enclosure, carefully remove it to provide better access to the cone and other components.
- Inspect and Document: Before removing the damaged cone, inspect its condition and take note of any specific issues or damages. This will help you identify potential causes and prevent them in the future.
- Remove the Dust Cap: The dust cap is a small circular cap in the center of the cone. Use a thin and flat object, such as a putty knife or a small screwdriver, to gently pry off the dust cap from the cone. Be careful not to damage the cone or the dust cap.
- Loosen the Surround: The surround is the flexible ring that attaches the outer edge of the cone to the subwoofer frame. Gently loosen the surround by using your fingers or a small tool. Be cautious not to tear or damage it in the process.
- Detach the Cone: Once the surround is loosened, carefully detach the cone from the voice coil and magnet assembly. Take your time to ensure a smooth and controlled removal.
During the process of removing the damaged cone, it’s important to handle the subwoofer and its components with care. Avoid applying excessive force or causing any unnecessary damage.
Once the damaged cone is successfully removed, you can move on to the next step, which involves cleaning the voice coil gap.
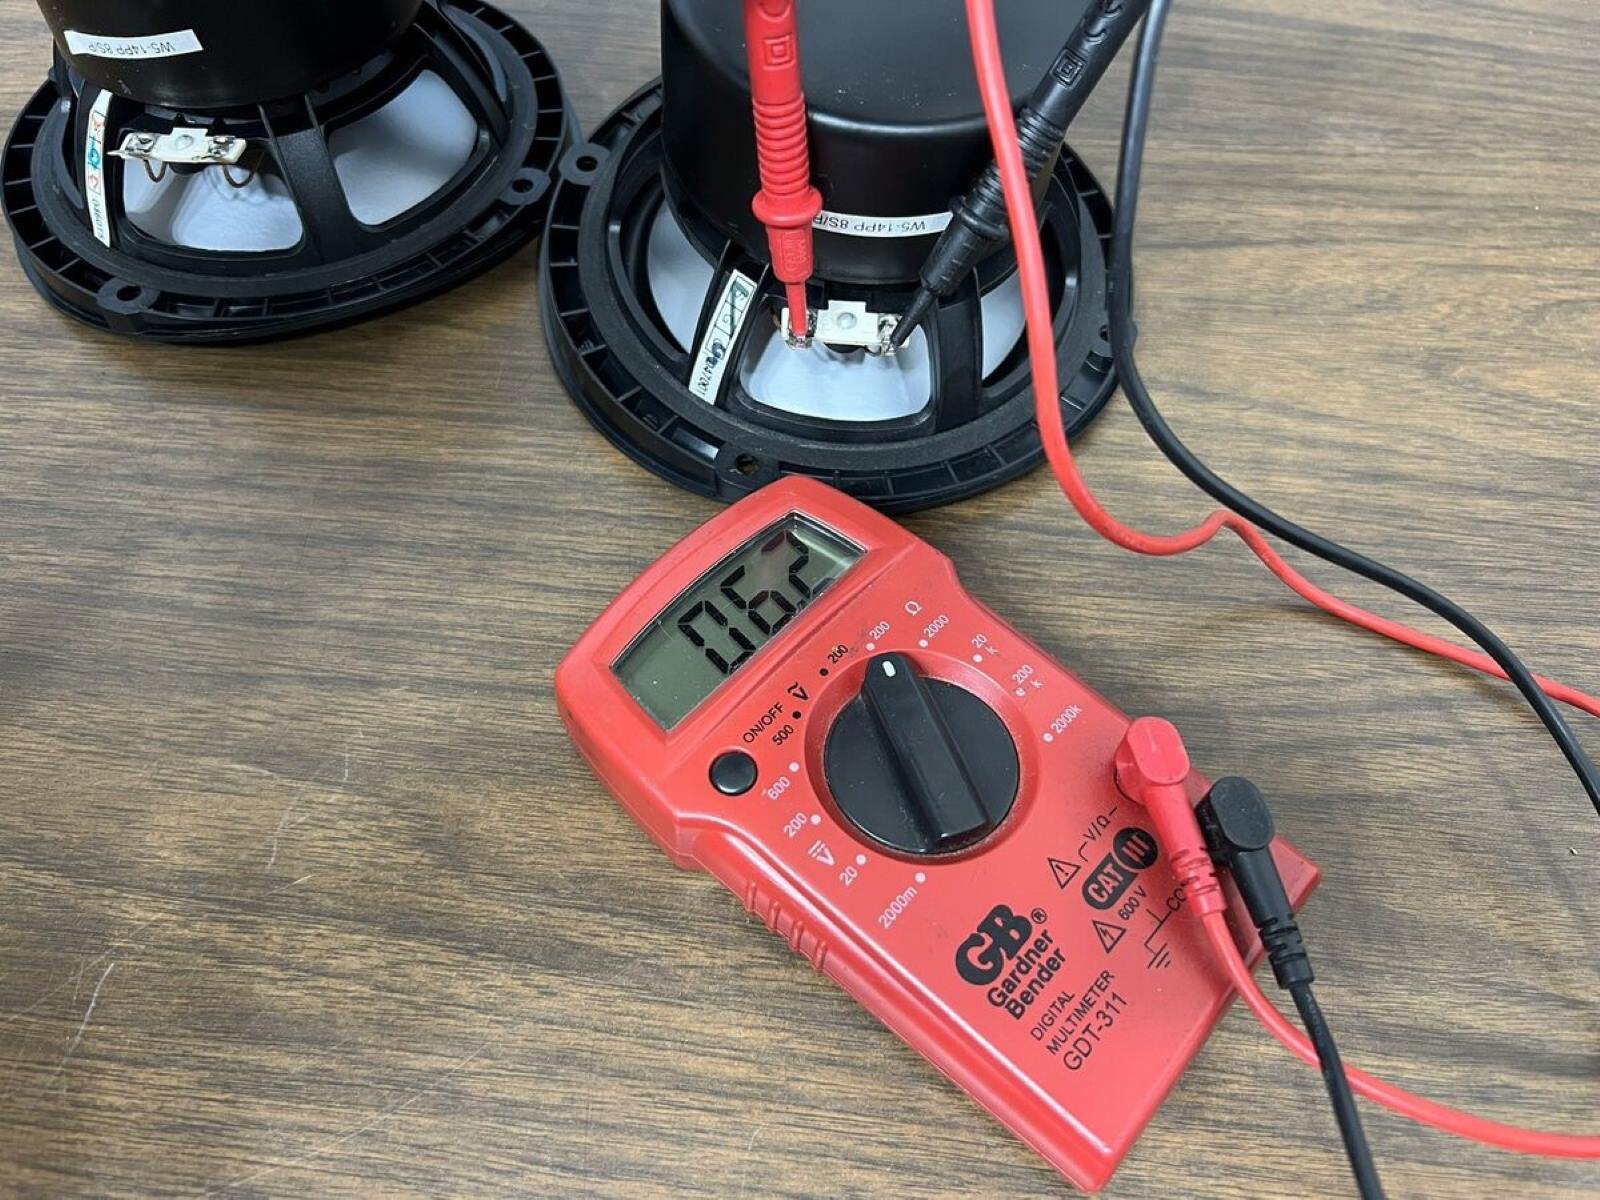
Step 2: Cleaning the Voice Coil Gap
After removing the damaged cone, the next crucial step in reconing a subwoofer is to clean the voice coil gap. Over time, dirt, debris, and adhesive residue can accumulate in the gap, affecting the subwoofer’s performance. Here’s a step-by-step guide on how to clean the voice coil gap:
- Gather the Necessary Tools: Before cleaning, make sure you have rubbing alcohol, cotton swabs, and a soft brush or toothbrush handy.
- Dampen the Cotton Swab: Moisten a cotton swab with rubbing alcohol. Make sure it is not soaking wet, as excess liquid can potentially damage the voice coil or other components.
- Gently Clean the Gap: Insert the dampened cotton swab into the voice coil gap and move it in a circular motion. This will help remove any dirt, debris, or adhesive residue that may have accumulated.
- Use a Soft Brush: If necessary, use a soft brush or toothbrush to gently scrub the gap. Be careful not to apply too much pressure or damage the delicate components.
- Remove Excess Residue: After cleaning, use a dry cotton swab to remove any excess rubbing alcohol or debris from the voice coil gap. Ensure that the gap is completely dry before proceeding to the next step.
Cleaning the voice coil gap is essential to ensure proper alignment and movement of the new cone. It helps to eliminate any obstructions that may hinder the subwoofer’s performance.
Now that the voice coil gap is clean, we can move on to the next step, which involves installing the new cone.
Step 3: Installing the New Cone
Once the voice coil gap is clean, the next step in reconing a subwoofer is to install the new cone. This process requires precise alignment and careful handling to ensure the best performance and longevity of the subwoofer. Here’s a step-by-step guide on how to install the new cone:
- Prepare the New Cone: Take the new cone from your recone kit and inspect it for any defects or damages. Ensure that it is the correct size and type for your subwoofer model.
- Apply Adhesive: Apply a thin layer of adhesive to the area where the cone will attach to the voice coil. Be sure to use a compatible adhesive recommended by the recone kit or manufacturer.
- Align the Cone: Carefully align the new cone with the voice coil and gently press it into position. Take your time to ensure that it is properly centered and sits flush with the subwoofer’s frame.
- Secure the Cone: Apply light and even pressure to the cone to ensure a secure bond with the voice coil. You can use your hands or a soft tool to achieve this. Avoid applying excessive force that could damage the cone or other components.
- Clean Excess Adhesive: Wipe away any excess adhesive that squeezed out during the installation process. Use a clean cloth or cotton swab moistened with rubbing alcohol.
- Allow the Adhesive to Cure: Follow the instructions provided with the adhesive to determine the recommended curing time. It’s important to allow sufficient time for the adhesive to fully bond the new cone to the voice coil before proceeding.
Properly installing the new cone is crucial for the subwoofer’s performance. Ensure that the cone is securely bonded to the voice coil and sits centered and flush with the subwoofer’s frame.
With the new cone successfully installed, we can move on to the next step, which involves aligning and centering the coil.
Step 4: Aligning and Centering the Coil
After installing the new cone, it’s important to align and center the coil to ensure optimal performance and prevent any rubbing or distortion. This step requires precision and careful adjustment. Here’s a step-by-step guide on how to align and center the coil:
- Inspect the Alignment: Take a close look at the coil and ensure that it is properly aligned within the gap. It should not be tilted or off-center.
- Make Adjustments if Necessary: If the coil is not aligned or centered, gently move it by applying light pressure on the cone or voice coil. Use your fingers or a soft tool to carefully make adjustments. Be cautious not to damage the coil or other components in the process.
- Check for Clearance: Ensure that the coil has enough clearance on all sides and is not touching the magnet or any other parts of the subwoofer. Rubbing or interference can cause distortion or damage.
- Test the Movement: Move the cone gently with your hand to check for any resistance or abnormal movement. It should move freely and smoothly without any sticking or scraping sounds.
- Realign if Needed: If you notice any issues during the movement test, realign the coil as necessary until it moves without any obstructions or irregularities.
Properly aligning and centering the coil is essential to ensure that it moves freely and smoothly within the voice coil gap. This step is crucial in achieving accurate and distortion-free sound reproduction.
With the coil aligned and centered, we can move on to the next step, which involves gluing the surround and spider.
Step 5: Gluing the Surround and Spider
Once the coil is properly aligned and centered, the next step in reconing a subwoofer is to glue the surround and spider. The surround and spider play a crucial role in maintaining stability and allowing the coil to move smoothly. Here’s a step-by-step guide on how to glue the surround and spider:
- Prepare the Surround and Spider: Inspect the surround and spider from your recone kit for any damages or defects. Ensure they are the correct size and type for your subwoofer model.
- Apply Adhesive: Apply a thin and even layer of adhesive to the underside of the surround and spider. Be careful not to use too much adhesive, as it can seep onto other components and cause issues.
- Attach the Surround: Gently position the surround onto the subwoofer frame, ensuring that it lines up properly with the cone. Press it down firmly so that it adheres to the frame securely.
- Attach the Spider: Align the spider with the voice coil and carefully position it onto the subwoofer frame. Make sure it is centered and doesn’t interfere with the movement of the coil. Press it down gently to secure it in place.
- Allow the Adhesive to Cure: Follow the instructions provided with the adhesive to determine the recommended curing time. It’s essential to allow sufficient time for the adhesive to fully bond the surround, spider, and other components.
Properly gluing the surround and spider is crucial for maintaining stability and allowing the subwoofer to produce accurate and distortion-free sound. Take your time during this step to ensure a secure and reliable bond.
With the surround and spider glued in place, we can move on to the next step, which involves reassembling the subwoofer.
Step 6: Reassembling the Subwoofer
After successfully gluing the surround and spider, the next step in reconing a subwoofer is to reassemble all the components. This step involves putting everything back together in the correct order and ensuring a secure fit. Here’s a step-by-step guide on how to reassemble the subwoofer:
- Reattach the Dust Cap: Take the dust cap that was removed earlier and carefully place it back in the center of the cone. Apply light pressure to secure it in place.
- Align the Subwoofer Frame: Position the subwoofer frame back into the enclosure (if applicable) or onto the mounting surface. Ensure that it is aligned properly and sits flush.
- Secure the Frame: Use the appropriate screws or fasteners to secure the subwoofer frame in place. Make sure they are tightened securely but avoid over-tightening, which can damage the frame or cause distortion.
- Connect the Wiring: Reconnect the wiring to the subwoofer terminals, following the proper polarity. Ensure a secure and tight connection to prevent any signal loss or interference.
- Test the Subwoofer: Before closing the enclosure or finalizing the installation, it’s crucial to conduct a test to ensure that the reconed subwoofer is functioning correctly. Connect it to an audio source, and gradually increase the volume to check for any issues or abnormal sounds.
- Make Adjustments if Needed: If you notice any problems during the testing phase, such as distortion or unwanted vibrations, carefully inspect and make necessary adjustments to address the issues. This may involve realigning components or revisiting previous steps in the reconing process.
Properly reassembling the subwoofer is essential to ensure its proper functioning and integration into your audio system. Take your time and double-check each step to ensure everything is in order before proceeding.
With the subwoofer successfully reassembled and tested, we can move on to the final step, which involves testing the reconed subwoofer.
Step 7: Testing the Reconed Subwoofer
After going through the reconing process and reassembling the subwoofer, the final step is to test the reconed subwoofer. This step is crucial in ensuring that the subwoofer is functioning properly and producing the desired sound quality. Here’s a step-by-step guide on how to test the reconed subwoofer:
- Reconnect the Subwoofer: Ensure that the subwoofer is properly connected to your audio system or amplifier using the appropriate cables or wires.
- Power on the System: Turn on the audio system or amplifier, and gradually increase the volume to a moderate level.
- Listen for Distortion or Abnormal Sounds: Pay close attention to the sound produced by the subwoofer. Listen for any distortion, rattling, buzzing, or other abnormal sounds that might indicate an issue with the reconed subwoofer.
- Check for Proper Functioning: Test the subwoofer across different frequency ranges and music genres to ensure that it performs well in delivering deep, impactful bass without muddying the other audio frequencies.
- Make Adjustments if Necessary: If you notice any issues during the testing phase, such as distortion, lack of bass response, or improper integration with the rest of the audio system, make necessary adjustments. This may involve revisiting previous steps in the reconing process or consulting with a professional if needed.
Testing the reconed subwoofer is crucial to ensure that it meets your expectations and performs at its best. Don’t rush this step and take the time to fine-tune and adjust as needed to achieve the desired sound quality.
If everything sounds good and the reconed subwoofer is producing the desired bass response, congratulations! You have successfully reconed your subwoofer and brought it back to life.
Keep in mind that the reconed subwoofer may require some “break-in” time to fully optimize its performance. Give it some time and allow the components to settle and adapt to their new state. As you continue to use it, you may notice further improvements in its sound quality.
Congratulations once again on reconing your subwoofer, and enjoy the enhanced audio experience it brings!
Now that you’ve completed the reconing process and tested the subwoofer, we can move on to the next section, where we’ll discuss some common mistakes to avoid during reconing.
Common Mistakes to Avoid
Reconing a subwoofer requires precision and attention to detail. To ensure a successful recone and prevent any further damage, it’s important to avoid common mistakes that can compromise the subwoofer’s performance. Here are some mistakes to watch out for:
- Using the Wrong Recone Kit: Make sure to use a recone kit that is specifically designed for your subwoofer model. Using the wrong kit can lead to improper fitment and compatibility issues.
- Incorrect Alignment of Components: Improper alignment of the voice coil, cone, surround, or spider can lead to rubbing, distortion, or other performance issues. Take your time to ensure precise alignment during the reconing process.
- Using Excessive Force: Applying excessive force during the reconing process can cause damage to the subwoofer’s components. Be gentle and take care when handling delicate parts, such as the cone or voice coil.
- Using Incorrect Adhesive: Use adhesive that is recommended by the recone kit manufacturer. Using the wrong adhesive can result in poor bonding or damage to the components.
- Failing to Clean the Voice Coil Gap: Neglecting to clean the voice coil gap thoroughly can lead to poor performance and interference. Take the time to remove any dirt, debris, or adhesive residue before installing the new cone.
- Skipping the Testing Phase: Testing the reconed subwoofer is a crucial step to ensure its proper functioning. Skipping this phase can result in unnoticed issues that may affect the subwoofer’s performance in the long run.
- Not Following Instructions: Each recone kit may have specific instructions provided by the manufacturer. Failing to follow these instructions can lead to mistakes or improper installation. Always refer to the instructions and guidelines provided.
By avoiding these common mistakes and taking the necessary precautions, you increase the chances of a successful subwoofer recone and ensure the best possible performance from your subwoofer.
With these common mistakes in mind, you’re now equipped with the knowledge to avoid potential pitfalls during the reconing process. Keep them in mind as you embark on your subwoofer reconing journey.
Now that you’re aware of common mistakes to avoid, it’s time to wrap up our comprehensive guide on how to recone a subwoofer. Congratulations on acquiring the skills to tackle this DIY project and breathe new life into your subwoofer!
Conclusion
Reconing a subwoofer can be a rewarding and cost-effective way to restore its optimal performance and extend its lifespan. By following the step-by-step process outlined in this guide, you have gained the knowledge and skills to recone your subwoofer like a pro.
We started by understanding the reconing process and when it’s necessary to recone a subwoofer. We explored the various parts of a subwoofer, the materials and tools required for reconing, and each step of the reconing process, including removing the damaged cone, cleaning the voice coil gap, installing the new cone, aligning and centering the coil, gluing the surround and spider, reassembling the subwoofer, and testing the reconed subwoofer.
Throughout the reconing process, we highlighted common mistakes to avoid to ensure a successful recone. By being mindful of these pitfalls and taking the necessary precautions, you can avoid potential errors and achieve optimal results.
Remember, reconing a subwoofer requires patience, precision, and attention to detail. It’s essential to follow the instructions provided with the recone kit and consult professional help if needed.
Now that you have the knowledge and skills to recone a subwoofer, you can confidently tackle this DIY project and enjoy the enhanced audio experience that comes with a reconed subwoofer.
Good luck with your reconing journey, and may your subwoofer continue to deliver rich, powerful bass for years to come!