Home>Production & Technology>Audio Interface>How To Set Up Audio Interface

Audio Interface
How To Set Up Audio Interface
Published: February 5, 2024
Learn how to set up an audio interface and optimize your sound quality. Step-by-step guide for beginners. Improve your audio production with an audio interface.
(Many of the links in this article redirect to a specific reviewed product. Your purchase of these products through affiliate links helps to generate commission for AudioLover.com, at no extra cost. Learn more)
Table of Contents
- Introduction
- Step 1: Selecting the Audio Interface
- Step 2: Connecting the Audio Interface to Your Computer
- Step 3: Installing the Audio Interface Drivers
- Step 4: Configuring Audio Settings on Your Computer
- Step 5: Connecting Microphones, Instruments, or Other Audio Sources
- Step 6: Setting Levels and Monitoring Audio
- Step 7: Troubleshooting Common Issues
- Conclusion
Introduction
Audio interfaces are essential tools for musicians, podcasters, content creators, and anyone working with sound. These devices act as a bridge between your computer and external audio sources, providing high-quality audio recording, playback, and monitoring capabilities. Whether you’re setting up a home recording studio or need to improve the audio quality of your video productions, understanding how to set up an audio interface is crucial.
In this article, we’ll guide you through the step-by-step process of setting up an audio interface. We’ll cover selecting the right interface for your needs, connecting it to your computer, installing drivers, configuring audio settings, connecting microphones and instruments, setting levels, and troubleshooting common issues.
Before we dive into the technical aspects, it’s worth mentioning that audio interfaces come in various shapes, sizes, and feature sets. They may have different input and output options, preamps, converters, and connectivity options. Some interfaces are specifically designed for home studios, while others cater to professional recording environments. Therefore, it’s important to choose an audio interface based on your specific requirements and budget.
Now, let’s get started with the step-by-step process of setting up your audio interface.
Step 1: Selecting the Audio Interface
When it comes to selecting an audio interface, there are a few key factors to consider:
- Number of Inputs and Outputs: Determine how many inputs and outputs you need for your setup. This will depend on how many microphones, instruments, or other audio sources you plan to record simultaneously, as well as the number of speakers or headphones you want to connect.
- Audio Quality: Look for an audio interface with high-quality audio converters and preamps to ensure accurate and professional sound reproduction.
- Connectivity Options: Consider the type of connections you need, such as USB, Thunderbolt, or Firewire, and choose an interface that is compatible with your computer and other devices.
- Budget: Set a budget for your audio interface and look for options that fit within that range. It’s important to find a balance between price and the features you need.
- Additional Features: Some audio interfaces may include features like MIDI connectivity, built-in DSP processing, or virtual mixing software. Consider whether these additional features are important for your setup.
Research different audio interfaces, read reviews, and compare specifications to find the one that best fits your needs. It’s also helpful to consider any future expansions you may want to make, such as adding more inputs or connecting external effects processors.
Once you’ve selected an audio interface, make sure to check for compatibility with your operating system and any software applications you plan to use. Manufacturers typically provide information on compatibility on their websites or in product documentation.
Now that you’ve chosen your audio interface, it’s time to move on to the next step: connecting it to your computer.
Step 2: Connecting the Audio Interface to Your Computer
Connecting your audio interface to your computer is a straightforward process. Here’s a step-by-step guide:
- Locate the appropriate cable: Most audio interfaces will come with a USB, Thunderbolt, or Firewire cable for connecting to your computer. If not, you will need to purchase the appropriate cable separately.
- Power off your computer: Before connecting the audio interface, it’s always a good idea to power off your computer to avoid any potential damage or interference.
- Connect the cable: Depending on the type of interface you have, connect one end of the cable to the corresponding port on your audio interface, and the other end to an available USB, Thunderbolt, or Firewire port on your computer.
- Power on the audio interface: Once the cable is securely connected, power on the audio interface. Some interfaces may require an external power source, so make sure it’s connected if needed.
- Wait for the computer to recognize the interface: After powering on the audio interface, your computer should recognize it and automatically install the necessary drivers. If your interface came with a driver installation CD or download link, you can also manually install the drivers.
- Check the connection: Once the drivers are installed, check your computer’s audio settings to ensure that the interface is recognized as the default audio input and output device.
If you encounter any issues during the connection process, refer to the user manual or contact the manufacturer’s support for further assistance. It’s also a good idea to periodically check for driver updates on the manufacturer’s website to ensure optimal performance and compatibility.
Now that your audio interface is successfully connected to your computer, it’s time to move on to the next step: installing the audio interface drivers.
Step 3: Installing the Audio Interface Drivers
Installing the proper drivers for your audio interface is crucial to ensure optimal performance and compatibility with your computer. Here’s how you can install the drivers:
- Check for driver installation options: Most audio interfaces will include a driver installation CD or provide a download link for the latest drivers on their website. Make sure to check the packaging or the manufacturer’s website for this information.
- Download the drivers (if necessary): If your audio interface requires drivers to be downloaded, navigate to the manufacturer’s website and locate the drivers for your specific model and operating system.
- Run the installer: Once you have the drivers downloaded, run the installer file and follow the on-screen instructions to install the drivers. This typically involves accepting the license agreement and specifying the installation location.
- Restart your computer (if prompted): After the driver installation is complete, you may be prompted to restart your computer. It’s important to follow this step to ensure that the drivers are properly initialized.
- Confirmation: After restarting your computer, verify that the drivers have been installed correctly. You can do this by checking the device manager or system preferences on your computer.
It’s worth mentioning that some audio interfaces may be class-compliant, meaning they don’t require specific drivers to function. These interfaces typically work seamlessly with your computer’s built-in audio drivers, and you can skip the driver installation process.
If you encounter any difficulties during the installation process or the audio interface is not functioning properly after installation, refer to the troubleshooting guide provided by the manufacturer or contact their support team for assistance.
Now that you have installed the audio interface drivers, it’s time to move on to the next step: configuring audio settings on your computer.
Step 4: Configuring Audio Settings on Your Computer
Once the audio interface drivers are installed, it’s important to configure the audio settings on your computer to ensure proper functionality and optimal performance. Here’s how you can do it:
- Access the audio settings: Depending on your operating system, you can access the audio settings through the Control Panel (Windows), System Preferences (Mac), or the sound icon in the system tray/menu bar.
- Select the audio interface as the default input/output device: In the audio settings, navigate to the input and output section and select your audio interface as the default device. This ensures that all audio signals will be routed through the interface.
- Adjust the sample rate and buffer size: The sample rate determines the number of audio samples captured or played back per second, while the buffer size determines the amount of audio data processed at a given time. Set the sample rate and buffer size according to your project requirements and the capabilities of your audio interface.
- Enable low-latency mode (if available): If your audio interface supports low-latency mode, enable it. This minimizes the delay between the audio input and output, which is crucial for real-time monitoring while recording or playing virtual instruments.
- Test the audio: Play a test sound or record a short audio clip to ensure that the audio signals are being properly routed through the interface and that the sound quality is optimal.
It’s important to note that different audio recording and production software may have their own audio settings. Make sure to check the software’s preferences or settings menu to configure the audio input and output to match your audio interface settings.
Additionally, if you are using a digital audio workstation (DAW) or other software for recording and editing audio, make sure to select your audio interface as the input and output device within the software’s settings.
If you experience any issues with audio signal routing, latency, or sound quality, refer to the user manual or documentation provided by the manufacturer. You can also seek assistance from online forums or the manufacturer’s support team.
Now that you have configured the audio settings on your computer, it’s time to move on to the next step: connecting microphones, instruments, or other audio sources to your audio interface.
Step 5: Connecting Microphones, Instruments, or Other Audio Sources
Now that your audio interface is properly set up and the audio settings are configured, it’s time to connect your microphones, instruments, or other audio sources to the interface. Here’s how you can do it:
- Determine the type of inputs on your audio interface: Most interfaces offer a variety of input options, such as XLR, 1/4-inch TRS, or MIDI. Identify the appropriate input type for your specific audio source.
- For microphones: If you are connecting a microphone, make sure to use the correct type of cable. For most microphones with XLR connectors, you’ll need an XLR cable. Plug one end of the cable into the microphone and the other end into the corresponding XLR input on the audio interface. If your microphone requires phantom power, enable it on the interface.
- For instruments: If you are connecting an instrument, such as a guitar or keyboard, identify the appropriate input for your instrument. Depending on the interface, you may have a dedicated instrument input or you may need to use a DI (Direct Input) box to connect your instrument. Use a 1/4-inch cable to connect your instrument to the interface.
- For other audio sources: If you are connecting other audio sources, such as line-level devices or synthesizers, use the appropriate cable and connection type. This may include RCA, 1/4-inch TRS, or MIDI cables, depending on your audio source and the available inputs on your interface.
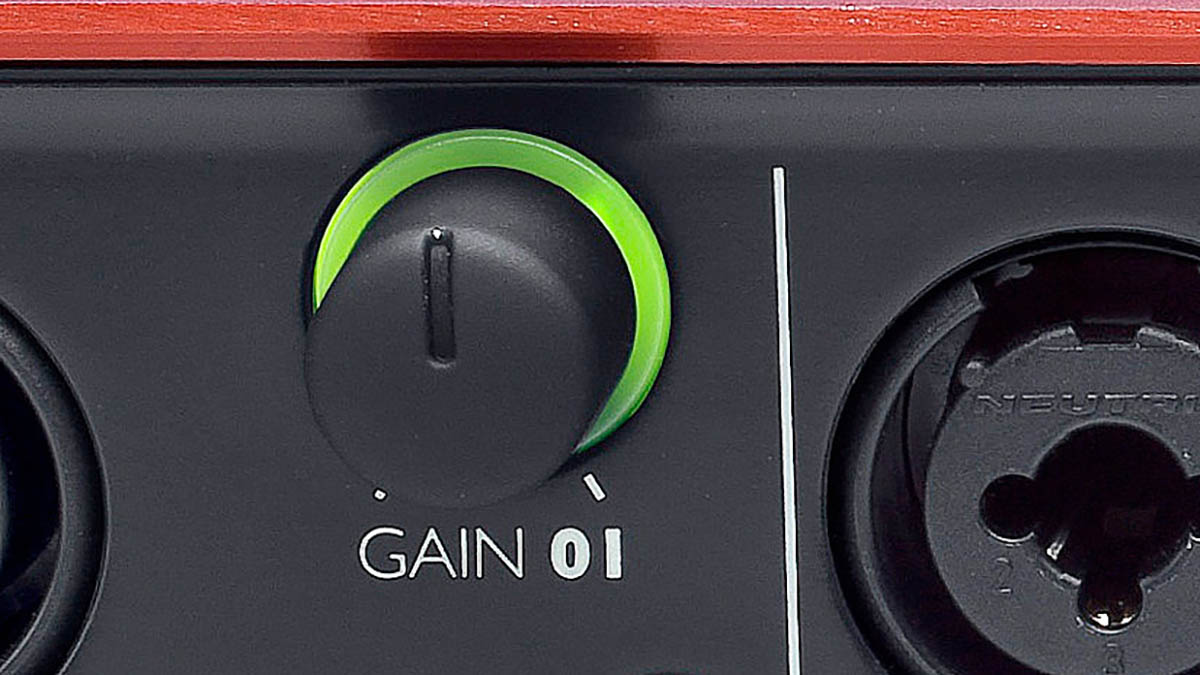
- Set the input levels: Once everything is connected, adjust the input levels on your audio interface. You’ll typically find gain knobs or sliders for each input channel. Start with low gain settings and gradually increase the level until you achieve a good signal without clipping or distortion.
It’s important to note that some audio interfaces may have additional features, such as pad switches, impedance selectors, or phase reverse options. Refer to the user manual or documentation provided by the manufacturer to understand the specific functionalities of your interface and utilize them accordingly.
Once your microphones, instruments, or other audio sources are connected to the audio interface, you can start recording or working with the audio in your preferred software applications. Make sure to select the appropriate input sources within your recording software to capture the audio from the desired sources.
Now that you have connected your audio sources to the interface, it’s time to move on to the next step: setting levels and monitoring audio.
Step 6: Setting Levels and Monitoring Audio
Setting levels and monitoring audio is a crucial step in the audio interface setup process. Properly adjusting the levels ensures that your recordings are clean and free from distortion, while monitoring allows you to hear what you are recording or playing in real-time. Here’s how you can set levels and monitor audio:
- Open your recording software: Launch your preferred recording software or digital audio workstation (DAW) and create a new project or session.
- Select the audio interface inputs: Within your software, specify the audio interface inputs for each track or recording channel. This allows the software to receive audio from the correct inputs on the interface.
- Set the input levels: In your recording software or on the audio interface itself, adjust the input gain for each input channel. Start with low gain settings and gradually increase the levels while monitoring the audio. Aim for a level that is strong enough to be heard clearly, but not so high that it clips or distorts.
- Monitor the audio: Use the headphone output or connect your monitor speakers to the audio interface to monitor the audio while recording or playing. Ensure that the monitor volume is set to a comfortable level.
- Utilize the software meters: Most recording software includes level meters that show the input signal levels in real-time. Keep an eye on these meters to make sure the levels are within an optimal range. Avoid going into the red, as this indicates clipping and distortion.
- Consider using a monitor mix: If your audio interface supports it, use the monitor mix feature to balance the levels between the direct input (the audio coming from your microphones and instruments) and the playback from your software. This allows you to hear a blend of both without any latency issues.
Periodically check the input levels and monitor the audio while recording or playing to ensure that the levels remain consistent and distortion-free. It’s also a good idea to do a test recording and playback to ensure that the audio is being captured accurately and at the desired levels.
If you encounter issues with levels being too low or too high, refer to the user manual or documentation provided by the software and hardware manufacturers. They may offer specific guidelines or tips for optimizing input levels and monitoring.
Now that you have set the levels and are monitoring the audio, it’s time to move on to the final step: troubleshooting common issues.
Step 7: Troubleshooting Common Issues
While setting up an audio interface is generally a straightforward process, you may encounter some common issues along the way. Here are a few troubleshooting steps to help you resolve them:
- No audio signal: If you’re not getting any audio signal from your microphones or instruments, double-check the cables and connections. Ensure that all cables are securely plugged into the appropriate inputs and outputs. Additionally, make sure that the input and output settings on your software and audio interface are correctly configured.
- Low audio output: If the audio output from your monitor speakers or headphones is low, check the volume levels on your audio interface and in your software. Also, verify that the monitor speakers or headphones are connected properly and turned on. Adjust the volume levels accordingly and make sure that no mute buttons or switches are activated.
- Latency issues: Latency refers to the delay between the input signal and the audio playback. If you’re experiencing latency issues, try adjusting the buffer size in your audio settings. A smaller buffer size can reduce latency but may put more strain on your computer’s processing power. Experiment with different buffer sizes to find the optimal balance between latency and system performance.
- Driver conflicts: In some cases, conflicts between audio drivers can cause issues. Ensure that you have installed the latest drivers for your audio interface and that they are compatible with your operating system. If you are experiencing driver conflicts or compatibility issues, try uninstalling and reinstalling the drivers or consult the manufacturer’s support for further guidance.
- Audio artifacts or distortion: If you notice audio artifacts or distortion in your recordings or playback, it could be an issue with the input levels. Check that the input gain is not set too high, causing clipping or distortion. Adjust the input levels accordingly and make sure the audio signal is within the optimal range.
If you have tried the troubleshooting steps above and are still experiencing issues, consult the user manual or documentation provided with your audio interface. Additionally, you can reach out to the manufacturer’s support team or seek assistance from online forums and communities dedicated to audio recording and production.
By troubleshooting common issues, you can overcome any barriers to achieving high-quality audio recordings and ensure a smooth operation of your audio interface setup.
Now that you have learned how to troubleshoot common issues, you should be well-equipped to set up and utilize your audio interface effectively.
Conclusion
Setting up an audio interface is an essential step for anyone working with audio, whether you’re a musician, podcaster, or content creator. By following the step-by-step process outlined in this article, you can ensure that your audio interface is properly selected, connected, and configured for optimal performance.
Start by selecting an audio interface that meets your specific needs in terms of inputs and outputs, audio quality, connectivity options, and budget. Once you have chosen the right interface, connect it to your computer using the appropriate cable and ensure that the drivers are properly installed.
After the connection is established, configure the audio settings on your computer, including selecting the interface as the default input and output device, adjusting sample rate and buffer size, and enabling any low-latency modes that are available.
Next, connect your microphones, instruments, or other audio sources to the appropriate inputs on the interface, set the input levels, and monitor the audio to ensure optimal recording quality and real-time playback. Make use of the software meters and monitor mix features provided by your interface to fine-tune the levels and achieve a balance between your input sources and playback.
If any issues arise during the setup process, such as no audio signal, low output, latency, driver conflicts, or audio artifacts, refer to the troubleshooting steps outlined in this article and consult the user manual or manufacturer’s support for further assistance.
By successfully setting up your audio interface, you gain the ability to capture and create high-quality audio recordings, elevating your music, podcasts, and content to the next level. With the right equipment and proper configuration, you can fully unleash your creativity and achieve professional results.
Remember, practice and experimentation are key in getting the most out of your audio interface setup. As you familiarize yourself with the process and learn more about the advanced features and functionalities of your interface, you’ll be able to explore new possibilities and take your audio production to new heights.

