Home>Events & Info>Playback>How To Get Smooth Playback In VLC
Playback
How To Get Smooth Playback In VLC
Modified: January 22, 2024
Learn how to achieve smooth playback in VLC media player. Follow our guide to optimize your settings and enhance your viewing experience.
(Many of the links in this article redirect to a specific reviewed product. Your purchase of these products through affiliate links helps to generate commission for AudioLover.com, at no extra cost. Learn more)
Table of Contents
Introduction
VLC Media Player is one of the most popular and widely used media players available today. It supports a wide range of audio and video formats, making it a versatile choice for playing media files on various platforms. However, many users may encounter issues with smooth playback when using VLC. Stuttering, buffering, or audio/video syncing problems can be frustrating, especially when you’re trying to enjoy your favorite movies or music.
In this article, we will explore different techniques and strategies to optimize VLC Media Player for smooth playback, ensuring an uninterrupted and enjoyable media experience. From adjusting playback settings to upgrading hardware, we will cover a range of solutions that can help enhance VLC’s performance on your system.
Before we dive into the solutions, it’s important to have a basic understanding of what VLC Media Player is and how it works. VLC is an open-source multimedia player developed by VideoLAN. It is free to download and use, and it is available for Windows, macOS, Linux, Android, and iOS. VLC supports a wide range of audio and video codecs, allowing you to play files in various formats, including MP4, AVI, MKV, MP3, FLAC, and more.
Now that we have a brief overview of VLC, let’s take a look at the system requirements to ensure that your computer meets the necessary specifications to run VLC smoothly. Having a compatible system is the first step in achieving smooth playback.
Understanding VLC Media Player
VLC Media Player is a versatile and feature-rich multimedia player that allows users to play various audio and video formats. It is known for its wide-ranging codec support, which enables it to handle almost any media file you throw at it. Whether you want to watch movies, listen to music, or stream online content, VLC has got you covered.
One of the key features of VLC is its ability to play incomplete or partially downloaded media files. It uses a technique known as “streaming” or “on-the-fly” playback, which allows users to start playing a file before the entire file has been downloaded. This is particularly useful when downloading large files or streaming online videos.
VLC also includes a range of advanced playback options, such as the ability to adjust playback speed, synchronize subtitles, and apply audio and video filters. It supports multi-track audio and subtitles, allowing users to select their preferred audio track or display subtitles in multiple languages.
Another noteworthy feature of VLC is its support for network streaming protocols. It can stream media over local networks (LAN) as well as over the internet using various streaming protocols, such as HTTP, RTP, RTSP, and more. This makes it a popular choice for streaming media from one device to another, such as from a computer to a smart TV or from a media server to a mobile device.
In addition to its playback capabilities, VLC offers a range of other features, including the ability to convert media files to different formats, rip audio CDs, and even record your desktop. It also supports plugins and extensions, allowing users to extend its functionality and customize the player to their specific needs.
Overall, VLC Media Player is a powerful and versatile multimedia player that provides a seamless and feature-rich media playback experience. Whether you’re a casual user or a media enthusiast, VLC offers a wealth of options and customization settings to enhance your media consumption habits.
System Requirements
Before you can optimize VLC Media Player for smooth playback, it’s essential to ensure that your system meets the minimum requirements to run the player efficiently. When your computer meets or exceeds the recommended specifications, it can handle media playback without experiencing performance issues.
The specific system requirements for VLC may vary depending on the version and platform you are using, but here are the general guidelines:
- Operating System: VLC is compatible with Windows (Windows XP and later), macOS (10.7 and later), Linux (most distributions), Android (4.0.3 and later), and iOS (7.0 and later).
- Processor: A multi-core processor is recommended for smoother playback. The higher the clock speed and number of cores, the better the performance.
- RAM: VLC can run on systems with as little as 128 MB of RAM, but for optimal performance, it is recommended to have at least 2 GB of RAM.
- Graphics Card: A dedicated graphics card is not essential for VLC, as it can utilize the CPU for video decoding. However, having a graphics card with hardware acceleration capabilities can significantly improve performance, especially when playing high-resolution or high-bitrate videos.
- Disk Space: VLC requires only a small amount of disk space for the application itself. However, the amount of storage needed may vary depending on the media files you play. Ensure that you have enough free space to store your media files.
- Internet Connection: While VLC can function without an internet connection, it is beneficial for streaming media and accessing online content. A stable and reasonably fast internet connection is recommended for a smooth streaming experience.
Keep in mind that these are basic system requirements, and the actual performance of VLC may vary depending on various factors, such as the complexity of the video or audio codec, the resolution of the media files, and the overall system performance.
If your system meets the minimum requirements, you are ready to optimize VLC for smooth playback. In the next sections, we will explore different techniques and settings that can help improve the performance and enhance your media playback experience in VLC.
Updating VLC Media Player
Keeping your VLC Media Player up to date is crucial for optimal performance and compatibility with the latest audio and video formats. VideoLAN, the organization behind VLC, regularly releases updates that address bugs, improve stability, and introduce new features.
To update VLC Media Player, follow these steps:
- Open VLC Media Player on your computer.
- Click on the “Help” tab in the menu bar at the top of the player.
- Select “Check for Updates” from the drop-down menu.
- VLC will automatically check for updates and prompt you to download and install the latest version if available.
- Follow the on-screen instructions to complete the update process.
Alternatively, you can visit the official VLC website (www.videolan.org) to manually download and install the latest version of VLC Media Player for your operating system.
By keeping VLC up to date, you ensure that you have the latest bug fixes and performance improvements. Additionally, newer versions of VLC often come with enhanced codec support, allowing you to play a wider range of audio and video formats without any issues.
Regularly checking for updates and installing them ensures that you are benefiting from the latest features and optimizations, which can contribute to a smoother and more enjoyable media playback experience in VLC.
Now that you have updated VLC to the latest version, let’s dive into various settings and adjustments that can further optimize the playback performance.
Adjusting Playback Settings
Adjusting the playback settings in VLC Media Player can significantly improve the smoothness and quality of your media playback. By optimizing these settings to match your hardware and preferences, you can enhance the overall performance and enhance your viewing or listening experience.
Here are some key settings you can adjust in VLC:
1. Video Output: Go to the “Tools” tab in the menu bar, select “Preferences,” and navigate to the “Video” tab. Here, you can experiment with different video output modules, such as Direct3D, OpenGL, or DirectXVideo Acceleration (DXVA). Try different options to determine which one provides the best performance on your system.
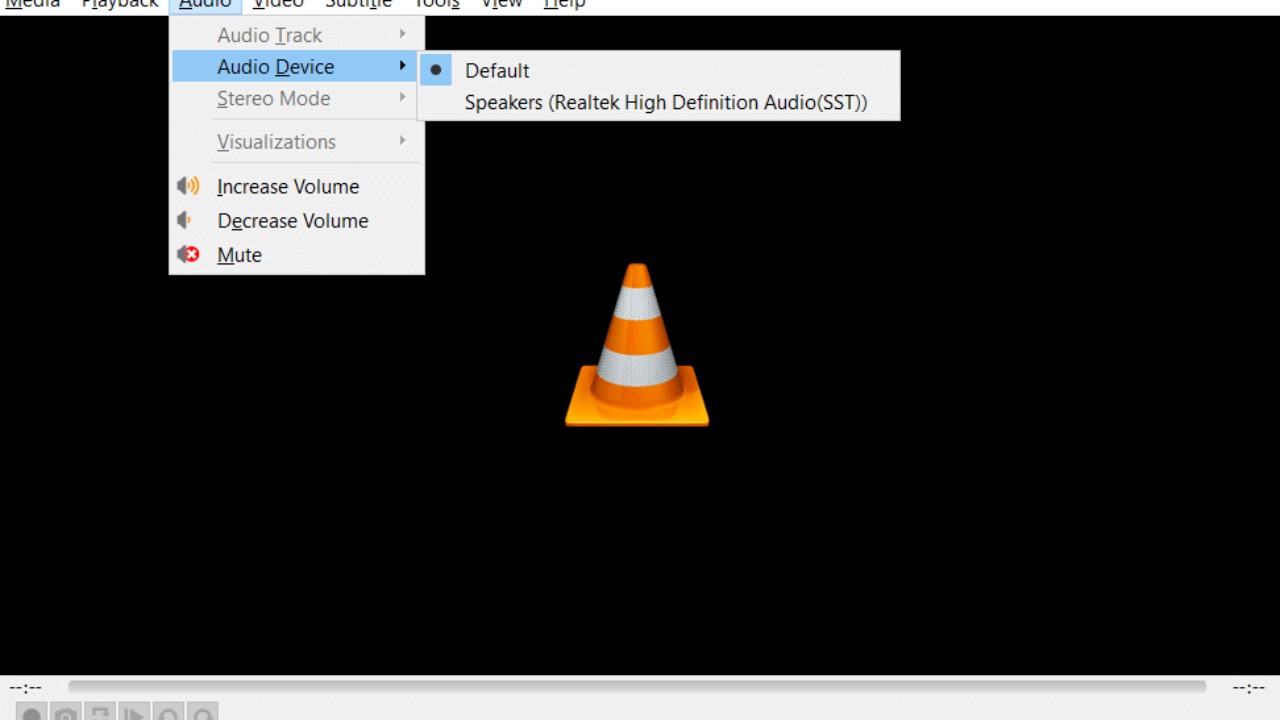
2. Audio Output: Similarly, in the “Preferences” window, go to the “Audio” tab. Select the appropriate audio output module that suits your system. You can try options like DirectSound, WASAPI, or ASIO, depending on your audio hardware and requirements.
3. Hardware Decoding: Hardware acceleration can offload the decoding process to your system’s graphics card or dedicated hardware decoders, resulting in smoother playback. In the “Preferences” window, go to the “Input/Codecs” tab and under “Hardware-accelerated decoding,” enable options like “Automatic” or “Experimental,” depending on the availability and compatibility of your hardware.
4. Deinterlacing: If you are experiencing interlacing artifacts or jagged lines in video playback, try enabling deinterlacing. In the “Preferences” window, go to the “Video” tab and under “Deinterlace,” select the appropriate method that suits your content, such as “Automatic,” “Blend,” or “Yadif.”
5. Sync and Subtitle Settings: If you notice audio synchronization issues or subtitle delays, use the “J” and “K” keys on your keyboard to adjust audio delay and subtitle synchronization, respectively. You can also fine-tune these settings under the “Preferences” window, in the “Audio” and “Subtitle/OSD” tabs.
Experimenting with these playback settings in VLC can help optimize the performance and ensure smoother playback. However, keep in mind that the optimal settings may vary depending on your hardware configuration and the specific media file you are playing.
In the next sections, we will explore additional techniques, such as clearing cache, disabling hardware acceleration, closing background processes, and more, to further enhance the smoothness of playback in VLC Media Player.
Clearing Cache
Clearing the cache in VLC Media Player can resolve playback issues and improve performance, especially when dealing with large or high-resolution media files. The cache is a temporary storage location where VLC stores parts of the media file as it plays. This allows for smoother playback by preloading and buffering portions of the video or audio.
To clear the cache in VLC Media Player, follow these steps:
- Open VLC Media Player on your computer.
- Click on the “Tools” tab in the menu bar at the top of the player.
- Select “Preferences” from the drop-down menu.
- Navigate to the “Input/Codecs” tab in the “Preferences” window.
- Under the “Advanced” section, find the “File caching (ms)” option.
- Decrease the value to a lower setting. For example, you can try setting it to 500 or 1000.
- Click on the “Save” button to apply the changes.
By reducing the file caching value, you are clearing the cache more frequently, allowing VLC to load new portions of the media file and adapt to changes in network conditions more effectively.
In addition to clearing the cache, you can also try adjusting other caching-related settings in VLC. Under the same “Input/Codecs” tab, you will find options like “Access modules caching,” “Network caching (ms),” and “Live capture caching.” Experimenting with different values for these settings can help improve playback performance, especially for streaming media or network-based playback.
Clearing the cache and adjusting caching settings can be particularly helpful when you experience buffering or stuttering issues during playback. However, keep in mind that excessively low cache settings may cause the playback to become unstable or lead to video/audio synchronization problems. It is recommended to find a balance that suits your specific system and media playback requirements.
In the following sections, we will explore more techniques, such as disabling hardware acceleration, closing background processes, converting video formats, and more, to further optimize VLC Media Player for smooth playback.
Disabling Hardware Acceleration
Enabling hardware acceleration in VLC Media Player can enhance the performance of media playback, especially when dealing with high-resolution or high-bitrate videos. Hardware acceleration offloads the video decoding process to your system’s graphics card or dedicated hardware decoders, reducing the strain on the CPU and improving overall playback efficiency. However, in some cases, hardware acceleration can cause playback issues or conflicts with certain graphics drivers.
To disable hardware acceleration in VLC Media Player, follow these steps:
- Open VLC Media Player on your computer.
- Click on the “Tools” tab in the menu bar at the top of the player.
- Select “Preferences” from the drop-down menu.
- Navigate to the “Input/Codecs” tab in the “Preferences” window.
- Scroll down to the “Codecs” section.
- Find the “Hardware-accelerated decoding” option and set it to “Disable.”
- Click on the “Save” button to apply the changes.
By disabling hardware acceleration, VLC Media Player will utilize software decoding instead, which can be more compatible with certain systems and graphics configurations. This can help resolve playback issues, such as stuttering, freezing, or visual artifacts, that may occur due to conflicts with hardware acceleration.
It’s important to note that disabling hardware acceleration may result in a slightly higher CPU usage during playback, as the decoding process is handled by the CPU rather than the GPU. However, on modern systems with capable CPUs, the impact on overall performance should be minimal.
If you continue to experience playback issues with hardware acceleration disabled, you can try enabling it again or experiment with different video output and codec settings in VLC. The optimal configuration may vary depending on your specific hardware and software environment.
In the next sections, we will explore additional techniques, such as closing background processes, converting video formats, installing codec packs, and upgrading hardware, that can further optimize VLC Media Player for smooth playback.
Closing Background Processes
When it comes to optimizing VLC Media Player for smooth playback, it’s important to ensure that your computer’s resources are dedicated to running VLC efficiently. One way to achieve this is by closing unnecessary background processes and applications that may be consuming system resources and causing performance bottlenecks.
Here are some steps you can take to close background processes:
- Press Ctrl + Shift + Esc simultaneously to open the Task Manager on Windows or use the corresponding keyboard shortcut for your operating system.
- In the Task Manager, go to the Processes or Details tab.
- Identify processes or applications that are consuming significant CPU or memory resources.
- Right-click on the process or application and select End Task or End Process to close it.
Closing unnecessary processes and applications frees up system resources, allowing VLC to utilize more of the available CPU and memory for smooth playback. This can help prevent performance issues such as buffering, stuttering, or laggy playback.
It’s worth noting that some background processes are essential for the proper functioning of your system, so exercise caution when terminating processes. If you’re unsure about a specific process, it’s best to research it online before terminating it.
In addition to closing background processes manually, you can also use system optimization tools or task manager applications to help identify and close unnecessary processes more efficiently.
By clearing up system resources and focusing them on VLC Media Player, you can ensure a smoother playback experience. In the next sections, we will explore techniques such as converting video formats, installing codec packs, and upgrading hardware to further enhance the performance of VLC.
Converting Video Formats
Converting video formats can be a useful technique to optimize VLC Media Player for smoother playback. Certain video formats may require more processing power or have limited codec support, which can result in performance issues. By converting videos to a more compatible format, you can potentially improve VLC’s ability to handle and play the media smoothly.
Here are some steps to convert video formats:
- Use a video conversion software or online converter to convert the video file. Popular software options include HandBrake, VLC itself, and Adobe Media Encoder.
- Open the conversion software and import the video file you want to convert.
- Select the desired output format. Choosing a more widely supported format like MP4 or MKV is generally a safe choice.
- Configure the conversion settings, including resolution, bitrate, and audio settings, according to your preferences and target device (if applicable).
- Start the conversion process and wait for it to complete.
By converting videos to a more compatible format, you help ensure that VLC can easily decode and play the media without encountering any format-related issues. This can result in smoother playback and a better user experience overall.
Keep in mind that video conversion can be a time-consuming process, especially for longer or high-definition videos. Additionally, converting videos may result in some loss of quality, depending on the settings and target format chosen. It’s essential to strike a balance between file size, quality, and compatibility when performing video conversions.
If you are experiencing issues with a specific video file, it’s worth trying to convert it to a different format and see if it helps improve the playback performance in VLC. However, it’s always recommended to keep a backup of the original video file in case you need it in its original format for other purposes.
In the next sections, we will explore techniques such as installing codec packs, upgrading hardware, and optimizing network settings to further optimize VLC Media Player for smooth playback.
Installing Codec Packs
Installing codec packs can be a beneficial solution for optimizing VLC Media Player’s playback capabilities. Codecs are software components that allow VLC to decode and play different audio and video formats. While VLC comes with built-in support for a wide range of codecs, there may be instances where certain formats are not natively supported.
A codec pack is a collection of codecs bundled together, providing comprehensive codec support for various audio and video formats. By installing a codec pack, you can expand VLC’s codec library and ensure compatibility with a broader range of media files.
Here are some popular codec packs you can consider:
- K-Lite Codec Pack: K-Lite is one of the most widely used and comprehensive codec packs available. It includes both popular and rare codecs, ensuring compatibility with various audio and video formats.
- CCCP (Combined Community Codec Pack): CCCP is a codec pack specifically designed for Windows users. It focuses on providing excellent playback quality and includes commonly used codecs.
- Windows 10 Codec Pack: As the name suggests, this codec pack is targeted towards Windows 10 users and aims to enhance the multimedia experience on the operating system.
To install a codec pack, follow these general steps:
- Download the codec pack from the official website.
- Run the installer, and follow the on-screen instructions to install the codec pack.
- Restart VLC Media Player to ensure that it recognizes the newly installed codecs.
Remember to choose a reputable source when downloading codec packs to ensure they are safe and free from malware.
By installing codec packs, you increase VLC’s ability to decode and play a wide range of audio and video formats, reducing the likelihood of encountering playback issues or format incompatibilities.
In the subsequent sections, we will explore techniques such as upgrading hardware and optimizing network settings to further enhance VLC Media Player’s playback performance.
Upgrading Hardware
If you’re experiencing persistent issues with VLC Media Player’s playback performance, upgrading your hardware components may be a necessary step to achieve smoother playback. Upgrading hardware can provide increased processing power, improved graphics capabilities, and faster data transfer rates, all of which are essential for seamless media playback.
Consider the following hardware components for potential upgrades:
- CPU (Central Processing Unit): Upgrading to a faster and more powerful CPU can significantly improve VLC’s performance, especially when dealing with demanding video codecs or high-resolution content. Look for CPUs with higher clock speeds and more cores for better multitasking capabilities.
- Graphics Card: A dedicated graphics card with hardware acceleration capabilities can greatly enhance VLC’s ability to decode and render video files. This can result in smoother playback, especially for high-resolution or high-bitrate videos. Ensure that the graphics card you choose is compatible with VLC and supports the desired video codecs.
- RAM (Random Access Memory): Increasing the amount of RAM in your system allows for smoother multitasking and efficient handling of large media files. Having more RAM enables VLC to buffer and process media more effectively, reducing the chances of buffering or stuttering during playback.
- Storage: Consider upgrading to a faster and larger-capacity storage drive, such as a Solid State Drive (SSD). This can improve loading times and seek times, resulting in quicker access to media files, which contributes to smoother playback.
Before upgrading hardware components, ensure that your system’s power supply and motherboard are compatible with the new components you plan to install. Also, consider consulting with a professional or doing thorough research to determine the best hardware upgrades for your specific needs and budget.
Upgrading hardware can have a significant impact on VLC’s performance and overall media playback experience. It is a more substantial investment, but it can provide long-term benefits and improvements in other areas of your computing tasks as well.
In the next section, we will explore optimizing network settings to further enhance VLC Media Player’s playback performance, especially for streaming media or network-based playback.
Conclusion
Optimizing VLC Media Player for smooth playback is essential to ensure an enjoyable media experience. By following the techniques and strategies discussed in this article, you can enhance VLC’s performance and overcome common issues such as buffering, stuttering, and format compatibility.
We began by understanding VLC Media Player and its capabilities, including its support for various audio and video formats, streaming protocols, and advanced playback options. We then explored the importance of meeting the system requirements to ensure optimal performance.
Updating VLC to the latest version is crucial for accessing bug fixes, new features, and improved codec support. Adjusting playback settings, such as video and audio output, hardware decoding, and deinterlacing, can help tailor VLC to your system and preferences.
Clearing the cache and disabling hardware acceleration are effective techniques for addressing playback issues and conflicts. Closing unnecessary background processes frees up system resources for VLC to use, while converting video formats and installing codec packs expand compatibility and codec support.
If you’re willing to invest in hardware upgrades, such as a faster CPU, dedicated graphics card, additional RAM, or faster storage drives, you can significantly enhance VLC’s performance and handling of media files.
Finally, optimizing network settings can improve streaming and network-based playback, ensuring smoother and uninterrupted media streaming.
In conclusion, maximizing VLC Media Player’s playback performance involves a combination of software adjustments, hardware enhancements, and network optimization. By implementing these techniques, you can enjoy a seamless media playback experience, free from disruptions and performance issues.
Remember to experiment with the different settings and techniques to find the optimal configuration for your specific hardware and media requirements. Enjoy your enhanced media playback experience with VLC Media Player!