Home>Events & Info>Playback>How To Get Finale To Playback From Measure

Playback
How To Get Finale To Playback From Measure
Modified: February 20, 2024
Learn how to enable playback in Finale and hear your music from a specific measure. Follow our step-by-step guide to get the best out of your Finale experience.
(Many of the links in this article redirect to a specific reviewed product. Your purchase of these products through affiliate links helps to generate commission for AudioLover.com, at no extra cost. Learn more)
Table of Contents
Introduction
Welcome to the world of music notation software! If you’re a composer, arranger, or musician, you’re probably familiar with Finale, one of the most popular and powerful notation programs available. Finale allows you to create and edit sheet music with a wide range of features and tools.
One of the key components of any good music notation software is playback functionality. Being able to hear your compositions come to life can be invaluable in the creative process. Finale offers robust playback options that allow you to audition your music as you work, ensuring that it sounds the way you intended.
By default, Finale’s playback starts from the beginning of the score. However, there may be times when you want to start playback from a specific measure to focus on a particular section or to check for errors. In this article, we’ll explore how to get Finale to playback from a specific measure, so you can fine-tune your composition and make any necessary adjustments.
Whether you’re a beginner or an experienced user, this guide will help you navigate Finale’s settings and get your playback starting exactly where you need it to. Let’s dive in!
Setting up Finale
Before we can start using Finale’s playback features, it’s important to ensure that the software is properly set up. Here are a few steps to get started:
- Install Finale: If you haven’t already, make sure you have the latest version of Finale installed on your computer. You can download it from the official MakeMusic website and follow the installation instructions.
- Create or open a score: Once Finale is installed, you’ll need to either create a new score or open an existing one. Finale supports a wide range of file formats, so you can import your composition from other software if needed.
- Check playback device: Next, verify that Finale is using the correct playback device. To do this, go to the “MIDI/Audio” menu, select “Device Setup,” and choose the appropriate device from the list. This ensures that Finale’s playback will be routed to the correct output.
- Set up MIDI input device: If you plan to use an external MIDI instrument or controller to record or input notes, you’ll need to configure the MIDI input device. Again, go to the “MIDI/Audio” menu, select “Device Setup,” and choose the MIDI device you want to use. This allows Finale to recognize and capture MIDI input from your device.
- Configure MIDI mapping: Finale allows you to map MIDI data to various playback parameters, such as volume and articulations. If you have specific MIDI controller settings or want to customize the playback controls, you can do so by going to the “MIDI/Audio” menu, selecting “MIDI Mapping,” and adjusting the settings accordingly.
By following these steps, you will ensure that Finale is properly set up for playback and ready to start from any measure you choose. Now, let’s move on to selecting the desired measure.
Selecting the Desired Measure
In order to playback from a specific measure in Finale, you need to first select that measure. Follow these steps to select the desired measure:
- Open your score in Finale: Launch Finale and open the score that you want to work with. You can do this by going to the “File” menu and selecting “Open,” or by using the keyboard shortcut Ctrl+O (or Command+O on Mac).
- Navigate to the measure: Use the navigation tools in Finale to locate the measure you want to playback from. You can scroll through the score using the scroll bars or use the arrow keys on your keyboard to move between measures.
- Click on the measure: Once you have found the desired measure, click on it with your mouse to select it. The measure will typically highlight or change color to indicate that it’s been selected.
- Verify the measure selection: Double-check that the correct measure is selected by looking at the measure number displayed in the score. This will ensure that Finale knows which measure you want to start playback from.
Now that you have successfully selected the desired measure, it’s time to adjust the playback settings to ensure it starts playing from that measure. Let’s move on to the next section.
Adjusting Playback Settings
Before we enable playback from the selected measure, it’s important to adjust the playback settings in Finale to ensure the desired playback experience. Here’s what you need to do:
- Open the Playback Controls: In Finale, go to the “Window” menu and select “Playback Controls” to open the Playback Controls panel. This panel displays various playback options and controls.
- Set the playback tempo: Use the “Tempo” slider or input field in the Playback Controls panel to adjust the playback tempo to your desired speed. You can drag the slider or manually enter a tempo value to match the playback to your preference.
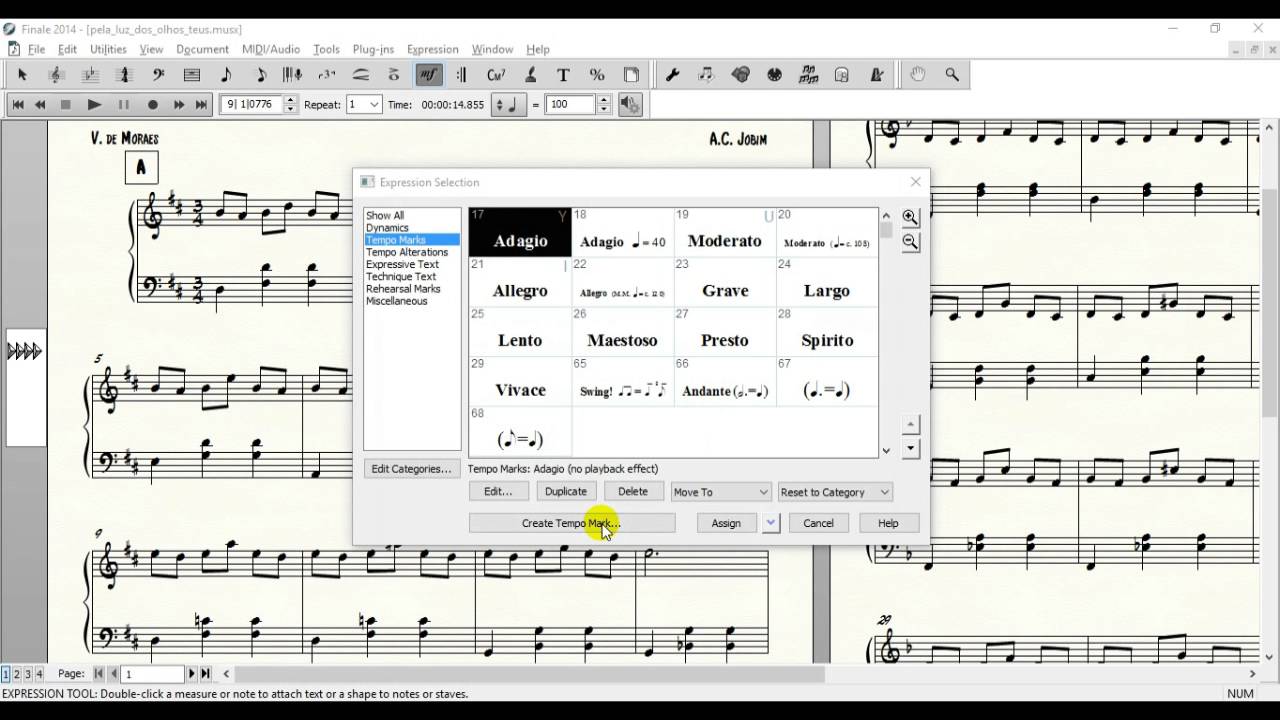
- Configure playback options: Finale offers several playback options that you can customize to your preference. These options include dynamics, articulations, repeats, and more. To access these options, click on the gear icon in the Playback Controls panel, or go to the “Playback” menu and select “Playback Options.”
- Experiment with human playback: Finale’s Human Playback feature adds human-like expression and phrasing to the playback, making it sound more natural. You can experiment with different Human Playback styles to enhance the musicality of your composition. Access these styles in the Human Playback section of the Playback Options menu.
- Use MIDI/Audio setup: If you want to change the sound output of Finale playback, you can configure the MIDI/Audio setup. This allows you to choose different virtual instruments or external sound modules to ensure the playback matches your desired sound.
By adjusting these playback settings in Finale, you can personalize the playback experience and tailor it to your specific musical requirements. Once you have made these adjustments, you’re ready to enable playback from the selected measure. Let’s move on to the next section.
Enabling Playback from Measure
Now that you’ve set up Finale and selected the desired measure, it’s time to enable playback from that specific measure. Follow these steps to achieve playback from the measure of your choice:
- Locate the play icon: In the Playback Controls panel, you’ll find a play icon resembling a triangle. This is the playback button that starts the playback of your composition.
- Click on the play icon: Simply click on the play icon in the Playback Controls panel to start the playback. Finale will now play the music from the selected measure onwards.
- Verify playback from the desired measure: As the playback begins, visually verify that the music is starting from the measure you previously selected. The highlighted measure or the cursor indicator should indicate the current position.
- Listen to the playback: Enjoy listening to your composition as it plays from the selected measure. You can make any necessary adjustments or tweaks to the score while the playback is ongoing.
- Stop the playback: To stop the playback, click on the stop icon in the Playback Controls panel. This will pause the playback and allow you to make further edits or changes to your score.
Enabling playback from a specific measure in Finale gives you the ability to focus on a particular section or analyze specific parts of your composition. Take advantage of this feature to fine-tune your music and ensure it sounds exactly as you envision.
In some cases, you may encounter issues or encounter unexpected behavior when trying to playback from a measure other than the beginning. Let’s explore some troubleshooting steps in the next section to help you overcome any challenges you may face.
Troubleshooting
While enabling playback from a specific measure in Finale is usually a straightforward process, you may encounter some issues or unexpected behavior along the way. Here are some common troubleshooting steps to help you resolve any playback-related challenges:
- Double-check measure selection: Ensure that you’ve accurately selected the desired measure before starting the playback. Check the highlighted measure or the cursor indicator to confirm that playback is starting from the correct measure.
- Review playback settings: Verify that your playback settings, such as tempo, dynamics, and articulations, are properly configured. Make any necessary adjustments in the Playback Controls panel or the Playback Options menu to ensure the desired playback experience.
- Check for conflicting playback commands: If you’re using keyboard shortcuts or MIDI controllers to control playback, check for any conflicting commands. Conflicting commands can lead to undesired playback behavior or the inability to start playback from the desired measure.
- Update Finale and drivers: Ensure that you’re using the latest version of Finale and that your audio drivers are up to date. Outdated software or drivers can cause compatibility issues that may affect the playback functionality.
- Reset MIDI/Audio configuration: If you’re experiencing issues with MIDI playback or audio output, try resetting the MIDI/Audio configuration. Go to the “MIDI/Audio” menu, select “Device Setup,” and click on the “Reset” button. Then, reconfigure your MIDI and audio devices.
If you’re still encountering problems with enabling playback from a measure in Finale, it may be helpful to consult the Finale user manual, online forums, or reach out to technical support for further assistance. They can provide specific guidance based on your unique setup and circumstances.
With these troubleshooting steps, you’ll be able to overcome any playback-related challenges and enjoy seamless playback from your desired measure in Finale. Now, let’s wrap up our discussion.
Conclusion
Congratulations! You’ve learned how to enable playback from a specific measure in Finale. By following the steps outlined in this guide, you can now focus on a particular section of your composition, make necessary adjustments, and ensure that your music sounds just the way you envision it.
We started by setting up Finale and making sure it’s properly configured for playback. We then explored how to select the desired measure in your score. We adjusted playback settings to personalize the playback experience, including tempo, dynamics, and human playback options. Finally, we walked through the steps to enable playback from the selected measure.
If you encounter any challenges along the way, remember our troubleshooting tips, such as double-checking your measure selection, reviewing playback settings, and updating software and drivers. Don’t hesitate to consult the Finale user manual or seek support from the Finale community if needed.
Now, armed with your newfound knowledge, you can take full advantage of Finale’s playback features and unleash your creativity. Use playback from a specific measure to fine-tune your compositions, analyze musical passages, and bring your musical ideas to life.
Remember, practice makes perfect. As you continue to work with Finale and explore its playback capabilities, you’ll become more proficient in using this powerful tool. So, keep composing, experimenting, and enjoying the process of creating beautiful music.
Happy playback from measure, and may your musical journey be filled with harmony and inspiration!