Home>Production & Technology>Audio Cable>How To Ground Unbalanced 3.5Mm Audio Cable
Audio Cable
How To Ground Unbalanced 3.5Mm Audio Cable
Modified: January 22, 2024
Learn how to ground unbalanced 3.5mm audio cable for improved audio quality. Follow our step-by-step guide on grounding techniques for audio cables.
(Many of the links in this article redirect to a specific reviewed product. Your purchase of these products through affiliate links helps to generate commission for AudioLover.com, at no extra cost. Learn more)
Table of Contents
- How To Ground Unbalanced 3.5mm Audio Cable
- Introduction
- Understanding Unbalanced Audio
- The Importance of Grounding
- Tools and Materials Needed
- Step 1: Identify the Ground Terminal
- Step 2: Strip the Cable
- Step 3: Identify the Signal and Ground Wires
- Step 4: Connect the Ground Wire
- Step 5: Test the Grounded Cable
- Conclusion
How To Ground Unbalanced 3.5mm Audio Cable
If you are an audio enthusiast or a professional in the field, you may come across unbalanced 3.5mm audio cables in your setups. Though widely used, these cables are susceptible to interference and noise due to their unbalanced nature. However, by grounding the cable properly, you can significantly enhance the audio quality and minimize unwanted disturbances.
Grounding an unbalanced 3.5mm audio cable helps to eliminate hums, buzzes, and other forms of electrical interference that can degrade the audio signal. This process involves connecting the cable’s ground wire to a designated ground terminal, providing a reference point for all electrical components to prevent potential noise issues.
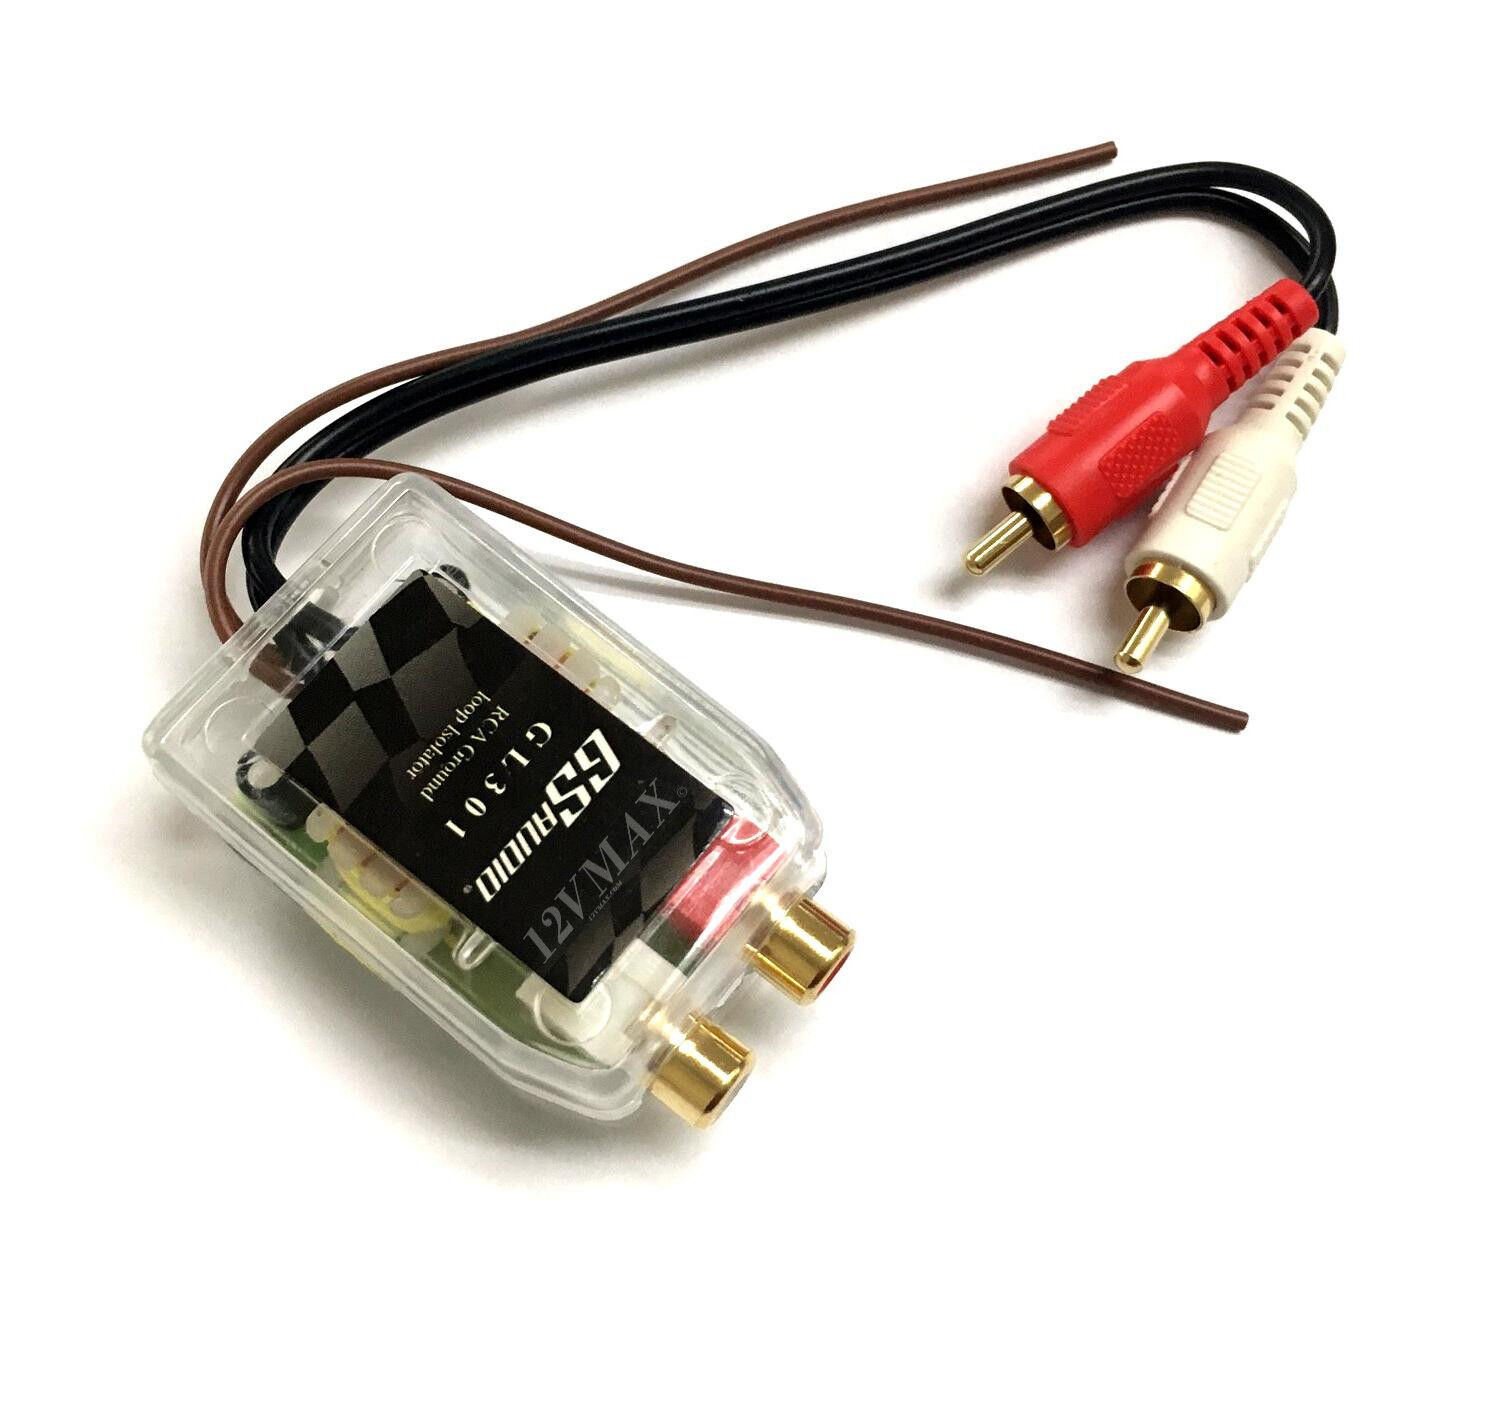
To ground an unbalanced 3.5mm audio cable, you will need a few basic tools and materials:
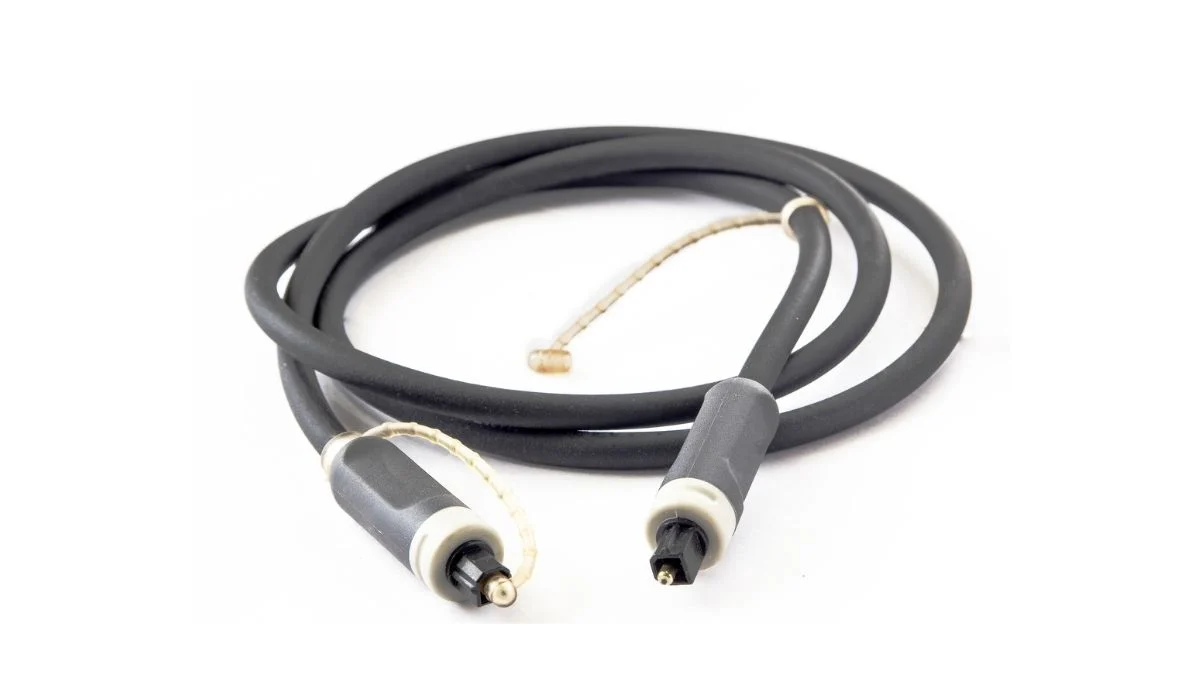
- Unbalanced 3.5mm audio cable
- Wire stripper
- Soldering iron and solder
- Heat shrink tubing
- Heat gun or lighter
Now, let’s go through the step-by-step process of grounding your unbalanced 3.5mm audio cable:
Step 1: Identify the Ground Terminal
Before proceeding, you will need to identify the ground terminal on your audio device or amplifier. This is usually labeled as “GND” or “Ground” and is often marked with a symbol representing a three-pronged connection.
Step 2: Strip the Cable
Using a wire stripper, carefully remove the outer insulation from the unbalanced 3.5mm audio cable, exposing the inner wires. Take caution not to damage the signal and ground wires while stripping the cable.
Step 3: Identify the Signal and Ground Wires
Once the cable is stripped, you will notice two wires inside – the signal wire (usually copper) and the ground wire (typically wrapped in insulation or a different color). Identify and separate these wires.
Step 4: Connect the Ground Wire
Using a soldering iron, carefully solder the ground wire to the designated ground terminal on your audio device or amplifier. Ensure that the connection is secure and free from any loose strands of wire that can cause interference.
Step 5: Test the Grounded Cable
With the ground wire connected, test the cable by playing audio through it. Check for any unwanted noise or interference. If the audio is clean and interference-free, then congratulations – you have successfully grounded your unbalanced 3.5mm audio cable!
By properly grounding your unbalanced 3.5mm audio cable, you can greatly improve the audio quality and enjoy a cleaner, more pristine sound. Remember to take necessary precautions while working with soldering irons and other tools, and always follow the manufacturer’s instructions. Happy grounding!
Introduction
Audio cables are an integral part of any audio setup, ensuring the transmission of high-quality sound from one device to another. When it comes to connecting portable devices such as smartphones, tablets, or laptops to audio equipment, the unbalanced 3.5mm audio cable is the go-to choice due to its widespread compatibility.
Unbalanced audio cables are popular for their simplicity and convenience. However, they are more susceptible to interference and noise compared to their balanced counterparts. This can result in undesirable hums, buzzes, and other electrical disturbances, compromising the audio experience.
To overcome these challenges, it is crucial to properly ground the unbalanced 3.5mm audio cable. Grounding helps create a reference point for electrical signals, minimizing unwanted disturbances and ensuring a cleaner audio signal transmission.
In this article, we will guide you through the process of grounding an unbalanced 3.5mm audio cable effectively. By following these steps, you can improve the overall audio quality, reduce interference, and enjoy a more immersive audio experience.
Whether you are a music enthusiast, a producer, or a professional in the audio industry, understanding how to ground an unbalanced 3.5mm audio cable is an essential skill to have. It allows you to optimize your audio setup and ensure the best possible sound quality.
Before we delve into the grounding process, it is important to familiarize ourselves with unbalanced audio cables and their characteristics. This knowledge will help you better understand why grounding is necessary and how it can make a significant difference in audio performance.
So, let’s dive in and explore the world of unbalanced 3.5mm audio cables and the importance of grounding in ensuring optimal audio transmission.
Understanding Unbalanced Audio
Unbalanced audio cables are commonly used for connecting various audio devices, including smartphones, tablets, laptops, and portable audio players, to amplifiers, mixers, and other audio equipment. They are characterized by a single conductor (the signal wire) and a ground wire that acts as a return path for the audio signal.
Unlike balanced audio cables that utilize a dedicated ground wire along with two signal wires (positive and negative polarity), unbalanced cables are more straightforward in their design. The signal wire carries the audio information, while the ground wire provides the reference point for the electrical signal.
Unbalanced audio cables are typically identified by their 3.5mm (1/8″) stereo mini-plug connector, which is widely used in consumer electronics. This connector allows for easy connectivity and is commonly found on headphones, earphones, and aux cables.
While unbalanced audio cables offer convenience and compatibility, they are more susceptible to external noise and interference compared to balanced cables. This susceptibility arises because the ground wire can pick up electromagnetic interference and introduce it into the audio signal, leading to audible disturbances like hums, buzzes, or static.
Without proper grounding, these unwanted noises can degrade the audio quality and affect the overall listening experience. To mitigate this issue, it is essential to ground the unbalanced audio cable, effectively reducing the chances of interference and preserving the integrity of the audio signal.
Grounding an unbalanced audio cable provides a reliable reference point for electrical signals. It helps divert any unwanted electrical noise and interference away from the signal wire, ensuring a clean and uninterrupted audio path.
By establishing a proper ground connection, you can minimize the risk of ground loops, which can occur when multiple audio devices are connected together, resulting in a circular flow of electrical current and introducing unwanted noise into the audio system.
Overall, understanding the characteristics of unbalanced audio cables and their susceptibility to interference is crucial in realizing the importance of grounding. With this knowledge in mind, you can take the necessary steps to ground your unbalanced 3.5mm audio cables, resulting in improved audio quality and a more enjoyable listening experience.
The Importance of Grounding
Grounding is a crucial aspect of maintaining audio integrity and minimizing unwanted interference in any audio setup. When it comes to unbalanced 3.5mm audio cables, grounding plays a significant role in ensuring optimal signal transmission and preserving the fidelity of the audio.
The primary purpose of grounding is to provide a stable reference point for electrical signals. By establishing this reference, any unwanted electrical noise or interference can be diverted away from the audio signal, resulting in a cleaner and more accurate representation of the original sound.
Proper grounding is especially important for unbalanced cables due to their vulnerability to external interference. These cables, with their single conductor and ground wire, can act as antennas, picking up electromagnetic interference from various sources such as power cables, lights, and other electronic devices.
Without proper grounding, the interference can infiltrate the audio signal, resulting in audible disturbances in the form of hums, buzzes, or static noise. These unwanted artifacts can significantly degrade the audio quality and detract from the intended listening experience.
One common issue that can arise without proper grounding is ground loops. Ground loops occur when multiple audio devices or equipment are interconnected, and there is an unintentional difference in ground potential between them. This difference in potential creates a circular flow of electrical current, leading to humming or buzzing sounds in the audio.
Grounding the unbalanced 3.5mm audio cable helps to eliminate ground loops by providing a consistent and stable ground reference. This helps to equalize the ground potential across all interconnected devices, effectively minimizing the occurrence of unwanted noises.
Furthermore, grounding also ensures the safety of the audio equipment and the individuals using them. In the event of a fault or electrical spike, grounding provides a safe path for excess electrical current to flow, preventing damage to the equipment and reducing the risk of electrical shocks.
Overall, the importance of grounding unbalanced 3.5mm audio cables cannot be overstated. It is essential for maintaining audio integrity, minimizing interference, eliminating ground loops, and ensuring a safe and enjoyable audio experience. By taking the time to properly ground your audio cables, you can maximize the potential of your sound system and achieve the best possible audio quality.
Tools and Materials Needed
Grounding an unbalanced 3.5mm audio cable requires a few essential tools and materials to ensure a successful and secure connection. Before you begin the grounding process, make sure you have the following items on hand:
- Unbalanced 3.5mm audio cable: This cable is commonly used for connecting devices such as smartphones, tablets, or laptops to audio equipment. Ensure that you have an unbalanced cable with a 3.5mm stereo mini-plug connector.
- Wire stripper: A wire stripper is a handy tool that allows you to remove the insulation from the cable without damaging the delicate wires inside. Choose a wire stripper suitable for the diameter of your audio cable.
- Soldering iron and solder: You will need a soldering iron and solder to make a secure and reliable connection between the ground wire and the ground terminal. Make sure your soldering iron is in good working condition and that you have enough solder for the job.
- Heat shrink tubing: Heat shrink tubing is used to insulate and protect the soldered connection. It provides a clean and professional finish while ensuring electrical safety. Choose heat shrink tubing that fits snugly around the wires.
- Heat gun or lighter: A heat gun or lighter is necessary to shrink the heat shrink tubing and create a tight seal around the soldered connection. Use caution when working with heat sources and follow safety precautions.
These tools and materials are readily available at electronics stores or online retailers. Having them prepared before you start the grounding process will help ensure a smooth and efficient workflow.
Additionally, it is essential to have a suitable working area with proper lighting and ventilation. A clean and organized workspace will make it easier to handle the tools and materials, reducing the risk of unwanted accidents or mistakes.
With the necessary tools and materials at hand and a suitable work environment set up, you are ready to proceed with the grounding process for your unbalanced 3.5mm audio cable. Let’s move on to the next steps and guide you through the grounding process step by step.
Step 1: Identify the Ground Terminal
Before you can begin grounding your unbalanced 3.5mm audio cable, you need to identify the ground terminal on your audio device or amplifier. The ground terminal is where you will connect the ground wire of the audio cable to establish a proper ground connection.
Typically, the ground terminal is labeled as “GND” or “Ground” and is often accompanied by a symbol representing a three-pronged connection. It may be located near the audio input jack or on the back panel of the device.
Take a close look at your audio device or amplifier and look for any markings or symbols that indicate the ground terminal. If you are unsure, consult the product manual or refer to the manufacturer’s website for specific information about your device.
When identifying the ground terminal, it is important to distinguish it from other connectors such as the audio input or output jacks. The ground terminal typically has a separate designation to avoid any confusion.
Once you have located the ground terminal, take note of its position and prepare for the next steps in the grounding process. Identifying the ground terminal is a crucial first step as it ensures that you are connecting the ground wire to the appropriate point for optimal grounding.
Remember, accuracy and precision are key when working with audio connections, so double-check your findings to ensure you are connecting to the correct terminal. By correctly identifying the ground terminal, you are setting the foundation for a successful grounding process and ensuring a clean and reliable audio signal.
With the ground terminal identified, you are now ready to move on to the next step: stripping the unbalanced 3.5mm audio cable.
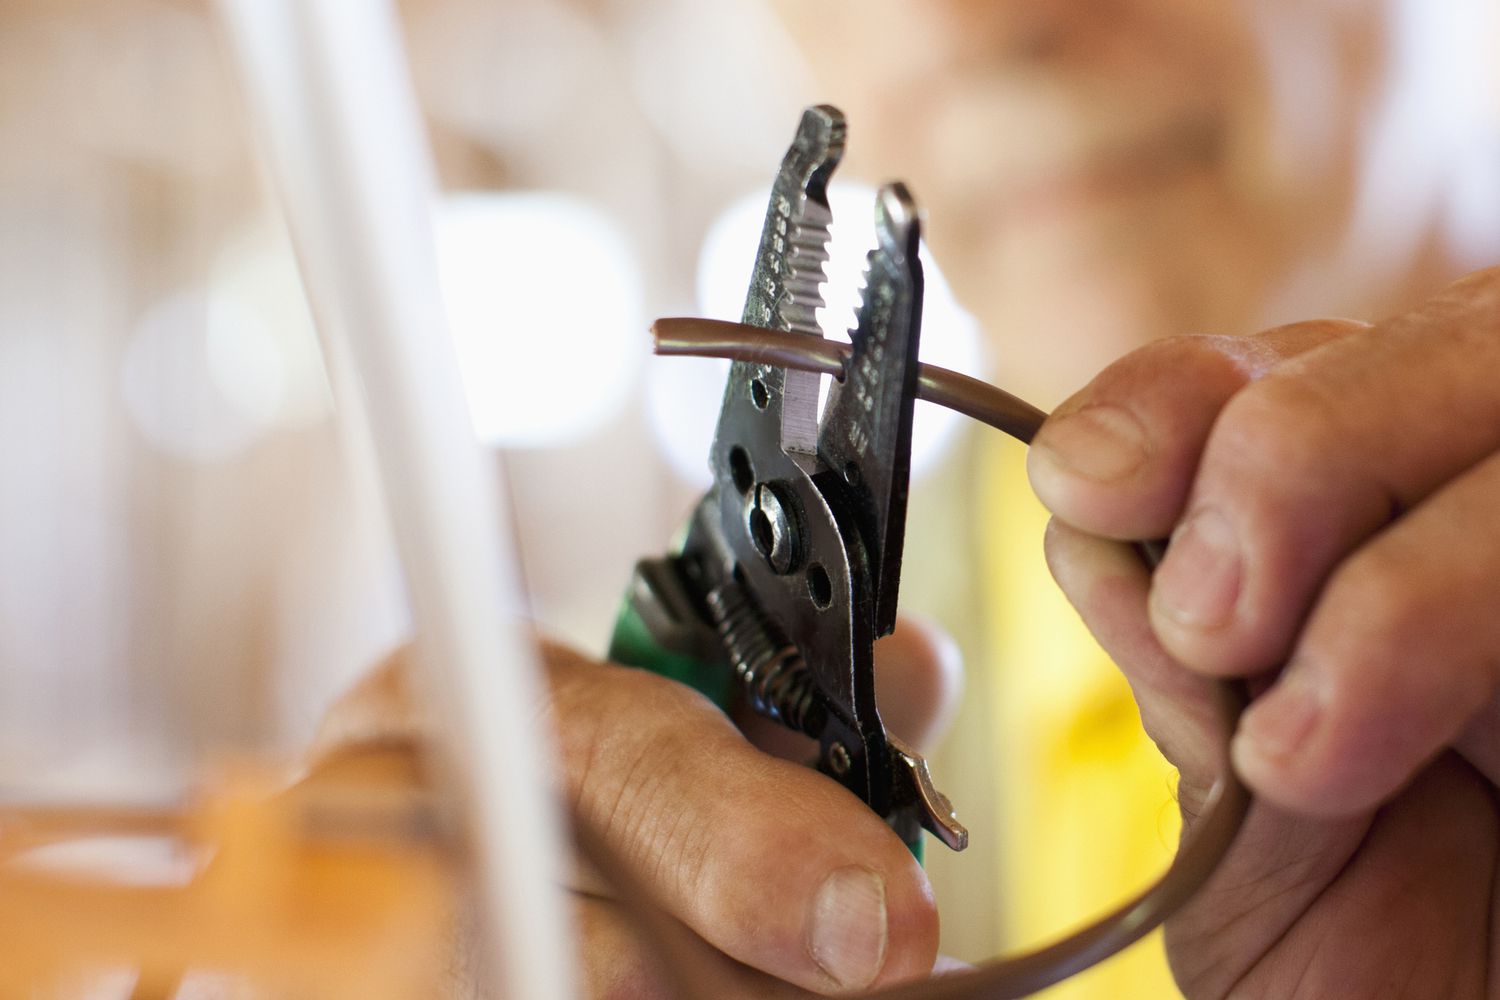
Step 2: Strip the Cable
Now that you have identified the ground terminal, it’s time to strip the unbalanced 3.5mm audio cable to expose the inner wires. This step is essential for making a solid and secure connection during the grounding process.
To strip the cable, you will need a wire stripper tool. Wire strippers are specifically designed to remove the outer insulation of the cable without damaging the delicate signal and ground wires inside.
Follow these steps to strip the cable correctly:
- Ensure that the cable is unplugged from any audio devices or amplifiers to avoid any potential electric shock or damage.
- Position the unbalanced 3.5mm audio cable between the appropriate notch of the wire stripper. Make sure the notch is suitable for the cable’s diameter without being too tight or too loose.
- Gently squeeze the wire stripper’s handles, applying light pressure to the cable. The insulation should be scored but not cut or nicked.
- While maintaining a firm grip, rotate the cable within the wire stripper to complete a full rotation. This will help loosen the cut insulation.
- Release the handles of the wire stripper and carefully pull the insulation away from the cable. The inner signal and ground wires should now be visible.
It is crucial to exercise caution while stripping the cable to prevent any damage to the signal and ground wires. Avoid applying excessive force or using a wire stripper that is not appropriate for the cable’s diameter, as this can lead to unintended cuts or breaks in the wires.
Once the cable is properly stripped, inspect the signal and ground wires for any signs of damage or fraying. If any issues are detected, it may be necessary to trim the wires and strip the cable again to ensure proper contact and signal transmission.
With the cable successfully stripped, you are now ready to move on to the next step: identifying the signal and ground wires.
Step 3: Identify the Signal and Ground Wires
After stripping the outer insulation of the unbalanced 3.5mm audio cable, it’s time to identify the signal and ground wires within. Properly identifying these wires is crucial for establishing the correct connections during the grounding process.
Typically, unbalanced audio cables consist of two wires: the signal wire and the ground wire.
The signal wire is responsible for carrying the audio signal from the source device to the destination device. It is usually made of copper and is the wire that will be connected to the appropriate input on your audio equipment.
The ground wire, on the other hand, acts as the reference point for the electrical signal and is responsible for minimizing interference and noise. This wire is often wrapped in insulation or has a different color to differentiate it from the signal wire.
To identify the signal and ground wires, carefully examine the exposed wires after stripping the cable. Typically, the signal wire is the one that appears metallic and may have a copper color. The ground wire is often wrapped in insulation or may have a different color, such as black or green.
If you are unsure about the identification, you can use a multimeter set to continuity mode to confirm the connectivity of the wires. By touching the probes of the multimeter to the exposed wires, you can determine which wire corresponds to the signal and which is the ground.
Once you have correctly identified the signal and ground wires, it’s crucial to keep them separated and avoid any accidental contact between them. Mixing up the wires during the grounding process can lead to improper connections, affecting the audio signal quality and potentially causing interference.
By properly identifying and distinguishing the signal and ground wires, you are now ready to move on to the next step: connecting the ground wire to the designated ground terminal.
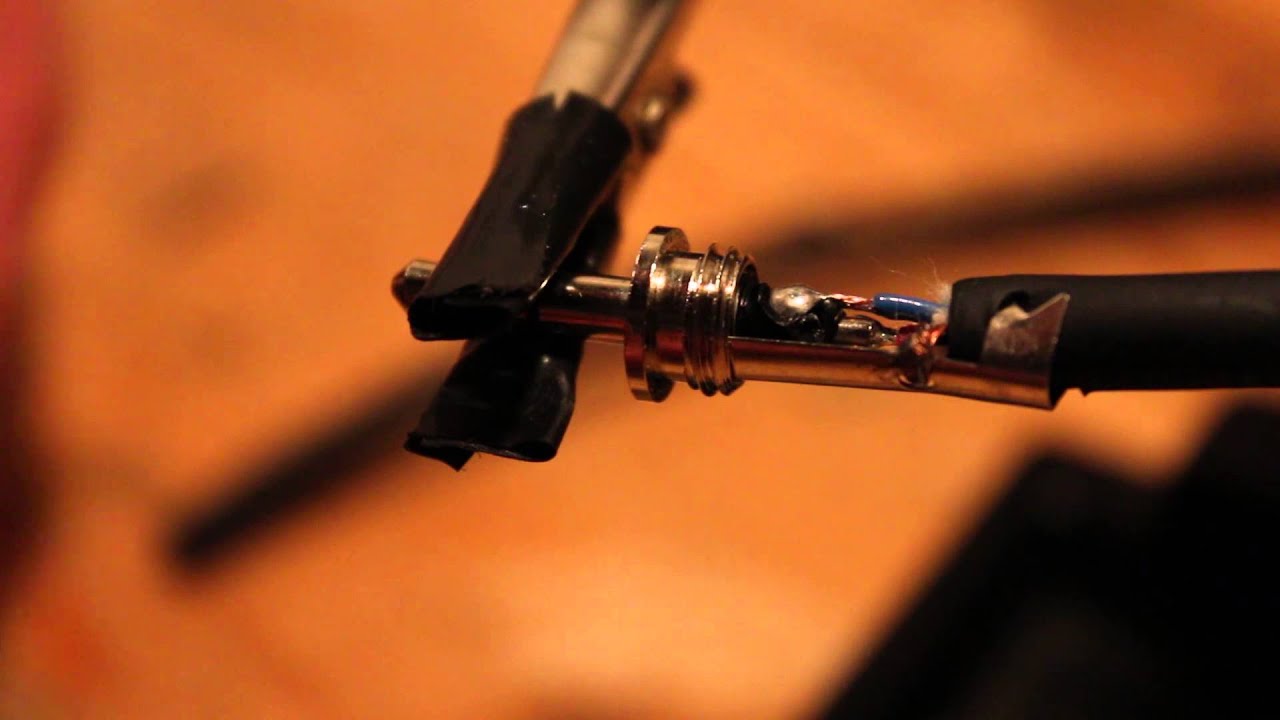
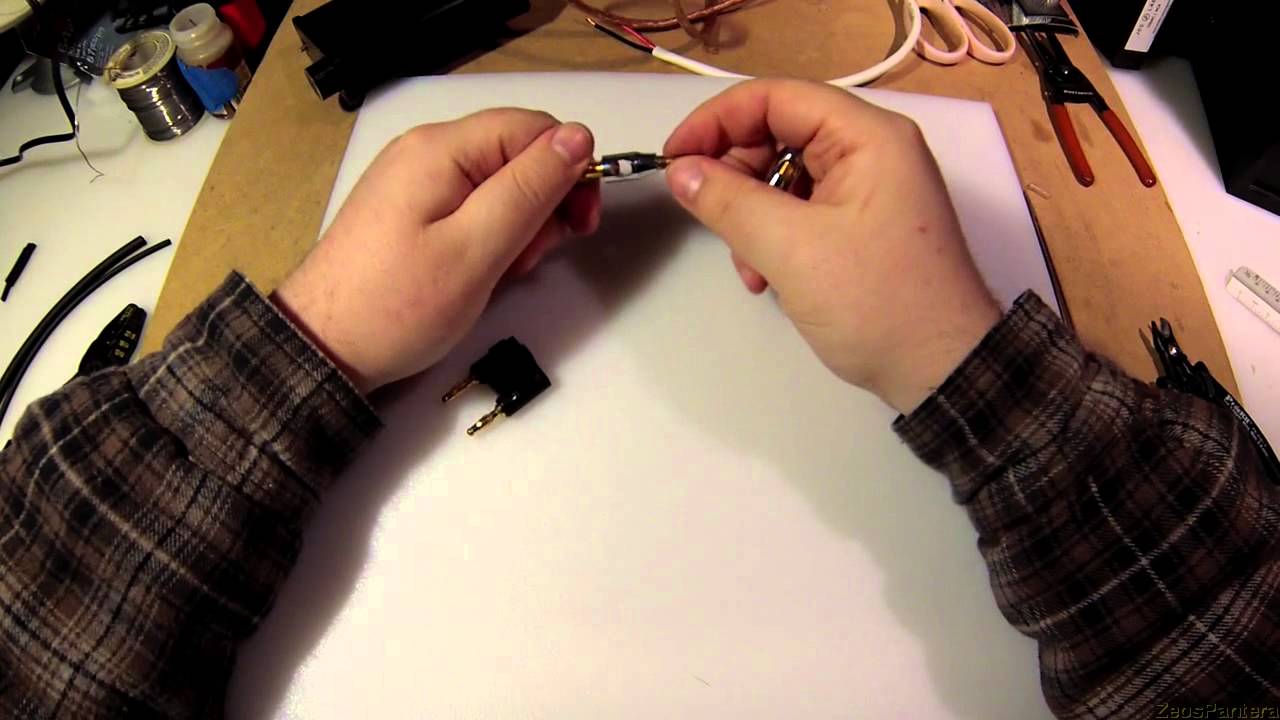
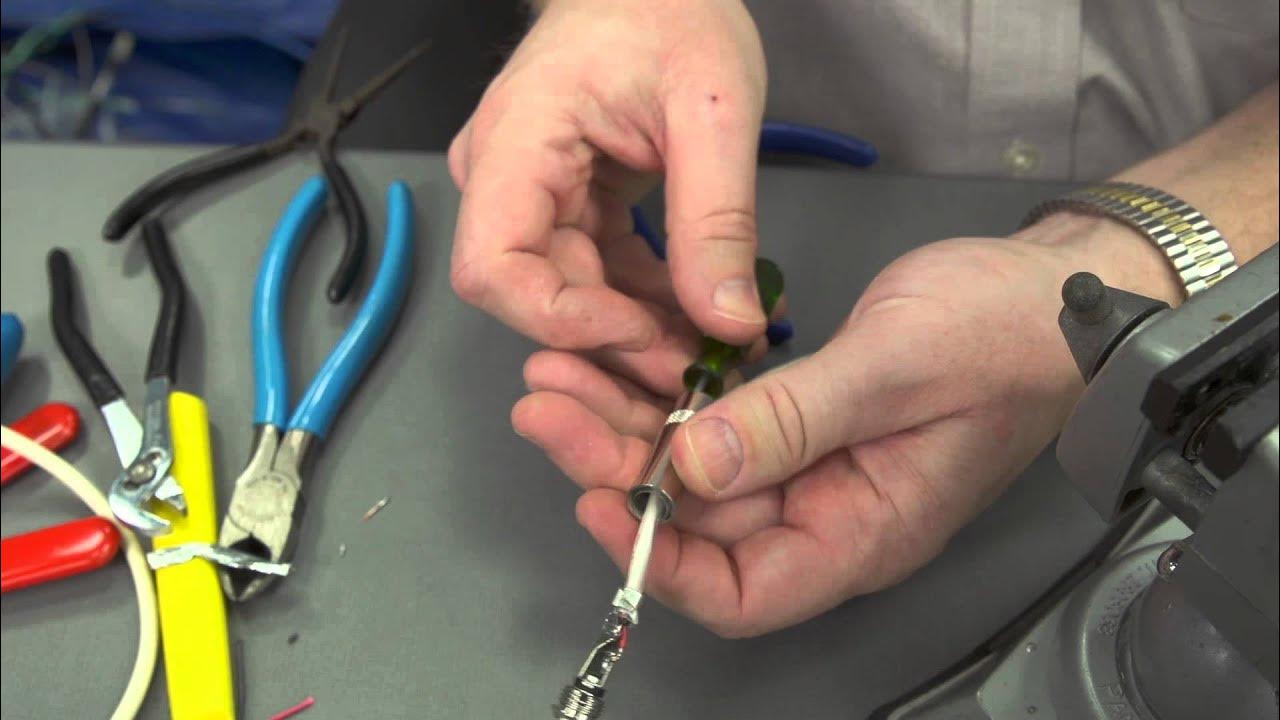
Step 4: Connect the Ground Wire
With the signal and ground wires properly identified, it’s time to connect the ground wire to the designated ground terminal. This step ensures a solid and secure ground connection, minimizing unwanted interference and noise in the audio signal.
Follow these steps to connect the ground wire:
- Ensure that the audio device or amplifier is turned off and unplugged to prevent any potential electrical hazards.
- Take the exposed end of the ground wire and align it with the ground terminal on your audio device or amplifier. The ground terminal is typically labeled as “GND” or “Ground” and may be accompanied by a symbol representing a three-pronged connection.
- Once aligned, use a soldering iron to heat the connection point on the ground terminal. This ensures a secure and durable joint.
- Carefully apply a small amount of solder to the joint, allowing it to flow and create a strong connection. Avoid using excessive amounts of solder, as this can result in messy and unreliable connections.
- Once the solder has cooled and solidified, inspect the joint to ensure a clean and visually pleasing appearance. The connection should be secure and free from any loose strands of wire.
- For added protection and insulation, slide a length of heat shrink tubing over the solder joint. Make sure the tubing covers the joint completely.
- Using a heat gun or a lighter, carefully apply heat to the heat shrink tubing, causing it to shrink and form a tight seal around the solder joint. Ensure that the tubing is evenly heated and sealed.
- Allow the tubing to cool completely before proceeding. This ensures a proper and secure insulation for the connection.
It is important to handle the soldering iron and solder with caution to prevent any accidental burns or damage to the audio equipment. Follow safety guidelines and always work in a well-ventilated area.
By connecting the ground wire to the designated ground terminal and securing the joint with solder and heat shrink tubing, you have established a reliable ground connection for your unbalanced 3.5mm audio cable.
Now that the ground wire is properly connected, it’s time to test the grounded cable and ensure that the audio signal is clean and interference-free. Let’s move on to the final step of the grounding process.
Step 5: Test the Grounded Cable
After successfully connecting the ground wire to the designated ground terminal, it’s crucial to test the grounded cable to ensure that the audio signal is clean and free from interference. This step allows you to verify the effectiveness of the grounding process and confirm that the cable is working as intended.
Follow these steps to test the grounded cable:
- Ensure that the audio device or amplifier is turned on and connected to a source with audio playback, such as a smartphone or music player.
- Connect the unbalanced 3.5mm audio cable to both the audio device’s output jack and the corresponding input jack on the audio equipment.
- Play audio through the connected devices and carefully listen for any unwanted noise, such as hums, buzzes, or static.
- If you hear any interference or noise, check the connections, ensuring that the ground wire is securely connected to the ground terminal.
- Inspect the solder joint and heat shrink tubing to ensure that there are no loose strands or poor connections.
- If necessary, make any adjustments or repairs to the grounding connection and retest the cable.
- If the audio signal is clean and interference-free, congratulations! You have successfully grounded your unbalanced 3.5mm audio cable.
During the testing process, it’s important to listen carefully and critically to the audio playback. Pay attention to any subtle or noticeable improvements in audio quality compared to when the cable was ungrounded. A successful grounding should result in a cleaner and more pristine sound, devoid of any unwanted noise or interference.
If you encounter any issues or persistent interference despite proper grounding, it may be necessary to troubleshoot the audio setup further, such as isolating and eliminating potential sources of electromagnetic interference or checking the cables and connections for any other faults.
By thoroughly testing the grounded cable, you can ensure that your audio setup is optimized for the best possible sound quality and minimize the risk of interference negatively impacting your listening experience.
Congratulations! You have successfully grounded your unbalanced 3.5mm audio cable and verified that the audio signal is clean and interference-free. Enjoy your enhanced audio experience!
Conclusion
Grounding an unbalanced 3.5mm audio cable is a vital process that can significantly improve the audio quality and minimize unwanted interference in your audio setup. By establishing a proper ground connection, you create a stable reference point for electrical signals, reducing the risk of hums, buzzes, and other forms of electrical noise.
In this article, we discussed the importance of grounding and provided a step-by-step guide to help you properly ground your unbalanced 3.5mm audio cable. We explored the tools and materials needed for the process, identified the ground terminal, stripped the cable, identified the signal and ground wires, connected the ground wire, and tested the grounded cable.
By following these steps, you can ensure a clean and reliable audio signal transmission, free from interference and noise. Grounding helps eliminate ground loops, reduces electromagnetic interference, and maintains a consistent ground reference between interconnected devices.
Remember, when working with audio cables, it’s crucial to be cautious and follow safety precautions. Handle soldering irons and other tools with care, and always work in a well-ventilated area.
Now that you have learned how to ground an unbalanced 3.5mm audio cable, you can apply this knowledge to improve your audio setup and enjoy a superior audio experience. Whether you’re an audio enthusiast or a professional in the field, proper grounding is essential for achieving optimal sound quality and preserving the integrity of your audio signals.
So go ahead, apply these grounding techniques to your unbalanced 3.5mm audio cables and unlock the full potential of your audio system. Say goodbye to unwanted noise and interference, and immerse yourself in a world of crystal-clear sound.
Happy grounding!