Home>Production & Technology>Audiophile>M Audio Audiophile 192 How Many Tracks Can Be Recorded Through Sdif
Audiophile
M Audio Audiophile 192 How Many Tracks Can Be Recorded Through Sdif
Published: December 17, 2023
Discover how many tracks can be recorded through SDIF with the M Audio Audiophile 192, an audiophile-grade audio interface designed to deliver high-quality recording and playback.
(Many of the links in this article redirect to a specific reviewed product. Your purchase of these products through affiliate links helps to generate commission for AudioLover.com, at no extra cost. Learn more)
Table of Contents
Introduction
Welcome to the world of audiophiles, where sound quality and precision are of utmost importance. If you’re an audio enthusiast seeking to elevate your listening experience, you’ve come to the right place. In this comprehensive guide, we will delve into the fascinating world of the M Audio Audiophile 192 and explore its capabilities for recording tracks through SDIF (Sony/Philips Digital Interface) technology.
The Audiophile 192 is a top-tier audio interface renowned for its exceptional sound quality and versatile recording capabilities. Designed for professional musicians, audio engineers, and music producers, this audio interface delivers unrivaled accuracy and detail, making it a favored choice among audiophiles.
SDIF, or Sony/Philips Digital Interface, is a digital audio interface protocol widely used in the audio industry. It provides a reliable and efficient means of transmitting digital audio data between different audio devices, such as audio interfaces, mixers, and digital recorders. The Audiophile 192 features an SDIF connector, allowing for seamless integration with compatible devices.
One of the essential aspects that every audiophile considers is the recording capacity of their audio interface. How many tracks can the M Audio Audiophile 192 record simultaneously through SDIF? Well, the answer varies depending on several factors, such as the available system resources, bit depth, and sample rate. In this guide, we will explore these factors in detail to help you optimize your recording setup and get the most out of your Audiophile 192.
It’s important to note that the Audiophile 192 offers a range of recording options, allowing you to tailor your setup to your specific needs. Whether you’re recording a single instrument, capturing a full band performance, or working on a complex multi-track project, this audio interface has got you covered.
So, without further ado, let’s embark on this journey to explore the recording capacity of the M Audio Audiophile 192 through SDIF and discover how to maximize its potential for your audio recording endeavors.
Overview of M Audio Audiophile 192
The M Audio Audiophile 192 is a highly regarded audio interface that offers exceptional audio quality and versatility. It is designed to meet the demands of professional musicians, audio engineers, and music producers who prioritize precision and performance in their recordings.
With its sleek design and robust construction, the Audiophile 192 is built to withstand the rigors of studio use while delivering pristine audio reproduction. It boasts a 24-bit/192kHz resolution and a dynamic range of 113dB, providing unparalleled clarity and detail in your recordings.
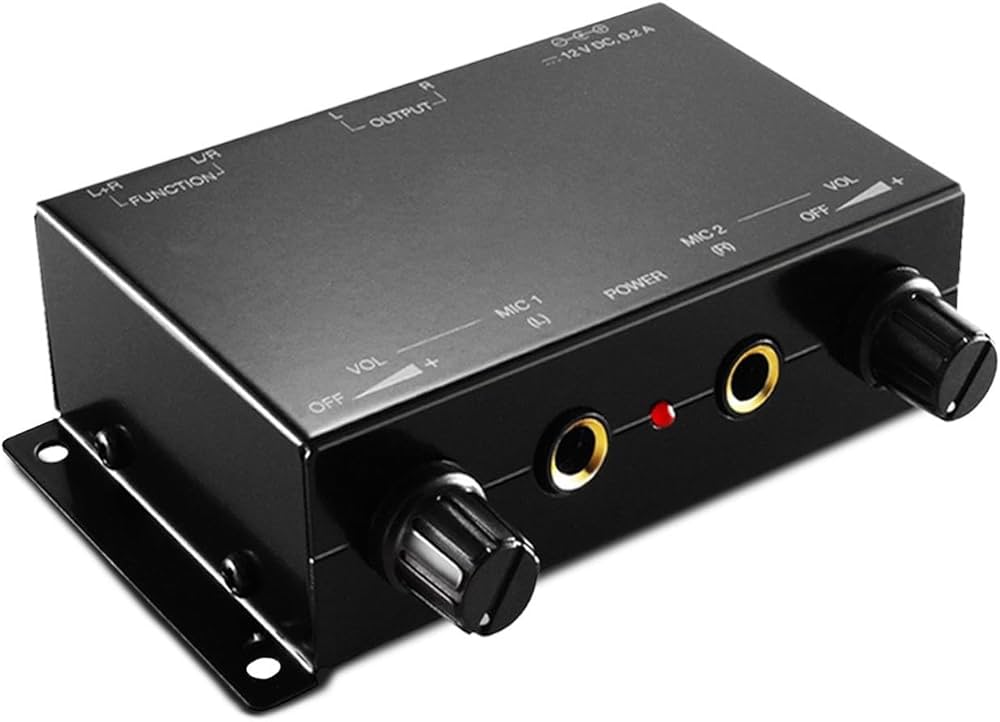
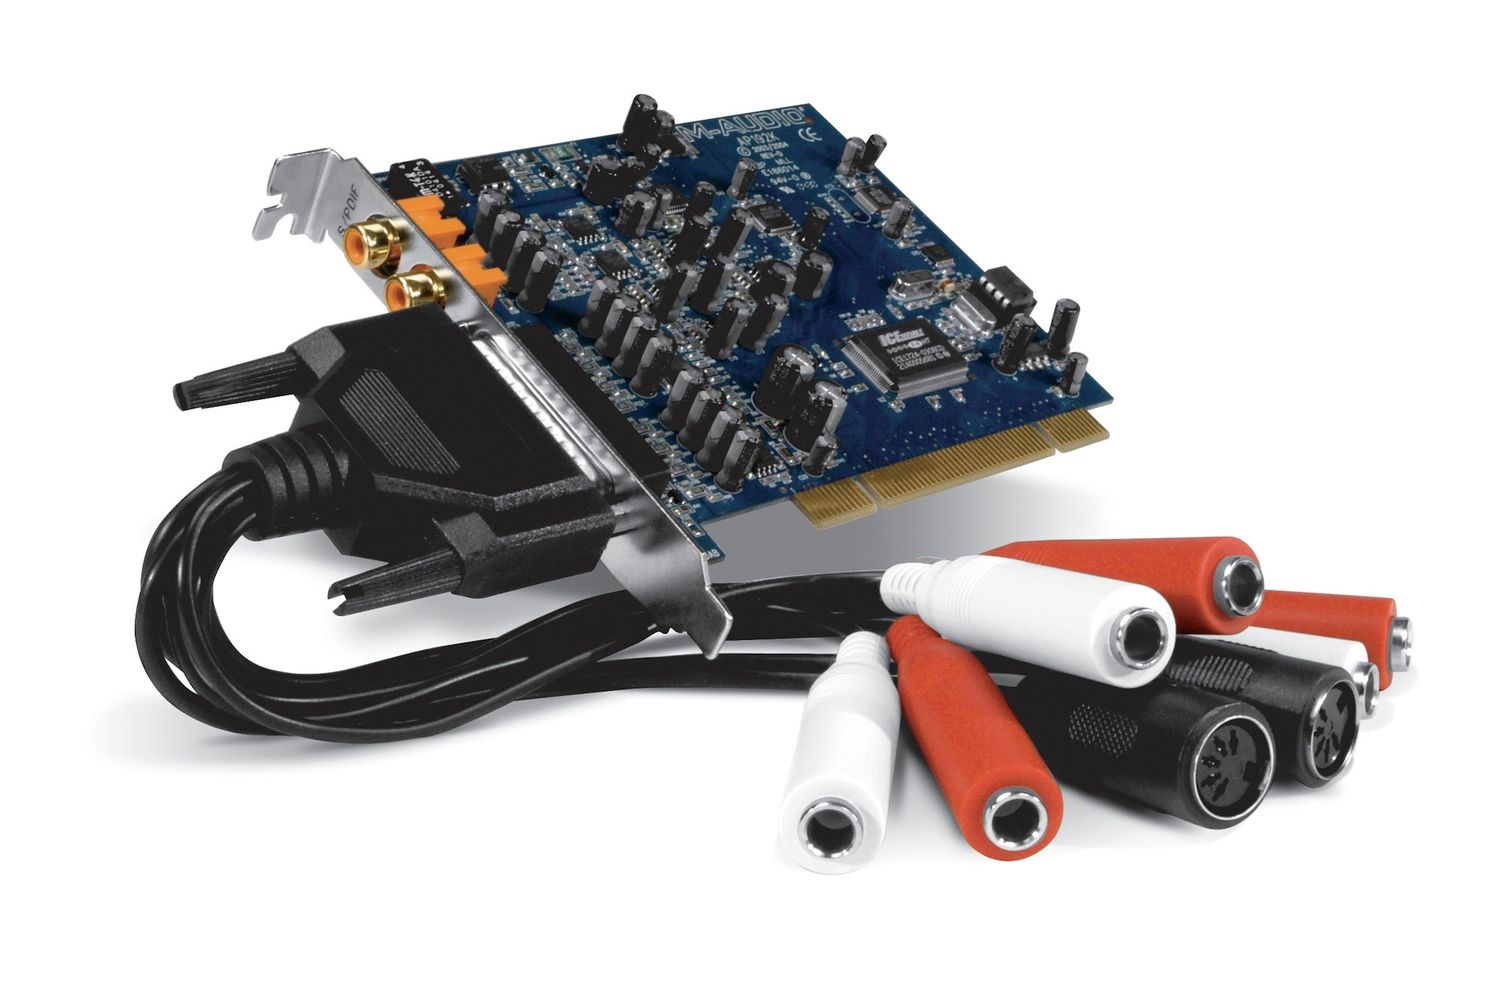
The Audiophile 192 features a comprehensive set of inputs and outputs, including two XLR/TRS combo inputs with switchable phantom power, MIDI I/O, S/PDIF, and ADAT inputs and outputs. This generous selection of connections allows for seamless integration with a wide range of instruments, microphones, and other audio devices.
One of the standout features of the Audiophile 192 is its flexible monitoring options. It offers a headphone output with its dedicated volume control, ensuring accurate monitoring for critical listening and mixing tasks. Additionally, it features stereo line outputs, allowing you to connect studio monitors for precise playback.
Another notable feature of the Audiophile 192 is its low-latency performance. It utilizes high-speed USB 2.0 connectivity, providing stable and fast data transfer for real-time monitoring and recording without noticeable delay. This is especially important for musicians who require immediate feedback when recording their performances.
In terms of software integration, the Audiophile 192 comes bundled with a variety of software applications to enhance your recording experience. This includes Pro Tools | First M-Audio Edition, Ableton Live Lite, and a range of virtual instruments and effects plugins. These tools offer a comprehensive suite of creative possibilities, enabling you to take your recordings to new heights.
Overall, the M Audio Audiophile 192 is a powerhouse audio interface that combines exceptional sound quality, extensive connectivity, and user-friendly features. Whether you’re a seasoned professional or a budding musician, this audio interface is sure to exceed your expectations and help you achieve studio-grade recordings.
Understanding SDIF
When it comes to digital audio transmission, the Sony/Philips Digital Interface, or SDIF, plays a crucial role in ensuring high-quality and reliable audio signals. SDIF is a digital audio interface protocol used in a variety of professional audio equipment, including the M Audio Audiophile 192. Understanding how SDIF works is essential for maximizing the recording capabilities of your audio interface.
SDIF utilizes a coaxial cable or fiber optic connection to transmit digital audio data between devices. It operates using a serial data format, where audio information is converted into a stream of digital bits and transmitted sequentially. This ensures accurate and lossless transmission of audio signals from one device to another.
One of the key advantages of SDIF is its ability to maintain high quality throughout the audio signal chain. It supports high-resolution audio formats, allowing for the recording and playback of audio at sample rates up to 192kHz and at a bit depth of 24 bits. This ensures that every detail and nuance of your audio is faithfully captured and reproduced.
In addition, SDIF offers low latency operation, which is vital for real-time audio applications. The Audiophile 192 takes full advantage of the SDIF protocol to provide a stable and responsive recording environment. This is especially beneficial for musicians who require precise timing and immediate feedback when tracking their performances.
SDIF also provides synchronization capabilities, allowing multiple devices to stay in sync with each other. This is particularly useful when working with a complex recording setup involving multiple audio interfaces or digital recorders. By utilizing the SDIF protocol, you can ensure that all devices are perfectly aligned, minimizing any timing discrepancies.
Furthermore, SDIF supports both stereo and multi-channel audio transmission. This means you can not only record and play back stereo audio signals but also take advantage of multi-channel setups for immersive surround sound recordings. The Audiophile 192 offers multiple inputs and outputs, making it ideal for capturing and reproducing multi-channel audio with ease.
Overall, understanding SDIF is essential for harnessing the full potential of your M Audio Audiophile 192 audio interface. Whether you’re recording a solo instrument, a full band, or creating immersive soundscapes, SDIF ensures that your audio signals are transmitted with the utmost fidelity and precision.
Recording Capacity of M Audio Audiophile 192
One of the key considerations for any audio enthusiast or professional is the recording capacity of their audio interface. When it comes to the M Audio Audiophile 192, the recording capabilities are impressive and offer flexibility to accommodate a wide range of recording scenarios.
The Audiophile 192 provides up to 8 input channels and 8 output channels, allowing you to record multiple instruments or microphones simultaneously. Whether you’re recording a solo performance or capturing an entire band, this audio interface has the capacity to handle your recording needs.
The actual number of tracks you can record through the Audiophile 192 depends on several factors, including the available system resources, the bit depth, and the sample rate. Higher bit depths and sample rates require more processing power and memory, which can limit the number of tracks that can be recorded simultaneously.
For example, if you’re recording at a sample rate of 44.1kHz with a bit depth of 16 bits, the Audiophile 192 can handle a substantial number of simultaneous tracks. However, if you choose to record at a higher sample rate of 96kHz or 192kHz and a higher bit depth of 24 bits, the number of tracks may be reduced due to the increased demands on the system.
It’s worth noting that the recording capacity may also vary depending on the recording software you’re using. Different digital audio workstations (DAWs) have their own system requirements and performance optimizations. Therefore, it’s important to ensure that your software and hardware are properly configured to maximize the recording capacity of the Audiophile 192.
In addition to the recording capacity, it’s crucial to consider the storage capacity of your computer or external storage devices. Higher track counts and longer recording sessions require significant storage space. Therefore, it’s a good practice to have ample storage capacity to accommodate your recording needs without running out of space.
To get the most out of your Audiophile 192 and optimize the recording capacity, it is advisable to close unnecessary applications and processes running in the background. This helps free up system resources and ensures a smooth recording experience without any dropouts or performance issues.
Overall, the M Audio Audiophile 192 offers a generous recording capacity, capable of handling multiple tracks simultaneously. By considering the system resources, bit depth, sample rate, and storage capacity, you can make the most of this audio interface and unleash your creativity in the recording studio.
Factors Affecting the Number of Tracks
When it comes to recording multiple tracks simultaneously with the M Audio Audiophile 192, there are several factors to consider that can impact the number of tracks you can record. Understanding these factors is crucial for optimizing your recording setup and achieving the desired results.
1. System Resources: The available system resources, including the processing power of your computer’s CPU and the amount of RAM, play a vital role in determining the number of tracks you can record. Recording multiple tracks simultaneously requires a significant amount of computational power. If your system lacks sufficient resources, you may experience performance issues such as audio dropouts or latency. It’s important to ensure that your computer meets or exceeds the minimum system requirements for recording with the Audiophile 192.
2. Bit Depth and Sample Rate: The bit depth and sample rate settings of your recording session also impact the number of tracks you can simultaneously record. Higher bit depths and sample rates, such as 24-bit/192kHz, require more data to be processed, resulting in increased system resource demands. If you opt for higher bit depths and sample rates, you may need to reduce the number of tracks to maintain optimal performance.
3. Buffer Size: The buffer size refers to the amount of audio that is stored in the audio interface’s buffer before it is sent to the computer for processing. A smaller buffer size reduces latency but requires more processing power and can limit the number of tracks you can record simultaneously. On the other hand, a larger buffer size increases latency but allows for greater track counts. It’s important to find a balance that suits your recording needs and system capabilities.
4. Software Optimization: The performance and optimization of your recording software, also known as the digital audio workstation (DAW), can significantly impact the number of tracks you can record. Some DAWs offer specific settings or optimizations to improve performance and reduce system resource usage. It’s advisable to explore these options and follow best practices recommended by the software developer to maximize your recording capacity.
5. Storage Capacity: The amount of available storage space on your computer or external storage devices affects the number of tracks you can record. Each track requires a certain amount of storage space, and recording multiple tracks simultaneously can quickly consume a significant amount of storage. Ensuring sufficient storage capacity is essential to avoid running out of space during recording sessions.
By considering these factors and optimizing your recording setup accordingly, you can maximize the number of tracks you can record simultaneously with the M Audio Audiophile 192. It’s crucial to strike a balance between track count, system resources, and overall performance to achieve high-quality recordings and a smooth recording experience.
Recommended Recording Settings
When it comes to achieving optimal recording results with the M Audio Audiophile 192, certain settings and configurations can help you capture high-quality audio with maximum accuracy. Here are some recommended recording settings to consider:
1. Bit Depth and Sample Rate: Choose the appropriate bit depth and sample rate for your recording. Higher bit depths, such as 24 bits, offer increased dynamic range and capture more detail in your audio. Sample rates, such as 44.1kHz or 48kHz, are commonly used for music production. However, if your project requires higher fidelity, you can opt for sample rates up to 96kHz or even 192kHz. Ensure that your chosen bit depth and sample rate are supported by your recording software and that your computer can handle the increased processing demands.
2. Buffer Size: Set the buffer size to an appropriate value based on your recording requirements. A smaller buffer size reduces latency but increases the strain on your computer’s processing capabilities. If you have sufficient system resources, you can choose a smaller buffer size for near real-time monitoring. However, if you’re experiencing performance issues or audio dropouts, consider increasing the buffer size to reduce the strain on your system.
3. Input Levels and Gain Staging: Pay attention to your input levels to avoid distortion or clipping. Ensure that your audio source is not too loud or too quiet by adjusting the input gain control on the Audiophile 192. Aim for levels that provide a healthy signal without reaching the maximum level, as this can introduce unwanted distortion. Proper gain staging is crucial for capturing clean and dynamic recordings.
4. Monitoring: Use headphones or studio monitors to monitor your recordings accurately. The Audiophile 192 offers dedicated headphone outputs and line outputs for connecting your preferred monitoring devices. Make sure to calibrate your monitors to provide a flat and accurate representation of the recorded audio. This will help you make informed decisions during the recording and mixing process.
5. Software Configuration: Take advantage of the configuration options in your recording software to optimize performance. This can include adjusting the buffer size, enabling low-latency mode, and disabling any unnecessary plugins or processes running in the background. Consult the user manual or online resources specific to your recording software to learn about recommended settings and optimization techniques.
6. Storage and Backup: Ensure that you have sufficient storage space on your computer or external storage devices to accommodate your recordings. It’s always a good practice to regularly back up your recordings to prevent data loss. Consider using external hard drives or cloud storage for additional backup options and to free up space on your primary recording device.
By following these recommended recording settings, you can make the most of the M Audio Audiophile 192 and capture your audio with exceptional clarity and precision. Experiment with different settings to find what works best for your specific recording needs and preferences.
Optimizing SDIF Performance
To ensure optimal performance and reliable audio transmission with the M Audio Audiophile 192 through SDIF, it’s important to take certain steps to optimize its functionality. Here are some tips for maximizing SDIF performance:
1. Quality Cables: Use high-quality SDIF cables for connecting your Audiophile 192 to other compatible devices. The quality of the cables can significantly impact the integrity and stability of the audio signal. Look for cables that are specifically designed for digital audio transmission and provide excellent shielding to minimize interference and signal degradation.
2. Shielding and Grounding: Ensure proper grounding and shielding throughout your audio setup. Grounding issues or improper shielding can introduce unwanted noise and interference into the SDIF signal path. Use grounded power outlets and consider investing in high-quality surge protectors or power conditioners to minimize external electrical noise.
3. Device Compatibility and Firmware Updates: Ensure that the devices you are connecting to the Audiophile 192 through SDIF are compatible and running the latest firmware. Compatibility issues or outdated firmware can affect the performance and stability of the audio transmission. Check the manufacturer’s website for any available firmware updates and install them as necessary.
4. Proper Clock Synchronization: SDIF devices typically rely on a master clock to ensure accurate and synchronized audio transmission. Ensure that all connected devices are using the same clock source or are properly synchronized. This will help maintain sample-accurate audio across multiple devices, resulting in a seamless and coherent audio recording and playback experience.
5. System Optimization: As with any digital audio setup, optimizing your overall system performance is vital for achieving optimal SDIF performance. Close any unnecessary applications and processes running in the background to free up system resources. Disable any CPU-intensive tasks or background services that may interfere with the real-time audio processing and SDIF transmission.
6. Monitor Signal Levels: Keep an eye on the signal levels when working with SDIF. Ensure that the input and output levels are within a reasonable range to avoid signal clipping or distortion. Adjust the gain settings on your Audiophile 192 or other connected devices accordingly to maintain a healthy signal level throughout the SDIF signal chain.
7. Regular Maintenance: Perform regular maintenance and cleaning of your Audiophile 192 and other connected devices. Dust and debris can accumulate over time, affecting the performance and longevity of the equipment. Follow the manufacturer’s instructions for cleaning and maintenance and keep your SDIF setup in optimal condition.
By implementing these optimization techniques, you can ensure smooth and reliable SDIF performance with the M Audio Audiophile 192. A well-optimized SDIF setup ensures accurate and high-quality audio transmission, allowing you to focus on capturing the best possible recordings with your Audiophile 192.
Conclusion
The M Audio Audiophile 192 is a powerful and versatile audio interface that offers exceptional sound quality and extensive recording capabilities. With its high-resolution audio reproduction and flexible connectivity options, it is a popular choice among audiophiles, musicians, and audio professionals.
In this guide, we explored various aspects of the Audiophile 192’s recording capacity through SDIF technology. We learned about SDIF and its vital role in transmitting digital audio signals accurately and reliably. Understanding the factors that influence the number of tracks you can record simultaneously with the Audiophile 192 is essential for maximizing its potential.
We also discussed recommended recording settings, including bit depth, sample rate, buffer size, and monitoring practices, to ensure optimal results. These settings help you achieve high-quality recordings while balancing system resources and performance.
Furthermore, we explored optimizing SDIF performance by using quality cables, proper grounding, device compatibility, clock synchronization, system optimization, and regular maintenance. By following these optimization techniques, you can ensure reliable and high-fidelity audio transmission through SDIF.
The M Audio Audiophile 192 offers a generous recording capacity, enabling you to capture multi-channel audio with exceptional detail and precision. However, it’s important to consider the limitations of your system resources, bit depth, and sample rate when recording multiple tracks simultaneously.
In conclusion, the M Audio Audiophile 192 is a powerful tool for audiophiles and audio professionals alike. By understanding its capabilities, optimizing your recording settings, and ensuring efficient SDIF performance, you can unlock its full potential and elevate your audio recording experience to new heights.
So, grab your instruments, connect your Audiophile 192, and let your creativity flow as you delve into the world of pristine audio recordings.