Home>Production & Technology>Background Music>How To Put Background Music In Canva
Background Music
How To Put Background Music In Canva
Published: October 28, 2023
Learn how to easily add background music to your Canva designs. Enhance your visuals with the perfect audio to make your creations come to life.
(Many of the links in this article redirect to a specific reviewed product. Your purchase of these products through affiliate links helps to generate commission for AudioLover.com, at no extra cost. Learn more)
Table of Contents
Introduction
Background music has the power to enhance the overall experience of a multimedia project. Whether you’re creating a video presentation, a slideshow, or a social media post, adding the right background music can elevate your content to the next level. Canva, a popular graphic design platform, not only allows you to create stunning visuals but also gives you the ability to incorporate background music into your designs.
In this article, we will guide you through the process of putting background music in Canva. Whether you have a specific track in mind or you’re looking for inspiration, we’ll show you how to select, upload, and add background music to your Canva design. We’ll also cover how to adjust the settings and preview your design before saving it.
By following these step-by-step instructions, you’ll be able to create compelling multimedia projects in Canva with the perfect background music accompanying your visuals. Let’s get started!
Step 1: Selecting a Background Music Track
The first step in adding background music to your Canva design is selecting the perfect track. Canva offers a wide range of royalty-free music options to choose from, ensuring that you can find the right sound to match the mood and tone of your project. Here’s how to select a background music track:
- Open Canva: Start by opening Canva on your preferred device and logging in to your account.
- Create a New Design: Click on the “Create a design” button on Canva’s homepage and select the type of design you want to create. It could be a presentation, a social media post, a video, or any other design format that Canva supports.
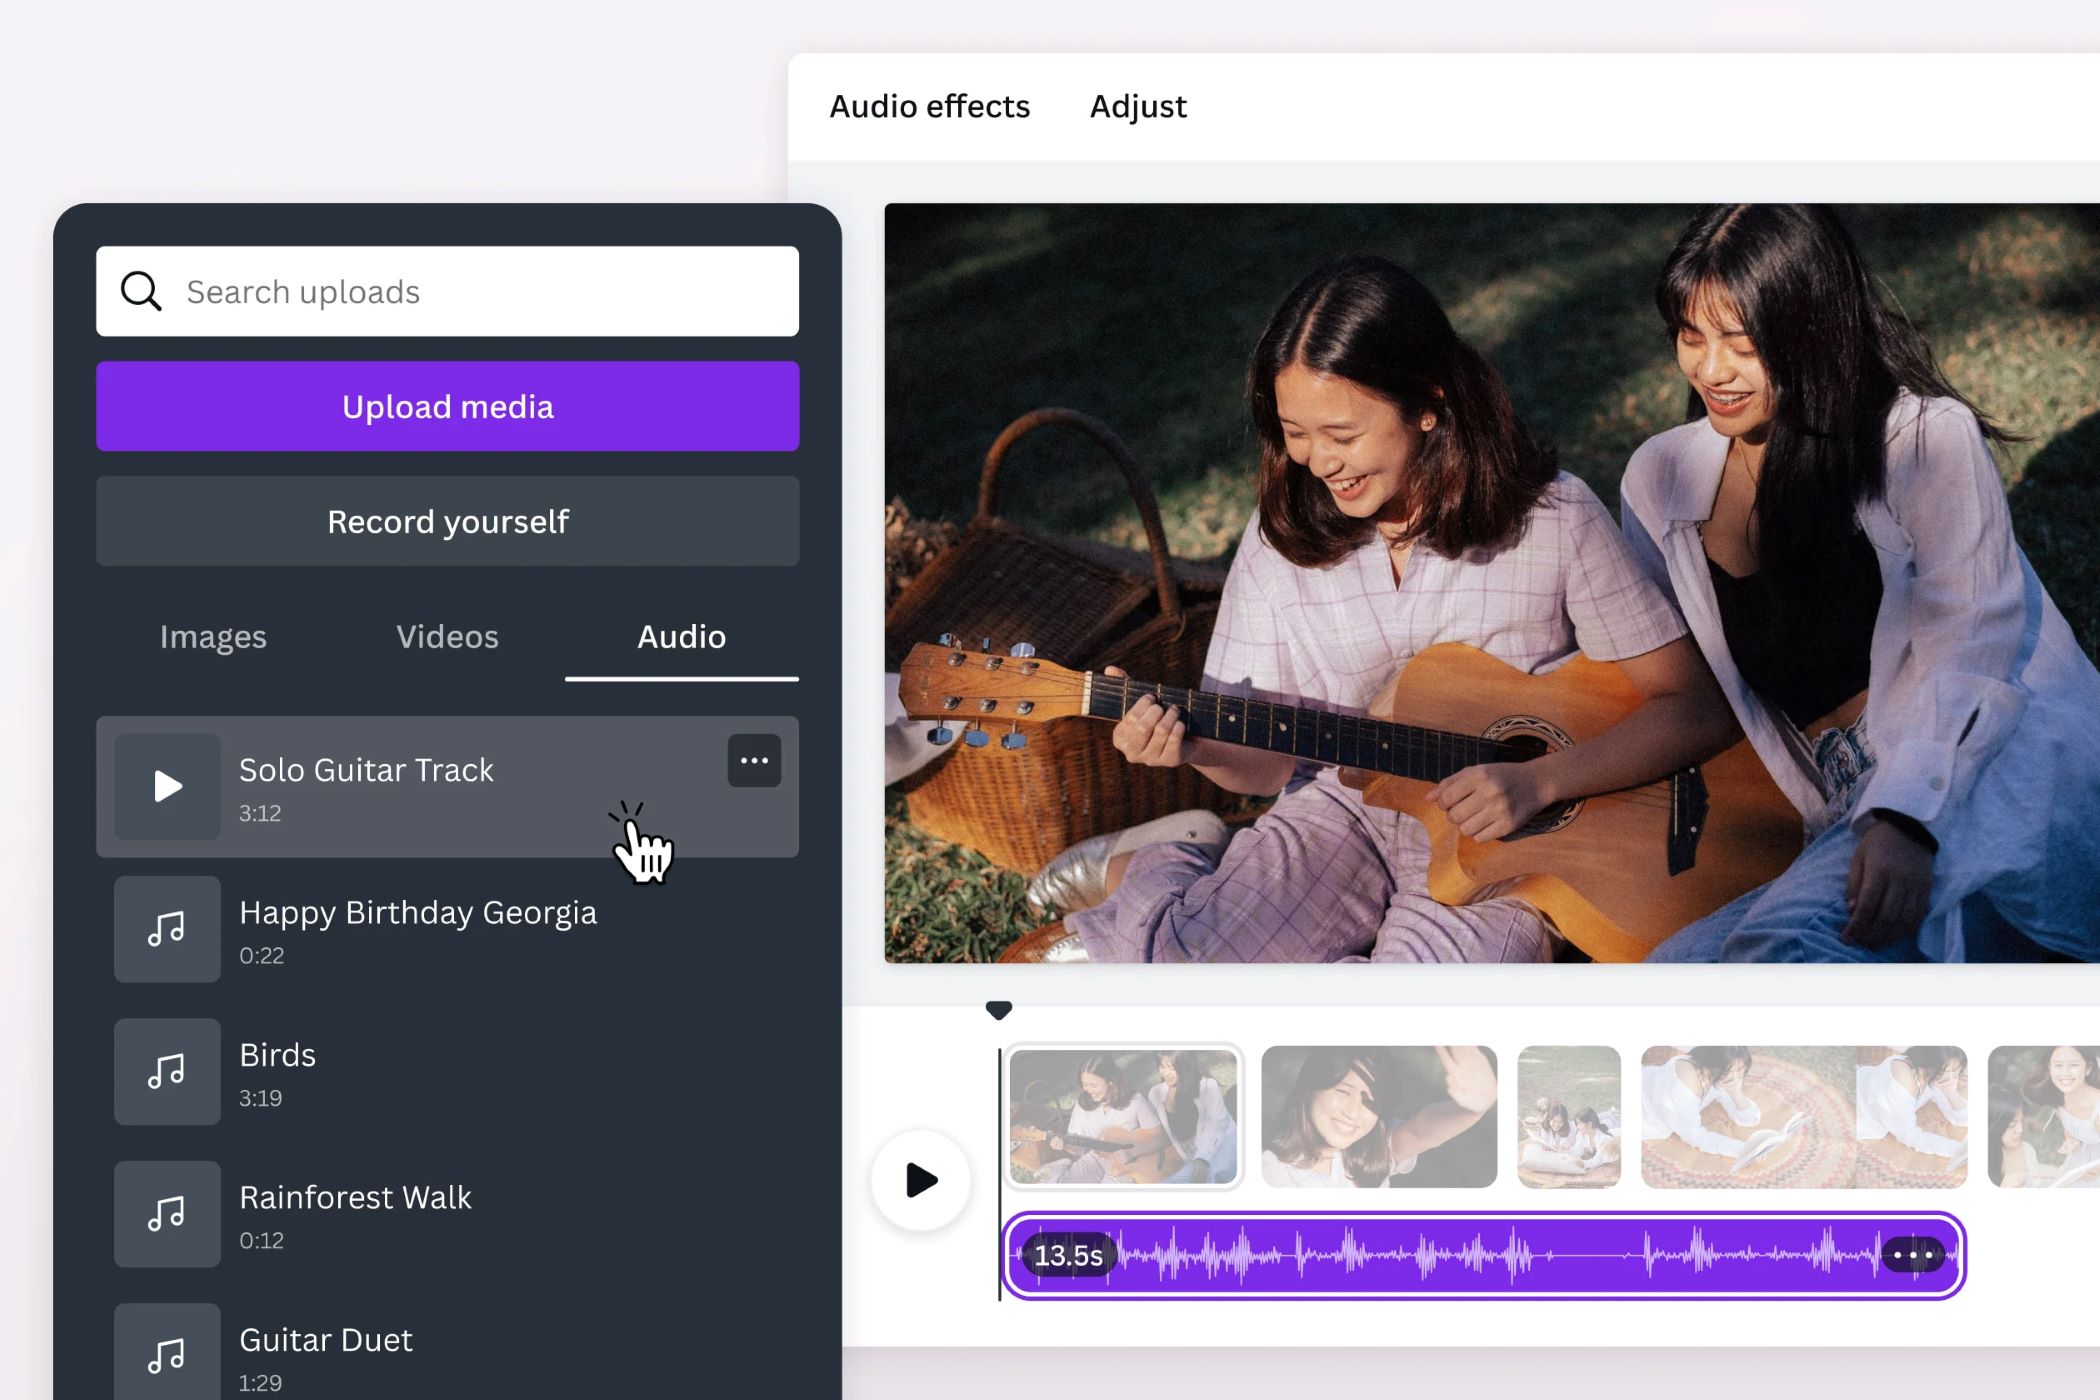
- Access the Music Library: Once you’re in the design editor, click on the “Elements” tab on the left-hand side of the screen. Then, click on the “Audio” option to access Canva’s music library.
- Browse and Preview Music Tracks: Scroll through the available music tracks or use the search bar to find specific genres, moods, or keywords. Canva provides filters to narrow down your search based on duration, genre, and mood. Click on the play button next to each track to preview it.
- Select a Music Track: After previewing the tracks, choose the one that best fits your project. Consider factors like tempo, energy level, and the emotions you want to evoke. Once you’ve made your selection, click on the track to add it to your design.
Remember to choose a track that is appropriate for your project and aligns with its purpose. Whether you’re going for an upbeat and cheerful tone or a more somber and reflective atmosphere, the right music track can greatly enhance the impact of your design.
Step 2: Uploading the Background Music to Canva
If you have a specific background music track that you want to use in your Canva design, you also have the option to upload your own music. This allows you to add a personal touch to your project or use copyrighted music that you have the rights to. Here’s how you can upload your own background music to Canva:
- Open Canva: Start by opening Canva on your preferred device and logging in to your account.
- Create a New Design: Click on the “Create a design” button on Canva’s homepage and select the type of design you want to create.
- Access the Music Library: Once you’re in the design editor, click on the “Elements” tab on the left-hand side of the screen. Then, click on the “Audio” option to access Canva’s music library.
- Upload Your Music: At the top of the audio library, you’ll find an “Uploads” tab. Click on it to access the upload feature.
- Select and Upload Your Music File: Click on the “Upload Media” button and browse your device to find the background music file you want to use. Once you’ve located the file, select it and click “Open” to start the upload.
- Wait for the Upload to Complete: Depending on the size of the file and your internet connection speed, the upload may take a few moments. Once it’s finished, the music track will appear in the “Uploaded” section of the audio library.
- Add the Music to Your Design: To add the uploaded music to your Canva design, simply click on it and drag it into the workspace. You can position and resize the music element as desired.
By following these steps, you can easily upload and use your own background music in Canva. This gives you more flexibility and customization options to create a unique and personalized experience for your audience.
Step 3: Adding the Background Music to Your Canva Design
Once you have selected or uploaded the background music track, it’s time to add it to your Canva design. Here’s how you can incorporate the music into your project:
- Open Canva: Start by opening Canva on your preferred device and logging in to your account.
- Create a New Design: Click on the “Create a design” button on Canva’s homepage and select the type of design you want to create.
- Access the Music Library: Once you’re in the design editor, click on the “Elements” tab on the left-hand side of the screen. Then, click on the “Audio” option to access Canva’s music library.
- Select the Background Music Track: Choose the background music track that you want to add to your design. You can either select a track from Canva’s library by clicking on it or use the music that you have uploaded as mentioned in Step 2.
- Drag and Drop the Music Element: Click on the music track and drag it into the workspace. You can position and resize the music element as desired. Canva also provides options to change the duration of the music track and loop it if necessary.
- Sync Music with Design Elements: To synchronize the music with specific design elements in your project, move the music element along the timeline. This allows you to align the music with different parts of your design and create a cohesive visual and auditory experience.
By following these steps, you can easily add the background music to your Canva design. Remember to adjust the positioning, duration, and synchronization of the music to create the desired effect and enhance your design’s overall impact.
Step 4: Adjusting the Background Music Settings
After adding the background music to your Canva design, you may want to make some adjustments to ensure that it seamlessly integrates with your project. Canva provides various settings that allow you to fine-tune the background music according to your preferences. Here’s how you can adjust the background music settings:
- Select the Music Element: Click on the music element in your design to activate the settings.
- Access the Music Settings: A toolbar will appear at the top of the screen, containing different options to customize the background music. Click on the “Settings” button (usually represented by a gear icon) to open the music settings panel.
- Volume Control: Use the volume slider to adjust the volume level of the background music. You can increase or decrease the volume to achieve the desired balance between the music and other audio elements in your design.
- Fade In/Fade Out: Canva allows you to add a fade-in and fade-out effect to the music. Use the corresponding toggles to enable or disable these effects. A fade-in gradually increases the volume at the beginning of the music, while a fade-out slowly decreases the volume at the end.
- Trimming the Music: In some cases, you may want to trim the music to eliminate unwanted sections or to fit the duration of your design. Canva allows you to trim the music by dragging the start and end points on the timeline.
- Background Music Overlay: If you have other audio elements in your design, such as voiceovers or sound effects, you can adjust the background music overlay setting. This determines whether the music will play alongside other audio elements or override them.
By utilizing these settings, you can customize the background music to suit your design’s specific requirements. Experiment with the volume, fade-in and fade-out effects, trimming, and overlay options to create the perfect audio accompaniment for your Canva project.
Step 5: Previewing and Saving Your Canva Design with Background Music
Once you have added and adjusted the background music in your Canva design, it’s crucial to preview and ensure that everything is in sync and works as intended. Canva provides a convenient preview feature that allows you to see and hear how your design looks with the background music. Here’s how you can preview and save your Canva design:
- Preview Your Design: Click on the “Preview” button located in the top-right corner of the screen. This will generate a preview of your design that includes the background music.
- Review the Design: Carefully watch and listen to the preview to ensure that the timing of the music corresponds to your design elements. Pay attention to transitions, animations, and any specific synchronization you want to achieve.
- Make Adjustments: If you notice any issues or areas for improvement, go back to the design editor and make the necessary adjustments. Tweaks to the music duration, timing, or positioning can significantly enhance your design.
- Save Your Design: Once you are satisfied with the preview and have made any necessary adjustments, it’s time to save your Canva design. Click on the “Download” button or select the appropriate saving/exporting option based on your desired output format (e.g., PDF, image file, video file).
Remember to choose the appropriate file format and resolution for your intended usage and target platform. Canva provides various options to ensure that your design with background music is saved and exported in the most suitable format.
By following these steps, you can fully optimize and finalize your Canva design with background music. Previewing and saving the design allows you to ensure that the background music enhances the overall impact and delivers a compelling multimedia experience to your viewers.
Conclusion
Adding background music to your Canva design can elevate your projects to new heights, creating a more immersive and engaging experience for your audience. Whether you choose a track from Canva’s extensive music library or upload your own, the process of incorporating background music is straightforward and user-friendly.
Throughout this guide, we have walked you through the steps of selecting, uploading, and adding background music to your Canva design. We have also explored how to adjust the settings to customize the volume, fade-in/out effects, trimming, and overlay options. Lastly, we emphasized the importance of previewing and saving your design to ensure that the background music aligns perfectly with your visuals.
Remember to consider the mood, tone, and purpose of your project when selecting a background music track. It should complement your design and evoke the desired emotions in your audience. Additionally, be mindful of copyright restrictions and only use copyrighted music if you have the necessary rights or choose royalty-free options provided by Canva.
By following the steps outlined in this guide, you now have the knowledge and tools to enhance your Canva designs with captivating background music. Experiment with different tracks, syncing techniques, and customization options to create impactful multimedia projects that leave a lasting impression on your viewers.
So, what are you waiting for? Start exploring the world of background music in Canva and elevate your designs to the next level!