Home>Production & Technology>Metronome>How To Change Metronome Mark In Sibelius 7
Metronome
How To Change Metronome Mark In Sibelius 7
Modified: January 22, 2024
Learn how to easily change the metronome mark in Sibelius 7 with this step-by-step guide. Control your tempo and stay in sync with the #Metronome feature in Sibelius.
(Many of the links in this article redirect to a specific reviewed product. Your purchase of these products through affiliate links helps to generate commission for AudioLover.com, at no extra cost. Learn more)
Table of Contents
Introduction
In music composition and performance, the metronome plays a crucial role in maintaining precise timing and rhythm. It is a valuable tool for musicians, both beginners and professionals, helping them stay in sync and deliver powerful performances.
Sibelius 7, a popular music notation software, provides users with the ability to customize the metronome mark according to their preferences. By changing the metronome mark, you can adjust the tempo indications in your composition, creating the desired musical effect.
In this article, we will walk you through the process of changing the metronome mark in Sibelius 7. Whether you are composing, arranging, or analyzing music, this simple yet effective customization feature will add a new level of flexibility to your work.
So, if you are ready to discover the power of the metronome in Sibelius 7 and learn how to change the metronome mark, let’s dive right in!
Step 1: Opening the Metronome Settings
The first step to changing the metronome mark in Sibelius 7 is accessing the Metronome Settings. This is where you can make adjustments to the tempo and sound of the metronome.
To open the Metronome Settings, follow these simple steps:
- Launch Sibelius 7 on your computer.
- Open the score or create a new one that you want to work with.
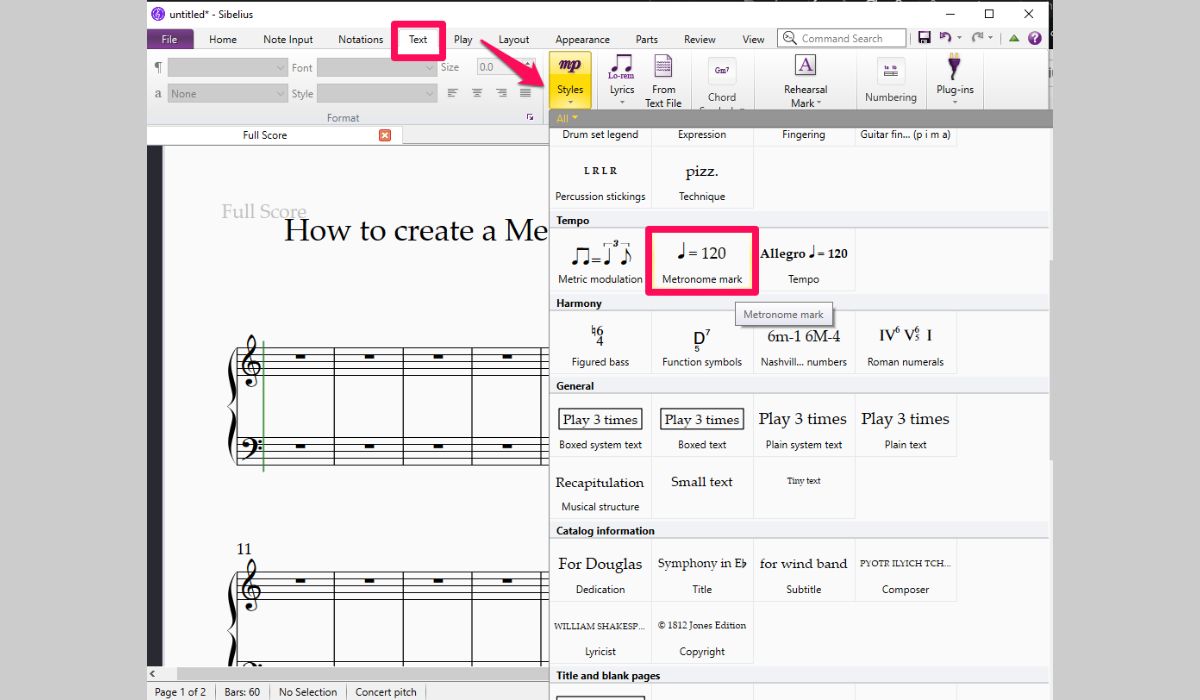
- Click on the “Play” tab in the main menu.
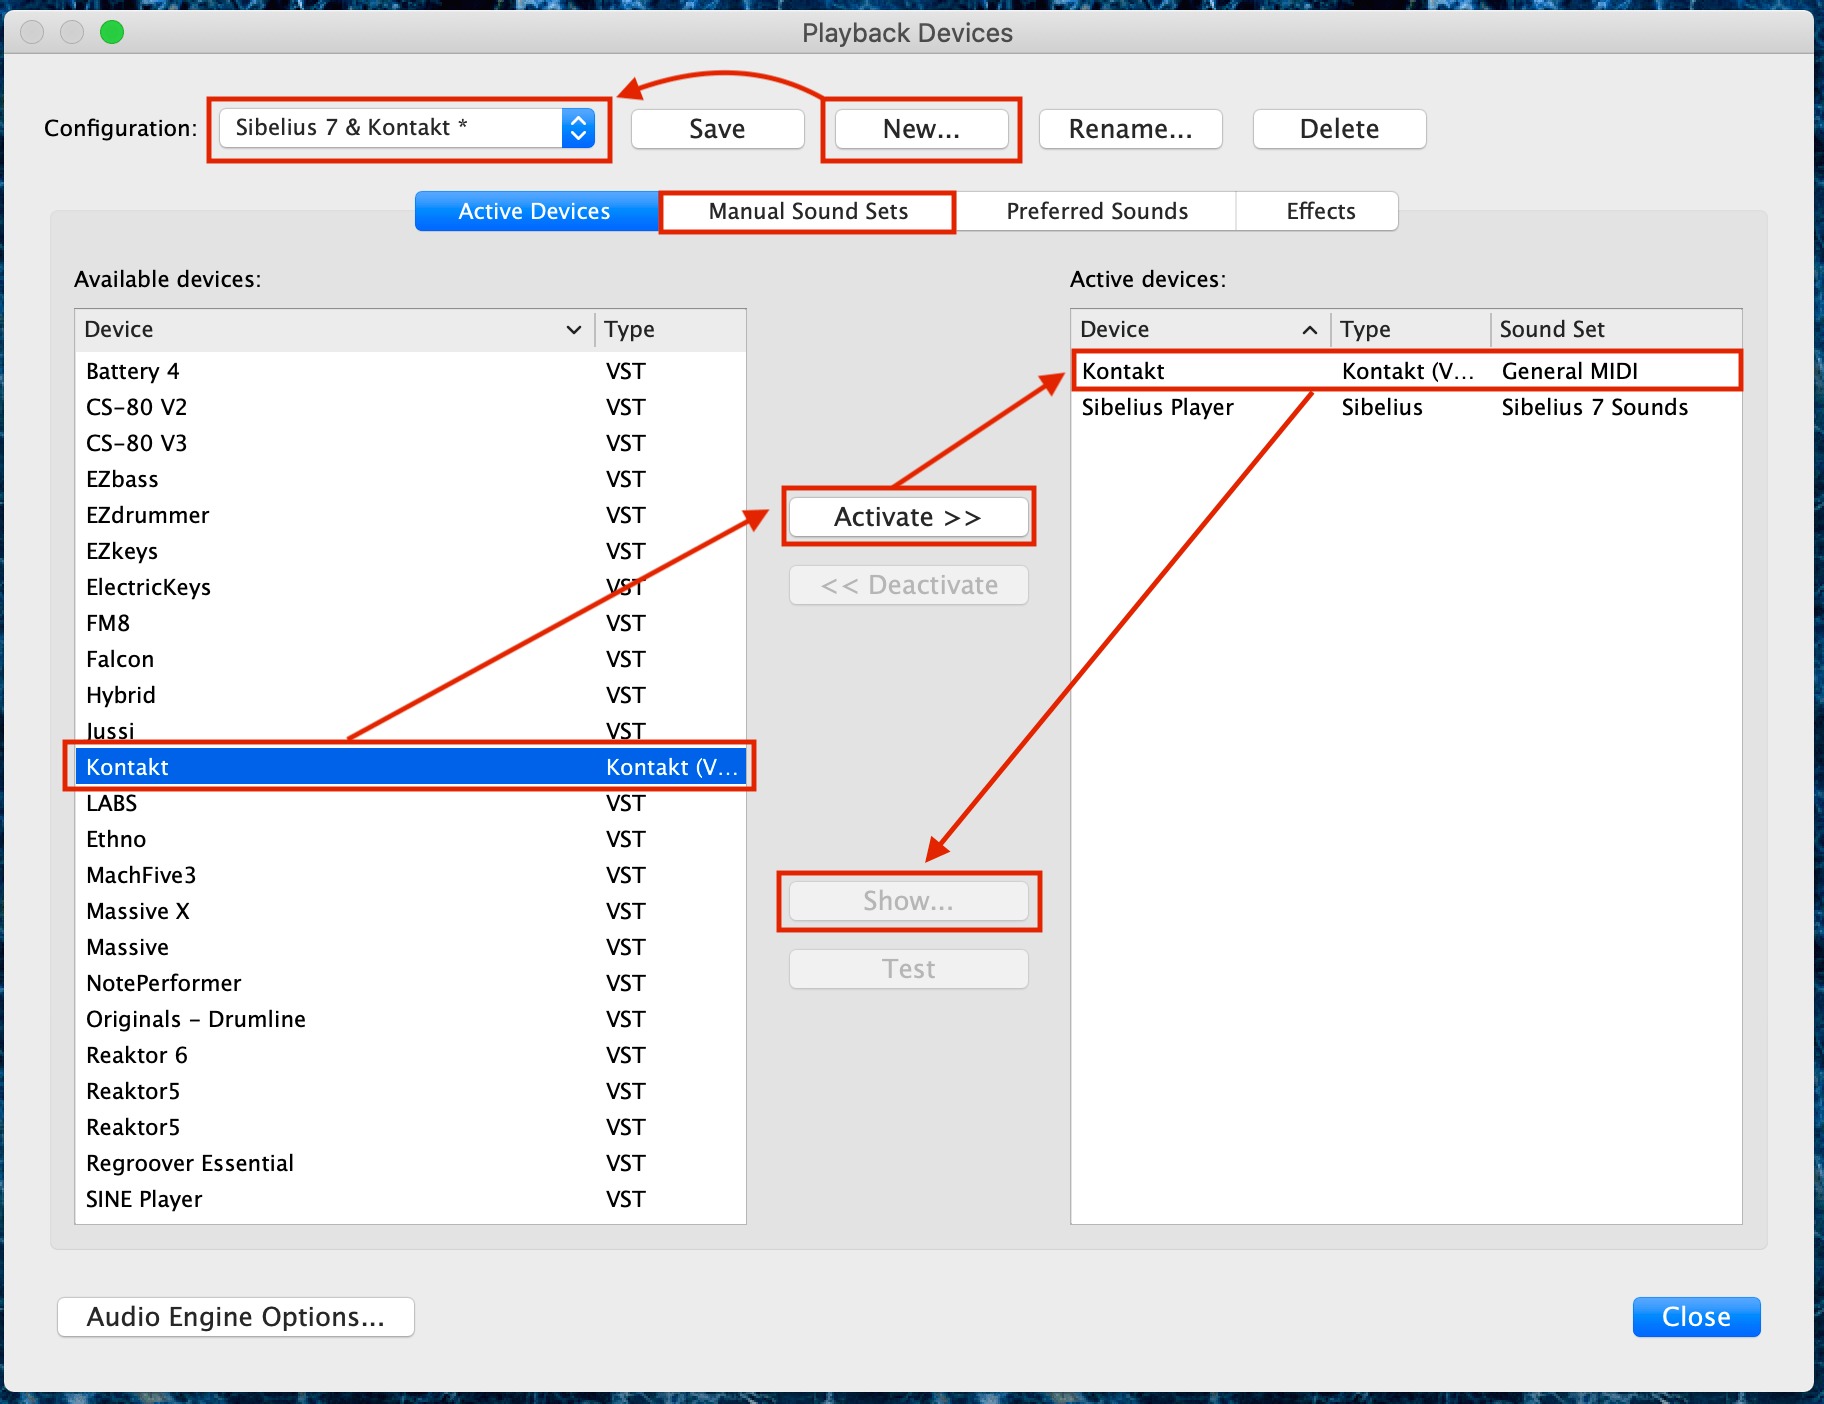
- From the dropdown menu, select “Playback Devices” and then choose “Metronome Settings” from the submenu.
Once you have completed these steps, a window will appear with various options for customizing the metronome.
It’s important to note that the location and interface of the Metronome Settings may vary slightly depending on the version of Sibelius you are using. However, the general process remains the same: accessing the settings through the “Play” tab in the main menu.
Now that you have successfully opened the Metronome Settings, it’s time to move on to the next step: changing the metronome mark.
Step 2: Changing the Metronome Mark
After opening the Metronome Settings in Sibelius 7, you can now proceed to change the metronome mark. This step allows you to modify the tempo indications according to your musical needs.
Follow these steps to change the metronome mark:
- In the Metronome Settings window, you will see a section labeled “Tempo Mark.” This section displays the current metronome mark for the selected score.
- To change the metronome mark, simply click on the existing Tempo Mark box and enter the desired tempo value. You can either type in the tempo manually or use the increment/decrement buttons to adjust the value.
- As you enter the new tempo value, you will notice the metronome marking on the score changing accordingly, reflecting the modified tempo.
Changing the metronome mark provides you with the flexibility to adapt the tempo indications to various musical passages or sections within your composition. Whether you want to slow down for a more expressive moment or speed up for a dramatic climax, you have the freedom to make the necessary adjustments.
Take your time to experiment with different tempo values to find the perfect metronome mark that suits your composition’s overall feel and performance style.
Once you have successfully changed the metronome mark to your desired tempo, it’s time to move on to the next step: adjusting the metronome sound.
Step 3: Adjusting the Metronome Sound
In addition to changing the metronome mark, Sibelius 7 also allows you to customize the metronome sound. This step enables you to select a metronome sound that best fits your preferences and enhances your musical experience.
To adjust the metronome sound, follow these steps:
- In the Metronome Settings window, locate the section labeled “Metronome Sound”. This section provides various options for the metronome sound.
- Click on the dropdown menu to see the available metronome sound options.
- Select the sound that you prefer from the list. Sibelius 7 offers a range of metronome sound choices, including clicks, sticks, beeps, and even drum sounds.
By selecting different metronome sound options, you can tailor the auditory experience to your liking. Whether you prefer a traditional click-like sound or a more modern and unique sound, Sibelius 7 has you covered.
It’s important to mention that the metronome sound options may vary depending on your version of Sibelius. The software provides multiple choices to cater to different musical styles and personal preferences.
Once you have chosen the desired metronome sound, you are ready for the final step: applying the changes.
Step 4: Applying the Changes
After you have made the necessary modifications to the metronome mark and sound in Sibelius 7, it’s time to apply the changes to your score. This step ensures that your composition reflects the updated tempo indications and metronome settings.
To apply the changes, follow these simple steps:
- Click on the “Apply” or “OK” button in the Metronome Settings window. This will save your changes and close the window.
- Return to your score by clicking on the appropriate tab or window.
- Play back your composition to hear the updated metronome sound and tempo indications.
By applying the changes, you can verify that the modified metronome mark and sound are accurately represented in your score. Take the time to listen carefully to ensure that the tempo and metronome settings align with your musical vision.
If you need to make further adjustments, repeat the previous steps until you achieve the desired results.
Remember that changing the metronome mark and adjusting the metronome sound in Sibelius 7 are valuable tools for fine-tuning your compositions and enhancing your musical performances.
Now that you have successfully applied the changes, you are ready to make the most of the customizable metronome features in Sibelius 7.
Conclusion
The ability to change the metronome mark in Sibelius 7 provides musicians with a powerful tool to customize their compositions and performances. By adjusting the tempo indications, you can create the desired musical effect and maintain precise timing.
In this article, we explored the step-by-step process of changing the metronome mark in Sibelius 7. We learned how to open the Metronome Settings, modify the tempo values, and select different metronome sound options.
With these customization features, you have the flexibility to adapt the metronome to suit your composition’s unique characteristics and your personal preferences as a musician. Whether you are composing, arranging, or analyzing music, the customizable metronome in Sibelius 7 is a valuable tool in your creative toolkit.
Remember to apply the changes to your score once you have made the desired modifications. This ensures that your composition accurately reflects the updated metronome settings.
By leveraging the power of the metronome and its customizable features in Sibelius 7, you can elevate your musical performances and bring your compositions to life with precision and rhythm.
So, why wait? Start exploring the possibilities of the customizable metronome in Sibelius 7 and unlock the full potential of your musical creations.