Home>Production & Technology>Metronome>How To Add Metronome Marking In Finale
Metronome
How To Add Metronome Marking In Finale
Modified: January 22, 2024
Learn how to add metronome markings in Finale to keep your music in perfect time. Speed up your compositions with this step-by-step guide.
(Many of the links in this article redirect to a specific reviewed product. Your purchase of these products through affiliate links helps to generate commission for AudioLover.com, at no extra cost. Learn more)
Table of Contents
- Introduction
- Step 1: Open Finale and create or open a musical score
- Step 2: Select the measure where you want to add the metronome marking
- Step 3: Click on the “Expression Tool” in the toolbar
- Step 4: Choose the “Metronome Marking” option from the Expression Selection dialog
- Step 5: Click on the desired note or rest in the measure to add the metronome marking
- Step 6: Adjust the properties of the metronome marking as needed
- Step 7: Preview and playback your musical score to hear the metronome marking
- Step 8: Save your work and export the final score as desired
- Conclusion
Introduction
Welcome to the world of music notation software! If you’re a musician or composer using Finale, you already know how powerful this tool is for creating and editing musical scores. In this article, we’ll focus on one specific aspect of Finale – adding metronome markings.
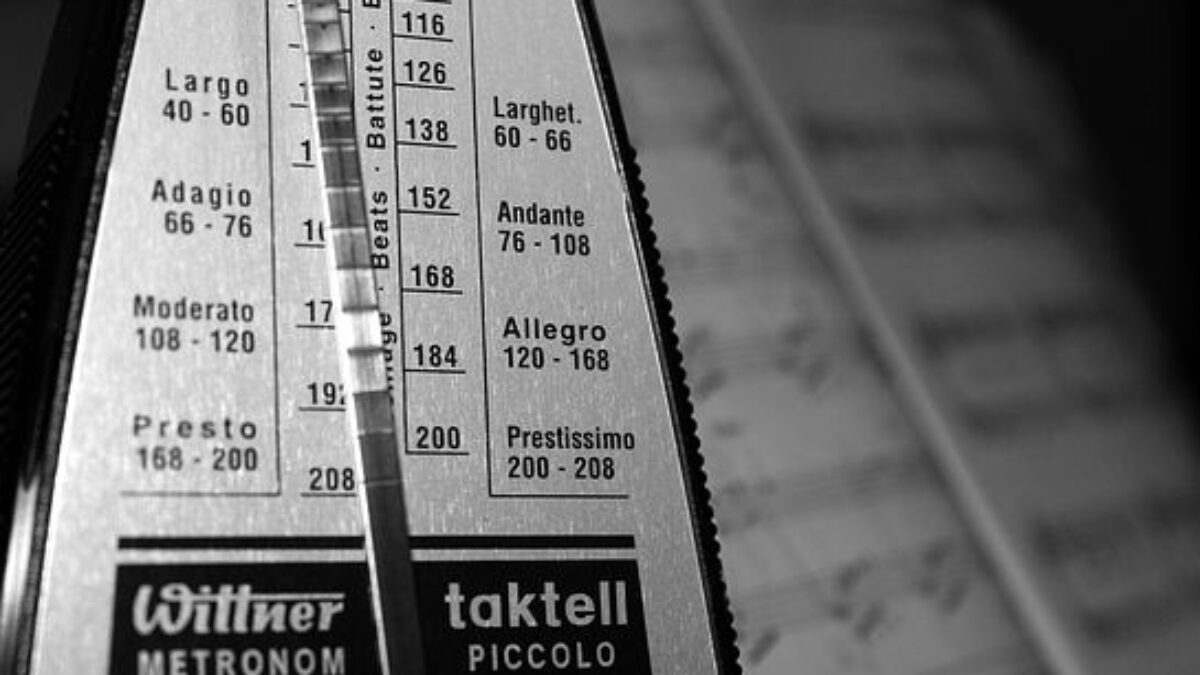
A metronome marking is a symbol used to indicate the tempo or speed of a musical passage. It helps musicians stay in time and play at the desired speed. Adding metronome markings to your score not only makes it easier for performers to follow, but also adds a level of professionalism to your compositions.
In Finale, adding a metronome marking is a simple process that can be done in just a few steps. Whether you’re a beginner or an experienced Finale user, this guide will walk you through the process and help you take your compositions to the next level.
So, let’s get started and learn how to add metronome markings in Finale!
Step 1: Open Finale and create or open a musical score
The first step in adding a metronome marking in Finale is to open the software and either create a new musical score or open an existing one. If you’re starting from scratch, you can choose the appropriate template for your composition, such as a piano solo, orchestral score, or choral arrangement.
Once you have your score open, make sure you’re in the correct view mode. Finale offers different views for entering and editing musical notation, such as Simple Entry, Speedy Entry, and HyperScribe. Choose the view that you’re most familiar and comfortable with, as this will make it easier to add the metronome marking accurately.
If you’re working on an existing score, locate the measure where you want to add the metronome marking. This can be any measure within the score, depending on where you want the marking to appear. If you’re unsure, it’s a good idea to listen to the music and identify a section where a metronome marking would be helpful for performers.
With your score open and the desired measure selected, you’re ready to move on to the next step of adding the metronome marking in Finale.
Step 2: Select the measure where you want to add the metronome marking
Now that you have your musical score open in Finale, it’s time to select the measure where you want to add the metronome marking. This step is crucial as it ensures that the marking is placed at the correct location within your composition.
To select a measure, simply click on the desired measure in your score. You may need to zoom in or out to locate the measure accurately. If you’re unsure about the measure number, you can refer to the measure number displayed on the left-hand side of the score or use the measure selection tool in Finale to help you select the correct measure.
It’s important to note that you can add the metronome marking to any measure in your score, whether it’s the beginning of a piece or a specific measure within the music. Depending on your musical intentions, you may want to add multiple metronome markings throughout your score to indicate tempo changes.
Once you have selected the measure where you want to add the metronome marking, you’re ready to move on to the next step in Finale.
Step 3: Click on the “Expression Tool” in the toolbar
After selecting the measure where you want to add the metronome marking in Finale, it’s time to access the tools necessary for adding the marking. In this step, we’ll be using the “Expression Tool” to insert the metronome marking into your musical score.
The Expression Tool in Finale is a powerful feature that allows you to add a wide range of musical expressions and markings, including metronome markings. To access this tool, look for the toolbar at the top of your screen in Finale.
Locate the “Expression Tool” icon, which typically looks like a musical note with an accent mark. It may be grouped with other similar tools, so make sure to select the correct one. You can also refer to the tooltip that appears when you hover over the icons to confirm that it is indeed the Expression Tool.
Once you have identified the Expression Tool, click on it to activate it. This will allow you to add various musical expressions, including the metronome marking, to your score. By clicking on the Expression Tool, you are indicating to Finale that you want to add a specific musical instruction or notation to your score.
With the Expression Tool activated, you’re now ready to move on to the next step and specifically choose the metronome marking option in Finale.
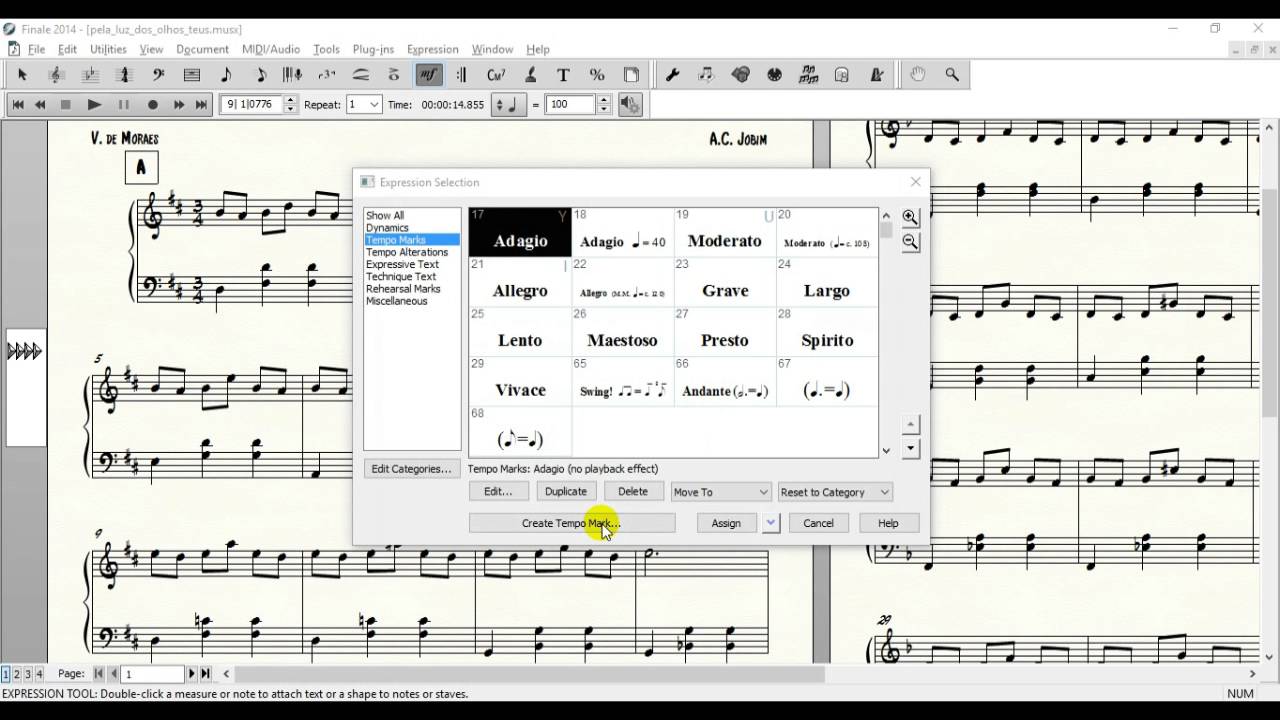
Step 4: Choose the “Metronome Marking” option from the Expression Selection dialog
Now that you have activated the Expression Tool in Finale, it’s time to choose the specific option for adding the metronome marking. Finale provides a wide range of musical expressions, and the metronome marking is one of them.
To access the metronome marking option, you will need to open the Expression Selection dialog. This dialog allows you to select from a variety of predefined musical expressions that you can add to your score.
To open the Expression Selection dialog, simply right-click or control-click (for Mac users) within the measure where you want to add the metronome marking. This will bring up a contextual menu with various options for adding expressions to your score.
In the Expression Selection dialog, scroll through the list of available expressions until you find the “Metronome Marking” option. This option is specifically designed for adding tempo indications to your score using the metronome notation.
Once you have located the “Metronome Marking” option, select it by clicking on it in the Expression Selection dialog. This tells Finale that you want to add a metronome marking to the selected measure in your score.
With the “Metronome Marking” option chosen, you’re now ready to move on to the next step and actually place the metronome marking in your score using the Expression Tool in Finale.
Step 5: Click on the desired note or rest in the measure to add the metronome marking
With the “Metronome Marking” option selected from the Expression Selection dialog in Finale, it’s time to place the metronome marking in your musical score. This step involves clicking on the desired note or rest within the measure where you want the metronome marking to appear.
First, ensure that the Expression Tool is still active and that the “Metronome Marking” option is selected. Then, carefully navigate to the specific measure in your score and choose the note or rest where you want to add the metronome marking.
To add the metronome marking, simply position your cursor over the desired note or rest, and click on it with your mouse. Finale will automatically place the metronome marking above or below the selected element, indicating the desired tempo or speed for that specific part of the composition.
If you want the metronome marking to appear above or below multiple notes or rests in a measure, simply repeat this step for each element. You have the flexibility to add as many metronome markings as necessary to accurately indicate the tempo changes throughout your score.
Keep in mind that Finale allows you to adjust the position of the metronome marking as needed. If you want it to be slightly higher, lower, or horizontally aligned with the note or rest, you can use the tools provided in the Expression Selection dialog or manually move it using the mouse or arrow keys.
Once you have clicked on the desired note or rest, successfully placing the metronome marking in your measure, you’re now ready to move on to the next step and fine-tune the properties of the marking in Finale.
Step 6: Adjust the properties of the metronome marking as needed
After adding the metronome marking to your musical score in Finale, it’s time to fine-tune the properties of the marking to ensure it accurately reflects the desired tempo. Finale provides various options for adjusting the appearance and behavior of the metronome marking.
To access the properties of the metronome marking, double-click on the marking in your score. This will open the Expression Selection dialog again, but this time with the metronome marking selected and its specific properties displayed.
Within the Expression Selection dialog, you can adjust several properties of the metronome marking. For example, you can change the note value that represents the beat, such as quarter note, eighth note, or even a custom note value. You can also modify the tempo indication, whether it’s displayed in numerical form (e.g., 120 BPM) or using words (e.g., Allegro).
Furthermore, you have control over the appearance of the metronome marking, including its font, size, position, and alignment. This allows you to customize the visual representation of the marking to match your preferences or the requirements of your score.
Additionally, Finale offers advanced options for adjusting playback settings related to the metronome marking. You can specify whether the metronome marking affects the playback tempo, whether it should be audible during playback, and even define tempo changes throughout your score using multiple metronome markings.
Take your time to experiment with these properties and make the necessary adjustments until you’re satisfied with the appearance and behavior of the metronome marking in your score.
Once you have fine-tuned the properties of the metronome marking, you’re ready to move on to the next step and preview or playback your musical score to hear the metronome marking in action.
Step 7: Preview and playback your musical score to hear the metronome marking
Now that you have added the metronome marking and adjusted its properties in your Finale score, it’s time to hear how it sounds in the context of your music. Finale provides powerful preview and playback features that allow you to listen to the metronome marking and ensure it aligns with your desired tempo and musical intent.
To preview your musical score, simply click the “Play” button in the toolbar. This will start the playback from the beginning of your score, allowing you to listen to the metronome marking and how it interacts with the other elements in your composition.
As the playback progresses, pay close attention to the metronome marking’s timing and its alignment with other musical elements. Ensure that the tempo indicated by the marking is accurately reflected in the performance. If adjustments are needed, you can go back and modify the properties of the metronome marking as mentioned in the previous step.
If you have multiple metronome markings throughout your score, listen carefully to how the tempo changes occur as you progress through the music. Make sure that the transitions between different metronome markings are smooth and seamless.
During playback, you can also use Finale’s navigation tools to jump to specific sections of your score or loop certain measures to focus on particular sections. This allows you to pay extra attention to critical passages where precise tempo indication is necessary.
By previewing and playing back your musical score, you can ensure that the metronome marking is accurately represented in the performance and that it enhances the overall musical experience for both performers and listeners.
Once you are satisfied with how the metronome marking sounds during playback, you’re ready to proceed to the final step and save your work in Finale.
Step 8: Save your work and export the final score as desired
After adding the metronome marking, adjusting its properties, and previewing your musical score in Finale, it’s important to save your work to ensure that your progress is preserved.
To save your Finale score, click on the “File” menu at the top left of the program window. From the dropdown menu, select “Save” or use the keyboard shortcut (usually Ctrl + S or Command + S for Mac users).
When saving your score, it’s a good practice to provide a descriptive file name and choose a location on your computer where you can easily find it later. You can also create separate folders to organize your musical scores for easy access and management.
With your score saved, you can now proceed to export the final score in the desired format. Finale offers a variety of export options, such as PDF, MIDI, audio files, and more, depending on your specific needs.
To export your score, go to the “File” menu again, select “Export”, and choose the appropriate export format from the list. Follow the on-screen prompts to specify any additional settings or preferences for the export process.
Once you have selected the export format and completed any necessary options, click “Export” or “OK” to start the export process. Finale will generate the final file according to your specifications, making it ready for sharing, printing, or further editing in other programs.
It’s recommended to double-check the exported file to ensure that the metronome marking and all other elements appear correctly. Open the exported file in the corresponding software or application to confirm that everything looks and sounds as intended.
Congratulations! You have successfully added a metronome marking to your musical score in Finale, adjusted its properties, previewed the score, saved your work, and exported the final score. Your composition is now ready to be shared or performed using the precise tempo indications provided by the metronome marking.
Remember to continue exploring the many features and capabilities of Finale to further enhance your musical compositions and arrangements. Happy composing!
Conclusion
In this article, we have explored the process of adding a metronome marking in Finale, a powerful music notation software. By following the steps outlined, you can easily incorporate tempo indications into your musical scores, enhancing the precision and clarity of your compositions.
We began by opening Finale and creating or opening a musical score. Then, we selected the measure in which we wanted to add the metronome marking. Using the Expression Tool, we chose the “Metronome Marking” option from the Expression Selection dialog. Next, we clicked on the desired note or rest in the measure to place the metronome marking.
After adding the metronome marking, we adjusted its properties to align with our desired tempo and layout preferences. We then previewed and played back our musical score to ensure the metronome marking accurately reflected the intended tempo.
Once satisfied, we saved our work and exported the final score in the desired format, such as PDF or MIDI, ready for sharing or performance. By following these steps, we have successfully incorporated metronome markings into our musical scores using Finale.
Adding metronome markings not only aids performers in maintaining a consistent tempo but also adds a professional touch to your compositions. Whether you are a composer, arranger, or educator, these markings are essential for conveying your musical intentions clearly.
As you continue to explore Finale and its vast array of features, remember that the metronome marking is just one of the many tools at your disposal. Consider experimenting with other musical expressions, notations, and playback options to further enhance and refine your musical scores.
So, unleash your creativity, leverage the power of Finale, and let your musical compositions shine with the addition of precise and expressive metronome markings.