Home>Production & Technology>MP3>How To Export Audition To MP3
MP3
How To Export Audition To MP3
Modified: January 22, 2024
Learn how to export your audition files to MP3 format easily. Follow our step-by-step guide to convert and save your auditions as high-quality MP3 files.
(Many of the links in this article redirect to a specific reviewed product. Your purchase of these products through affiliate links helps to generate commission for AudioLover.com, at no extra cost. Learn more)
Table of Contents
Introduction
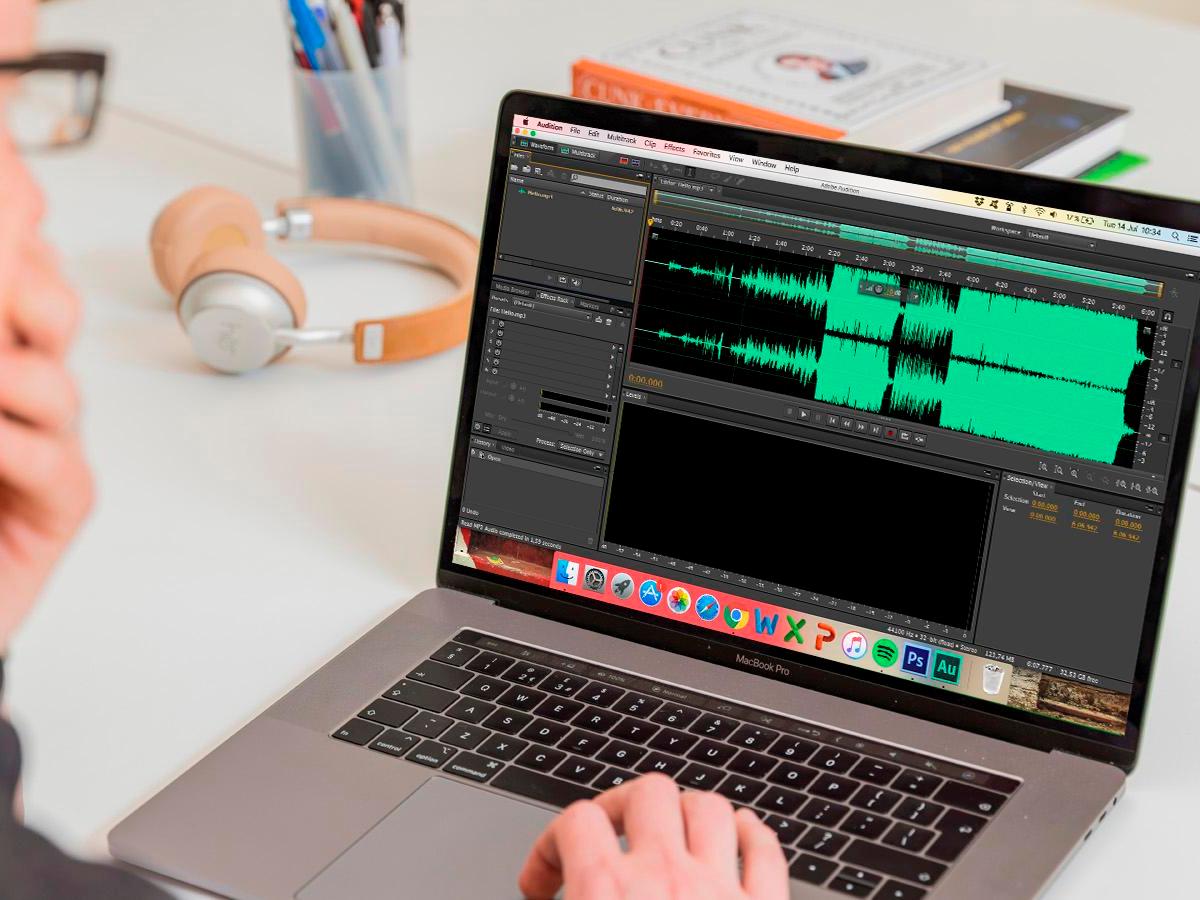
Welcome to this comprehensive guide on how to export auditions to MP3 format. Adobe Audition, the popular digital audio workstation, offers a wide range of features and tools for editing and mastering audio files. However, when it comes to sharing your work with others, the MP3 format is highly preferred due to its compatibility and widespread usage.
Exporting your auditions to MP3 allows you to easily share them with clients, colleagues, or upload them to online platforms such as your website, podcast directories, or social media platforms. Whether you’re an aspiring voice actor, a podcast producer, or an audio engineer, knowing how to convert your auditions to MP3 is an essential skill.
In this guide, we’ll walk you through a step-by-step process of exporting auditions to MP3 using Adobe Audition. We’ll cover everything from launching the software to selecting the right export settings and choosing the export location for your MP3 file. By the end of this guide, you’ll have a clear understanding of the export process and be able to share your auditions in the widely accepted MP3 format.
So let’s dive in and explore each step in detail to ensure a seamless and efficient export of your auditions to MP3 format!
Step 1: Launch Adobe Audition
The first step in exporting auditions to MP3 format is to launch Adobe Audition on your computer. If you haven’t already installed the software, you can download it from the official Adobe website and follow the installation instructions.
Once Adobe Audition is installed, double-click on the application icon to open it. You will be greeted with the Audition workspace, which consists of various panels and tools designed to help you edit and manipulate audio files.
If you already have your audition project saved, you can go ahead and open it within Adobe Audition. To do this, navigate to the “File” menu at the top left corner of the software and select “Open”. Browse your computer for the audition project file and click “Open”.
If you’re starting a new audition from scratch, you can create a new project by clicking on “New” in the “File” menu. This will open a window where you can specify the project settings such as sample rate, bit depth, and duration.
Once you have either opened your existing audition project or created a new one, you’re ready to proceed to the next step in exporting your auditions to MP3 format.
Step 2: Open the audio file
After launching Adobe Audition, the next step is to open the audio file that you want to export as an MP3. This could be the recorded audition or any other audio file that you’ve previously worked on.
To open an audio file in Adobe Audition, go to the “File” menu at the top left corner of the software and choose “Open”. A file explorer window will appear, allowing you to browse your computer for the desired audio file.
Once you’ve located the audio file, select it and click “Open” to import it into Adobe Audition. The audio file will then appear in the “Files” panel or the “Multitrack” panel, depending on your workspace setup and preferences.
If you’re working in the “Waveform” view, the audio file will be displayed as a graphical waveform, allowing you to visualize and manipulate the individual audio segments. If you’re working in the “Multitrack” view, the audio file will be added as a track in the multitrack timeline, alongside any other tracks that you may have.
Once the audio file is open in Adobe Audition, you can further edit and process it as needed. This may include tasks such as cutting and trimming the audio segments, applying effects or filters, adjusting the volume levels, or removing any unwanted noise or background sounds.
Remember to save your changes regularly to ensure that you don’t lose any progress. You can do this by going to the “File” menu and selecting “Save” or using the keyboard shortcut Ctrl+S (Windows) or Command+S (Mac).
Now that the audio file is open and ready for editing in Adobe Audition, let’s move on to the next step to prepare for the MP3 export process.
Step 3: Edit the audio (if necessary)
After opening the audio file in Adobe Audition, you may need to make edits or adjustments to ensure that the audition sounds perfect before exporting it as an MP3. This step is optional, but it gives you the opportunity to enhance the quality of the audio and make any necessary changes.
If you need to make edits, there are various tools and features available in Adobe Audition to help you achieve the desired results. Here are a few common editing tasks you may need to perform:
- Cutting and trimming: If there are any unwanted sections or parts of the audio that need to be removed, you can use the selection tool to highlight the segment and then either cut it or delete it.
- Adjusting volume levels: If certain parts of the audio are too loud or too soft, you can use the volume adjustment controls to increase or decrease the volume accordingly.
- Applying effects and filters: If you want to add artistic or corrective effects to the audio, you can explore the wide range of effects and filters available in Adobe Audition. These can help enhance the overall sound quality or achieve specific audio effects.
- Removing background noise: If the recording has any unwanted background noise or hiss, you can use the noise reduction tools in Adobe Audition to reduce or eliminate it.
- Adding music or sound effects: If you want to include background music or sound effects in your audition, you can import the additional audio files and arrange them accordingly in the multitrack timeline.
Remember to listen to your audio carefully and make any adjustments required to ensure that it meets your desired standards. Adobe Audition provides versatile tools that allow you to edit and manipulate audio with precision.
Once you’re satisfied with the edits and changes made to the audio file, it’s time to move on to the next step and prepare for the MP3 export process.
Step 4: Set the export settings
Before exporting your audition as an MP3 file, you need to configure the export settings in Adobe Audition. These settings determine the audio quality, format, and other parameters of the exported MP3 file.
To set the export settings, follow these steps:
- Ensure that the audio file you want to export is selected or active in Adobe Audition.
- Navigate to the “File” menu at the top-left corner of the software and select “Export”. This will open a submenu with various export options.
- From the submenu, choose “Export Audio” or “Export Multitrack Mixdown”, depending on your workflow and preferences. This will open the export settings window.
- In the export settings window, you’ll find several parameters that you can adjust according to your needs:
- Format: Choose “MP3” as the export format. This ensures that your audition is saved in the widely supported MP3 format.
- Bitrate: Select the desired bitrate for the MP3 file. Higher bitrates result in better audio quality but larger file sizes. For most auditions, a bitrate of 128 kbps or 192 kbps should be sufficient. You can experiment with different bitrates to find the balance between quality and file size.
- Sample Rate and Bit Depth: The sample rate determines the number of audio samples per second, while the bit depth determines the dynamic range of the audio. For auditions, a sample rate of 44.1 kHz and a bit depth of 16-bit are standard and widely supported.
- Channels: Select the appropriate number of channels based on your audio file. For mono auditions, choose “Mono”. For stereo auditions, choose “Stereo”.
- Metadata: Optionally, you can add metadata such as title, artist, and copyright information to the MP3 file.
Once you’ve set the export settings to your desired specifications, you’re almost ready to export your audition as an MP3 file. However, before proceeding, make sure to confirm the export location where the MP3 file will be saved.
Now that you have the export settings configured, let’s move on to the next step to choose the MP3 format for your audition.
Step 5: Choose the MP3 format
After setting the export settings in Adobe Audition, the next step is to choose the MP3 format for your audition. The export settings window allows you to select the specific format options and parameters for exporting your auditions as MP3 files.
To choose the MP3 format, follow these steps:
- Confirm that the export settings in Adobe Audition are configured to export as MP3 (as discussed in the previous step).
- Choose a suitable name for your MP3 file. You can either retain the existing filename or enter a new one in the “File Name” field.
- Select the destination or export location to specify where you want to save the MP3 file on your computer. Browse through your folders and navigate to the desired folder location.
- Optional: Customize additional export options, such as including markers or clipping protection, depending on your requirements.
Once you have filled in all the necessary information and made the desired selections, you are ready to proceed with exporting your audition as an MP3 file.
Remember to double-check the export settings to ensure that everything is in order and matches your preferences.
Now, let’s move on to the next step and select the export location for your MP3 file.
Step 6: Select the export location
After configuring the export settings and choosing the MP3 format for your audition in Adobe Audition, the next step is to select the export location for your file. The export location determines where the MP3 file will be saved on your computer or external storage devices.
To select the export location, follow these steps:
- Make sure that the export settings in Adobe Audition are correctly configured and the MP3 format is selected (as discussed in the previous steps).
- In the export settings window, locate the “Output Path” field or browse button.
- Click on the browse button next to the “Output Path” field to open the file explorer or directory window.
- Navigate through your computer’s folders to find the desired location where you want to save the MP3 file.
- Once you’ve reached the desired folder location, click “Select” or “OK” to confirm the export location.
Double-check the export location to ensure that you have chosen the correct folder and that you have the necessary permissions to save the file in that location.
It’s recommended to select a location that is easily accessible and organized, making it easier for you to locate and share your exported MP3 file in the future.
Now that you have selected the export location for your MP3 file, let’s move on to the final step and export the audio as an MP3 in Adobe Audition.
Step 7: Export the audio as MP3
After configuring the export settings, choosing the MP3 format, and selecting the export location, the final step is to export your audition as an MP3 file in Adobe Audition.
To export the audio as MP3, follow these steps:
- Ensure that all the necessary settings are properly configured and that you have selected the desired export location (as discussed in the previous steps).
- Review the export settings one last time to confirm that everything is set according to your preferences.
- Click on the “Export” button in the export settings window to initiate the export process.
- Adobe Audition will begin processing the audio and generating the MP3 file based on the specified settings.
- Wait for the export process to complete. The duration of the export will depend on the length and complexity of your audition.
- Once the export process is finished, you will see a confirmation message indicating that the MP3 file has been successfully exported.
- Navigate to the export location on your computer to locate the exported MP3 file. Verify that the file is present and accessible.
Congratulations! You have successfully exported your audition as an MP3 file using Adobe Audition.
At this point, you can now share your audition with others, upload it to online platforms, or use it in any desired way. The MP3 format ensures compatibility with a wide range of devices and applications.
Remember to safely store and backup your exported MP3 files to avoid any data loss and to have easy access to them in the future.
Now you are ready to showcase your talent and share your auditions with the world in the popular and widely supported MP3 format!
Conclusion
Exporting auditions to MP3 format using Adobe Audition is a straightforward process that allows you to easily share your work with others. Whether you’re a voice actor, a podcast producer, or an audio engineer, being able to convert your auditions to MP3 is an essential skill in the digital age.
In this comprehensive guide, we’ve walked you through the step-by-step process of exporting auditions to MP3 using Adobe Audition. We started by launching the software, opening the audio file, and making any necessary edits or adjustments. Then, we moved on to setting the export settings, choosing the MP3 format, selecting the export location, and finally, exporting the audio as an MP3 file.
By following these steps, you can ensure that your auditions are saved in the widely supported and easily shareable MP3 format. Whether you’re sharing your auditions with clients, colleagues, or uploading them to online platforms, the MP3 format guarantees compatibility and accessibility.
Remember to experiment with different export settings and consider your specific requirements to achieve the desired audio quality and file size. Additionally, always double-check the export location and make sure to properly save and back up your files for future use.
Now, armed with this knowledge, you can confidently export your auditions to MP3 format using Adobe Audition and share your talent with the world. So go ahead, showcase your skills, and make a lasting impression with your auditions in the universally recognized MP3 format!