Home>Production & Technology>Music Video>How To Make An Animated Music Video

Music Video
How To Make An Animated Music Video
Published: November 20, 2023
Learn how to create visually stunning animated music videos with our step-by-step guide. Enhance your music with captivating visuals that will leave a lasting impression.
(Many of the links in this article redirect to a specific reviewed product. Your purchase of these products through affiliate links helps to generate commission for AudioLover.com, at no extra cost. Learn more)
Table of Contents
- Introduction
- Step 1: Planning
- Step 2: Creating a Storyboard
- Step 3: Gathering Resources
- Step 4: Choosing Animation Software
- Step 5: Creating the Background
- Step 6: Designing and Animating Characters
- Step 7: Adding Effects and Transitions
- Step 8: Syncing Animation with Music
- Step 9: Editing and Finalizing
- Conclusion
Introduction
Music videos have become an integral part of the music industry, captivating audiences with their visual storytelling and enhancing the overall listening experience. In today’s digital age, creating an animated music video has become more accessible than ever before. With the right tools and knowledge, anyone passionate about music and creativity can bring their songs to life through animation.
In this article, we will guide you through the process of making an animated music video, from planning and storyboarding to designing characters and animating them. We will also explore the importance of syncing animation with the music and adding effects and transitions to enhance the visual appeal of your video. So, whether you are a musician looking to create a unique visual representation of your music or an aspiring animator interested in the world of music videos, this guide will provide you with the necessary steps to get started.
Before diving into the technical aspects of creating an animated music video, it’s important to have a clear vision of the story or concept you want to convey. Consider the mood, theme, and message of your song, and brainstorm ways to visually represent these elements. This will serve as the foundation for your video and guide your creative decisions during the production process.
Additionally, it’s crucial to have a solid understanding of the music video genre you aim to create. Explore different styles, themes, and visual techniques used in music videos to gather inspiration and find the right approach for your own project. Researching music videos from various artists and genres will help you identify what works and what doesn’t, ultimately shaping the unique style of your animated music video.
Throughout this article, we will provide insights into each step of the process, including planning, storyboarding, gathering resources, choosing animation software, creating backgrounds, designing characters, adding effects and transitions, syncing animation with music, and finalizing the video through editing. By following this comprehensive guide, you will have the necessary knowledge and tools to create a captivating and visually stunning animated music video.
Step 1: Planning
Before diving into the creative process of making an animated music video, you need to spend time planning and conceptualizing your vision. This step will lay the groundwork for the entire project and help you stay organized and focused throughout the production process.
Start by listening to your song multiple times and jotting down any initial ideas or concepts that come to mind. Consider the mood, emotion, and lyrics of the song, and think about how you can translate those elements into visuals. This brainstorming process will help you generate a variety of ideas and eventually narrow down your options to the strongest concepts.
Once you have a few solid ideas, it’s time to refine them and create a cohesive visual narrative. Develop a storyline or concept that aligns with the essence of the song and resonates with your target audience. Consider the pacing of the song and plan for key moments in the music where the visuals can amplify the impact.
Next, create a shot list or a rough breakdown of the sequences and scenes you envision for the video. This will help you visualize the flow of the animation and ensure that all necessary elements are included. You can also create a visual mood board by collecting images, illustrations, and references that align with your concept. This will serve as a visual guide and help communicate your vision to the team or collaborators.
Additionally, think about the budget and resources available for your project. Determine what is feasible and realistic in terms of animation quality, time constraints, and financial limitations. This will help you prioritize and make informed decisions throughout the production process.
Collaboration is key in the planning stage. If you are working with a team, discuss your ideas with them and gather feedback. Incorporating different perspectives and skill sets can lead to innovative solutions and a stronger end result. If you are working solo, consider seeking input from trusted peers or mentors who can provide valuable insights.
By dedicating time to proper planning, you will have a clear direction for your animated music video, making the subsequent steps in the production process smoother and more efficient. In the next step, we will explore how to create a storyboard, a crucial tool for visualizing and organizing the different scenes of your music video.
Step 2: Creating a Storyboard
Creating a storyboard is an essential step in the production of an animated music video. It serves as a visual blueprint that outlines the sequence of scenes, camera angles, character actions, and overall composition of your video. A well-executed storyboard helps you visualize and organize your ideas, ensuring a cohesive and engaging narrative.
To begin, divide your song into sections and identify the key moments of the music where the visuals should emphasize certain lyrics or beats. This will help you structure your storyboard and ensure that it aligns with the flow and energy of the song.
Next, create a rough sketch for each scene, capturing the main actions, characters, and camera angles. It’s important to keep the sketches simple and expressive, focusing on conveying the overall composition and dynamics rather than intricate details.
Consider the pacing and timing of your video while creating the storyboard. Use panels or frames to indicate the duration of each scene and how the shots transition from one to another. This will help you establish the rhythm and tempo of your animated music video.
You can also add notes or captions to your storyboard, providing additional information or specific instructions for each scene. This could include details about the character’s expression, camera movement, or any visual effects that need to be incorporated.
Keep in mind that storyboarding allows you to experiment and make revisions before committing to the animation process. It gives you the freedom to test different compositions, camera angles, and pacing to create the desired impact for your video.
Storyboarding can be done traditionally on paper or digitally using various software or applications. Choose the method that suits your workflow and comfort level. There are also online resources and templates available that can assist you in creating professional-looking storyboards.
Remember, the purpose of the storyboard is to guide your animation process and communicate your vision to your team or collaborators. Sharing the storyboard with others involved in the production will help ensure everyone is on the same page and can provide valuable feedback or suggestions to enhance the video.
By creating a detailed and well-structured storyboard, you will have a solid visual reference to follow during the animation process. In the next step, we will explore the process of gathering the necessary resources for your animated music video.
Step 3: Gathering Resources
Before diving into the animation process, it’s important to gather all the necessary resources for your animated music video. These resources can include assets such as images, illustrations, audio files, and any additional materials that will be used to bring your vision to life.
Start by collecting visual references that align with the style and aesthetic you have in mind for your video. This can be done by researching and saving images, artwork, or videos that evoke the desired mood and atmosphere. Look for inspiration in various sources such as movies, other music videos, art galleries, or online platforms like Pinterest or Behance.
Additionally, if you plan to incorporate characters or objects in your animation, you will need to create or find suitable assets. This can involve creating original illustrations or seeking royalty-free images and vector graphics that align with your vision. There are many online resources and stock websites available where you can find high-quality assets for your project.
In terms of audio resources, make sure you have the final version of the song or music track that will be used in your animated music video. This will allow you to synchronize the animation with the music accurately. If you are working with a musician or band, ensure that you have their permission to use the song and discuss any specific requirements they may have regarding the visual representation of their music.
Organize your resources in a folder or cloud storage platform, creating subfolders for different categories such as images, audio files, and graphics. This will help you stay organized and easily access the materials you need throughout the animation process.
While gathering resources, it’s important to keep the overall vision and style of your animated music video in mind. Ensure that the selected resources, such as images or illustrations, align with the desired aesthetic and contribute to the storytelling aspect of your video. Consistency in the choice of resources will help maintain a cohesive and visually appealing final product.
Collaboration is key during the resource-gathering stage. If you are working with a team or collaborating with others, ensure that everyone has access to the shared resources and understands the visual references and mood you are aiming for. Regular communication and feedback will help ensure everyone is on the same page and working towards a unified vision.
By gathering all the necessary resources in advance, you will be well-prepared to move forward with the animation process. In the next step, we will explore the different animation software options available for creating your animated music video.
Step 4: Choosing Animation Software
Choosing the right animation software is crucial for creating your animated music video. There are various options available, each with its own features, capabilities, and learning curves. Consider the following factors when selecting animation software:
1. User-friendly Interface: Look for software with an intuitive and user-friendly interface. This will make the animation process smoother and more efficient, especially if you are new to animation.
2. Compatibility: Ensure that the software is compatible with your operating system and hardware specifications. This will prevent any technical issues during the animation process.
3. Features and Tools: Assess the features and tools offered by the software. Look for options that align with your project’s requirements. For example, if you plan to incorporate 3D elements or effects, consider software that offers robust 3D capabilities. If you prefer a more traditional 2D animation style, look for software that specializes in that area.
4. Cost: Consider your budget when choosing animation software. Some software options are free or have low-cost alternatives, while others may require a subscription or a one-time purchase. Evaluate the cost based on your project’s complexity and your long-term animation goals.
5. Learning Curve: Evaluate the learning curve associated with the software. If you are new to animation, choosing software with a wide range of tutorials and documentation can make the learning process easier and more enjoyable.
Some popular animation software options include:
- Adobe Animate: A powerful and versatile software that allows you to create both 2D and vector-based animations. It offers a wide range of tools and is commonly used in professional animation studios.
- Toon Boom Harmony: A professional-grade software favored by many animation studios. It provides comprehensive features for both 2D and 3D animation, with a focus on frame-by-frame animation.
- Blender: A free and open-source software that offers extensive capabilities for 3D animation, modeling, and rendering. It’s suitable for those looking to create more complex and realistic animations.
- OpenToonz: An open-source software used by both amateur and professional animators. It offers a range of tools for traditional 2D animation and has been used in the production of films and television shows.
Take the time to explore and experiment with different animation software options to find the one that best suits your needs and preferences. Consider the features, user interface, and compatibility with your project requirements. Choose a software that allows you to bring your creative vision to life effectively and efficiently.
Once you have selected your animation software, you can proceed to the next steps of creating the background, designing and animating characters, and adding effects and transitions to your animated music video.
Step 5: Creating the Background
The background of your animated music video plays a crucial role in setting the scene and enhancing the overall visual experience. It sets the tone, mood, and atmosphere for your video, creating a visually captivating backdrop for your characters and story.
When creating the background, consider the style and aesthetic you have chosen for your video. Determine whether you want a realistic, abstract, or stylized background that complements the theme of your music and the overall narrative. The background should support and enhance the storytelling aspect of your video.
There are several ways to create backgrounds for your animated music video:
1. Traditional Illustration: If you have strong illustration skills, you can create the backgrounds manually using traditional art techniques. This approach allows for a personalized and unique look. Use painting, drawing, or mixed media techniques to bring your backgrounds to life.
2. Digital Illustration: Digital illustration is a popular choice for creating backgrounds. You can use software such as Adobe Photoshop or Procreate to create detailed and vibrant backgrounds. With digital tools, you have the advantage of making easy revisions and adjustments as needed.
3. Image Editing and Manipulation: You can combine or modify existing images to create your background. Use image editing software like Adobe Photoshop or GIMP to manipulate photographs or combine elements from different sources to create a unique and cohesive background.
4. 3D Modeling and Rendering: If you prefer a more realistic or immersive background, you can create 3D models and render them to use as backgrounds. Software like Blender or Cinema 4D allows you to create detailed 3D environments that can be customized to fit your music video’s aesthetic.
No matter which approach you choose, pay attention to the composition and visual balance of your background. Consider the rule of thirds, use leading lines, and experiment with different perspectives to create visually engaging backgrounds that guide the viewer’s attention where it needs to be.
Additionally, consider the movement and animation style of your video when creating the background. If you plan to add camera movements or parallax effects, keep this in mind while designing your background to provide a sense of depth and immersion.
Finally, ensure that your background elements do not overpower the main focus of your video, which is often the characters or actions. The background should enhance and support the story and characters without distracting from them.
By investing time and effort into creating a well-designed and visually captivating background, you’ll elevate the overall quality and impact of your animated music video. Once you have created the background, you can move on to designing and animating the characters in the next step.
Step 6: Designing and Animating Characters
The characters in your animated music video are the heart and soul of the story. They bring life and emotion to your visuals, capturing the attention and hearts of your audience. In this step, we will explore the process of designing and animating characters for your music video.
1. Character Design: Start by brainstorming and sketching different character concepts that align with the overall theme and mood of your music video. Consider the personality traits, emotions, and role each character will play in the story. Refine and develop your character designs, paying attention to their appearance, clothing, and distinguishing features.
2. Character Model Sheets: Create detailed character model sheets that provide a blueprint for how your characters will look from different angles. Include front, side, and back views, as well as close-up details of facial expressions or any unique characteristics. Use these model sheets as a reference when animating your characters.
3. Rigging: Rigging is the process of creating a skeleton or structure for your characters that allows for movement and animation. Depending on the animation software you are using, this could involve creating bones, joints, and controls that will manipulate the character’s movements.
4. Keyframing: Keyframing is the technique of setting key poses or keyframes to establish the overall movement and timing of your character animation. Determine the essential moments and poses that convey the story and emotions effectively.
5. In-betweening and Timing: In-betweening involves adding additional frames between keyframes to create smooth and fluid character animation. Focus on the timing of movements, ensuring they match the music and evoke the desired impact. Experiment with different timing and spacing to create dynamic and visually appealing animations.
6. Expressions and Emotions: Pay attention to the expressions and emotions of your characters. Use facial rigging or drawing techniques to convey the appropriate emotions that align with the lyrics and mood of the music. Characters with expressive faces will enhance the storytelling and engagement of your music video.
7. Lip Syncing: If your music video features characters singing or speaking, you’ll need to pay close attention to lip syncing. Sync the character’s mouth movements with the lyrics to create a realistic and synchronized effect. Refer to reference videos or use phoneme charts to ensure accurate lip syncing.
8. Testing and Refining: Regularly test your character animations to spot any issues or inconsistencies. Use the playback function in your animation software to view and tweak your animations. Make necessary adjustments to improve the overall quality of the character movements.
9. Secondary Motions: Add secondary motions to characters, such as hair sways, clothing movements, or subtle gestures, to create a more realistic and lively animation. These details enhance the believability and depth of your characters.
Remember, character animation takes time and patience. Don’t be afraid to experiment and iterate to achieve the desired look and feel for your characters. By carefully designing and animating your characters, you’ll bring them to life and create a captivating and immersive music video.
Step 7: Adding Effects and Transitions
Adding effects and transitions to your animated music video can elevate the visual appeal and enhance the overall storytelling experience. Effects and transitions help create smooth transitions between scenes, convey emotions, and highlight key moments in your video. In this step, we will explore the process of adding effects and transitions to your animated music video.
1. Effects: Effects can be used to add visual elements such as particles, lighting, or stylized textures to your scenes. They can create a sense of magic, enhance the mood, or add flair to your animations. Experiment with different effects to find the ones that best align with your artistic vision and complement the style of your music video.
2. Transitions: Transitions are essential for creating smooth and seamless transitions between scenes or shots. Consider how each scene flows into the next and use transitions like fades, dissolves, wipes, or cuts to create a visually pleasing and cohesive narrative. The choice of transitions should align with the mood and pace of the music video.
3. Color Grading: Color grading is the process of enhancing or altering the colors in your video to create a specific visual atmosphere. Use color grading techniques to adjust the color balance, contrast, and saturation of your scenes, elevating the overall aesthetic and mood of the music video.
4. Depth and Parallax: Adding depth to your animation creates a more immersive experience for the viewer. Use techniques like parallax scrolling, where the background and foreground elements move at different speeds, to simulate depth and create a sense of three-dimensionality in your scenes.
5. Motion Blur: Motion blur adds a realistic and dynamic feel to your animations. It mimics the effect of objects blurring as they move quickly, enhancing the sense of speed and fluidity. Apply motion blur selectively to elements that require emphasis or to create a more polished and professional look.
6. Sound Effects: Sound effects can greatly enhance the impact of your animated music video. Use sound effects to accentuate actions, emphasize transitions, or add atmospheric elements. Consider incorporating sound effects that align with the theme and mood of your music video to create a more immersive experience for your audience.
7. Timing and Synchronization: Ensure that the effects and transitions are timed and synchronized with the music and animations. Pay attention to the beats, lyrics, or significant moments in the song, and use the effects and transitions to amplify the impact of those elements.
8. Testing and Refining: Regularly test and preview your effects and transitions to make sure they work seamlessly with your animated music video. Fine-tune and adjust the timing, intensity, or placement of effects and transitions as needed. Seek feedback from peers or collaborators to gain different perspectives and refine your choices.
By adding effects and transitions thoughtfully, you can elevate the visual storytelling of your animated music video and create a more engaging and immersive experience for your viewers. In the next step, we will explore the importance of syncing animation with the music to create a seamless and impactful video.
Step 8: Syncing Animation with Music
Syncing animation with music is a crucial step in creating a visually powerful and impactful animated music video. When the animation is synchronized with the music, it enhances the overall experience, intensifies emotions, and creates a seamless and immersive audio-visual journey for the viewers. In this step, we will explore the process of syncing animation with music.
1. Analyze the Music: Listen to the music track multiple times and analyze its structure, rhythm, and energy. Identify key moments such as chorus, verse, or instrumental breaks that you want to highlight in your animation. Determine the pacing and tempo to guide your animation decisions.
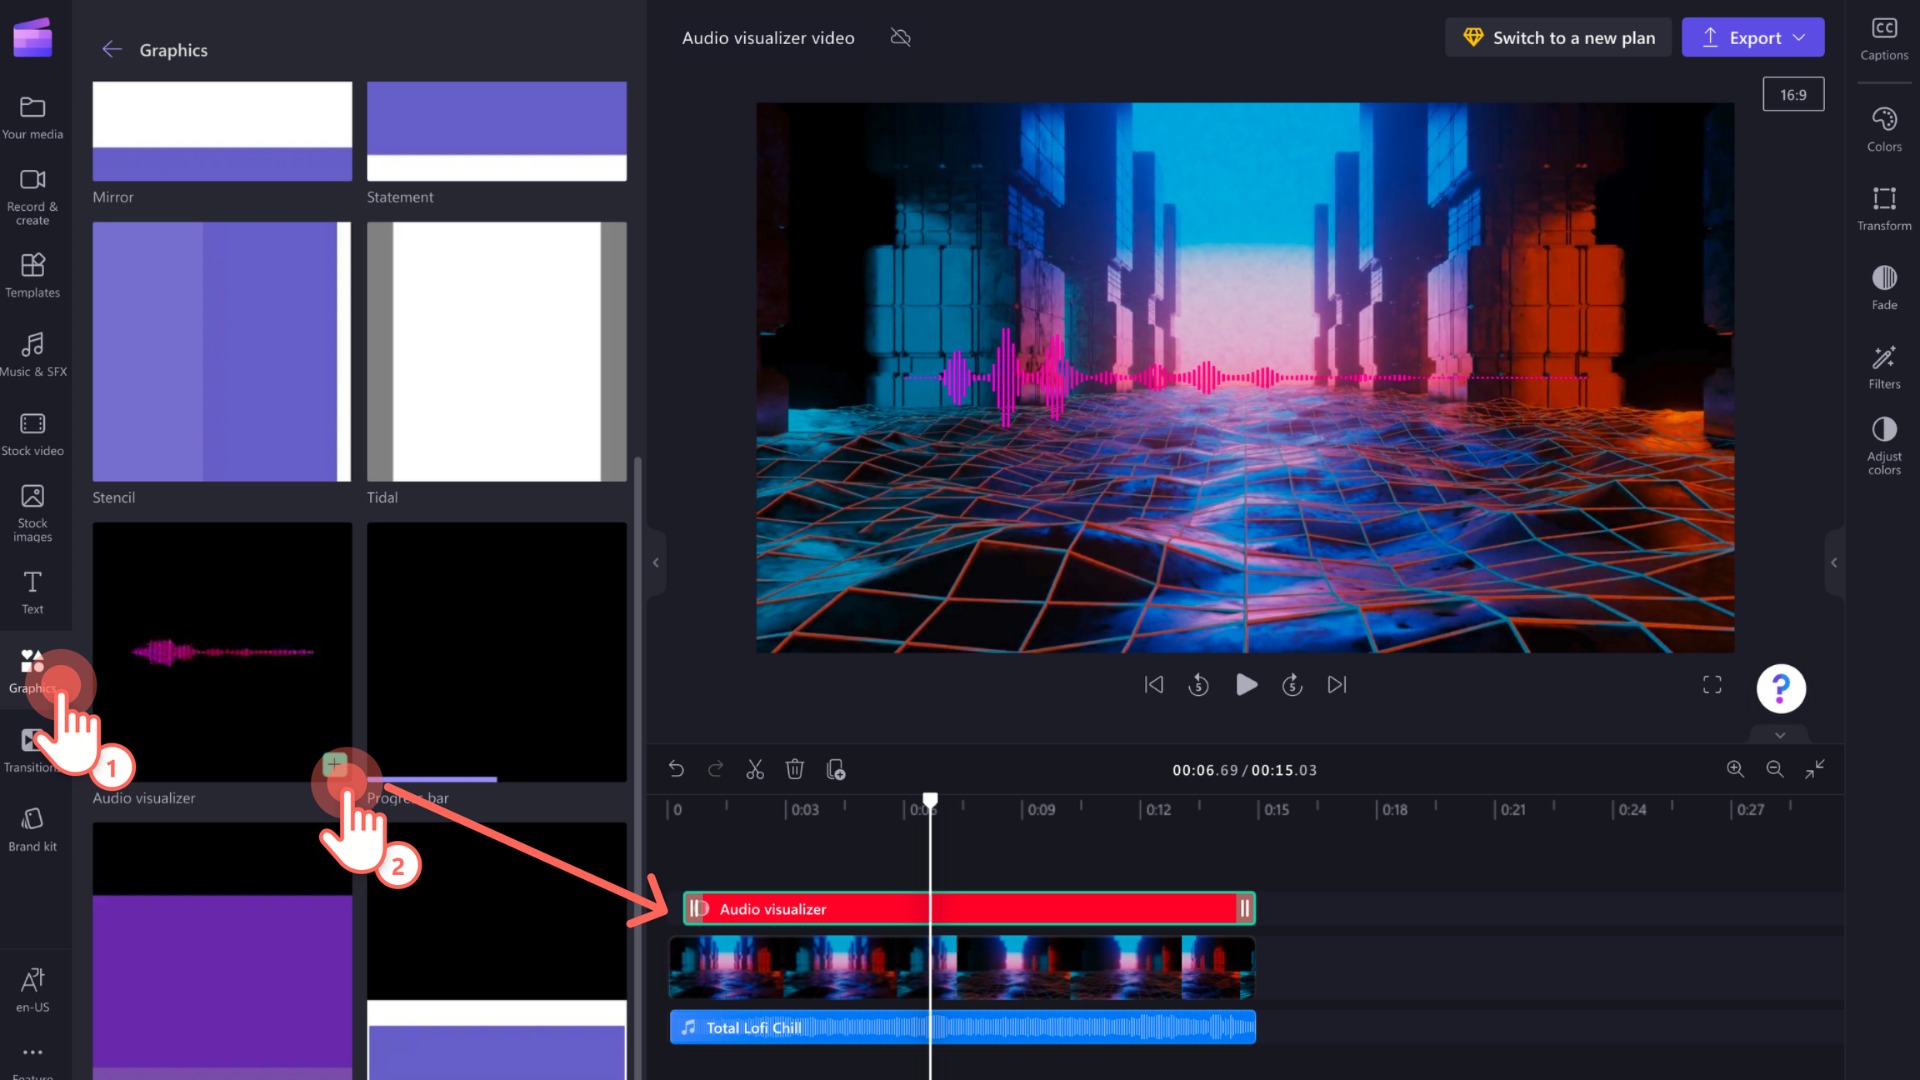
2. Time Markers: Use time markers or beat markers in your animation software to align key animation events with the music. This will help you synchronize the movements and actions of the characters with specific beats or musical accents. Ensure that the visual elements complement and enhance the emotions conveyed by the music.
3. Anticipation and Release: Pay attention to the buildup and release of energy in the music. Use anticipatory movements or poses to create tension and then release it with impactful actions or movements that align with the most powerful moments in the music. This practice adds depth and dynamicity to the animation.
4. Emphasize Lyrics: If your music contains lyrics, focus on syncing the animation with the words. Highlight key words or phrases by using visual cues or actions that represent their meaning. Pay attention to lip-syncing and ensure that character movements match the lyrics accurately.
5. Rhythmic Movement: Incorporate rhythmic movements in your animation that align with the beats or pulses in the music. This could include gestures, dance moves, or movements that emphasize the rhythm and flow of the music. It enhances the synchronization and adds visually pleasing elements to your video.
6. Visualize Sound Effects: If there are sound effects in the music or you have added them separately, synchronize the visual elements with those sounds. For instance, if there’s a drumroll in the music, you can animate a character drumming or create visual effects that mimic the sound of drumming.
7. Play with Timing: Experiment with different timing choices to create a more impactful synchronization. This could involve slowing down or speeding up the animation to match specific musical moments or playing with pauses and stutters to emphasize certain beats or actions. Fine-tune the timing to enhance the overall impact of your video.
8. Test and Refine: Regularly test and preview your animation with the music to ensure the synchronization is effective. Make adjustments and refinements as needed to maintain a seamless and compelling connection between the visuals and the music. Seek feedback from others to gain different perspectives and improve the synchronization further.
By syncing your animation with the music, you will create a powerful audio-visual experience that engages viewers on a deeper level. A well-executed synchronization enhances the emotions, storytelling, and overall impact of your animated music video.
In the final step, we will explore the process of editing and finalizing your animated music video.
Step 9: Editing and Finalizing
Once you have completed the animation process for your music video, the final step is to edit and finalize your project. Editing allows you to refine and polish your video, ensuring that it flows smoothly and meets your desired vision. In this step, we will explore the process of editing and finalizing your animated music video.
1. Review and Revisions: Begin by reviewing the entire animated music video. Take note of any areas that need improvement or additional refinement. Look for inconsistencies, timing issues, or any visual elements that may detract from the overall quality of the video. Make the necessary revisions to ensure a cohesive and visually engaging result.
2. Sequence and Flow: Assess the sequencing of your scenes and make sure they flow seamlessly from one to another. Pay attention to the pacing, timing, and transitions. Ensure that the narrative and visual elements align with the music and effectively convey your intended story or message.
3. Sound Mixing and Mastering: Pay attention to the audio quality of your music and add any additional sound effects, if necessary. Ensure that the sound levels are balanced, and the music is clear and distinct. Consider adjusting the volume, EQ, and other audio parameters to achieve the best possible sound quality for your final video.
4. Color Correction and Grading: Fine-tune the colors of your animated music video through color correction and grading. Adjust the brightness, contrast, saturation, and color balance to create a consistent and visually appealing aesthetic. This step helps unify the visual elements and enhances the overall impact of your video.
5. Finalize Transitions and Effects: Review the transitions and effects used in your video. Ensure that they are seamless and enhance the storytelling and visual experience. Make any necessary adjustments to the timing, duration, or intensity of the effects to achieve the desired impact.
6. Preview and Test: Watch the final version of your animated music video multiple times to ensure that everything is working as intended. Look for any remaining errors, glitchy animations, or technical issues. Pay attention to the overall flow, synchronization, and visual appeal. Share your video with trusted peers or collaborators and gather feedback to gain fresh perspectives and identify areas that can be further improved.
7. Export and Compression: Once you are satisfied with the final version, export your video in the desired format. Choose the appropriate settings that balance both quality and file size. Compression may be necessary to ensure optimal playback and easy sharing on various platforms.
8. Metadata and Credits: Add relevant metadata to your video file, such as title, artist name, and description. Include any necessary credits for the music, animation, and other collaborators involved in the project. These details help identify and promote your animated music video.
9. Distribution and Promotion: The final step is to distribute and promote your animated music video. Share it on your social media platforms, website, or video sharing platforms like YouTube or Vimeo. Engage with your audience, encourage sharing, and promote your video through appropriate channels to maximize visibility and reach.
By carefully editing and finalizing your animated music video, you ensure that it is professional, visually appealing, and compelling to your target audience. Take the time to refine and polish your video to create a finished product that showcases your artistry and creativity.
Congratulations! You have successfully completed the process of creating an animated music video. Enjoy the fruits of your hard work and share your masterpiece with the world!
Conclusion
Creating an animated music video is an exciting and fulfilling endeavor that allows you to merge the power of music with visual storytelling. Throughout this comprehensive guide, we have explored the step-by-step process of making an animated music video, from planning and storyboarding to designing characters, adding effects, and finalizing the project. By following these steps, you have the necessary tools and knowledge to embark on your own creative journey.
Remember to start with a clear vision and concept for your music video. Take the time to plan, storyboard, and gather the necessary resources to bring your vision to life. Choose the right animation software that suits your needs and skill level, and pay attention to the design and animation of your characters, ensuring they convey the desired emotions and actions.
As you progress, don’t forget the importance of syncing your animation with the music, enhancing the overall impact and creating a seamless audio-visual experience. Add effects and transitions that amplify the emotions and elevate the visual appeal of your video. Finally, edit and finalize your project, ensuring that it flows smoothly, the audio is well-balanced, and the visuals are polished.
Creating an animated music video requires patience, creativity, and attention to detail. Embrace the iterative process, seeking feedback and making revisions along the way. Remember, it’s not just about the final result, but also the journey of bringing your music and visuals together to create something truly unique and captivating.
Now, armed with your newfound knowledge and skills, it’s time to unleash your creativity, experiment, and make your mark in the world of animated music videos. Whether you are a musician looking to visually express your songs or an aspiring animator venturing into the realm of music videos, the possibilities are endless. So, grab your favorite music track, fire up your animation software, and let your imagination take flight. Good luck on your animated music video journey!

