Home>Production & Technology>Noise Cancellation>How To Turn On Noise Cancellation On Beats Studio 3
Noise Cancellation
How To Turn On Noise Cancellation On Beats Studio 3
Modified: January 22, 2024
Learn how to activate noise cancellation on your Beats Studio 3 headphones and enjoy a fully immersive and uninterrupted listening experience.
(Many of the links in this article redirect to a specific reviewed product. Your purchase of these products through affiliate links helps to generate commission for AudioLover.com, at no extra cost. Learn more)
Table of Contents
Introduction
Beats Studio 3 headphones are renowned for their superior audio quality, sleek design, and cutting-edge features. One of the standout features is noise cancellation, which allows you to immerse yourself in your favorite tunes without any distractions from the outside world.
Noise cancellation technology works by electronically reducing or even eliminating ambient sounds in your environment, making your listening experience more enjoyable and uninterrupted. Whether you’re on a crowded train, working in a noisy office, or simply seeking tranquility in your own space, noise cancellation can provide a welcome escape.
In this article, we will guide you through the process of turning on and customizing noise cancellation on your Beats Studio 3 headphones. Whether you’ve just purchased your pair or have had them for a while and want to make the most of this feature, we’ve got you covered.
So, put on your headphones, take a seat, and let’s dive into the wonderful world of noise cancellation with Beats Studio 3.
Understanding Noise Cancellation
Before we delve into the steps to turn on noise cancellation on your Beats Studio 3 headphones, it’s essential to understand how this technology works. Noise cancellation operates by analyzing the external environment’s ambient sounds and generating inverse sound waves to cancel them out.
There are two main types of noise cancellation: active noise cancellation (ANC) and passive noise cancellation.
- Active Noise Cancellation (ANC): This is the type of noise cancellation that is available on the Beats Studio 3 headphones. ANC relies on built-in microphones to detect external sounds. The headphones then generate sound waves that are phase-inverted to cancel out the ambient noise. ANC is particularly effective in reducing low-frequency sounds like engine noise, airplane cabin rumble, or the hum of office air conditioning.
- Passive Noise Cancellation: Passive noise cancellation is achieved through physical components of the headphones, such as cushioned ear cups that block out external noise by creating a seal around your ears. While passive noise cancellation is beneficial, it may not provide the same level of noise reduction as active noise cancellation.
It’s important to note that noise cancellation does not completely eliminate all sounds. Rather, it significantly reduces ambient noise, allowing you to enjoy your music or focus on your tasks without distractions. This technology can make a world of difference in noisy environments, providing a more immersive and enjoyable listening experience.
Now that you have a basic understanding of noise cancellation, let’s move on to the steps to activate this feature on your Beats Studio 3 headphones.
Step 1: Power Up Your Beats Studio 3
Before you can enjoy the benefits of noise cancellation on your Beats Studio 3 headphones, make sure they are powered on and ready to use. Here’s how:
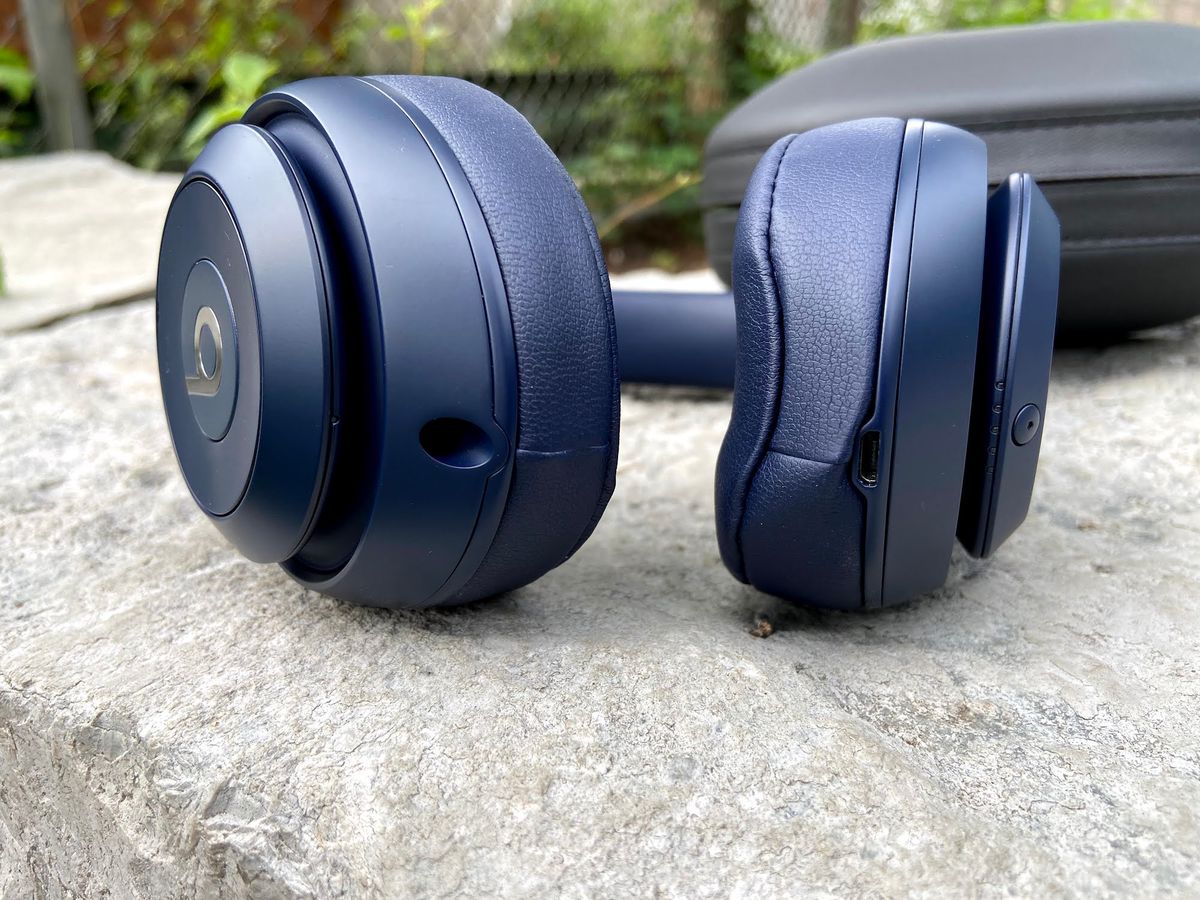
- Locate the Power Button: On your Beats Studio 3 headphones, you’ll find the power button on the right ear cup. It’s usually marked with the power symbol.
- Press and Hold: Press and hold the power button for a few seconds until you see the LED indicator light up. This indicates that the headphones are powered on.
- Check the Battery Level: Once your Beats Studio 3 headphones are powered on, it’s always a good idea to check the battery level. To do this, refer to the battery status indicator located near the power button. Green indicates a healthy battery level, while red indicates that the battery is running low and needs to be charged.
- Make Sure Your Device is Paired: To fully utilize the noise cancellation feature, ensure that your Beats Studio 3 headphones are paired with the device you plan to use them with. This could be your smartphone, tablet, computer, or any other compatible device.
Once you have completed these steps, your Beats Studio 3 headphones are ready to deliver exceptional sound quality with the added benefit of noise cancellation. Now let’s move on to enabling the noise cancellation mode.
Step 2: Enable Noise Cancellation Mode
Now that your Beats Studio 3 headphones are powered on, it’s time to enable the noise cancellation mode. Follow these simple steps:
- Locate the Noise Cancelling Button: On your Beats Studio 3 headphones, you’ll find the noise cancelling button on the left ear cup. It’s usually marked with the noise cancellation symbol.
- Press the Noise Cancelling Button: Press the noise cancelling button once to activate the noise cancellation mode. You will hear a confirmation tone, indicating that noise cancellation is now enabled.
- Confirm Noise Cancellation: To ensure that noise cancellation is active, pay attention to the LED indicator located near the noise cancelling button. It should turn on or change color, depending on the specific model of your Beats Studio 3 headphones.
And that’s it! You have successfully enabled the noise cancellation mode on your Beats Studio 3 headphones. Now, let’s move on to the next step where you can adjust the noise cancellation level to suit your preferences.
Step 3: Adjust Noise Cancellation Level
Every individual has unique preferences when it comes to noise cancellation. Fortunately, the Beats Studio 3 headphones allow you to adjust the noise cancellation level according to your liking. Follow these steps to customize the noise cancellation level:
- Play Audio: Start playing audio on your connected device, whether it’s music, a podcast, or any other sound.
- Access the Control Center: If you’re using an Apple device, swipe down from the top-right corner of the screen to access the Control Center. For Android and other devices, refer to your device’s settings or notification panel.
- Locate the Noise Cancellation Settings: In the Control Center or device settings, look for the noise cancellation settings. This may vary depending on your device and its operating system. It could be labeled as “Noise Cancellation,” “Sound Settings,” or similar terms.
- Adjust the Noise Cancellation Level: Within the noise cancellation settings, you will typically find a slider or multiple options to adjust the noise cancellation level. Slide the control to increase or decrease the intensity of noise cancellation until you achieve your desired level.
- Test and Fine-Tune: Once you’ve selected your preferred noise cancellation level, listen to the audio playing through your Beats Studio 3 headphones and assess if it meets your expectations. If needed, make further adjustments until you find the perfect balance that enhances your listening experience.
By adjusting the noise cancellation level, you can customize your audio experience to best suit your environment and personal preferences. Whether you need complete isolation or want to stay aware of your surroundings while enjoying music, finding the right noise cancellation level is key.
Now that you have adjusted the noise cancellation to your liking, let’s move on to the final step where we’ll explore additional ways to fine-tune your listening experience with Beats Studio 3.
Step 4: Fine-tuning the Listening Experience
With noise cancellation enabled and the level adjusted to your liking, you can further enhance your listening experience with some additional features and tips. Here’s how you can fine-tune your experience with your Beats Studio 3 headphones:
- Activate Transparency Mode: Transparency Mode is a feature that allows you to hear ambient sounds while still enjoying your audio. This can be useful when you need to be aware of your surroundings, such as in busy streets or during conversations. Check if your Beats Studio 3 headphones have this feature and, if available, enable it from the Control Center or device settings.
- Experiment with EQ settings: Many devices, including smartphones and music apps, offer equalizer (EQ) settings to adjust the audio frequencies. Take some time to explore these settings and find the EQ preset or custom settings that enhance the sound quality and match your preferred audio profile.
- Try different genres and audio content: Experiment with different genres of music, podcasts, audiobooks, or any other audio content to fully appreciate the impact of noise cancellation on various types of sounds. You might discover new nuances or hidden details in your favorite tracks.
- Find the right fit: Properly adjusting the fit of your Beats Studio 3 headphones can contribute to the overall noise cancellation effectiveness. Ensure that the ear cups form a secure yet comfortable seal around your ears, blocking out external noise as much as possible.
By exploring these additional features and tips, you can optimize your listening experience and make the most of your Beats Studio 3 headphones’ noise cancellation capabilities. Remember, customization is key to tailor the audio to your preferences and surroundings.
Should you encounter any issues or have questions related to noise cancellation or your Beats Studio 3 headphones, continue reading to the next section for troubleshooting tips.
Troubleshooting Noise Cancellation Issues
While noise cancellation technology is designed to provide a seamless and immersive listening experience, you may encounter some issues along the way. Here are some common problems and their possible solutions:
- Insufficient Noise Reduction: If you find that the noise cancellation is not blocking out enough external noise, ensure that your headphones are positioned properly and that there is a good seal around your ears. Adjusting the fit or trying different ear cup positions can improve the noise reduction.
- Unexpected Audio Distortions: In rare cases, you may experience audio distortions when noise cancellation is enabled. This could be caused by interference from other electronic devices or a software glitch. Try disabling and re-enabling noise cancellation or restarting your headphones to resolve the issue.
- Inconsistent Noise Cancellation: If you notice that the noise cancellation level varies or drops out at times, check the battery level of your headphones. Insufficient battery power can affect the functionality of the noise cancellation feature. Make sure your headphones are charged properly before use.
- Compatibility Issues: If you’re experiencing connectivity or compatibility issues with your device, ensure that your Beats Studio 3 headphones are updated with the latest firmware. Check the Beats website or their official app for any available updates.
- Reach out for Support: If troubleshooting on your own doesn’t resolve the noise cancellation issues, don’t hesitate to contact customer support for further assistance. They can provide specific troubleshooting steps or advice based on your situation.
Remember that noise cancellation technology can vary between different headphone models and brands. Familiarize yourself with the user manual or manufacturer’s website for any specific troubleshooting instructions related to your Beats Studio 3 headphones.
With these troubleshooting tips, you should be able to address common noise cancellation issues and enjoy a seamless listening experience with your Beats Studio 3 headphones.
Now, let’s conclude our guide to turning on noise cancellation on your Beats Studio 3 headphones.
Conclusion
Congratulations! You have successfully learned how to turn on and customize the noise cancellation feature on your Beats Studio 3 headphones. With noise cancellation activated, you can now escape the distractions of the outside world and immerse yourself in your favorite music, podcasts, or audio content.
Noise cancellation technology has the power to transform your listening experience, whether you’re on a noisy commute, working in a bustling office, or simply seeking tranquility in your own space. With the ability to adjust the noise cancellation level and explore additional features like Transparency Mode and EQ settings, you can tailor your audio experience to your preferences and surroundings.
Should you encounter any issues, remember to troubleshoot by adjusting the fit, checking the battery level, and ensuring your headphones are updated. If all else fails, don’t hesitate to reach out to customer support for further assistance.
Now, put on your Beats Studio 3 headphones, activate the noise cancellation feature, and enjoy uninterrupted audio like never before. Let the music transport you, the podcasts captivate you, and the noise cancellation envelop you in a world of pure audio bliss.
Thank you for following our guide. Happy listening!