Home>Production & Technology>Sound Effects>How To Make Sound Effects With Fl Studio

Sound Effects
How To Make Sound Effects With Fl Studio
Modified: February 19, 2024
Learn how to create stunning sound effects using Fl Studio. Enhance your audio production skills and bring your music to life with this comprehensive tutorial.
(Many of the links in this article redirect to a specific reviewed product. Your purchase of these products through affiliate links helps to generate commission for AudioLover.com, at no extra cost. Learn more)
Table of Contents
Introduction
Sound effects play a crucial role in enhancing the overall experience of music, films, podcasts, and more. They add depth, emotion, and realism to various forms of media, making them more engaging and immersive. If you’re a creator or producer looking to add professional sound effects to your projects, you’ve come to the right place.
In this article, we will explore how to make sound effects using FL Studio, a powerful digital audio workstation (DAW) widely used by musicians, producers, and sound designers. FL Studio provides a wide range of tools and features that allow you to create and manipulate sounds, apply effects, and achieve professional-quality results.
Whether you’re a beginner or an experienced user, this step-by-step guide will walk you through the process of creating your own custom sound effects using FL Studio. By the end of this article, you’ll have the knowledge and skills to unleash your creativity and add unique soundscapes to your productions.
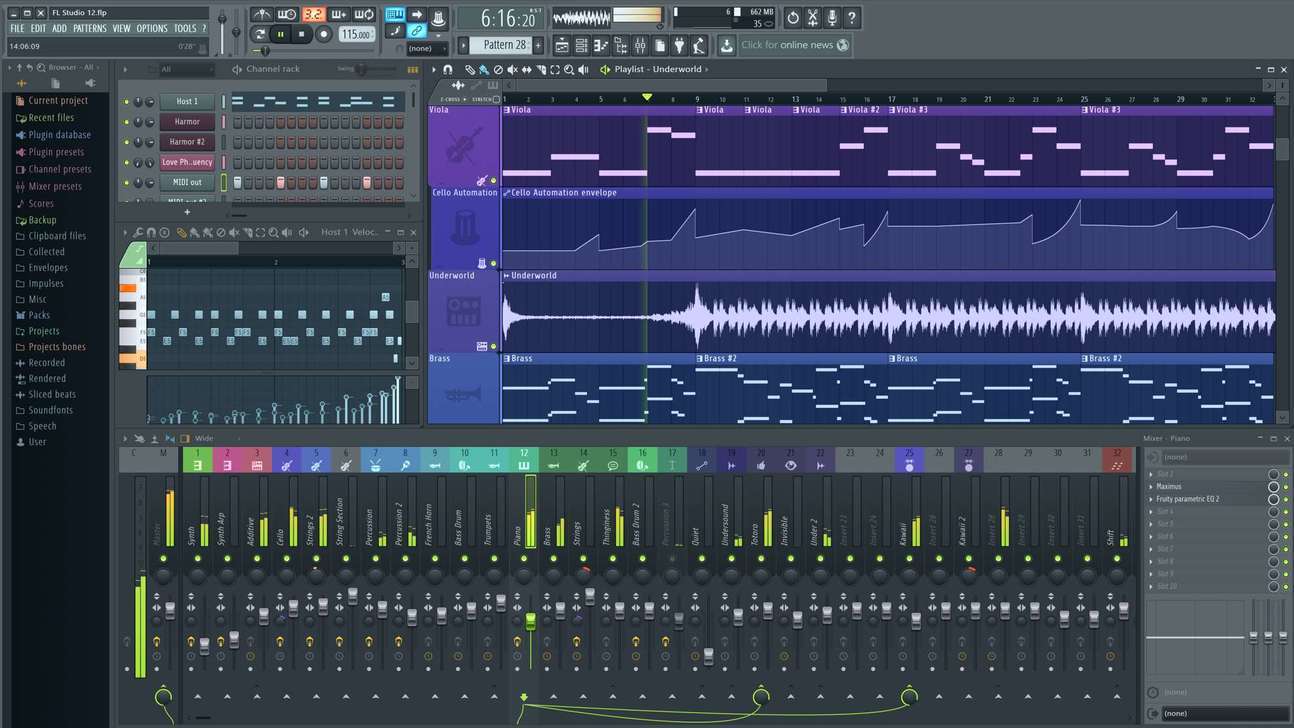
Before we dive into the process, it’s essential to have a basic understanding of FL Studio and its interface. If you’re new to FL Studio, take some time to familiarize yourself with the various elements such as the mixer, playlist, piano roll, and browser. This will help you navigate through the software and make the most out of the features mentioned in this guide.
Now that we have the groundwork covered, let’s get started on the exciting journey of creating sound effects with FL Studio. Get ready to explore the possibilities and unleash your sonic imagination!
Step 1: Setting up FL Studio
Before we can start creating sound effects in FL Studio, we need to make sure the software is properly set up for our needs. Here are the essential steps to get started:
- Choosing a project template: When you launch FL Studio, you’ll be presented with various project templates. Select a template that suits your desired workflow or start with a blank template if you prefer a clean slate.
- Setting up audio preferences: Go to the Options menu and select Audio Settings. Here, you can configure your audio device, sample rate, buffer size, and other audio-related settings. Make sure the settings match your hardware and project requirements for optimal performance.
- Organizing the workspace: FL Studio offers a highly customizable interface, allowing you to arrange and resize windows to your preference. Take a few moments to organize the windows and panels for easy access and efficient workflow. You can rearrange and dock windows by dragging and dropping them.
- Configuring MIDI devices: If you plan to use MIDI controllers or external synthesizers, you’ll need to set them up in FL Studio. Go to Options > MIDI Settings and select your desired input and output devices. FL Studio will automatically detect connected MIDI devices, but you may need to enable them manually.
Once you’ve completed these initial setup steps, FL Studio is ready to go. You can now focus on exploring the vast array of sounds, effects, and creative tools that FL Studio has to offer. In the next steps, we’ll dive into the process of creating and manipulating sound effects using FL Studio’s powerful features.
Step 2: Choosing and Loading Sounds
Now that FL Studio is set up, it’s time to choose and load the sounds you want to work with. FL Studio provides several ways to import sounds into your project:
- Browsing the sample library: FL Studio comes with a vast collection of built-in samples and sound packs. To access the sample library, click on the Browser panel on the left-hand side of the FL Studio interface. From here, you can browse different categories of sounds and preview them before loading them into your project.
- Importing your own samples: If you have your custom sound effects or samples, you can easily import them into FL Studio. Simply locate the folder containing your sample files in your computer’s file explorer and drag and drop them into the FL Studio Browser. They will now be available for use in your project.
- Recording audio: If you prefer to record your own sound effects using a microphone or other audio recording devices, FL Studio allows you to do so. Create an audio track, arm it for recording, and hit the Record button. You can then capture live sounds or perform your own sound effects directly into FL Studio.
When choosing sounds for your sound effects, consider the context and purpose of your project. Think about the emotions, atmosphere, or actions you want to convey through the sound effects. For example, if you’re working on a horror film, you might want to look for eerie, suspenseful, or creepy sounds.
Experiment with different combinations of sounds and explore various genres and styles to find the perfect fit for your project. FL Studio’s sample library offers a wide range of sounds, including drums, percussion, ambient sounds, vocals, and more. Don’t be afraid to get creative and think outside the box by layering and manipulating sounds to achieve unique and interesting sound effects.
Once you have chosen your desired sounds, simply drag and drop them from the Browser panel into the Channel Rack or Playlist window to start working with them. From here, you can edit, manipulate, and apply effects to create the desired sound effects for your project.
Step 3: Applying Effects
Now that you have loaded your sounds into FL Studio, it’s time to start applying effects to shape and transform them into unique sound effects. FL Studio provides a wide range of built-in effects that you can use to enhance and modify your sounds. Here’s how you can apply effects to your sound effects:
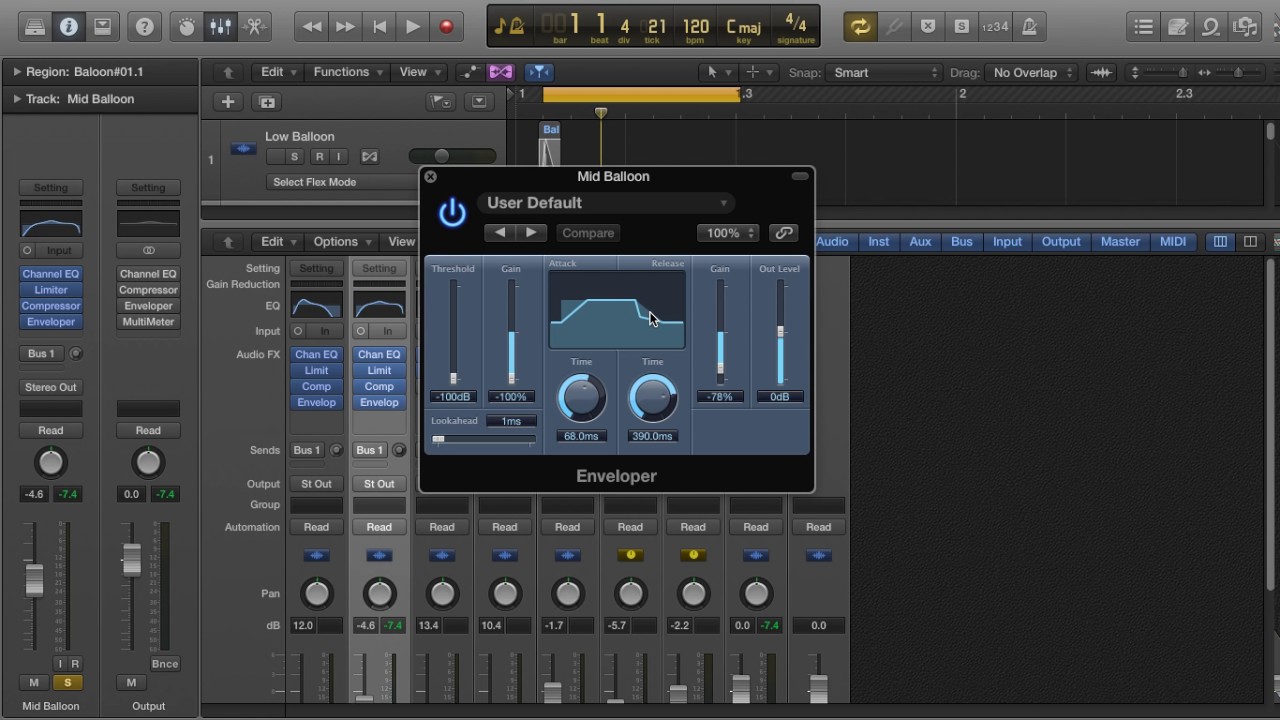
- Choose the effect plugin: In FL Studio, effects are applied to individual Mixer tracks. To add an effect to a sound, select the Mixer track where the sound is routed. Right-click on the empty effects slot of the selected track and choose an effect plugin from the menu. FL Studio offers various plugins like reverb, delay, distortion, chorus, and many more.
- Adjust the effect parameters: Once you’ve added an effect plugin, you can adjust its parameters to achieve the desired sound effect. Each effect plugin comes with its own set of controls and settings. Experiment with the different parameters, such as wet/dry mix, decay time, feedback, and modulation, to shape the sound to your liking.
- Layering and routing effects: FL Studio allows you to layer multiple effects on a single sound or create complex effect chains. You can add multiple effects to the same Mixer track by repeating the process mentioned above. Additionally, you can route sounds to different Mixer tracks and apply different effects to each track, giving you more control over the sound manipulation.
When applying effects, consider the purpose and mood of your sound effect. For example, if you want to create a thick and atmospheric sound, you might apply a reverb effect. If you want to add movement and dimension, a modulation effect like chorus or phaser can be helpful. Experiment with different combinations of effects and tweak the parameters until you achieve the desired result.
Remember to use your ears and trust your instincts. Don’t be afraid to explore unconventional settings or experiment with various effects to create unique and unexpected sound effects. FL Studio’s extensive collection of effects plugins provides endless possibilities for shaping and transforming your sounds.
Once you’re satisfied with the applied effects, you can move on to the next step of manipulating the pitch and speed of your sound effects to further enhance their impact.
Step 4: Manipulating Pitch and Speed
Manipulating the pitch and speed of your sound effects can significantly alter their character and create interesting variations. FL Studio offers a variety of tools and techniques to achieve this. Here’s how you can manipulate the pitch and speed of your sound effects:
- Using the Pitcher plugin: FL Studio’s Pitcher plugin allows you to adjust the pitch of your sound effects in a flexible and precise manner. Simply load the Pitcher plugin onto the Mixer track where the sound effect is routed and play around with the pitch controls. You can increase or decrease the pitch, create harmonies, and even apply formant shifting to transform the timbre of the sound.
- Using the Time-Stretching feature: FL Studio’s Time-Stretching feature enables you to adjust the speed of your sound effects without affecting the pitch. This is useful when you want to create slow-motion or fast-paced sound effects. To access the Time-Stretching feature, right-click on the audio clip in the Playlist, go to the Edit submenu, and choose “Time Stretch.” You can then stretch or shrink the duration of the sound effect while maintaining its original pitch.
- Manual editing in the Piano Roll: For more precise control over pitch and timing, you can manually edit the MIDI notes representing your sound effects in FL Studio’s Piano Roll. By adjusting the pitch and length of the MIDI notes, you can create unique patterns and melodies out of your sound effects. This method allows for intricate pitch bends, slides, and arpeggios, giving your sound effects a dynamic and expressive quality.
When manipulating pitch and speed, consider the desired effect you want to achieve. Higher pitches can create a sense of excitement, tension, or urgency, while lower pitches can evoke darkness, suspense, or mystery. Altering the speed can enhance or diminish the intensity or impact of the sound effect.
Experiment with different combinations of pitch and speed adjustments to find the perfect balance for your sound effects. Don’t be afraid to be creative and experiment with extreme settings to generate unconventional and unexpected results. Trust your ears and let your imagination guide you in shaping your sound effects into something truly unique.
Once you have manipulated the pitch and speed of your sound effects to your satisfaction, you can move on to the next step of creating unique soundscapes by layering and combining multiple sound elements.
Step 5: Creating Unique Soundscapes
Creating unique soundscapes is all about layering and combining different sound elements to build a rich and immersive audio environment. FL Studio provides several tools and techniques to help you achieve this. Let’s explore how you can create unique soundscapes:
- Layering sounds: Start by layering multiple sound effects on different Mixer tracks. This allows you to blend sounds together and create complex textures. Experiment with different combinations of sounds, such as ambient pads, atmospheric textures, or subtle background noises, to evoke specific moods or settings.
- Panning and spatial effects: Use panning techniques to position sounds within the stereo field. By assigning different panning positions to each sound, you can create a sense of width and depth in your soundscapes. Additionally, FL Studio offers spatial effects like stereo enhancers and reverbs to further enhance the spatial experience of your soundscapes.
- Automation and modulation: FL Studio’s automation and modulation features allow you to dynamically control various parameters of your sound effects. Experiment with automating parameters like volume, panning, filter cutoff, and effect parameters over time. This adds movement and variation to your soundscapes, making them more dynamic and immersive.
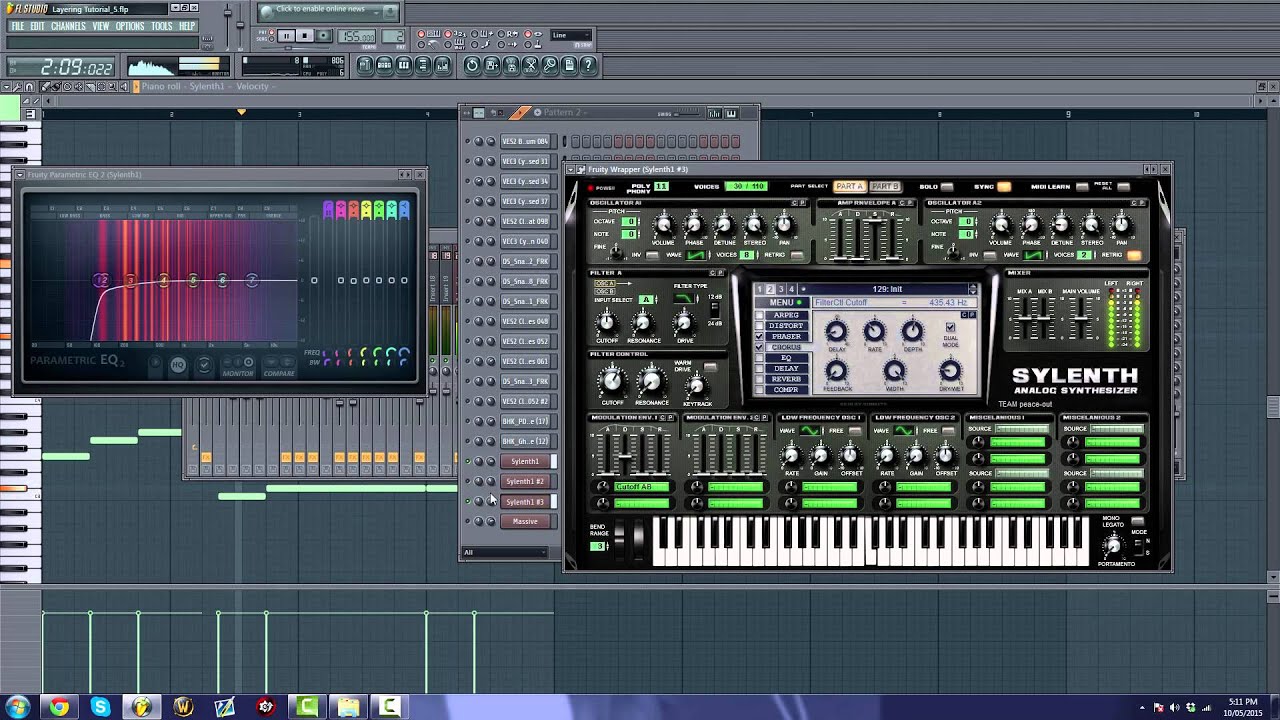
- Using virtual instruments: FL Studio comes with a wide range of virtual instruments that can generate unique and atmospheric sounds. Explore synthesizer plugins, such as Sytrus or Harmor, to create ethereal pads, evolving textures, or otherworldly soundscapes. Combine these virtual instruments with your manipulated sound effects for even more creative possibilities.
When creating soundscapes, consider the purpose and context of your project. Whether it’s a film scene, a video game level, or a music composition, the soundscapes should complement and enhance the overall experience. Think about the emotions, atmosphere, and narrative elements you want to convey through your soundscapes.
Experiment with different combinations of sound layers, spatial effects, automation, and virtual instruments to achieve the desired sonic landscape. Listen carefully and make adjustments as needed to create a cohesive and compelling audio environment.
Remember, creating unique soundscapes is about unleashing your creativity and exploring different sonic possibilities. Let your imagination guide you as you layer and blend sounds to transport your audience into a world of immersive audio.
Once you have crafted your unique soundscapes, it’s time to refine and polish the overall audio mix through the process of mixing and mastering.
Step 6: Mixing and Mastering
Mixing and mastering are essential steps in the sound production process that ensure your sound effects sound polished, balanced, and ready for the final presentation. Let’s dive into how you can effectively mix and master your sound effects in FL Studio:
- Mixing: Mixing involves balancing the levels and frequencies of individual sound elements to create a cohesive and well-blended sound. Here are a few key aspects to consider during the mixing process:
- Volume levels: Adjust the volume levels of each sound effect to ensure they are audible and balanced within the mix. Pay attention to any sound elements that may dominate or clash with the others.
- Panning: Use panning to position sounds in the stereo field. Distribute elements across the left and right speakers to create a sense of width and depth. This can help to enhance the overall immersion of your sound effects.
- Equalization (EQ): Use EQ plugins to shape the frequency response of your sound effects. This allows you to enhance certain frequencies or remove unwanted resonances, ensuring clarity and balance within the mix.
- Compression: Apply compression to control the dynamic range of your sound effects. This helps to even out the volume levels and add more sustain or presence to certain elements.
- Mastering: Mastering is the final step in the production process, where the entire mix is processed as a whole to achieve a consistent and professional sound. Here are some techniques you can use for mastering in FL Studio:
- Equalization: Use EQ to shape the overall frequency balance of the mix. Tweak the EQ to enhance the sonic characteristics and address any frequency issues.
- Dynamic Range Compression: Apply subtle compression to the master track to control the overall dynamics and ensure a consistent volume level throughout the sound effects.
- Stereo Imaging: Use stereo imaging plugins to widen the stereo field or make the sound effects more focused. This can help to create a sense of depth and width in the final mix.
- Loudness Maximization: Use a limiter or maximizer plugin to increase the overall loudness of the sound effects while preventing clipping and distortion. Be mindful of maintaining a balanced and natural sound.
During the mixing and mastering process, it’s crucial to trust your ears and use reference tracks for comparison. Take breaks to refresh your hearing and maintain objectivity. Additionally, consider the target platform or medium your sound effects will be used in and adjust the mix accordingly to ensure compatibility and optimum playback.
Once you are satisfied with the mix and master, make sure to export your sound effects in a suitable format and quality settings for your intended purpose. Test the final sound effects in different listening environments to ensure they translate well across various playback systems.
With the mixing and mastering process complete, you have successfully brought your sound effects to their full potential. Now, it’s time to incorporate them into your projects and captivate your audience with immersive and impactful audio experiences.
Conclusion
Congratulations! You have now learned how to make sound effects using FL Studio. Throughout this guide, we explored the step-by-step process of creating and manipulating sound effects, from setting up FL Studio to mixing and mastering your final creations.
FL Studio provides a powerful platform for unleashing your creativity and crafting unique soundscapes. By choosing and loading sounds, applying effects, manipulating pitch and speed, and layering elements, you can create sound effects that evoke emotions, enhance storytelling, and captivate your audience.
Remember to experiment, trust your instincts, and let your imagination guide you as you explore the vast capabilities of FL Studio. Take advantage of its intuitive interface, extensive sample library, built-in effects, and powerful tools to shape and transform your sounds into something truly remarkable.
Additionally, don’t be afraid to think outside the box and try unconventional techniques. The beauty of sound design lies in its limitless possibilities and endless potential for innovation. Have fun exploring different sound combinations, experimenting with plugins, and pushing the boundaries of what is possible with sound effects.
Lastly, always strive for a balanced and professional mix and master. The quality and polish of your sound effects will greatly impact the overall impression and effectiveness of your projects. Take the time to fine-tune the volumes, panning, equalization, and dynamics to ensure your sound effects blend seamlessly and sound great on any playback system.
Now it’s time to take what you’ve learned and apply it to your own creative endeavors. Whether you’re working on a film, game, podcast, or any other form of media, your newfound knowledge of sound effects in FL Studio will allow you to elevate your projects and deliver a truly immersive audio experience.
So go forth, explore, and create amazing sound effects that will captivate, engage, and transport your audience to new sonic worlds. Embrace your inner sound designer and let your imagination run wild!