Home>Production & Technology>Metronome>How To Put Metronome In To Channel FL Studio

Metronome
How To Put Metronome In To Channel FL Studio
Published: January 13, 2024
Learn how to easily incorporate a metronome into your FL Studio channel for precise timing and rhythm control. Enhance your music production with this essential tool.
(Many of the links in this article redirect to a specific reviewed product. Your purchase of these products through affiliate links helps to generate commission for AudioLover.com, at no extra cost. Learn more)
Table of Contents
Introduction
Welcome to this comprehensive guide on how to put a metronome into the Channel in FL Studio. FL Studio is a powerful music production software used by both beginners and professionals. Having a metronome in your project is crucial for maintaining rhythm and timing, whether you’re producing electronic music, recording live instruments, or arranging MIDI sequences.
A metronome is a valuable tool that provides a constant click or sound at a specific tempo, helping musicians stay in sync and play with precision. While FL Studio comes with several built-in plugins, it doesn’t have a dedicated metronome channel by default. However, you can easily add a metronome to your project using plugins or third-party tools.
In this guide, we will walk you through the step-by-step process of adding a metronome to the Channel in FL Studio. You’ll learn how to customize the metronome sounds, sync it with your project’s tempo, and test it out to ensure it fits perfectly with your music.
Whether you’re a beginner exploring FL Studio’s features or an experienced producer looking to improve your workflow, this guide is for you. So let’s dive in and learn how to integrate a metronome into the Channel in FL Studio!
Step 1: Opening FL Studio
The first step in adding a metronome to the Channel in FL Studio is to open the software on your computer. If you haven’t already downloaded and installed FL Studio, you can find it on the official Image-Line website and follow the installation instructions for your operating system.
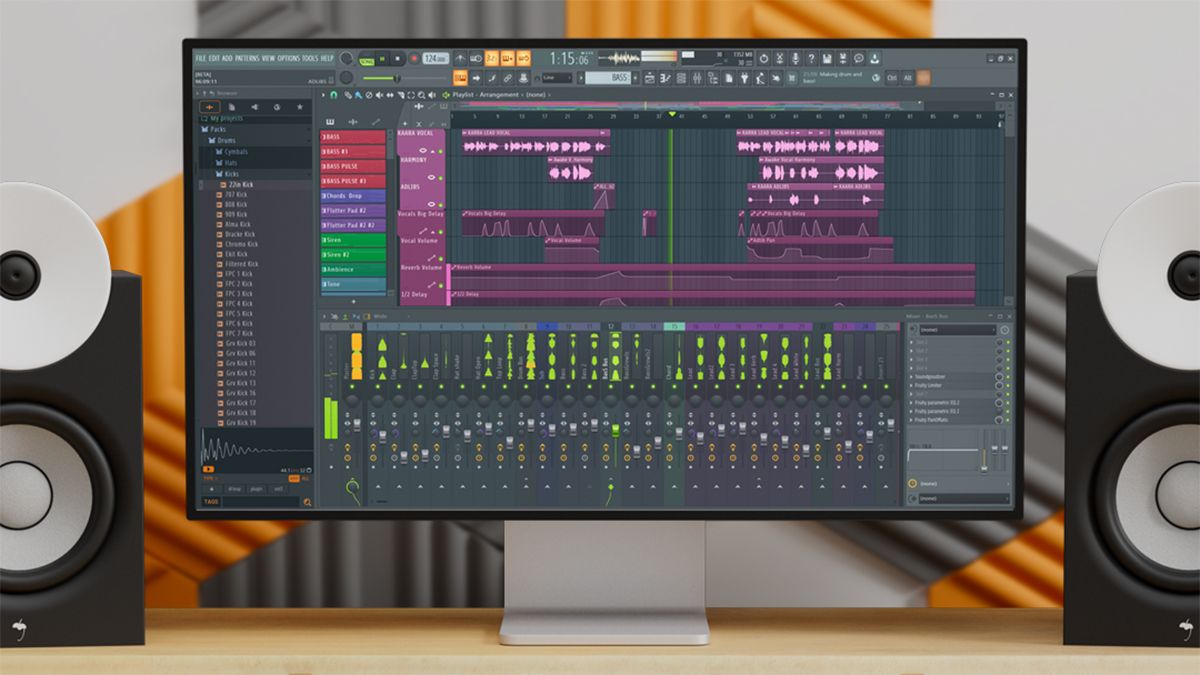
Once FL Studio is installed, launch the program by double-clicking on the FL Studio icon. After a few moments, you’ll be greeted with the FL Studio interface, ready to start creating music.
If you’re new to FL Studio, you’ll notice that it consists of various windows and panels that can seem overwhelming at first. Don’t worry! We’ll focus on the essential elements you need to know in order to add a metronome to the Channel.
In FL Studio, the Channel Rack is where you’ll find all your instruments, samples, and plugins. The Channel Rack is the foundation of your music project and where you’ll create your beats and melodies.
To access the Channel Rack, look for the “Channel Rack” button or tab in the FL Studio interface. It’s usually located near the bottom or left side of the screen, depending on your version of FL Studio.
Step 2: Adding a Channel
Now that you have FL Studio open and the Channel Rack accessible, it’s time to add a channel for the metronome. The channel will serve as a container for the metronome sounds and settings.
To add a channel, locate the “Add” button or option in the Channel Rack. It is usually represented by a small plus sign or an icon indicating the addition of a new channel. Click on the “Add” button, and a list of available instruments and plugins will appear.
In this case, since we want to add a metronome, look for a plugin or instrument that provides metronome functionality. There are numerous options available, both built-in and third-party plugins. Some popular choices include FPC, Slicex, or dedicated metronome plugins like Poise or Metronome by Image-Line.
Select the metronome plugin of your choice from the list. If you don’t have a specific metronome plugin installed, consider searching for one in the FL Studio Plugin Database or explore reputable plugin websites to find and download the desired metronome plugin.
After selecting the metronome plugin, a new channel will be created in the Channel Rack. You’ll see the name of the plugin or instrument displayed in the channel, indicating that it’s ready for customization and configuration.
Adding a dedicated channel for the metronome ensures that it remains separate from other instruments and sounds in your project, allowing for precise control over its settings and easy access during the production process.
Step 3: Loading the Metronome Plugin
Now that you have added a channel for the metronome, the next step is to load the metronome plugin into the channel. This will give you access to its features and controls.
To load the metronome plugin, simply click on the channel you just created in the Channel Rack. This will select the channel and display its settings in the Channel Settings window. The Channel Settings window is where you can adjust and customize the properties of the selected channel.
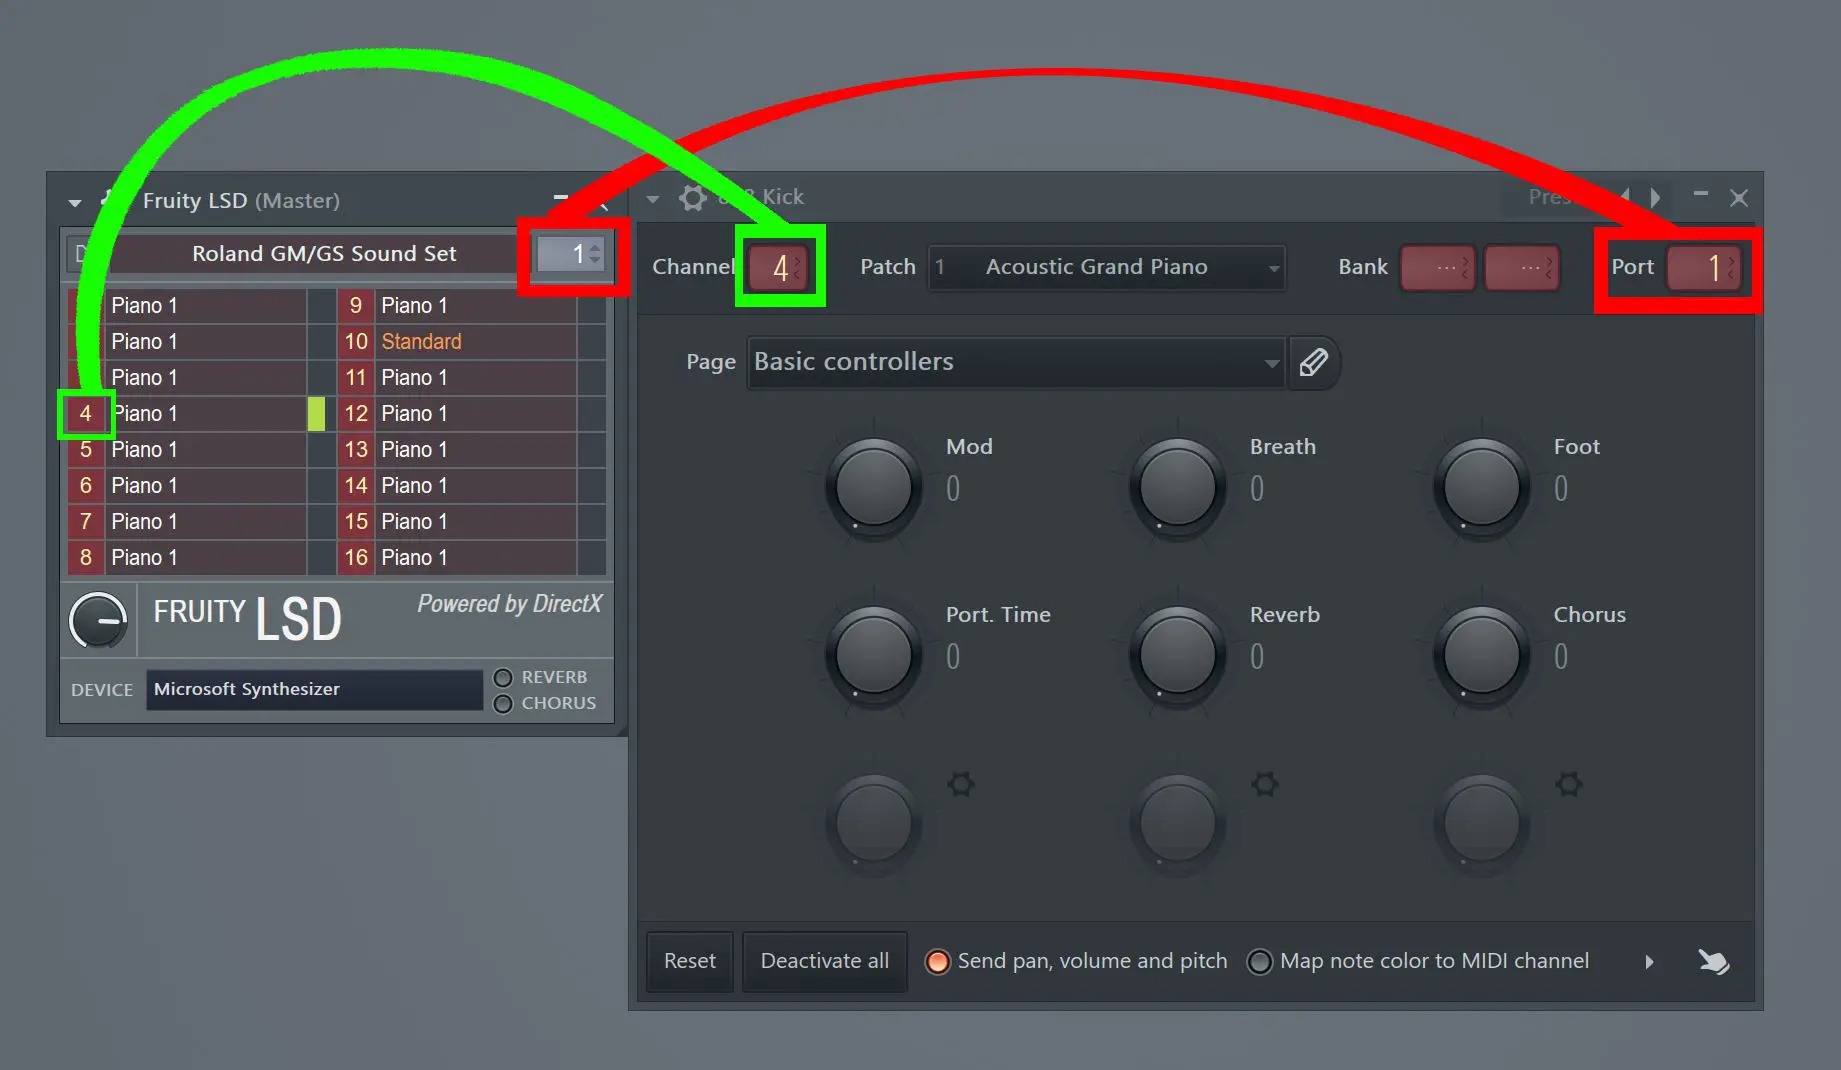
In the Channel Settings window, you’ll find a section that allows you to select the plugin or instrument for the channel. Look for the dropdown menu or browse button associated with the plugin selection. Click on the dropdown menu or browse button to open a list of available plugins.
Scroll through the list of plugins until you find the metronome plugin you added in the previous step. Select the metronome plugin from the list, and it will be loaded into the channel.
Once the metronome plugin is loaded, you may see its user interface or control panel within the Channel Settings window. This interface will vary depending on the metronome plugin you’re using.
Take some time to explore the controls and features of the metronome plugin. Familiarize yourself with its options, such as tempo adjustment, time signature settings, and accent patterns. Understanding these features will allow you to tailor the metronome to your project’s specific requirements.
Remember, each metronome plugin may have a different interface and feature set, so it’s important to refer to the plugin’s documentation or online resources for detailed instructions on how to navigate and configure the plugin.
Step 4: Adjusting Metronome Settings
After loading the metronome plugin into the channel, it’s time to adjust its settings to fit your project’s needs. This step allows you to customize the metronome’s tempo, time signature, volume, and other parameters.
Start by locating the controls or parameters specific to the metronome plugin within the Channel Settings window. These controls may be displayed as knobs, sliders, dropdown menus, or text fields. The location and appearance of these controls will vary depending on the metronome plugin you’re using.
Here are some common settings you may find for adjusting the metronome:
Tempo: This control allows you to set the desired tempo or beats per minute (BPM). Use the provided control or type in the desired BPM value to adjust the tempo of the metronome.
Time Signature: Depending on the metronome plugin, you may have the option to set the time signature of your project. This controls the number of beats per measure and the type of note that represents one beat (e.g., 4/4, 3/4, 6/8).
Volume: Adjust the volume or level of the metronome sound using the volume control. This allows you to set the metronome’s presence in your mix relative to other instruments and sounds.
Accent Patterns: Some metronome plugins offer the ability to create accent patterns, where certain beats are emphasized or accented. Explore the options within your metronome plugin to experiment with different accent patterns that suit your musical style.
While adjusting the metronome settings, it’s important to consider the musical context of your project. Take into account the desired tempo, time signature, and the role the metronome will play in your composition.
Feel free to experiment with different settings and options to find the perfect metronome configuration for your project. Adjustments can always be made later if needed, so don’t be afraid to explore and fine-tune the settings until you find what works best for your music.
Step 5: Syncing Metronome with Project Tempo
Now that you have adjusted the metronome settings, it’s important to sync it with your project’s tempo. By aligning the metronome with the project tempo, you ensure that all elements of your music are in sync and rhythmically cohesive.
To sync the metronome with the project tempo, you’ll need to locate the tempo settings within your DAW (Digital Audio Workstation), specifically FL Studio in this case.
In FL Studio, the tempo settings can usually be found at the top-left corner of the interface. Look for the numerical value representing the tempo BPM (beats per minute). Click on the tempo value to enter a new tempo or use the provided controls to adjust it.
If you have already set your desired tempo for the project, you can directly enter the same value into the tempo settings of the metronome plugin. This will ensure that the metronome clicks or sounds in sync with the project tempo.
Alternatively, some metronome plugins may automatically sync with the project tempo, requiring no additional manual adjustments. In this case, the metronome will follow any tempo changes made within the project.
Ensure that the metronome is set to the correct tempo by playing back your project and listening to the metronome clicks or sounds. If they align with the desired tempo, you have successfully synced the metronome with your project. If not, double-check the tempo settings for both your project and the metronome plugin, making any necessary adjustments.
Remember, maintaining a consistent tempo throughout your project is essential for creating a rhythmic foundation and ensuring that all elements of the music align harmoniously. The metronome acts as a guide to help you stay on beat and in time, so it’s crucial to keep it in sync with your project’s tempo.
Step 6: Customizing Metronome Sounds
Customizing the sounds of your metronome can add a unique touch to your music and make it more enjoyable to work with. In this step, we’ll explore how you can customize the metronome sounds to suit your preferences and style.
Depending on the metronome plugin you’ve chosen, there may be options to modify the sound of the metronome clicks, ticks, or beats. These options can include changing the sound itself, adjusting its volume, adding effects, or even using custom samples.
Start by accessing the sound customization options within the metronome plugin. Look for controls, knobs, or dropdown menus that allow you to select different sounds or samples for the metronome.
If your metronome plugin offers a variety of preset sounds, take the time to audition them to find one that suits the mood and genre of your project. Some plugins may even provide options to import or use your own custom sounds or samples, allowing for endless possibilities.
Experiment with different sounds and samples to find the perfect metronome sound for your project. You can choose a classic click sound, a more modern and electronic sound, or anything that complements your music.
In addition to sound selection, you may also have the opportunity to adjust the volume of the metronome sound within the plugin settings. Ensure that the metronome volume is balanced with the rest of your instruments and sounds, allowing it to be heard clearly without overpowering the mix.
Remember that the metronome sound can be more than just a simple click. Some plugins offer the ability to add effects, such as reverb, delay, or distortion, to the metronome sound to create unique textures and atmospheres.
Take some time to experiment with different effects and settings to add an extra layer of creativity to your metronome sound. However, be mindful that the primary purpose of the metronome is to provide a clear and precise reference for timing and rhythm.
By customizing the metronome sounds, you can make the process of composing and producing music more enjoyable and inspiring. It’s the small touches like these that can bring your music to life and make the creative process even more exciting.
Step 7: Testing the Metronome
After customizing the metronome sounds and adjusting its settings, it’s crucial to test the metronome to ensure it functions correctly and fits seamlessly into your project. This step allows you to verify that the metronome behaves as expected and provides the rhythmic guidance needed for your music.
Begin by playing back your project in FL Studio, paying close attention to the metronome clicks or sounds. Listen carefully and observe whether the metronome is in sync with the rest of your music. Does it maintain a steady rhythm throughout the song? Are the beats accurately aligned with the tempo?
If you notice any discrepancies or irregularities, it’s essential to investigate and identify the cause. Double-check the metronome settings, including tempo, time signature, and any accent patterns or volume adjustments you made. Ensure that the metronome plugin is properly loaded and integrated into the project.
During the testing phase, it’s also helpful to work on different sections of your composition, such as the verse, chorus, or bridge, to evaluate how well the metronome adapts to various parts of the song. Pay attention to transitions, tempo changes, and complex rhythmic patterns to confirm that the metronome continues to provide accurate timing guidance.
An excellent way to ensure the metronome functions optimally is to invite other musicians or collaborators to listen and provide feedback. Their insights can help you identify any potential issues or improvements that might enhance the metronome’s effectiveness.
Remember, the metronome is a valuable tool that enhances the quality and precision of your music. It acts as your rhythmic guide, helping you stay in sync and maintain a consistent tempo. Regularly testing and verifying its performance ensures that you can rely on the metronome throughout your creative process.
By thoroughly testing the metronome and addressing any issues, you can confidently proceed with the production of your music, knowing that your timing and rhythm are assured. This will ultimately contribute to a polished and professional sounding final product.
Conclusion
Adding a metronome to the Channel in FL Studio is a crucial step in music production. It provides the necessary rhythm and timing guidance to ensure that your music stays in sync and on beat. By following the steps outlined in this comprehensive guide, you can easily integrate a metronome into your FL Studio project and customize it to your liking.
Starting from opening FL Studio and adding a dedicated channel for the metronome, you learned how to load the metronome plugin and adjust its settings to fit your project’s tempo and time signature. Additionally, you discovered how to customize the metronome sounds, adding a unique touch to your music. Finally, by testing the metronome, you verified its performance and ensured that it provided accurate timing guidance throughout your project.
Remember, the metronome not only helps you stay on beat, but it also improves your overall music production by enhancing the precision and polish of your compositions. It acts as a reliable guide, setting the foundation for your music and allowing other elements to align harmoniously.
As you continue to explore FL Studio and develop your music production skills, incorporating a metronome into your workflow will become second nature. With each project, you’ll appreciate the benefits of having a metronome as a constant companion, aiding in creating rhythmically engaging and professionally produced music.
So, embrace the metronome as a valuable tool and utilize it to elevate the quality of your music. Whether you’re a beginner or an experienced producer, let the metronome be your trusty partner, keeping you on the path to musical excellence.