Home>Devices & Equipment>Turntable>How To Clean Turntable On A Garrard Stereo
Turntable
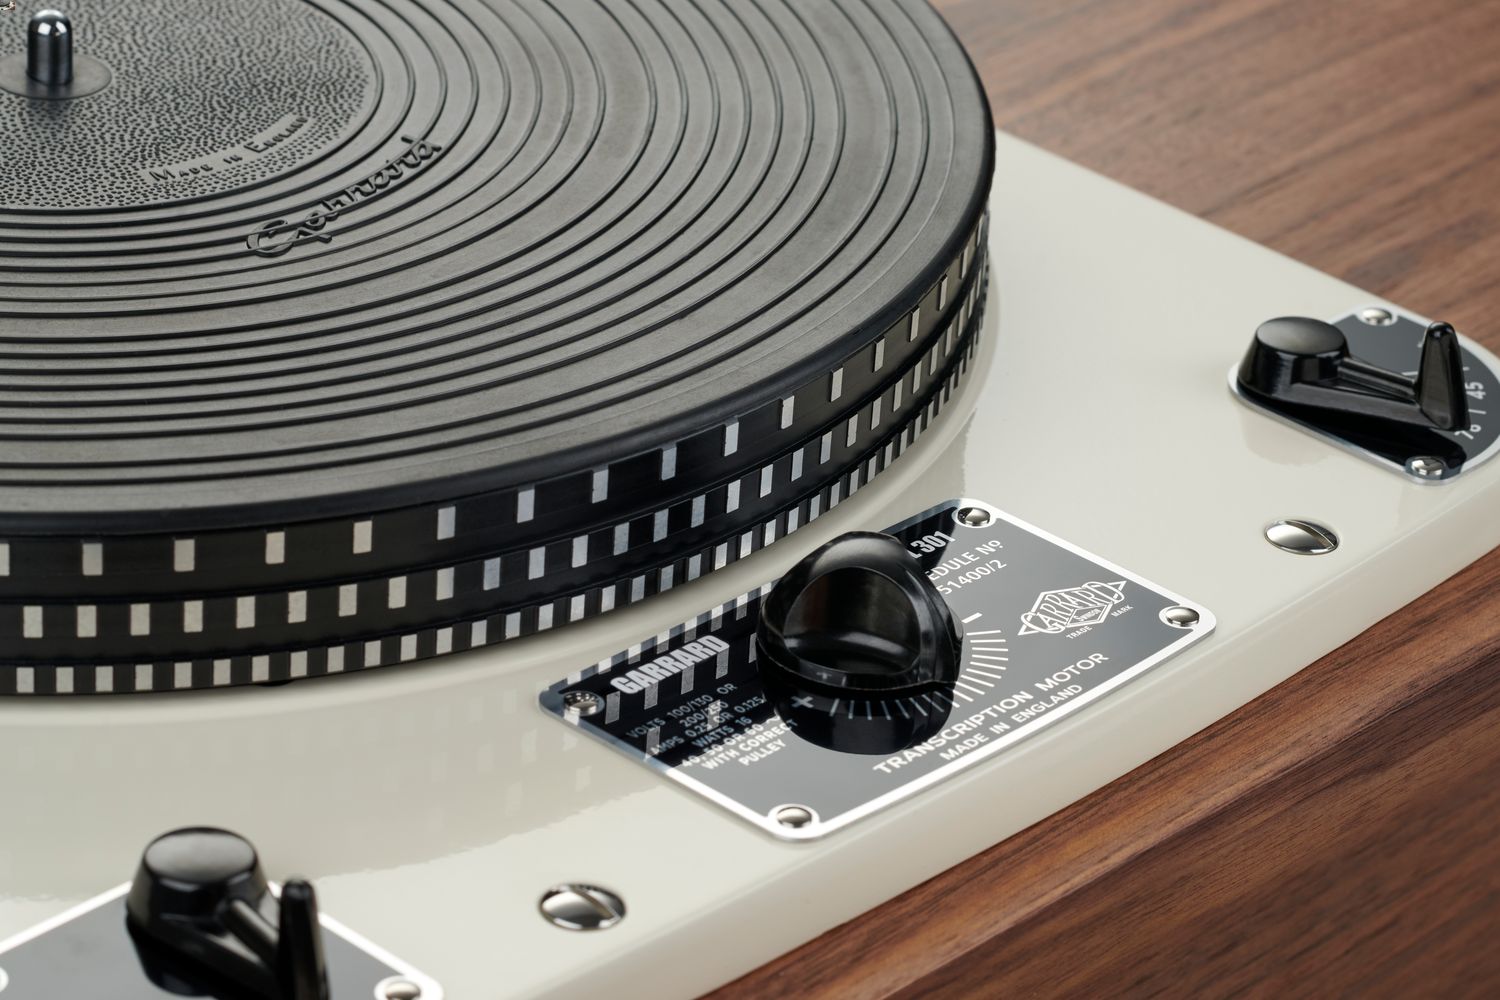
How To Clean Turntable On A Garrard Stereo
Published: January 18, 2024
Learn how to clean a turntable on a Garrard stereo to improve sound quality and prolong the life of your vinyl records. Turntable maintenance tips and step-by-step guide.
(Many of the links in this article redirect to a specific reviewed product. Your purchase of these products through affiliate links helps to generate commission for AudioLover.com, at no extra cost. Learn more)
Table of Contents
Introduction
Turntables have been a beloved part of the music listening experience for decades. Whether you’re a vinyl enthusiast or just starting to explore the world of analog music, taking care of your turntable is essential to ensure optimal sound quality and longevity.
A clean turntable not only improves audio performance but also prolongs the life of the stylus and cartridge. Regular maintenance can prevent dust, dirt, and debris from affecting the delicate components of your turntable. In this article, we will guide you through the process of cleaning a Garrard stereo turntable, one of the most iconic and popular models in the vinyl community.
Before you start cleaning your turntable, it’s important to gather all the necessary supplies. You’ll need a record brush or anti-static brush, stylus cleaning solution, lint-free cloth, isopropyl alcohol, distilled water, a small soft brush, and cotton swabs. These items are essential for a thorough and safe cleaning process.
Once you have all the supplies ready, the next step is to prepare the turntable for cleaning. This involves powering off the turntable, removing the dust cover, and securing the tonearm using the tonearm rest. This precaution ensures that the delicate tonearm and stylus are protected during the cleaning process.
Now that your turntable is prepared for cleaning, it’s time to focus on the stylus and cartridge. The stylus needs to be cleaned regularly to ensure optimal playback and prevent any unwanted buildup that can affect sound quality. Using a stylus cleaning solution and a dedicated stylus brush, gently brush the stylus from back to front to remove any accumulated debris.
Next, you’ll want to clean the turntable platter. This is where your vinyl records sit, so it’s essential to keep it free from dust and dirt. Start by using a record brush or anti-static brush to gently remove any surface debris. If there are stubborn stains or dirt, you can dampen a lint-free cloth with isopropyl alcohol and gently wipe the platter in circular motions. Be careful not to apply too much pressure or get any liquid near the sensitive components of the turntable.
Step 1: Gather the necessary supplies
Before you embark on the task of cleaning your Garrard stereo turntable, it’s important to ensure that you have all the necessary supplies at hand. Having the right tools will make the cleaning process more efficient and effective. Here are the supplies you’ll need:
- Record brush or anti-static brush: This is essential for removing dust and debris from your vinyl records. It helps to minimize static electricity and keep the grooves clean.
- Stylus cleaning solution: A dedicated cleaning solution specifically designed for cleaning the stylus is essential. It helps to remove buildup and debris from the delicate stylus tip.
- Lint-free cloth: A lint-free cloth is perfect for wiping down the turntable components without leaving behind any fibers or residue.
- Isopropyl alcohol: Isopropyl alcohol is a versatile cleaning agent that can help remove stubborn stains and dirt from the turntable.
- Distilled water: Distilled water is useful for diluting cleaning solutions and minimizing mineral deposits.
- Small soft brush: A small soft brush, like a paintbrush or makeup brush, can be used to clean hard-to-reach areas and remove dust from corners and crevices.
- Cotton swabs: Cotton swabs are handy for cleaning small and delicate parts of the turntable, such as connectors and switches.
By having these supplies on hand, you’ll be well-equipped to thoroughly clean your Garrard stereo turntable. It’s important to note that using the right tools and cleaning agents will help protect the delicate components of your turntable and ensure a safe cleaning process.
Now that you have all the necessary supplies gathered, you’re ready to move on to the next step: preparing the turntable for cleaning.
Step 2: Prepare the turntable for cleaning
Before diving into the cleaning process, it’s important to properly prepare your Garrard stereo turntable. This will ensure that you can clean it effectively without risking any damage to the delicate components. Follow these steps to prepare your turntable:
- Power off the turntable: Before doing anything, make sure to turn off the power to your turntable. This will prevent any accidental movement of the tonearm or damage to the stylus during the cleaning process.
- Remove the dust cover: Lift up the dust cover (if applicable) and set it aside carefully. Removing the dust cover will give you better access to the turntable and prevent any obstructions during cleaning.
- Secure the tonearm: To avoid any mishaps or accidents, it’s essential to secure the tonearm properly. Most turntables have a tonearm rest where you can place the tonearm gently. This will prevent it from moving or swinging while you clean other parts of the turntable.
By following these steps, you’ll ensure that your turntable is in a safe and stable position for cleaning. Securing the tonearm is especially important as a loose or moving tonearm can lead to scratching or damage to your records or the stylus.
It’s worth noting that some turntables may have additional components or features that require specific preparation steps. If your turntable has any unique features or accessories, consult the user manual for specific instructions on how to prepare it for cleaning.
Now that your turntable is properly prepared, you’re ready to move on to the next step: cleaning the stylus and cartridge.
Step 3: Clean the stylus and cartridge
The stylus and cartridge are crucial components of your Garrard stereo turntable, responsible for reading and playing the grooves of your vinyl records. Keeping them clean is essential for optimal sound quality and longevity. Follow these steps to effectively clean the stylus and cartridge:
- Apply stylus cleaning solution: Start by applying a small amount of stylus cleaning solution to the tip of the stylus. This cleaning solution is specially formulated to dissolve and remove any debris or buildup without damaging the stylus.
- Use a dedicated stylus brush: Gently brush the stylus from back to front using a dedicated stylus brush. Be sure to use light pressure and avoid any side-to-side brushing motion, as this can potentially damage the fragile stylus.
- Inspect for residue: After brushing, inspect the stylus for any remaining residue. If you notice any, repeat the process of applying the cleaning solution and gently brushing until the stylus is clean and clear.
It’s important to note that you should avoid touching the stylus with your fingers or any other objects. The stylus is delicate and can be easily damaged or misaligned. By using a dedicated stylus brush and cleaning solution, you can effectively remove dust and debris without compromising the integrity of the stylus.
In addition to cleaning the stylus, it’s also a good idea to clean the cartridge. The cartridge is the component that houses the stylus and is responsible for converting the vibrations of the stylus into electrical signals. To clean the cartridge:
- Use a cotton swab: Dampen a cotton swab with a small amount of isopropyl alcohol.
- Gently clean the cartridge: Carefully clean the outside of the cartridge, avoiding direct contact with the stylus. Use gentle circular motions to remove any surface dirt or residue that may have accumulated.
- Allow to dry: Once you’ve finished cleaning, allow the cartridge to air dry completely before reassembling the turntable.
By regularly cleaning the stylus and cartridge, you’ll ensure optimal sound performance and prevent any potential damage or deterioration. With the stylus and cartridge cleaned, you can now move on to the next step: cleaning the turntable platter.
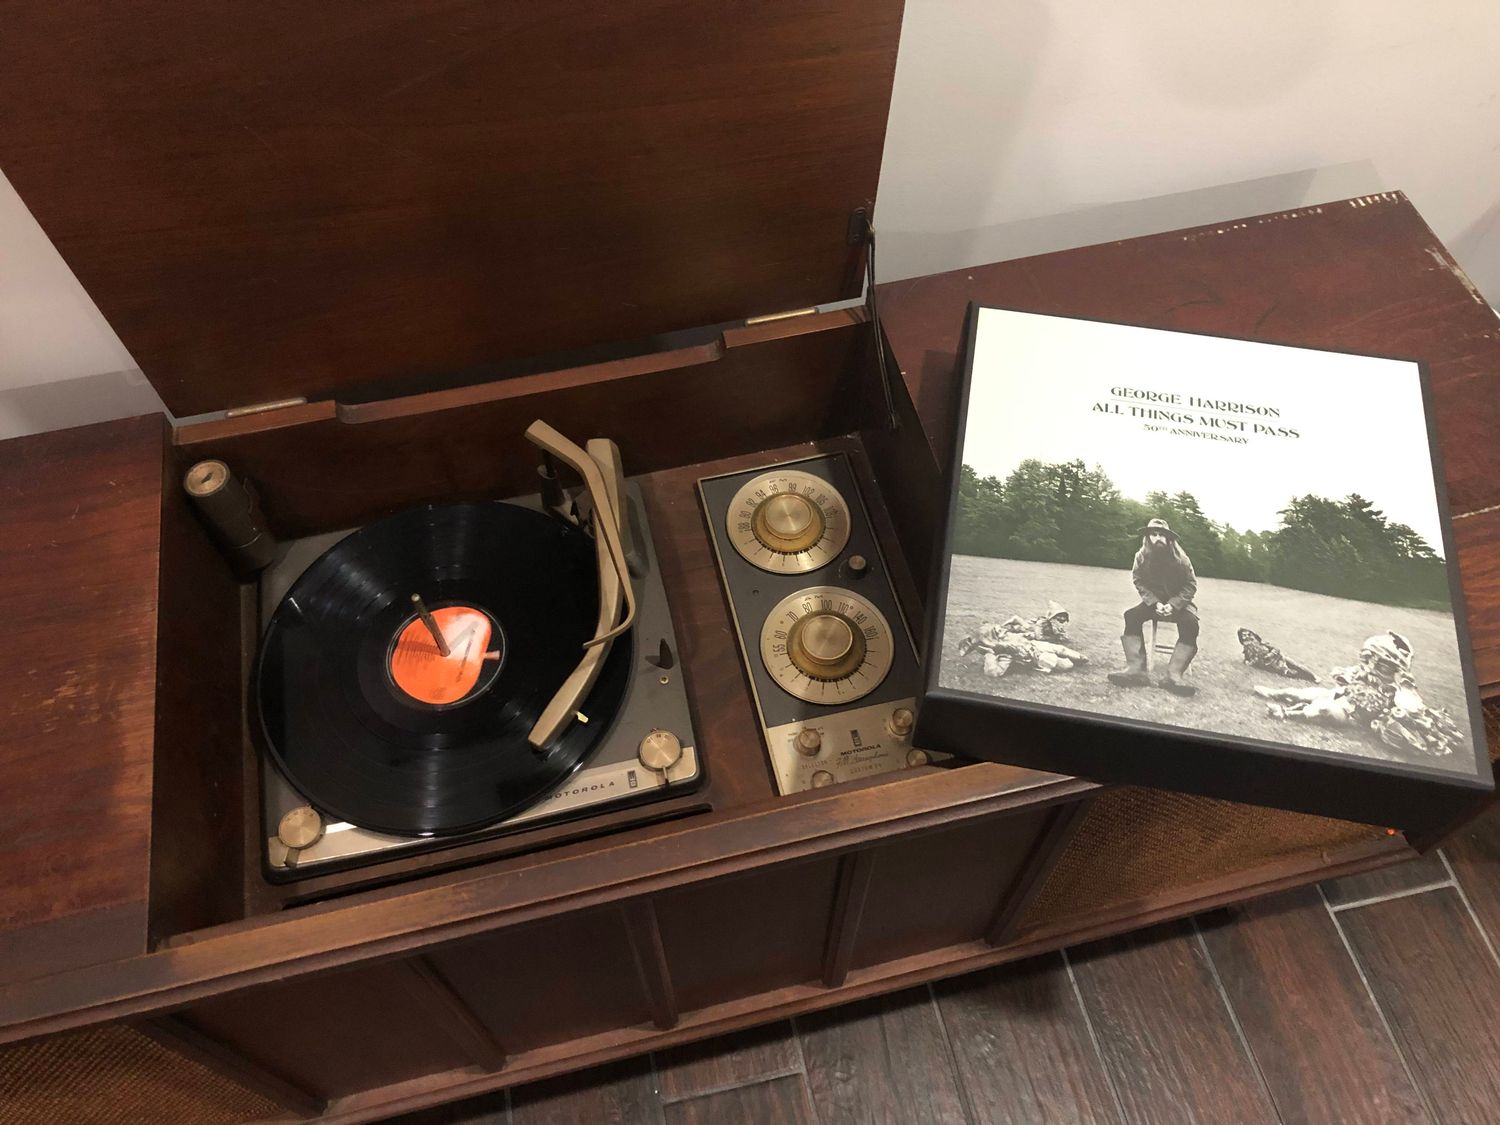
Step 4: Clean the turntable platter
The turntable platter is where your vinyl records rest and spin, making it a crucial component to keep clean. Accumulated dust and dirt on the platter can affect sound quality and even cause skipping or damage to your records. Follow these steps to effectively clean the turntable platter:
- Remove surface debris: Start by using a record brush or anti-static brush to gently remove any surface debris from the platter. Move the brush in the same direction as the rotation of the platter, following the grooves to ensure thorough cleaning.
- Address stubborn stains or dirt: If you encounter any stubborn stains or dirt on the platter, you may need to take additional steps to remove them. Dampen a lint-free cloth with a small amount of isopropyl alcohol or a mixture of isopropyl alcohol and distilled water. Gently wipe the platter in circular motions, applying minimal pressure.
- Dry the platter: After cleaning, use a dry lint-free cloth to remove any remaining moisture from the platter. Ensure that it is completely dry before proceeding to the next step.
When cleaning the turntable platter, it’s important to avoid excessive moisture or getting any liquids near the sensitive components of the turntable. Care and attention are key to prevent any damage during the cleaning process.
It’s also worth mentioning that if your turntable has a felt or rubber mat on the platter, you should remove it and clean it separately. Follow the manufacturer’s instructions or gently wipe it with a damp cloth to remove any dust or dirt. Allow it to dry completely before placing it back on the platter.
With the turntable platter now clean, you can move on to the next step: cleaning the tonearm and tonearm rest.
Step 5: Clean the tonearm and tonearm rest
The tonearm and tonearm rest are important components of your Garrard stereo turntable. Proper cleaning of these parts ensures smooth movement and accurate tracking of the stylus. Follow these steps to effectively clean the tonearm and tonearm rest:
- Inspect for dust and debris: Begin by visually inspecting the tonearm and tonearm rest for any visible dust or debris. Use a small soft brush, like a paintbrush or makeup brush, to gently remove any loose particles.
- Use a cotton swab: Dampen a cotton swab with a small amount of isopropyl alcohol. Gently clean the tonearm and tonearm rest, being careful not to apply excessive pressure or get any liquid near the sensitive components. Use circular motions to remove any dirt or residue.
- Dry the tonearm and tonearm rest: After cleaning, use a dry cotton swab or lint-free cloth to remove any remaining moisture. Ensure that both the tonearm and tonearm rest are completely dry before moving on to the next step.
Proper cleaning of the tonearm and tonearm rest helps maintain optimal performance and prolong the life of your turntable. It ensures that the tonearm moves freely and smoothly, allowing for accurate tracking of the stylus along the record grooves.
If you notice any stubborn stains or buildup on the tonearm, you may need to use a stylus cleaning solution or isopropyl alcohol on a cotton swab to gently remove them. Take extra care when cleaning around the delicate wires and connectors of the tonearm to avoid any damage.
With the tonearm and tonearm rest now clean, you can proceed to the next step: cleaning the exterior of the turntable.
Step 6: Clean the exterior of the turntable
Cleaning the exterior of your Garrard stereo turntable not only improves its appearance but also helps protect the surface from dust and grime. Follow these steps to effectively clean the exterior of the turntable:
- Remove dust and debris: Start by using a soft, lint-free cloth or a brush to gently remove any surface dust and debris from the turntable. Pay attention to corners and crevices where dirt can accumulate.
- Use a mild cleaning solution: If there are any stubborn stains or spots on the turntable, you can use a mild cleaning solution. Mix a small amount of isopropyl alcohol with distilled water and dampen a cloth with the solution. Gently wipe the exterior, avoiding sensitive components and electronic parts.
- Dry the turntable: After cleaning, use a dry cloth to remove any remaining moisture from the turntable. Ensure that it is completely dry before proceeding to the next step.
- Polish if desired: If you want to give your turntable an extra shine, you can use a specialized turntable polish. Apply a small amount of the polish to a soft cloth and gently buff the surface of the turntable. Follow the manufacturer’s instructions for best results.
When cleaning the exterior of the turntable, it’s important to be gentle and avoid using harsh cleaning agents or abrasive materials. These can damage the surface and the delicate aesthetics of the turntable.
Furthermore, be cautious around any indicators, buttons, or knobs to avoid accidental damage. Take your time and clean the turntable with care to ensure that it remains in great condition for years to come.
With the exterior of your turntable now clean, you’re ready for the final step: reassembling and testing the turntable.
Step 7: Reassemble and test
After completing the cleaning process for your Garrard stereo turntable, it’s time to reassemble the components and ensure everything is working properly. Follow these steps to safely reassemble and test your turntable:
- Replace the dust cover: Carefully place the dust cover back onto the turntable, aligning it with the hinges or slots. Ensure that it sits securely and does not obstruct the movement of the tonearm.
- Return the tonearm to its resting position: Gently lift the tonearm from the tonearm rest and return it to its original resting position. Be sure to handle the tonearm with care and avoid any sudden movements or drops.
- Power on the turntable: Plug in the power cord and turn on the turntable. Allow it a few moments to power up and stabilize before proceeding.
- Test playback: Select a clean and undamaged vinyl record from your collection and carefully place it onto the cleaned turntable platter. Power on the amplifier or receiver and set it to the appropriate input for the turntable. Gently lower the tonearm onto the record, ensuring that the stylus is aligned with the grooves.
- Listen for optimal sound: Pay attention to the sound quality and make sure there are no skips, distortion, or excessive noise. If you encounter any issues, double-check the alignment of the stylus and the tracking force adjustment.
By carefully reassembling and testing your turntable, you can ensure that everything is functioning as it should after the cleaning process. This final step allows you to enjoy your vinyl records with confidence, knowing that your turntable is in optimal condition.
Remember to periodically clean your turntable to maintain its performance and longevity. By following these steps regularly, you can continue to enjoy the rich sound and nostalgic experience that vinyl records offer.
With your Garrard stereo turntable now cleaned, reassembled, and tested, you can sit back, relax, and enjoy the vinyl experience to its fullest.
Conclusion
Cleaning your Garrard stereo turntable is an essential part of maintaining its performance and prolonging its lifespan. Regular maintenance not only ensures optimal sound quality but also prevents any potential damage that can occur due to dust, debris, or improper care. By following the step-by-step guide outlined in this article, you can effectively clean your turntable and keep it in excellent condition.
From gathering the necessary supplies to reassembling and testing your turntable, each step plays a crucial role in the cleaning process. The right tools, such as a record brush, stylus cleaning solution, and lint-free cloth, are key to achieving a thorough and safe cleaning. Preparing and securing the turntable, cleaning the stylus and cartridge, addressing the turntable platter, and taking care of the tonearm and tonearm rest all contribute to maintaining the optimal performance of your turntable.
Remember to be cautious and gentle when cleaning delicate components and avoid using harsh chemicals or abrasive materials. Taking the time to properly clean your turntable will not only enhance its sound quality but also prolong its life and protect your precious vinyl records.
So, whether you’re a dedicated vinyl enthusiast or a casual listener, make cleaning your Garrard stereo turntable a regular part of your maintenance routine. It’s an investment that will ensure many years of enjoyable and immersive music listening experiences.
Now, go ahead and put this knowledge into practice. Grab your cleaning supplies and give your turntable the care it deserves. Sit back, relax, and let the smooth sounds of vinyl transport you to another era.