Home>Production & Technology>Stereo>How To Set The Time On A JVC Car Stereo
Stereo
How To Set The Time On A JVC Car Stereo
Published: November 25, 2023
Learn how to set the time on your JVC car stereo easily and quickly. Follow our step-by-step guide and enjoy a perfectly synced stereo in no time.
(Many of the links in this article redirect to a specific reviewed product. Your purchase of these products through affiliate links helps to generate commission for AudioLover.com, at no extra cost. Learn more)
Table of Contents
Introduction
Setting the time on your car stereo is an essential task to ensure that your JVC stereo system functions properly and keeps you on schedule. Whether it’s due to a time change, a dead battery, or a new car purchase, knowing how to set the time on your JVC car stereo is a valuable skill.
JVC car stereos are known for their user-friendly interfaces and innovative features, making the time-setting process a breeze. In this article, we will guide you through the steps to set the time on your JVC car stereo, so you can stay synchronized with accuracy and convenience.
Setting the time not only adds a functional aspect to your stereo system but also provides a polished look to your car’s dashboard. With the correct time displayed, you can be punctual for appointments, plan your road trips effectively, and stay on top of your schedule.
Before we dive into the steps, let’s take a brief look at the interface of a JVC car stereo so you can familiarize yourself with the controls.
Understanding the JVC Car Stereo Interface
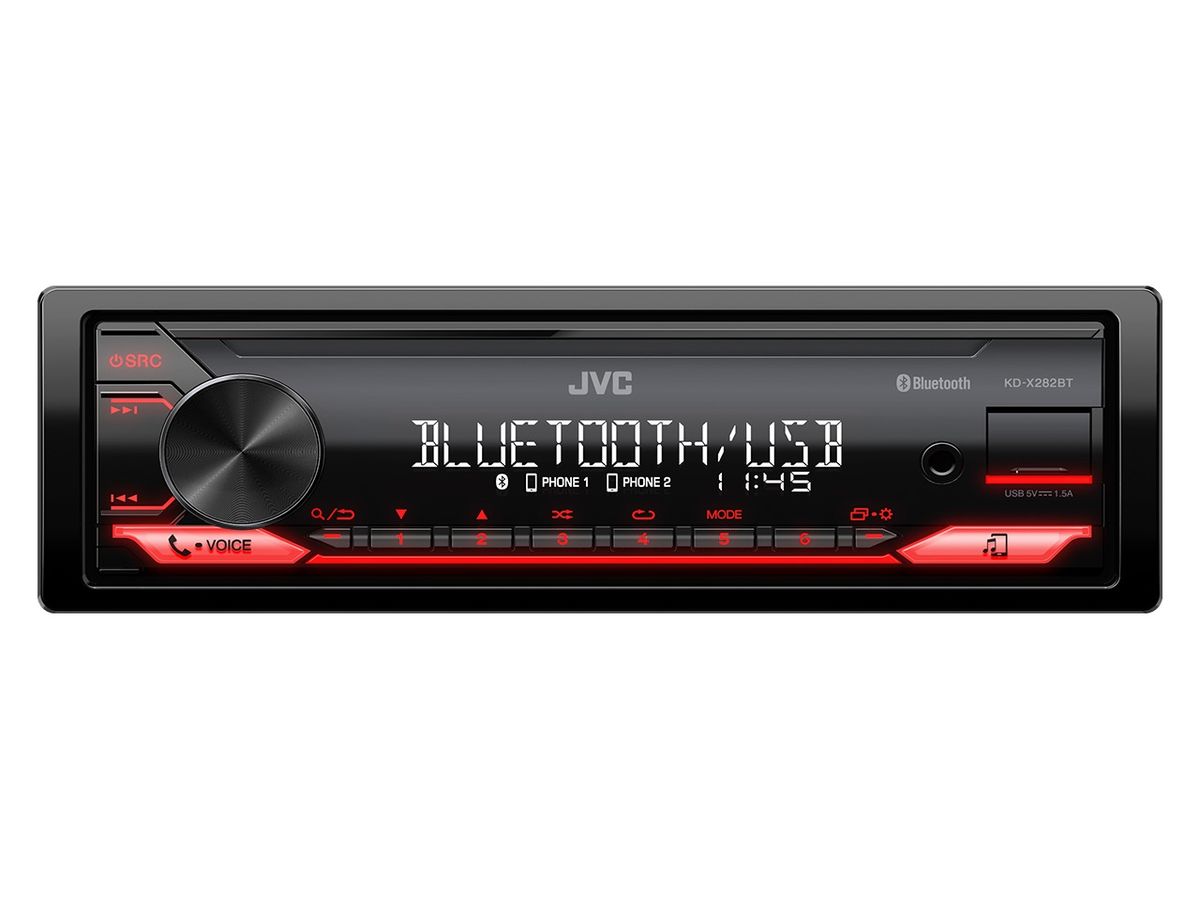
Before you can begin setting the time on your JVC car stereo, it’s important to understand the various controls and buttons on the interface. JVC car stereos typically feature a combination of physical buttons and a digital display, offering a user-friendly and intuitive experience.
The main control panel of a JVC car stereo usually includes buttons for power on/off, volume control, and source selection. These buttons are typically located on the front face of the stereo unit, making them easily accessible while driving.
In addition to these basic controls, JVC car stereos often come equipped with more advanced features and functionalities. Some stereos have built-in Bluetooth connectivity, allowing you to connect your smartphone for hands-free calling and audio streaming. Others may have USB ports or auxiliary inputs for connecting external devices like MP3 players or smartphones.
The digital display on a JVC car stereo is where you will find important information such as the current radio station, song title, and, of course, the time. The display may be set up with LED or LCD technology, providing clear and easy-to-read information.
To navigate through the different settings and menus of your JVC car stereo, you will typically use a combination of physical buttons. These buttons may include up/down arrows for scrolling through options, a menu button for accessing the settings menu, and an enter/okay button for making selections.
Now that you have a better understanding of the JVC car stereo interface, let’s move on to the steps to set the time on your JVC car stereo.
Steps to Set the Time on a JVC Car Stereo
Now that you’re familiar with the JVC car stereo interface, let’s dive into the step-by-step process to set the time on your JVC car stereo:
- Start by turning on your JVC car stereo by pressing the power button. The display should come to life, showing the current settings.
- Locate the “Menu” or “Settings” button on your car stereo. This button is usually found on the main control panel, and it allows you to access the settings menu.
- Once you’ve found the “Menu” or “Settings” button, press it to enter the settings menu. Use the up/down arrows or rotary knob to navigate through the options until you find the “Clock” or “Time” setting.
- Once you’ve highlighted the “Clock” or “Time” setting, press the enter/okay button to enter the clock settings mode.
- Use the up/down arrows or rotary knob to adjust the hours. Pay attention to whether the time format is in 12-hour or 24-hour mode. Select the appropriate hour for your desired time.
- After setting the hours, use the up/down arrows or rotary knob to adjust the minutes. Make sure to set the minutes accurately to reflect the correct time.
- Some JVC car stereos may also have an option to set the date. If you wish to set the date as well, navigate to the “Date” setting using the same method as before and adjust it accordingly.
- Once the time and, if applicable, the date are set, press the enter/okay button to save the changes.
- Exit the settings menu by pressing the “Menu” or “Settings” button until you return to the main display.
- Your JVC car stereo should now display the updated time.
Keep in mind that the exact steps may vary slightly depending on the specific model and firmware version of your JVC car stereo. Consult the user manual for your particular model if you encounter any difficulties or variations in the process.
Now that you’ve successfully set the time on your JVC car stereo, it’s important to troubleshoot any potential issues that may arise.
Troubleshooting Tips
While setting the time on your JVC car stereo is usually a straightforward process, there may be instances where you encounter some issues. Here are some troubleshooting tips to help you overcome common problems:
- If you are unable to access the settings menu, ensure that your car stereo is powered on and that you are using the correct buttons to navigate. Refer to the user manual for your specific model if you’re uncertain about the button layout.
- If the time does not change after adjusting it, try resetting your JVC car stereo. Refer to the user manual for instructions on how to perform a reset. Note that a reset may restore the stereo to its default settings, so you may need to set the time and other preferences again.
- In some cases, a weak or intermittent power connection can cause the time to reset or not display accurately. Check the wiring connections to ensure they are secure and free from any damage. If necessary, consult a professional car audio technician for assistance.
- If your JVC car stereo has a separate memory backup wire or a backup battery, ensure that it is properly connected and functioning. This backup power source helps retain the settings, including the time, when the car’s battery is disconnected or drained.
- If you’re having trouble adjusting the time or navigating through the settings menu, consult the user manual or seek online tutorials specifically tailored to your JVC car stereo model. These resources can provide detailed instructions to address any model-specific quirks or complications.
Remember, troubleshooting may vary depending on the specific model and configuration of your JVC car stereo. If you’re unable to resolve the issue on your own, it’s always a good idea to seek professional assistance from an authorized service center or car audio technician.
With these troubleshooting tips in mind, you should be well-equipped to address any common issues that may arise while setting the time on your JVC car stereo. Now, let’s wrap up our discussion.
Conclusion
Setting the time on your JVC car stereo is a simple yet important task that ensures you stay on track and arrive at your destinations punctually. With the user-friendly interface and intuitive controls of JVC car stereos, adjusting the time is a breeze.
In this article, we explored the steps to set the time on a JVC car stereo, starting from accessing the settings menu to adjusting the hours and minutes accurately. We also provided troubleshooting tips to help you overcome any potential issues that may arise during the process.
Remember to consult the user manual for your specific JVC car stereo model if you encounter any difficulties or if the steps slightly differ from what we described. Additionally, seeking professional assistance from an authorized service center or car audio technician can provide further guidance, especially for complicated issues.
By setting the time accurately on your JVC car stereo, you can stay synchronized with your schedule, make timely appointments, and enjoy a seamless driving experience. Plus, with the added benefit of advanced features like Bluetooth connectivity and USB ports, your JVC car stereo will enhance your driving experience and keep you entertained on the road.
Now, armed with the knowledge to set the time on your JVC car stereo and troubleshoot any potential issues, you’re ready to take control of your car’s audio system. So go ahead and ensure your JVC car stereo displays the correct time, making every journey a well-planned and enjoyable experience.