Home>Production & Technology>Surround Sound>How To Set Up 7.1 Surround Sound
Surround Sound
How To Set Up 7.1 Surround Sound
Modified: February 18, 2024
Learn how to set up 7.1 surround sound system for an immersive audio experience. Step-by-step guide to optimize your surround sound setup.
(Many of the links in this article redirect to a specific reviewed product. Your purchase of these products through affiliate links helps to generate commission for AudioLover.com, at no extra cost. Learn more)
Table of Contents
- Introduction
- Understanding 7.1 Surround Sound
- Choosing the Right Equipment
- Preparing Your Room for 7.1 Surround Sound
- Placing and Positioning Speakers
- Connecting Speakers to the AV Receiver
- Configuring and Tweaking Audio Settings
- Testing and Calibrating your 7.1 Surround Sound System
- Troubleshooting Common Issues
- Conclusion
Introduction
Welcome to the world of immersive audio! Surround sound has revolutionized the way we experience movies, music, and games, transporting us into a whole new dimension of sound. One of the most advanced surround sound setups available is the 7.1 system, which takes audio immersion to the next level. In this article, we will guide you through the process of setting up a 7.1 surround sound system in your home.
With the advancements in audio technology, you can recreate the cinematic experience right in your living room. The 7.1 surround sound system consists of eight speakers strategically placed around the room, providing a realistic and captivating audio experience. By adding two more channels compared to the traditional 5.1 system, the 7.1 setup enhances the spatial audio positioning and creates a more enveloping soundstage.
Before you dive into the setup process, it is essential to understand the fundamentals of surround sound and familiarize yourself with the different components and their functionalities. We will also explore the necessary steps to prepare your room for optimal sound quality, including speaker placement and room acoustics. Furthermore, we will walk you through the process of connecting your speakers to an AV receiver and configuring the audio settings.
Throughout this guide, we will provide you with expert tips and insights to ensure that you make the most of your 7.1 surround sound system. Whether you are a movie enthusiast, a gamer, or an audiophile, this setup will elevate your audio experience to new heights.
So, let’s embark on this thrilling journey to set up your very own 7.1 surround sound system and immerse yourself in a world of unparalleled audio bliss!
Understanding 7.1 Surround Sound
Before diving into the setup process, it’s crucial to understand the key elements of a 7.1 surround sound system. The “7” in 7.1 refers to the number of main speakers, while the “1” stands for the subwoofer. Together, they create an immersive audio environment that enhances your entertainment experience.
Let’s break it down:
- Front Left and Right Speakers: These two speakers are the foundation of your surround sound system. Placed on either side of your TV or screen, they deliver the main audio signals and are responsible for dialogue, music, and most sound effects.
- Center Channel Speaker: Positioned directly below or above your TV, the center speaker is responsible for delivering clear and focused dialogue. It helps anchor the sound to the visuals on the screen, ensuring a seamless audio-visual experience.
- Surround Left and Right Speakers: These speakers are placed to the sides or slightly behind your seating area. They create an immersive sound field by reproducing ambient sound and directional audio cues, pulling you deeper into the action.
- Surround Back Left and Right Speakers: With the addition of these two speakers, a 7.1 system provides an enhanced surround sound experience. They are positioned behind the seating area, adding an extra layer of depth and creating a more enveloping audio environment.
- Subwoofer: The subwoofer handles the low-frequency sounds, adding depth and impact. It produces the deep bass notes, making action sequences more thrilling and music more impactful.
By distributing the audio across these speakers, a 7.1 surround sound system creates a three-dimensional soundstage, enhancing the realism and immersion of your audio content.
It’s important to note that not all media is encoded in 7.1 surround sound. However, most modern Blu-rays, DVDs, and streaming services offer content with 5.1 or 7.1 audio tracks. Additionally, some advanced home theater receivers feature audio upmixing technology that can enhance stereo or 5.1 content to utilize all the speakers in your 7.1 system.
Understanding the foundation and purpose of each speaker in a 7.1 surround sound system is essential as we move forward with the setup process. Now that you have a clear understanding of the components, let’s explore the next steps in building your 7.1 surround sound system.
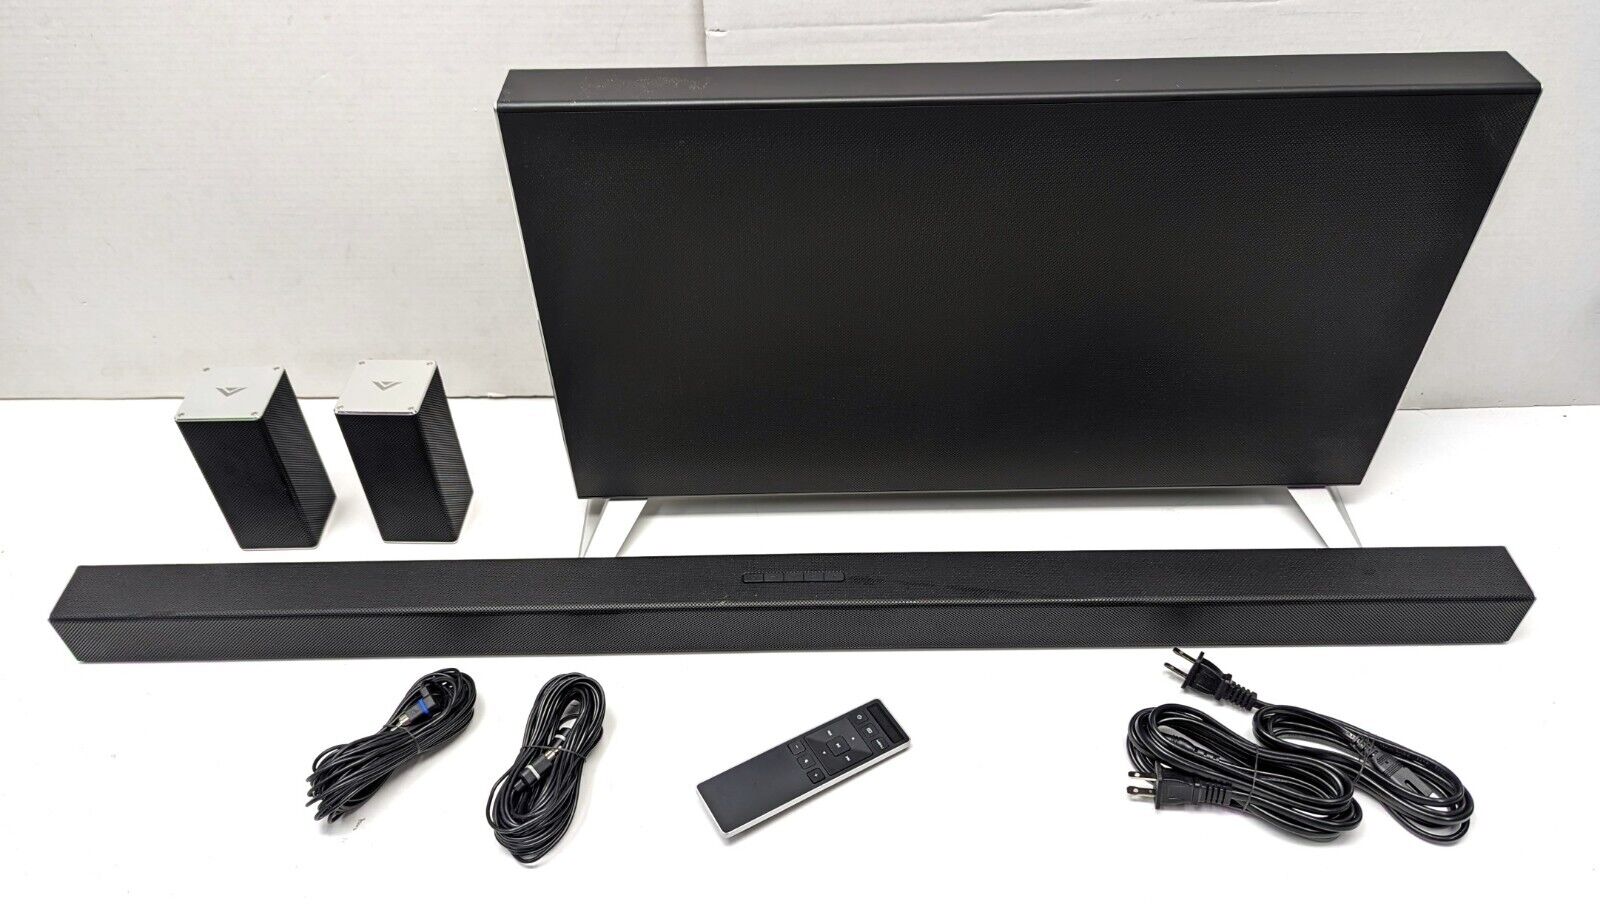
Choosing the Right Equipment
When it comes to setting up a 7.1 surround sound system, choosing the right equipment is crucial to ensure optimal audio performance. Let’s explore the key components you will need:
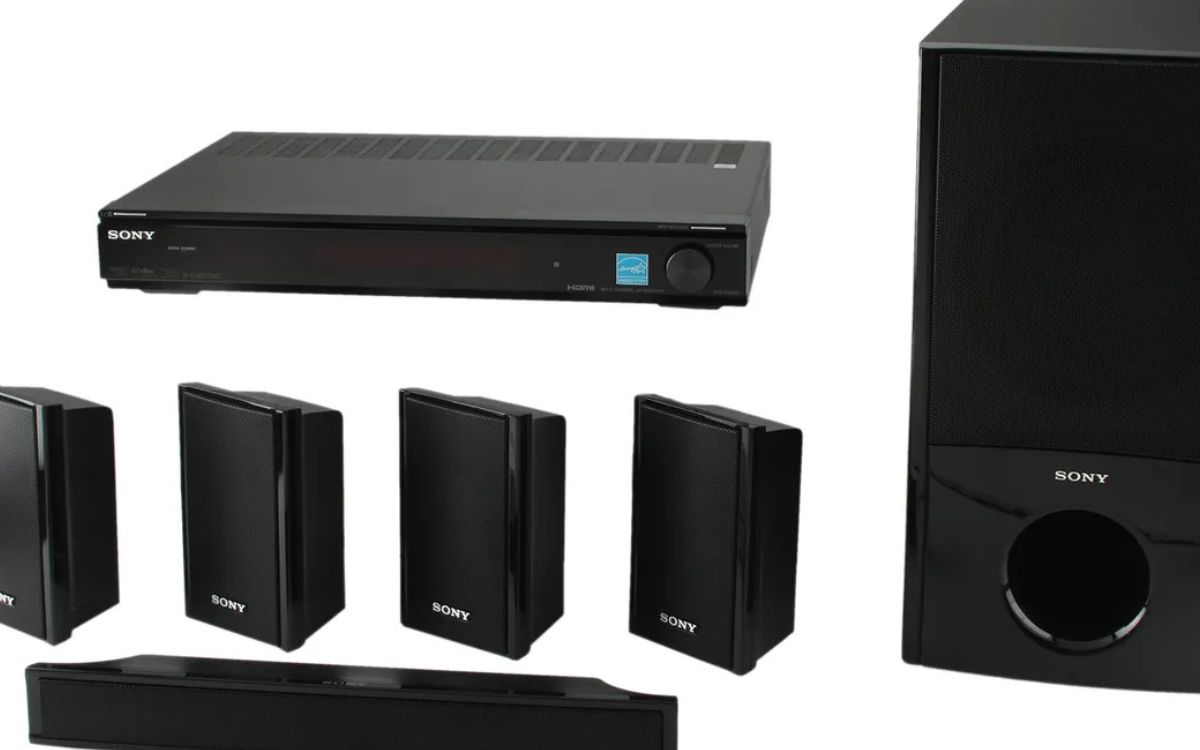
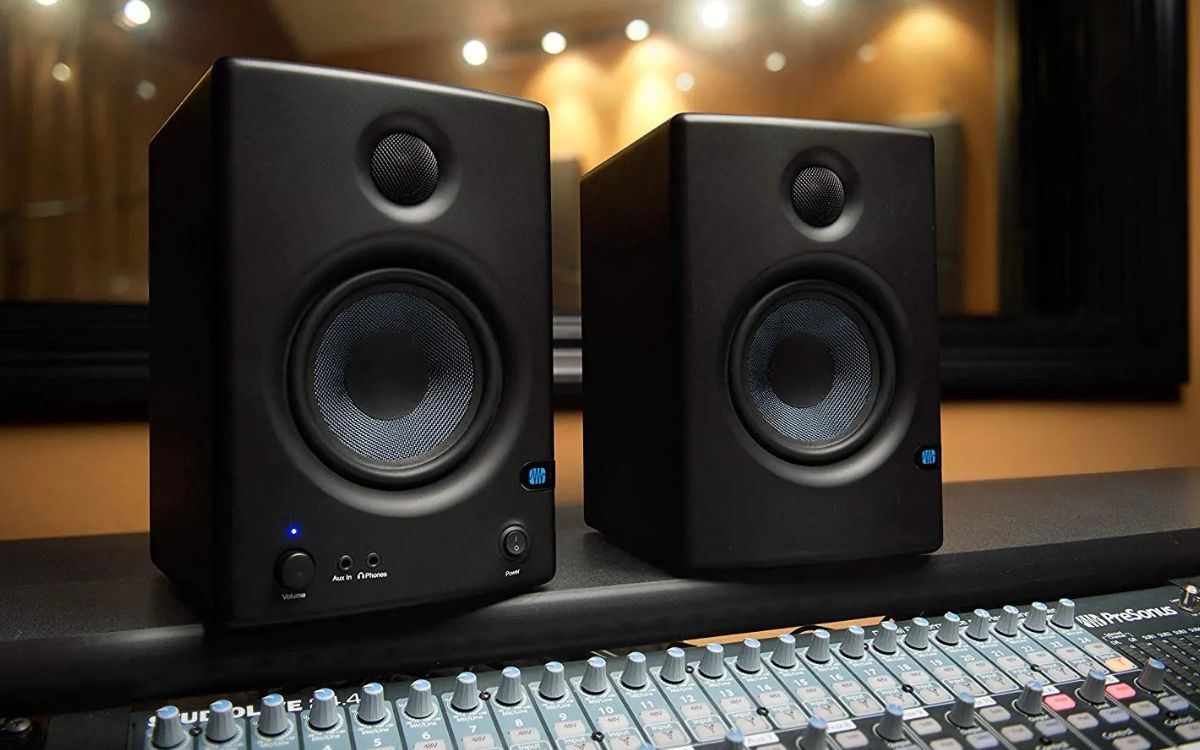
- AV Receiver: The heart of your surround sound system is the AV receiver. This device acts as a central hub, connecting and powering your speakers, decoding audio signals, and controlling the various audio settings. Look for a receiver that supports 7.1 channel output and has the necessary audio inputs for your sources.
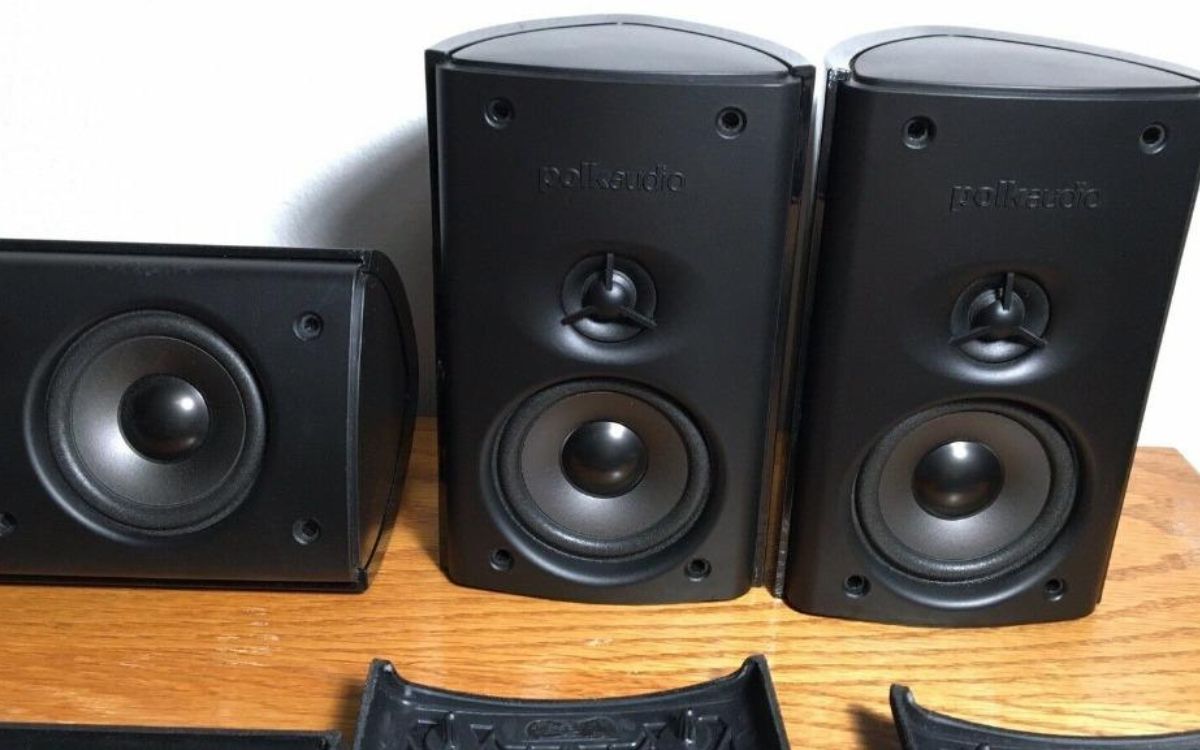
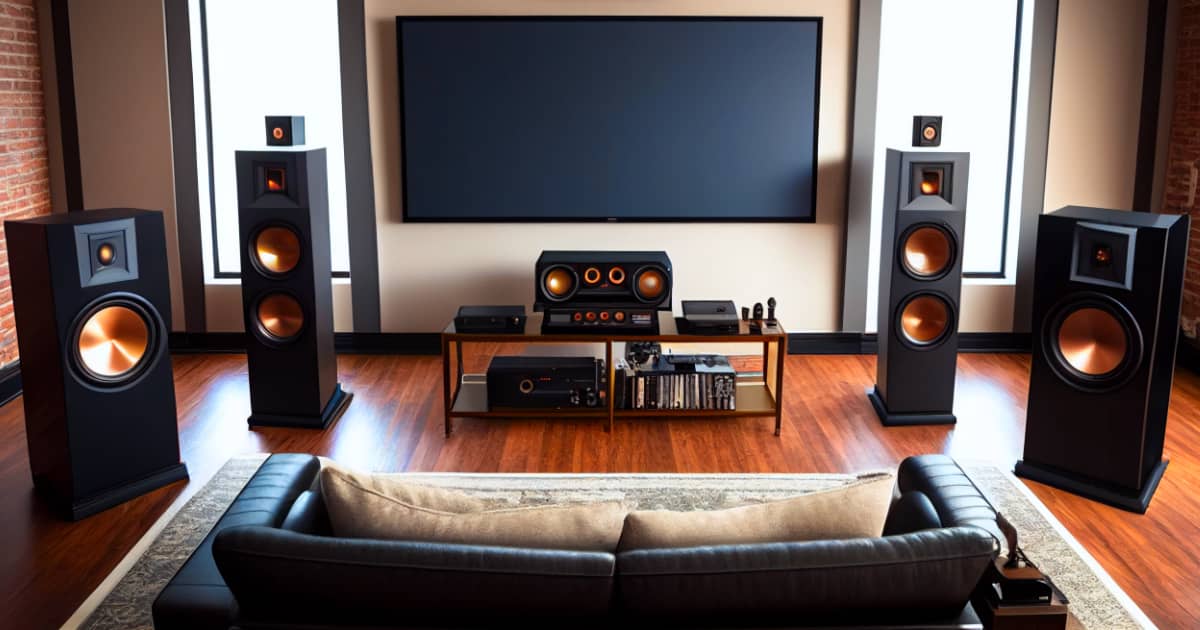
- Front Left and Right Speakers: Since these speakers carry the majority of the audio workload, investing in high-quality front speakers is essential. Consider floor-standing or bookshelf speakers that have the power and clarity to reproduce dialogue and music accurately.
- Center Channel Speaker: To ensure clear and articulate dialogue, choose a dedicated center channel speaker that matches the quality and timbre of your front speakers. Look for a speaker that can handle dialogue-heavy scenes and deliver a seamless sonic transition between the front speakers.
- Surround Left and Right Speakers: These speakers are responsible for creating an immersive audio experience. Opt for speakers that have a wide dispersion pattern and can effectively reproduce ambient sounds and directional audio cues.
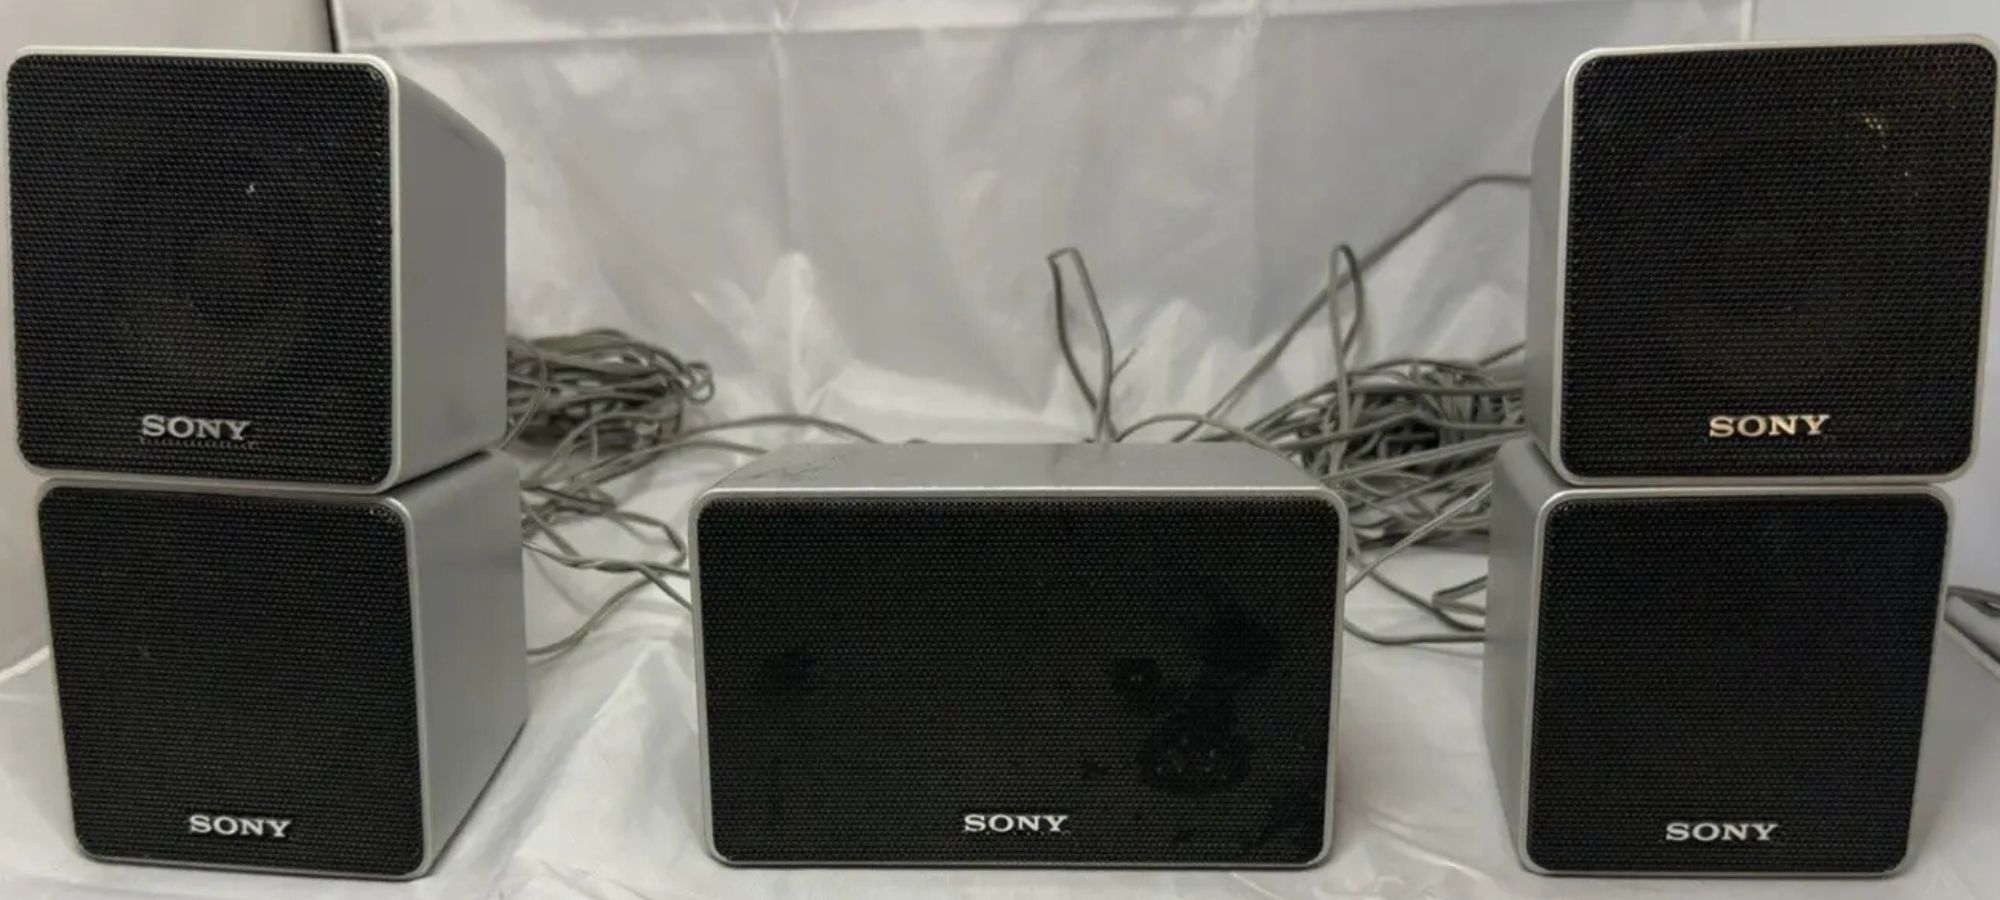
- Surround Back Left and Right Speakers: For a complete 7.1 setup, you’ll need additional speakers for the surround back channels. These speakers should complement the surround speakers to create a cohesive and enveloping soundstage.
- Subwoofer: A powerful subwoofer is essential to reproduce deep, impactful bass frequencies. Look for a subwoofer with adequate power and low-frequency response to elevate your movie watching and music listening experience.
- Cables and Speaker Wire: To connect your speakers to the AV receiver, high-quality cables and speaker wire are essential. Opt for shielded cables for audio connections and ensure that the speaker wire is of sufficient gauge to minimize signal loss and interference.
When selecting your equipment, it’s important to consider your budget, room size, and personal preferences. Research different brands, read reviews, and, if possible, audition speakers to find a system that matches your audio preferences and room acoustics.
Remember, a well-matched set of speakers and a capable AV receiver are the backbone of your 7.1 surround sound system. Take your time in choosing the right equipment, as it will greatly impact the overall audio experience.
With the equipment selected, we can now move on to the next step: preparing your room for optimal sound quality.
Preparing Your Room for 7.1 Surround Sound
Creating an optimal listening environment is essential to maximize the performance of your 7.1 surround sound system. Here are some steps to prepare your room for an immersive audio experience:
- Assess the Room: Take a look at the layout and size of your room. Note any potential challenges, such as windows, doors, or any furniture that may obstruct the sound. Consider the dimensions and acoustics of the room, as these can greatly impact the audio quality.
- Clear the Space: Remove any unnecessary furniture, objects, or clutter that could interfere with the sound dispersion. The goal is to create an open and unobstructed listening area.
- Acoustic Treatments: Consider adding acoustic treatments to minimize sound reflections and improve the overall sound quality. Options include adding sound-absorbing panels to the walls, installing bass traps in the corners, and using diffusers to scatter sound waves for a more balanced listening experience.
- Speaker Placement: Proper speaker placement is crucial for an immersive surround sound experience. Refer to the manufacturer’s recommendations for optimal speaker positioning. Generally, the front speakers should form an equilateral triangle with the primary listening position, while the surround and surround back speakers should be positioned to the sides or slightly behind the listening area at ear level.
- Subwoofer Placement: Experiment with subwoofer placement to find the ideal spot for deep and impactful bass. Placing it near a wall or corner can enhance bass response, but be mindful of any potential boominess or muddiness. Make subtle adjustments to find the sweet spot that delivers a balanced bass response.
- Cable Management: Conceal your speaker cables and wires to minimize visual distractions and potential hazards. Use cable management solutions, such as wire channels or running cables under carpets or along the baseboards, to keep them tidy and organized.
Every room is unique, and the acoustics can vary significantly. Experiment with different placements and configurations to find what works best for your space. Consider using room calibration systems that may be available in your AV receiver to optimize the audio performance based on your specific room characteristics.
By properly preparing your room, you create an environment that optimizes sound quality and ensures an immersive listening experience. With the room ready, it’s time to move on to the exciting step of placing and positioning your speakers.
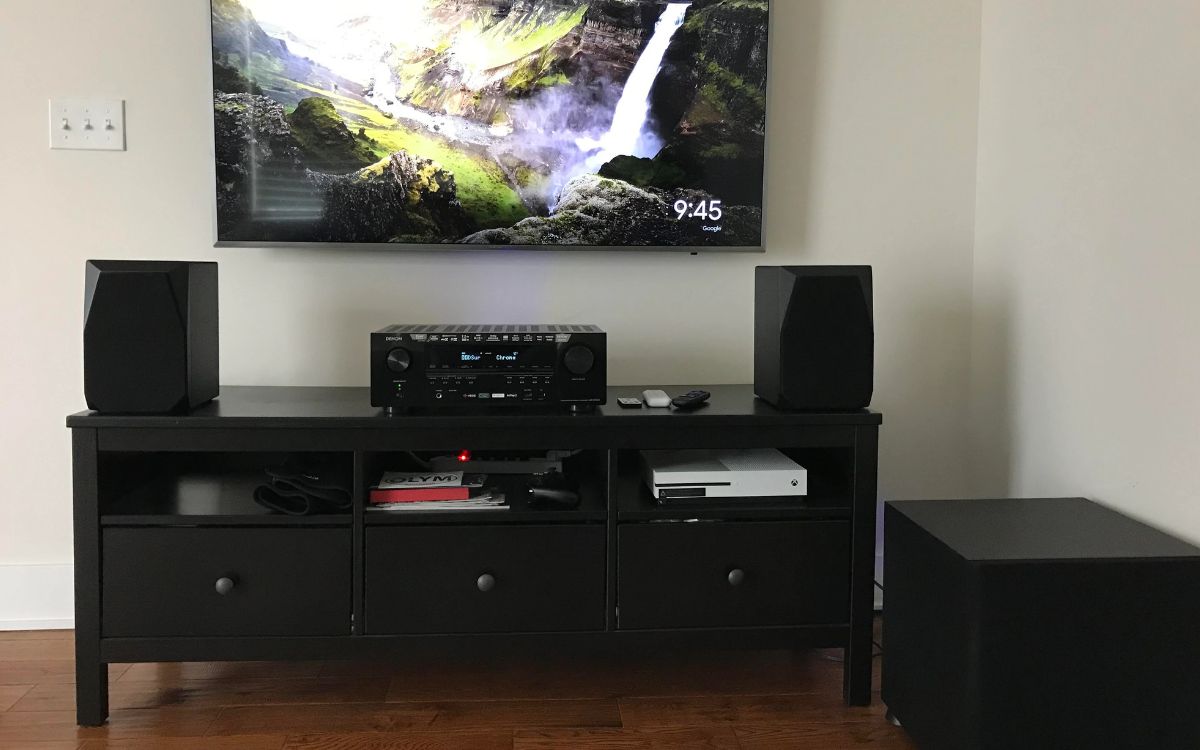
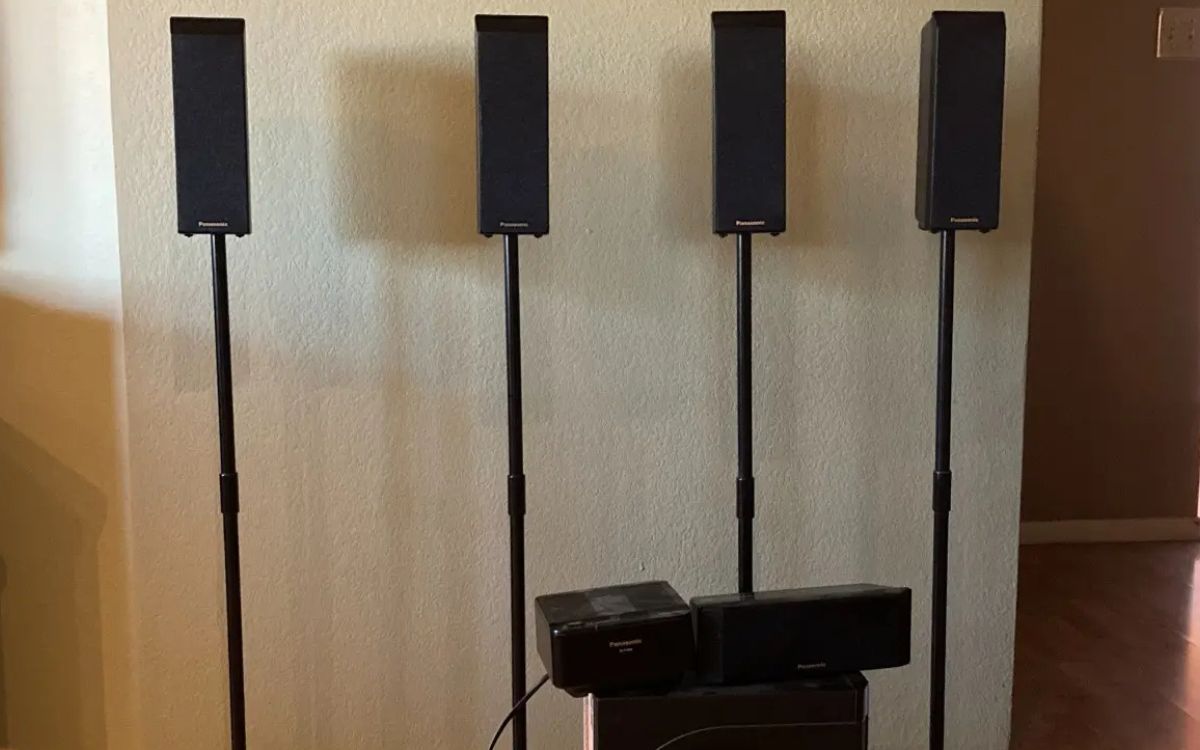
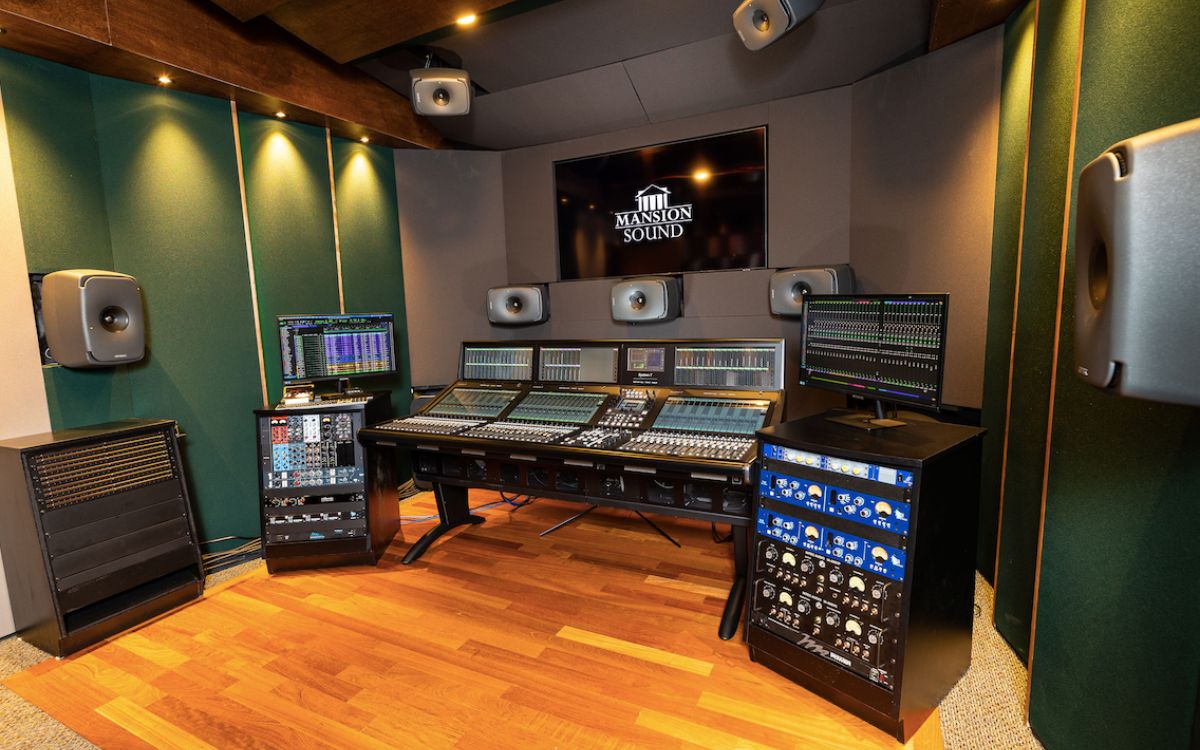
Placing and Positioning Speakers
The placement and positioning of your speakers play a critical role in achieving optimal audio performance and a balanced soundstage in your 7.1 surround sound system. Here are some guidelines to help you position your speakers correctly:
- Front Left and Right Speakers: Place these speakers at equal distances from your primary listening position and at ear level when seated. They should form an equilateral triangle with your seating position. If you have floor-standing speakers, ensure they are stable and positioned securely.
- Center Channel Speaker: Position the center channel speaker in line with your TV or screen, either above or below it. If possible, aim it towards your primary listening position to ensure clear dialogue reproduction.
- Surround Left and Right Speakers: Install these speakers to the sides of your seating area, slightly above ear level. Aim them towards the primary listening position to create an immersive surround sound experience.
- Surround Back Left and Right Speakers: Place these speakers behind your seating area, preferably at ear level or slightly higher. They should enhance the spatial audio experience by providing depth and dimension to the soundstage.
- Subwoofer: The subwoofer can be placed anywhere in the room that provides the best bass response. Experiment with different positions, such as corners or along the front wall, to find the optimal placement that delivers impactful bass without overpowering the rest of the audio.
While these guidelines provide a good starting point, it’s important to consider the specific characteristics of your room. Factors such as room size, furniture placement, and room acoustics can influence the ideal speaker positioning.
Take the time to experiment with different speaker placements to find what works best for your space. Consider using a speaker calibration system or manual speaker configuration in your AV receiver to assist in fine-tuning the speaker positions and optimizing the audio output for your room.
Remember, the placement and positioning of speakers significantly impact the overall audio experience. By taking care to position your speakers correctly, you can create an immersive and balanced soundstage that brings your audio content to life.
Once your speakers are correctly placed, it’s time to connect them to your AV receiver and configure the audio settings for optimal performance. We will cover this in the next section.
Connecting Speakers to the AV Receiver
Now that you have positioned your speakers, it’s time to connect them to your AV receiver. Properly connecting the speakers ensures that they receive the correct audio signals and deliver optimal performance. Here’s how to do it:
- Gather Your Cables: Ensure you have the necessary cables to connect your speakers to the AV receiver. Depending on your speakers and receiver, you may need banana plugs, bare wire connections, or RCA connectors.
- Identify Speaker Outputs: Locate the speaker outputs on your AV receiver. These are usually labeled with corresponding channel configurations, such as “Front Left,” “Front Right,” “Center,” “Surround Left,” “Surround Right,” “Surround Back Left,” “Surround Back Right,” and “Subwoofer.”
- Connect Front Speakers: Starting with the front speakers, connect the speaker cables to the corresponding output on the AV receiver. Ensure a secure and proper connection by matching the positive and negative terminals on both the receiver and speakers.
- Connect Surround and Surround Back Speakers: Following the same method, connect the surround and surround back speakers to their respective outputs on the AV receiver.
- Connect Center Channel Speaker: Connect the center channel speaker to the corresponding output on the AV receiver. This speaker is crucial for clear dialogue reproduction, so ensure a solid connection.
- Connect Subwoofer: If your subwoofer has a dedicated subwoofer output on the AV receiver, connect it using a subwoofer cable. If your receiver doesn’t have a dedicated subwoofer output, use a regular RCA cable and connect it to the subwoofer input on the receiver.
- Secure Connections: Double-check all your connections to ensure they are secure and properly seated. Loose or improper connections can affect the sound quality and performance of your speakers.
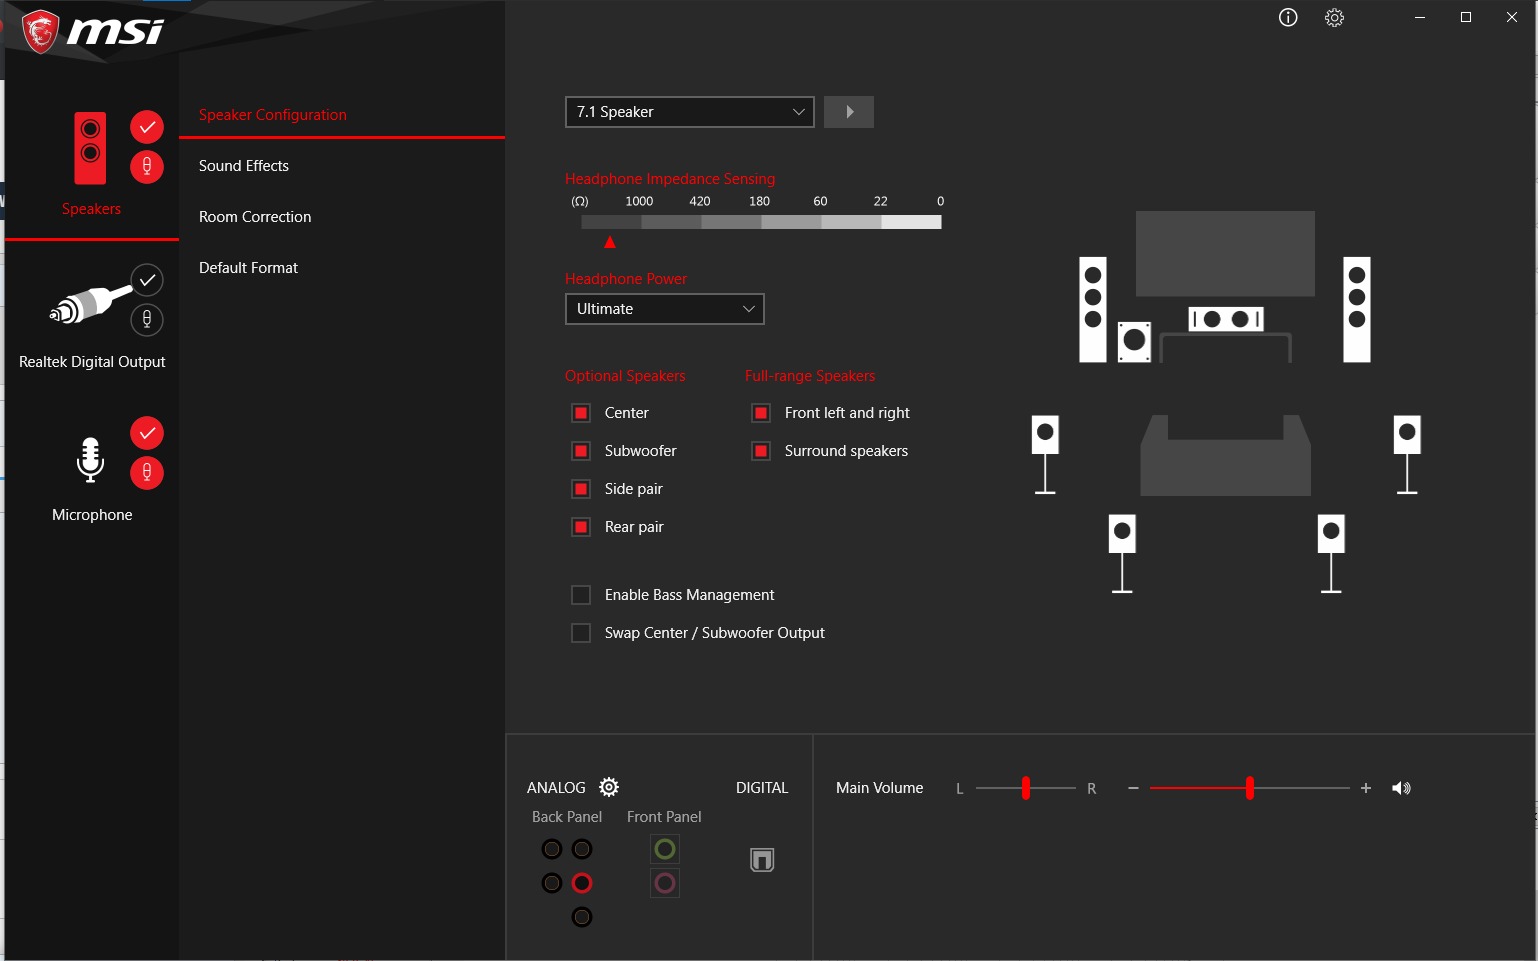
Once all the speakers are connected, carefully follow the instructions in your AV receiver’s manual to configure the settings for a 7.1 surround sound system. This may involve selecting the correct speaker configuration, setting the appropriate channel levels, and configuring any room correction or speaker calibration features that your receiver offers.
Once your AV receiver is properly set up, you can start enjoying the immersive audio experience provided by your 7.1 surround sound system. However, to fine-tune and optimize the performance, it’s important to configure and tweak the audio settings, which we will explore in the next section.
Configuring and Tweaking Audio Settings
Configuring and tweaking the audio settings of your 7.1 surround sound system is crucial to ensure optimal performance and an immersive audio experience. Here are some key settings to consider:
- Speaker Configuration: Access the settings menu of your AV receiver and select the appropriate speaker configuration. Choose the 7.1 channel option to match your setup.
- Channel Levels: Adjust the individual channel levels to balance the sound output from each speaker. This ensures that all speakers are equally audible, creating a cohesive and immersive soundstage.
- Bass Management: Set the crossover frequency for your speakers and subwoofer. This determines the point at which low-frequency signals are redirected from the main speakers to the subwoofer. Experiment with different crossover frequencies to find the right balance between your speakers and subwoofer.
- Room Correction: Some AV receivers offer room correction features, such as built-in calibration systems or the ability to manually adjust EQ settings. Utilize these features to compensate for any room acoustics issues and optimize the audio performance based on your specific listening environment.
- Surround Sound Modes: Explore the various surround sound modes available in your AV receiver. These modes can enhance specific audio content, such as movies or music, by applying different audio processing algorithms. Experiment with different modes to find the one that best suits your preferences and the content you’re enjoying.
- Dynamic Range Compression: Adjust the dynamic range compression settings to make softer sounds more audible and reduce the volume of louder sounds. This can be especially useful when watching movies late at night or in environments where you need to keep the volume lower.
- Audio Source Settings: For different audio sources, such as Blu-rays, DVDs, or streaming services, explore the audio settings within each source. Some sources allow you to select the preferred audio format or adjust specific audio settings to optimize the playback for your surround sound system.
Make sure to consult your AV receiver’s manual for specific instructions on accessing and adjusting these settings. Take the time to experiment and fine-tune the audio settings to your liking. Trust your ears and adjust the settings based on your personal preferences and the acoustics of your room.
It’s also worth noting that different audio content may be encoded in various formats, such as Dolby Digital, DTS, or PCM. Your AV receiver should automatically detect and decode these formats, ensuring that you enjoy the best possible audio quality for each source.
By configuring and tweaking the audio settings of your 7.1 surround sound system, you can tailor the audio output to your preferences and create a truly immersive and personalized audio experience.
Now that your system is set up and the audio settings are configured, it’s time to test and calibrate your 7.1 surround sound system to ensure optimal performance. We will cover this in the next section.
Testing and Calibrating your 7.1 Surround Sound System
Once your 7.1 surround sound system is set up and the audio settings are configured, it’s essential to test and calibrate your system to ensure optimal performance. Here are some steps to help you test and calibrate your system:
- Speaker Test Tone: Most AV receivers have built-in speaker test tones. Access the speaker settings menu and select the option for running a test tone. This will send a test sound to each speaker in sequence, allowing you to verify if all speakers are properly connected and working.
- Speaker Distance: In the receiver’s settings menu, measure the distance from each speaker to your primary listening position. Input these distances in the receiver’s speaker settings. This helps fine-tune the audio output by adjusting the sound delay and synchronization between the speakers.
- Sound Imaging and Balance: Play a movie, music, or game that features immersive surround sound effects. Pay attention to the sound imaging and balance. Does the sound move smoothly across the different speakers? Is the sound balanced, with no speaker overpowering the others? Make subtle adjustments to the channel levels if needed to achieve a harmonious and balanced audio experience.
- Bass Integration: Test the integration between your main speakers and subwoofer. Play audio content that features impactful bass, such as action sequences or bass-heavy music tracks. Listen for smooth bass transitions between the main speakers and the subwoofer. Adjust the subwoofer’s volume and crossover settings as necessary to achieve seamless integration.
- Dynamic Range and Volume Levels: Test the dynamic range capabilities of your system by playing content with varying volume levels. Ensure that dialogue is clear and not overwhelmed by loud sound effects, while still allowing for impactful and immersive audio. Adjust the dynamic range compression settings if needed to optimize the sound according to your preferences.
- Room Correction: If your AV receiver includes room correction features, follow the instructions in the manual to run the calibration process. This typically involves using a microphone to measure the acoustic characteristics of your room, allowing the receiver to apply EQ adjustments to optimize the audio performance based on your specific room conditions.
Take your time during the testing and calibration process. Trust your ears and make adjustments based on your personal preferences and the characteristic of your listening space. Note that room acoustics and personal preferences can greatly impact the overall sound quality, so fine-tuning the system to your liking is crucial.
If you’re unfamiliar with audio calibration or want expert assistance, consider consulting with a professional or utilizing specialized calibration tools to ensure precise audio measurements and optimal performance of your 7.1 surround sound system.
With your system properly tested and calibrated, you can now sit back, relax, and enjoy the immersive audio experience provided by your 7.1 surround sound system.
But what if you encounter any issues or challenges during the setup or calibration process? We’ll address some common troubleshooting tips in the next section.
Troubleshooting Common Issues
While setting up and calibrating your 7.1 surround sound system, you may come across common issues that can impact the audio performance. Here are some troubleshooting tips to help you address these issues:
- No Sound or Low Volume: Ensure that all cables are securely connected and that the speaker wires are properly attached to the correct terminals. Check the receiver settings to confirm that the audio output is configured correctly. Verify that the volume level is set appropriately on both the AV receiver and the source device.
- Imbalanced Sound: If you notice that certain speakers are louder than others, check the channel levels in the receiver’s settings menu. Adjust the channel levels until the sound output is well-balanced and evenly distributed across all speakers.
- Lack of Bass: If you’re not getting enough bass, check the subwoofer’s power and volume settings. Ensure that the subwoofer is properly connected to the AV receiver and that the crossover frequency is set correctly. Experiment with different subwoofer placements and make sure the room acoustics are not negatively affecting the bass response.
- Audio Lag: If you notice a delay in audio, particularly with video content, check the receiver’s settings to ensure that there are no audio processing features or sound modes causing a delay. In some cases, adjusting the audio delay settings in the receiver can help sync the audio with the video playback.
- Audio Distortion or Crackling: Distorted or crackling sound can be indicative of a faulty connection, damaged speaker, or high volume levels. Check all connections for loose or damaged cables, ensure proper speaker wire connections, and lower the volume levels to see if the distortion disappears. If the issue persists, it may require further troubleshooting or professional inspection.
- Room Acoustics Issues: If you’re experiencing sound reflections or excessive reverberation in your room, consider adding acoustic treatments such as absorptive panels or diffusers to minimize the issue. Adjusting speaker positioning or using room correction features in your AV receiver can also help mitigate room acoustic problems.
If you encounter any issues that you can’t resolve, consult the user manual of your AV receiver or reach out to the manufacturer’s support for assistance. Additionally, online forums and communities dedicated to home theater enthusiasts can provide valuable insights and tips for troubleshooting specific issues.
Remember that troubleshooting can sometimes be a trial-and-error process. Patience and careful attention to detail will help you identify and address any issues, ensuring that you achieve the best possible audio performance from your 7.1 surround sound system.
With troubleshooting tips in mind, you are now equipped with the knowledge to overcome common challenges. In the next section, we will conclude our guide to setting up a 7.1 surround sound system.
Conclusion
Congratulations! You’ve successfully embarked on the journey of setting up your very own 7.1 surround sound system. By understanding the components, choosing the right equipment, preparing your room, placing and positioning the speakers, and configuring the audio settings, you’ve created an immersive and captivating audio experience that will elevate your movie nights, gaming sessions, and music listening to new heights.
Throughout this guide, we’ve covered the fundamentals of 7.1 surround sound, the importance of speaker placement and positioning, and the process of connecting and configuring your speakers with the AV receiver. We’ve also highlighted the critical step of testing and calibrating your system, as well as provided troubleshooting tips to overcome common issues that may arise.
Remember that every room and personal preference is unique, so don’t be afraid to experiment and make adjustments to achieve the best audio performance for your individual setup. Use your ears as the ultimate guide and fine-tune the various settings to suit your listening space and preferences.
Whether you’re enjoying the thunderous explosions of an action movie, the intricate melodies of your favorite music, or the immersive soundscapes of a video game, your 7.1 surround sound system will transport you into a world of sonic bliss.
As technology continues to advance and new audio formats emerge, don’t hesitate to stay up-to-date with the latest advancements in surround sound technology. Upgrading your equipment or exploring additional audio enhancements can further enhance your audio experience.
Now, sit back, relax, and let the immersive sounds envelop you as you dive into a world of breathtaking audio with your 7.1 surround sound system. Enjoy the depth, clarity, and realism that this remarkable setup brings, and let yourself be captivated by the power of audio.