Home>Production & Technology>Surround Sound>How To Set Up 5 Speaker Surround Sound

Surround Sound
How To Set Up 5 Speaker Surround Sound
Modified: February 18, 2024
Learn how to set up a 5 speaker surround sound system with our step-by-step guide. Enhance your audio experience and enjoy immersive sound at home.
(Many of the links in this article redirect to a specific reviewed product. Your purchase of these products through affiliate links helps to generate commission for AudioLover.com, at no extra cost. Learn more)
Table of Contents
Introduction
Welcome to the world of immersive audio with 5 speaker surround sound! Whether you are a movie enthusiast, a gamer, or simply a music lover, a surround sound system can take your audio experience to a whole new level. With the right set of speakers and proper setup, you can enjoy the sensation of sound coming at you from all directions, creating a realistic and engaging audio environment in your own home.
In this article, we will guide you through the process of setting up a 5 speaker surround sound system. We will cover everything from speaker placement and installation to configuring the system for optimal performance. By the end of this guide, you’ll be ready to enjoy a truly immersive audio experience that will bring your favorite movies, games, and music to life.
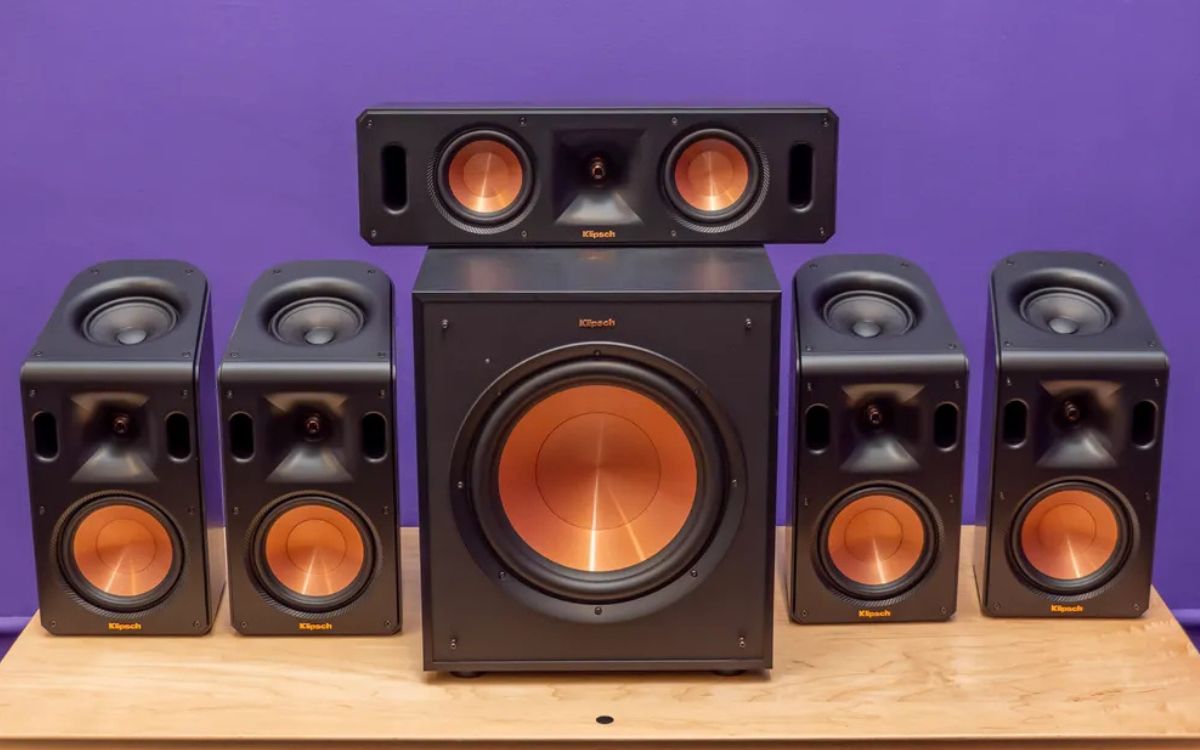
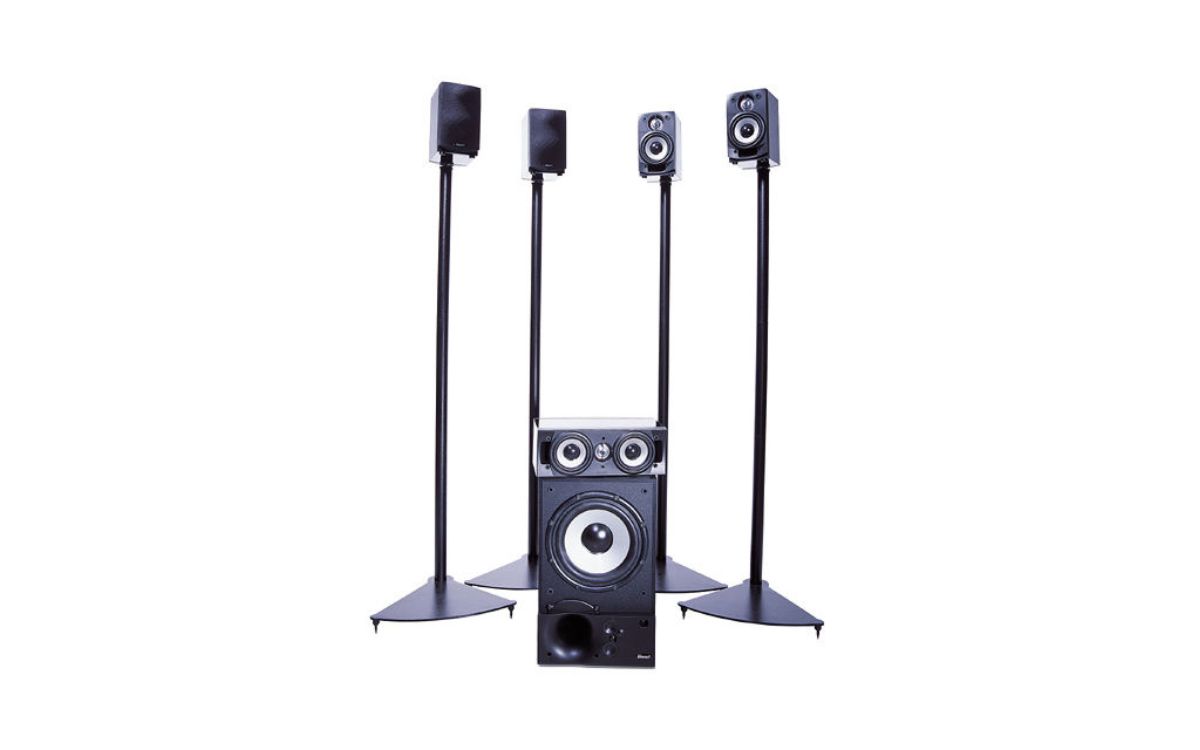
Before we dive into the details, let’s take a moment to understand the components that make up a 5 speaker surround sound system. The core elements include a receiver, five speakers, and a subwoofer. The receiver acts as the central hub, receiving audio signals from various sources and distributing them to the speakers. The five speakers are strategically positioned around the listening area to create a surround sound effect, while the subwoofer provides deep, low-frequency bass.
Now that we have a basic understanding of the components, let’s proceed to the next section on speaker placement, where we will explore the optimal positioning of the speakers to achieve the best surround sound experience.
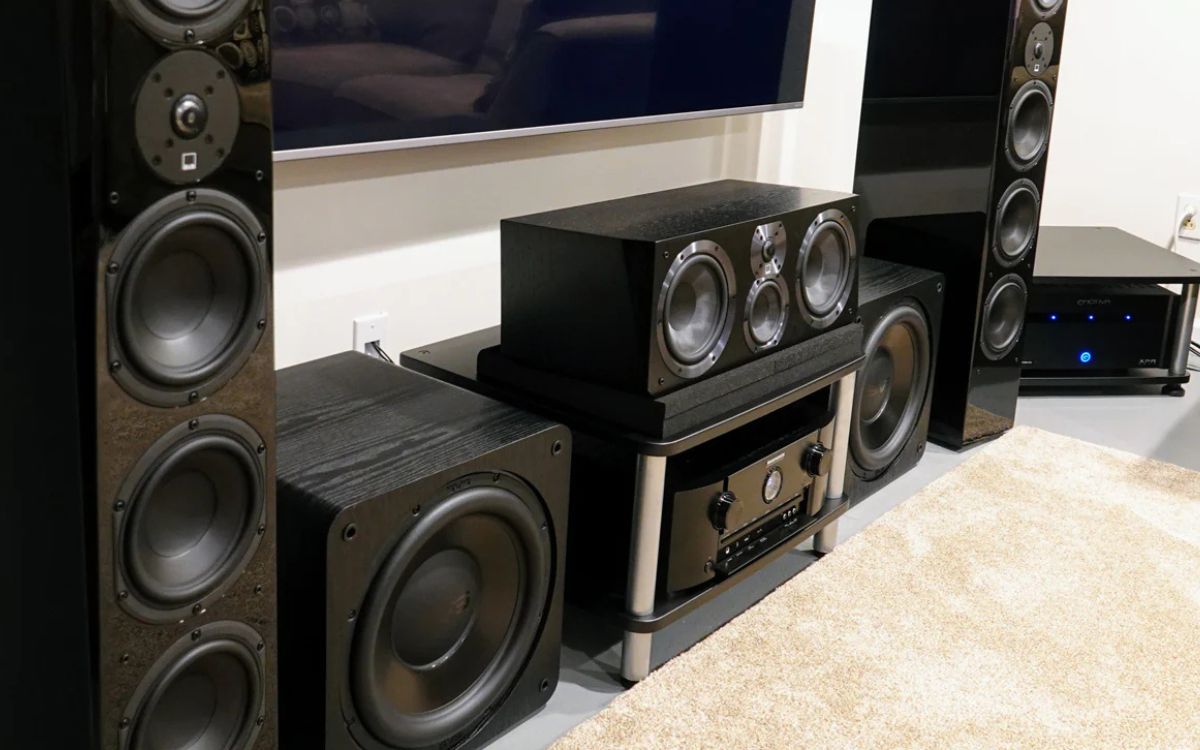
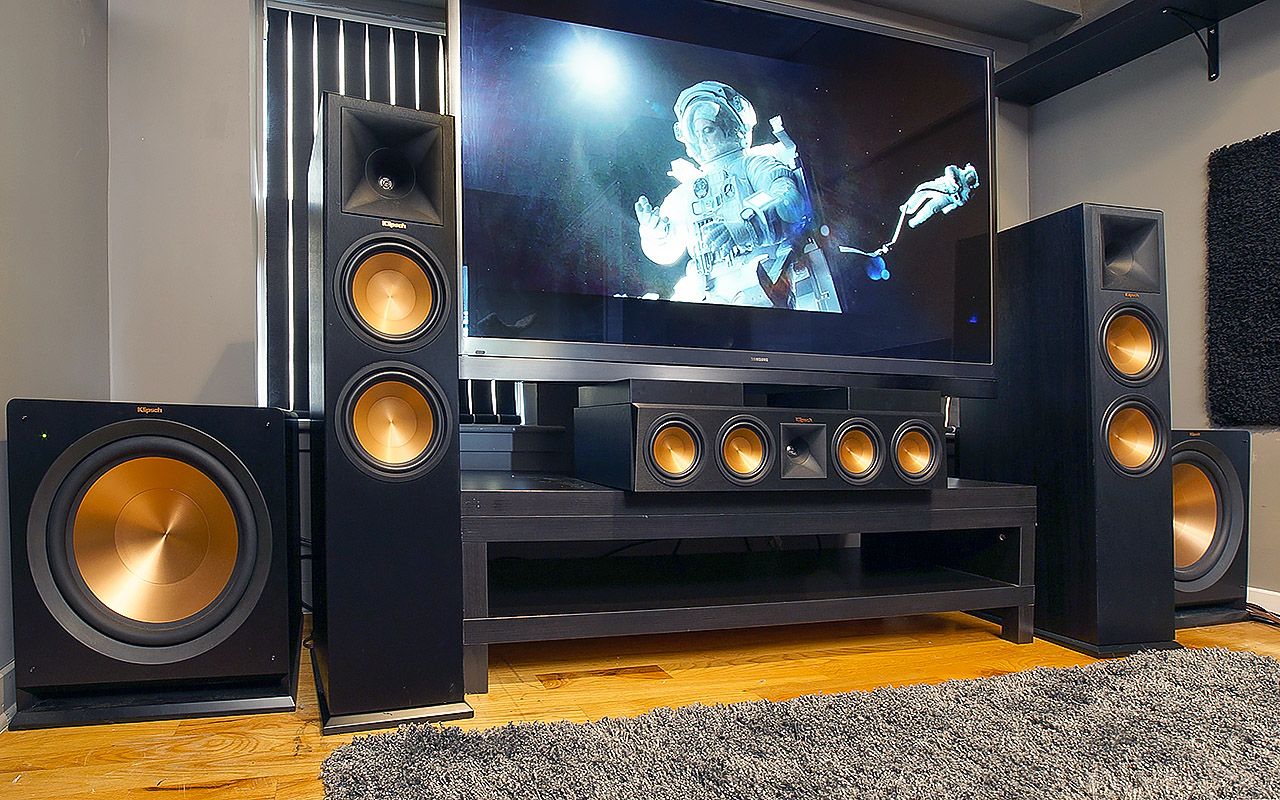
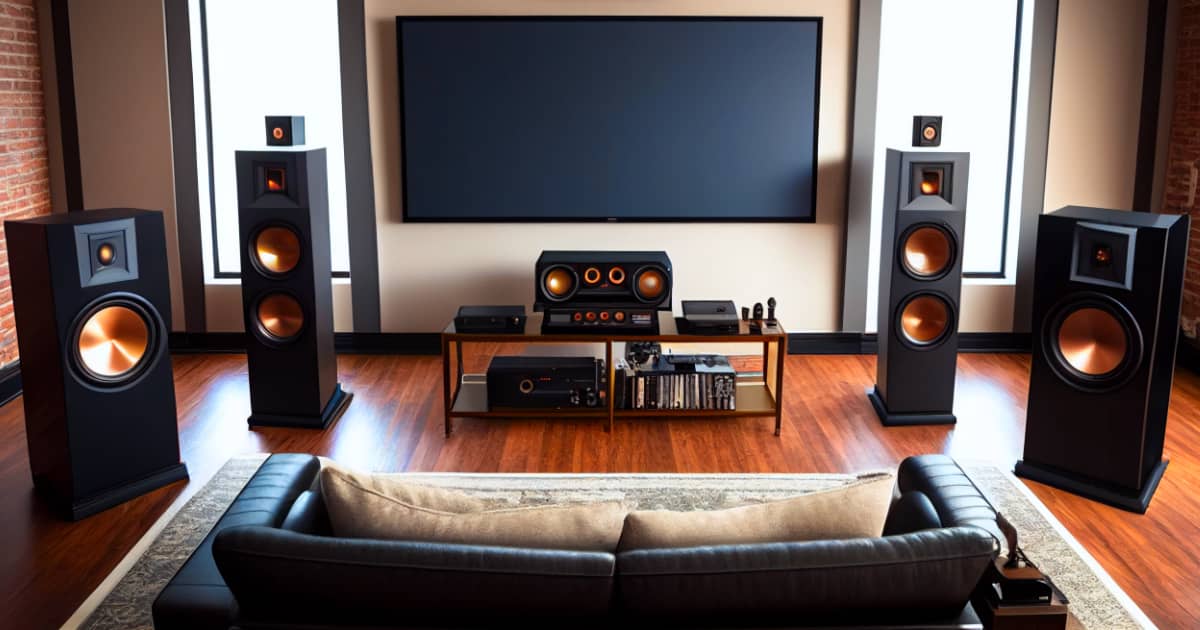
Speaker Placement
Proper speaker placement is crucial for creating an immersive surround sound experience. The positioning of each speaker will determine the accuracy and depth of the soundstage. Here are some key guidelines to follow when placing your speakers:
- Front Speakers: The front left and front right speakers should be placed at equal distances from the television or the main viewing area. Ideally, they should form a 45-degree angle with the listening position to create a balanced stereo image.
- Center Speaker: The center speaker is responsible for reproducing dialogue and should be positioned directly above or below the television. It should be aligned with the front left and front right speakers to ensure seamless integration of sound.
- Surround Speakers: The surround speakers should be placed slightly behind the listening area, ideally to the left and right of the viewer. They should be at ear level and angled towards the listening position to create an enveloping sound experience.
- Subwoofer: The subwoofer can be placed anywhere in the room to produce deep bass frequencies. Experiment with different locations to find the spot that provides the best bass response.
When positioning your speakers, keep in mind the acoustics of the room. Avoid placing speakers too close to walls or corners, as this can result in unwanted reflections and distortions. Experiment with speaker placement and adjust as necessary until you achieve optimal sound quality and a balanced surround sound experience.
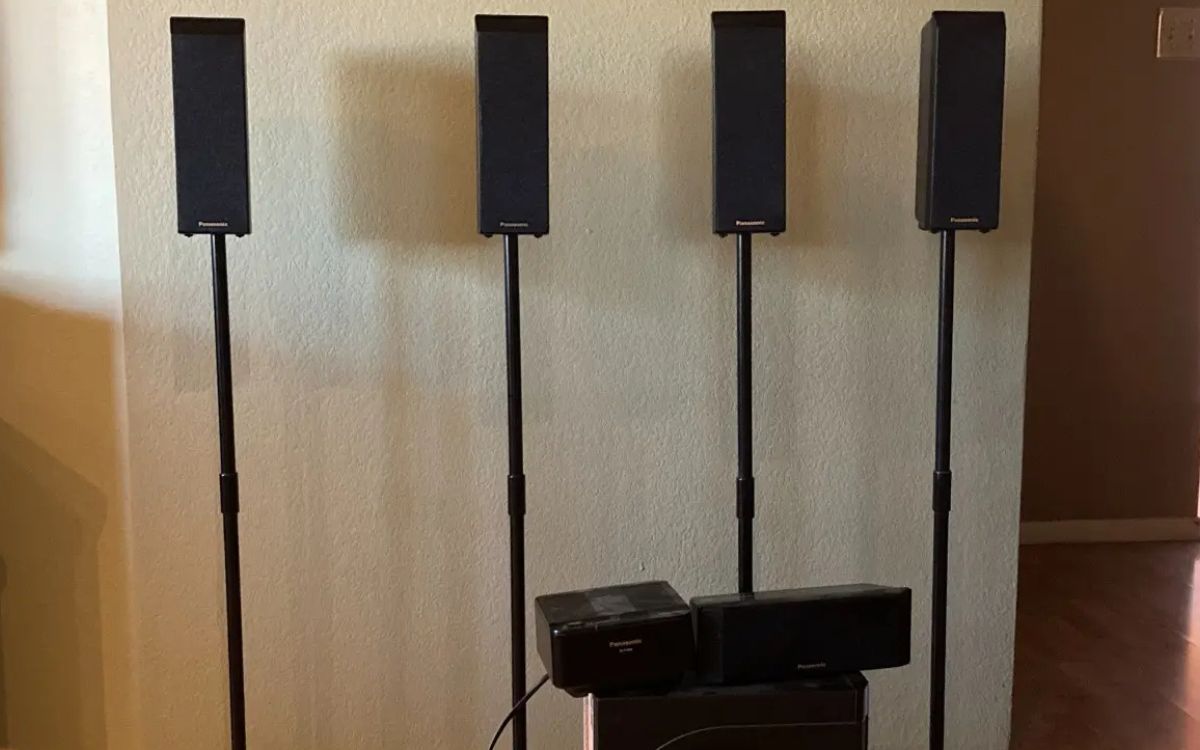
It is also worth mentioning that speaker stands can be a great investment, especially for surround and rear speakers. Stands can help position the speakers at the correct height and angle, facilitating better sound dispersion and imaging.
Once you have positioned your speakers according to these guidelines, it’s time to move on to the next step: installing the receiver. Let’s continue to the next section to learn how to set up the receiver in your surround sound system.
Installing the Receiver
The receiver is the heart of your surround sound system, responsible for processing audio signals and distributing them to the appropriate speakers. Proper installation of the receiver is essential for ensuring optimal performance. Here’s a step-by-step guide to help you set up your receiver:
- Choose the right location: Select a suitable location for your receiver. It should be well-ventilated and away from direct sunlight or heat sources to prevent overheating. Also, ensure that it is easily accessible for making connections and adjustments.
- Connect the speakers: Take the speaker wires and connect each speaker to the corresponding speaker output on the back of the receiver. Make sure to match the positive (+) and negative (-) terminals correctly to avoid phase issues.
- Connect audio sources: Identify the audio sources you want to connect to the receiver, such as a Blu-ray player, gaming console, or streaming device. Use HDMI, optical, or RCA cables to connect these devices to the appropriate inputs on the back of the receiver.
- Connect the television: Use an HDMI cable to connect the HDMI output of the receiver to an available HDMI input on your TV. This will allow you to enjoy audio and video from your sources through the surround sound system.
- Connect the subwoofer: If your receiver has a dedicated subwoofer output, use a subwoofer cable to connect it to the input on your subwoofer. Make sure to power on the subwoofer and adjust the volume accordingly.
- Power on and configure the receiver: Once all the connections are made, plug in the power cord of the receiver and turn it on. Follow the on-screen setup instructions or refer to the user manual to configure the receiver settings, such as speaker size, distance, and audio format.
- Test and troubleshoot: After the initial setup, play some audio or test various speaker channels to ensure that all speakers are functioning correctly. If you encounter any issues, refer to the receiver’s manual or consult the manufacturer’s support for troubleshooting guidance.
With the receiver properly installed and configured, you have laid the foundation for a fully functional surround sound system. The next step is to connect and configure the speakers, which we will cover in the following section.
Connecting the Speakers
Once you have installed the receiver and made the necessary audio connections, it’s time to connect the speakers. Properly connecting the speakers to the receiver will ensure that they deliver accurate and immersive sound. Here’s a step-by-step guide to help you connect the speakers:
- Identify the speaker terminals: Look for the speaker outputs on the back of the receiver. Each speaker output is labeled with a corresponding channel, such as Front Left, Front Right, Center, Surround Left, and Surround Right.
- Prepare the speaker wires: Strip off a small section of insulation from the end of each speaker wire to expose the bare wire. Ensure that there are no loose strands of wire, as they can cause connectivity issues.
- Connect the speaker wires: Take the end of the speaker wire and insert it into the corresponding speaker terminal on the back of the receiver. Twist the terminal cap clockwise to secure the wire in place. Repeat this process for each speaker.
- Match the polarity: It’s important to ensure that the positive (+) terminal on the speaker is connected to the positive (+) terminal on the receiver, and the negative (-) terminal on the speaker is connected to the negative (-) terminal on the receiver. This polarity matching will prevent any phase cancellation or distortion.
- Avoid crossed wires: Make sure that the speaker wires for each channel are not crossing or touching each other. Crossing the wires can introduce interference and affect the sound quality.
- Secure the connections: Once all the speaker wires are connected, double-check that they are securely fastened. Give each wire a gentle tug to ensure they are snugly in place.
After connecting the speakers, it’s a good idea to do a quick test to ensure that each speaker is functioning properly. Play some audio or perform a sound test that moves sound across different channels to verify if all the speakers are producing sound as expected.
Now that the speakers are connected, we can move on to the next section, which covers the configuration of the surround sound system for optimal performance.
Configuring the Surround Sound System
After connecting the speakers, it’s time to configure your surround sound system to ensure optimal performance and a seamless audio experience. Here are the essential steps to follow:
- Access the receiver settings: Turn on your receiver and access the settings menu. This can usually be done by pressing the “Menu” or “Settings” button on the remote control or the receiver itself.
- Speaker size and distance: In the settings menu, locate the speaker configuration options. Set the size of each speaker (small or large) based on its capabilities and your room size. Also, enter the distance of each speaker from the main listening position. This information helps the receiver calibrate the sound for proper level and timing.
- Channel levels: Adjust the volume levels for each speaker channel. The receiver may have an automatic calibration feature that uses a microphone to measure the sound levels and adjust them accordingly. If not, you can manually adjust the channel levels to balance the sound across all speakers.
- Audio formats: Navigate to the audio settings and select the appropriate audio formats that your receiver and speakers support, such as Dolby Digital or DTS. These formats provide enhanced surround sound experiences and make sure you’re getting the most out of your system.
- Subwoofer settings: Fine-tune the settings of your subwoofer to achieve the desired bass response. Adjust the crossover frequency, phase, and volume levels to blend the low-frequency sounds seamlessly with the rest of the speakers.
- Test the system: Play some audio or video content that highlights the capabilities of your surround sound system. Listen carefully to ensure that the sound is balanced, clear, and immersive. Make any necessary adjustments to the settings as you evaluate the performance.
It’s important to consult your receiver’s manual for specific instructions on accessing and adjusting these settings, as the process can vary depending on the brand and model.
Once you have configured your surround sound system, you are one step closer to enjoying a truly immersive audio experience. However, to optimize your listening experience, it’s important to consider calibrating the system to the unique characteristics of your room. This will be covered in the next section.
Calibrating the System
Calibrating your surround sound system is crucial to achieve the best possible audio performance in your specific room environment. The acoustic characteristics of each space can affect the overall sound quality. Here are the steps to calibrate your system:
- Room correction software: Some receivers come equipped with room correction software, such as Audyssey or YPAO. Follow the instructions provided by the manufacturer to run the automated calibration process. This usually involves connecting a microphone to the receiver and placing it in the listening position while the system measures and adjusts the audio based on the room’s acoustics.
- Manual adjustments: If your receiver does not have automated room correction software, you can manually adjust the speaker settings. Use an SPL (sound pressure level) meter or a smartphone app to measure the sound levels from each speaker. Adjust the channel levels to ensure equal loudness from all speakers at the main listening position.
- Fine-tuning: Experiment with different settings, such as speaker distance, crossover frequency, and equalization options, to fine-tune the sound to your preferences and room acoustics. Trust your ears and make adjustments accordingly.
- Avoiding room reflections: Consider adding acoustic treatments, such as wall panels or bass traps, to minimize reflections and improve the overall sound quality. Strategic placement of rugs, curtains, and furniture can also help absorb or diffuse sound reflections.
- Re-evaluate and adjust: After making any changes or modifications, listen to a variety of audio content to assess the impact of the calibration. Continue adjusting the settings as needed until you achieve a well-balanced and immersive sound experience.
Remember, calibration is an ongoing process, especially if you make changes to your room setup or speakers. Regularly revisit the calibration process to ensure optimal performance and to adapt to any changes you make to your surround sound system.
With your system properly calibrated, it’s time to move on to adjusting the sound settings to suit your personal preferences, which will be covered in the next section.
Adjusting Sound Settings
Adjusting the sound settings of your surround sound system can greatly enhance your audio experience, allowing you to customize the sound to your personal preferences. Here are some key sound settings to consider:
- Equalizer: Most receivers have built-in equalizer settings that allow you to fine-tune the sound frequencies. Adjust the bass, midrange, and treble levels to achieve the desired balance and tonal characteristics.
- Dynamic range compression: If you find that the volume levels between quiet and loud passages in movies or music are too extreme, enabling dynamic range compression can help by reducing the difference in volume. This feature can enhance the clarity of dialogues and prevent sudden loud sounds.
- Surround modes: Experiment with different surround modes, such as Dolby Pro Logic II or DTS Neural:X, to enhance the spatial effects of the audio. These modes can simulate a larger soundstage, add depth, and create a more immersive experience.
- Dialog enhancement: Some receivers offer a dialog enhancement feature that boosts the clarity and volume of dialogues. This can be particularly useful when watching movies or TV shows with heavy dialogue content, ensuring that speech is easily understandable.
- Subwoofer level: Adjust the subwoofer level to find the right balance between the low-frequency effects and the rest of the audio. Increase or decrease the subwoofer output to match your preference and the genre of content you are enjoying.
- Balance and channel delay: If you feel that the sound from one speaker is louder or reaches your ears at a different time, adjust the balance and channel delay settings to improve the sound imaging and synchronization between speakers.
Take the time to listen to various audio content, such as music, movies, and games, while experimenting with different sound settings. This will help you fine-tune the surround sound system to your liking and create a personalized audio experience.
Remember, sound settings can vary depending on the content you are consuming, so feel free to explore different settings and adjust them accordingly for each specific situation.
With the sound settings dialed in, let’s move on to the next section, where we will discuss some common issues you may encounter with your surround sound system and how to troubleshoot them.
Troubleshooting Common Issues
While setting up and configuring your surround sound system, you may encounter some common issues that can affect the performance and functionality of your audio setup. Here are a few troubleshooting tips to help you address these issues:
- No sound: If you’re not getting any sound from your speakers, check the connections between the speakers and the receiver. Ensure that the speaker wires are securely connected and that the receiver is set to the correct input source. Also, verify that the volume levels are appropriately adjusted on both the receiver and the source device.
- Poor audio quality: If you notice distorted or unclear sound, check the speaker connections for any loose wires or faulty connections. Make sure the speaker wires are properly attached to the correct terminals on both the receiver and the speakers. Additionally, ensure that the speaker placements follow the guidelines mentioned earlier in the article.
- No surround sound: If you’re not experiencing the desired surround sound effect, verify that the surround sound settings are configured correctly on your receiver. Ensure that the audio source you’re using supports surround sound, such as a Blu-ray disc with surround sound encoding or a video game with surround sound audio tracks.
- Inconsistent sound levels: If you notice variations in volume levels across different speakers, check the channel levels in your receiver’s settings. Make sure the levels are balanced and adjusted to a comfortable listening level for each speaker. You may also want to enable any dynamic range compression or night mode features available on your receiver to address sudden volume changes.
- Audio/video sync issues: If you experience a slight delay between the audio and video when using your surround sound system, adjust the audio delay or lip sync settings on your receiver. Refer to the receiver’s manual for instructions on how to adjust these settings.
If you encounter persisting issues despite troubleshooting, consult the user manual or reach out to the manufacturer’s support for further assistance. They can provide specific guidance tailored to your audio equipment and help diagnose and resolve any technical problems.
By troubleshooting common issues and resolving them, you can ensure that your surround sound system delivers the best possible audio performance and an immersive experience for your entertainment needs.
As we wrap up this guide, keep in mind that enjoying your surround sound system is a journey of discovery. Experiment with different settings, enjoy your favorite content, and fine-tune the system to your liking. With patience and a little bit of tweaking, you’ll soon be immersed in a captivating surround sound experience.
Conclusion
Congratulations! You have successfully set up and configured your 5 speaker surround sound system. By following the steps outlined in this guide, you have created an immersive audio experience that will elevate your enjoyment of movies, music, and games.
We started by discussing the importance of speaker placement and how it can greatly impact the overall sound quality and surround sound experience. Properly positioning the speakers, including the front, center, surround, and subwoofer, helps achieve a balanced and enveloping soundstage in your listening area.
Next, we guided you through the process of installing the receiver and making the necessary audio connections. The receiver serves as the central hub of your surround sound system, receiving and processing audio signals from various sources and distributing them to the speakers. With the connections in place, you are ready to enjoy a wide range of sound content.
We then moved on to configuring the surround sound system, where we explored settings such as speaker size, channel levels, and audio formats. Adjusting these settings allows you to fine-tune the system to your preferences and achieve optimal audio performance based on your room’s acoustics.
Calibrating the system was the next step, which involved using automated room correction software or manually adjusting the speaker settings. This process ensures that the audio is tailored to your specific listening environment, enhancing the overall sound quality and immersion.
Adjusting the sound settings further personalized your audio experience, allowing you to fine-tune aspects such as equalization, surround modes, and subwoofer levels. These settings give you control over the tonal balance and spatial effects, enabling you to create an audio environment that suits your preferences.
Lastly, we discussed common issues that may arise during the setup and usage of your surround sound system, along with troubleshooting tips to resolve them. By following these troubleshooting techniques, you can address any audio-related problems and optimize the performance of your system.
Remember, setting up a surround sound system is an ongoing journey of exploration and refinement. Don’t be afraid to experiment with different settings, speaker placements, and room treatments to find what works best for you. Your dedication to achieving the perfect audio experience will be well worth it once you’re immersed in the rich and dynamic soundscapes that surround sound has to offer.
Enjoy your newfound audio bliss and get ready to embark on countless adventures with your 5 speaker surround sound system!