Home>Production & Technology>Surround Sound>How To Setup A Surround Sound System
Surround Sound
How To Setup A Surround Sound System
Modified: January 22, 2024
Learn how to set up a surround sound system for an immersive audio experience at home. Step-by-step guide to optimize your surround sound with expert tips.
(Many of the links in this article redirect to a specific reviewed product. Your purchase of these products through affiliate links helps to generate commission for AudioLover.com, at no extra cost. Learn more)
Table of Contents
Introduction
Welcome to the world of surround sound systems! If you are a movie enthusiast or a music lover, having a surround sound system can significantly enhance your audio experience. Whether you enjoy the immersive sound of action flicks or the crisp clarity of your favorite tunes, a well-setup surround sound system can transport you into a whole new level of audio bliss.
In this article, we will guide you through the process of setting up a surround sound system from scratch. We will provide step-by-step instructions and valuable tips to ensure you optimize the placement and connectivity of your speakers, ensuring the best possible audio quality.
Before we dive into the nitty-gritty details, it’s important to understand what a surround sound system is. At its core, a surround sound system is a combination of speakers and a receiver that work together to deliver an immersive audio experience. These systems are designed to reproduce audio from all directions, creating a surround effect that makes you feel like you’re right in the middle of the action. From explosions to subtle whispers, a well-calibrated surround sound system can reproduce audio with incredible accuracy and depth.
Now that you have a basic understanding of what a surround sound system entails, let’s get started with the setup process. By the end of this article, you’ll have the knowledge and confidence to set up your own surround sound system, transforming your living room into a mini home theater.
Step 1: Determine the Room Layout
Before diving into the setup process, it’s crucial to assess your room and determine the optimal layout for your surround sound system. The room layout plays a significant role in the overall audio experience, as it affects speaker placement, sound reflection, and the positioning of the listener.
Start by identifying the ideal location for your TV or screen. This should be a central point in the room, where everyone can easily see the screen without any obstructions. Once you have determined the placement of your TV, envision yourself sitting in the primary listening position. This is where you will be spending most of your time when enjoying movies or music.
Next, consider the size and shape of your room. Observe any potential obstacles that could affect sound propagation, such as large furniture, windows, or open spaces. Additionally, take note of any reflective surfaces, such as glass or tile, as they can impact the acoustics of the room.
Another crucial aspect to consider is the distance between your primary listening position and the TV. This can help you determine the ideal speaker placement and the appropriate size and power of the speakers to ensure proper sound distribution in the room.
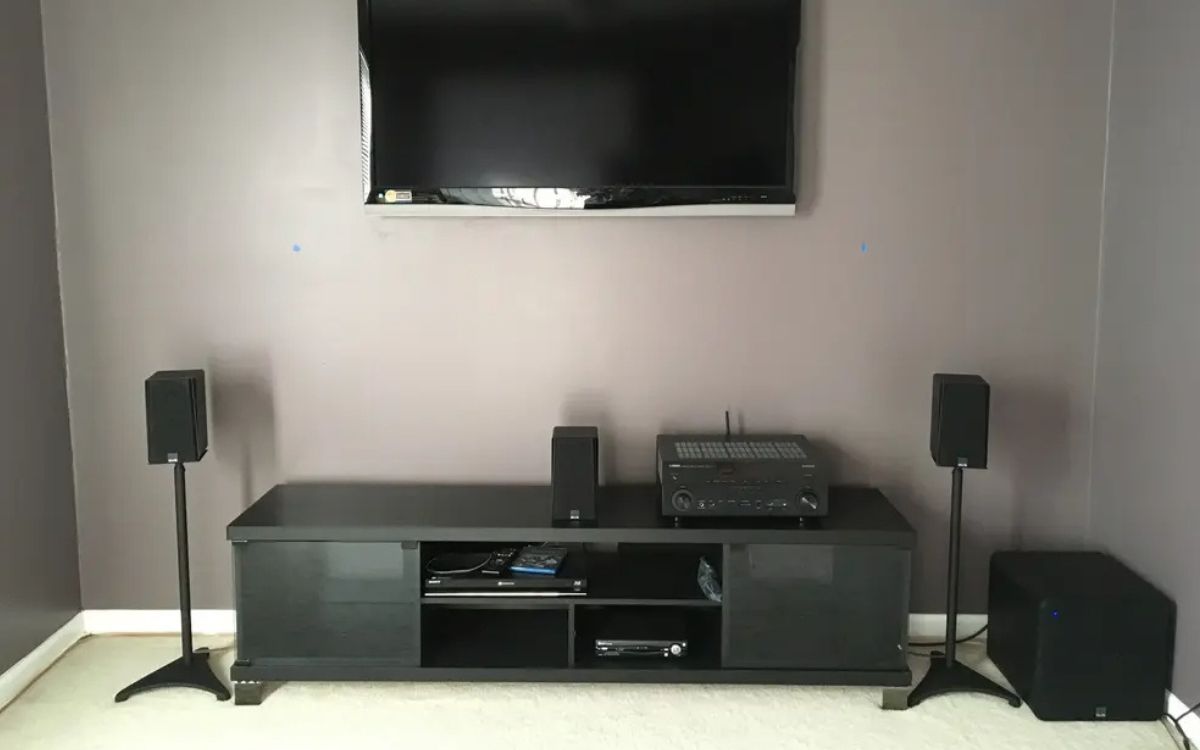
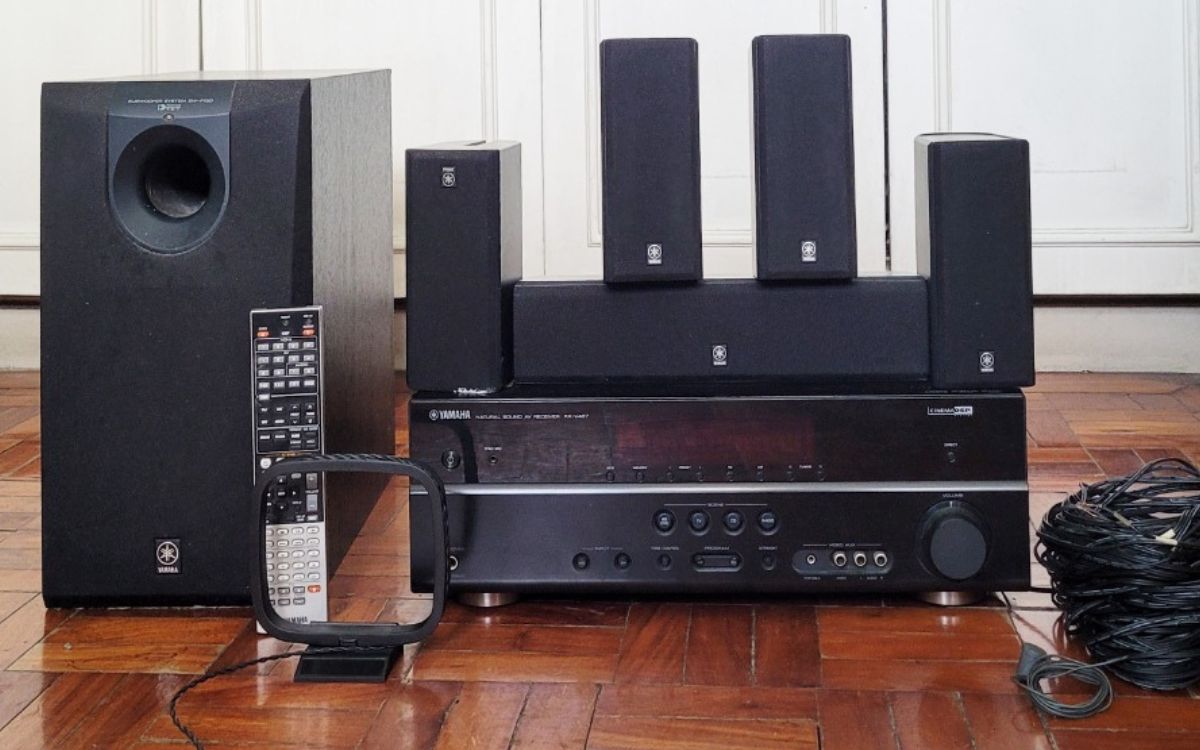
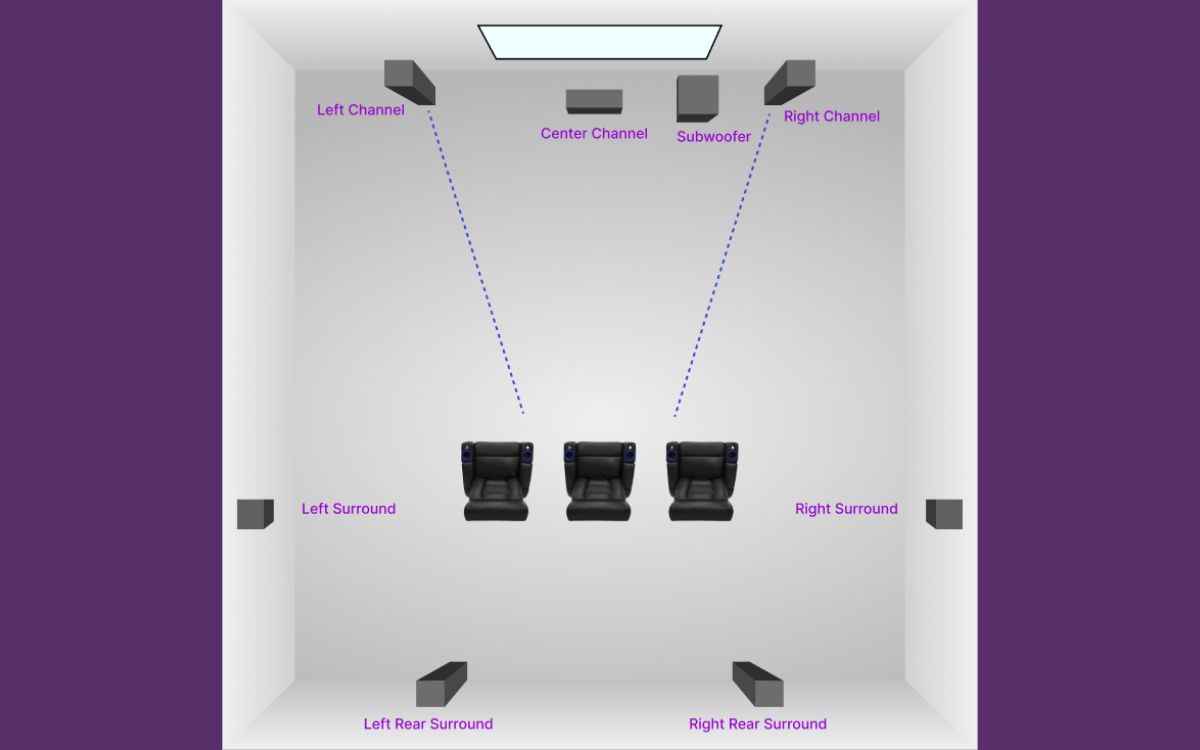
Once you have examined these factors, determine where you will position the speakers. In a typical surround sound system, there are five main speakers: front left, center, front right, rear left, and rear right. Additionally, you may have a subwoofer that reproduces low-frequency sounds, adding depth and impact to your audio experience.
Ideally, the front left, center, and front right speakers should be placed in front of the primary listening position, forming an arc or a straight line. The rear left and rear right speakers should be positioned behind the listener, creating a surround effect. The subwoofer can be placed anywhere in the room, as low-frequency sounds are less directional.
Take note that every room is unique, and you may need to make adjustments based on your specific layout and acoustic properties. Consider consulting professional installers or utilizing room correction software to optimize the speaker placement for the best possible audio experience.
Step 2: Choose the Right Speakers
Now that you have determined the layout of your room, it’s time to choose the right speakers for your surround sound system. The speakers you select will have a significant impact on the audio quality and immersion of your setup.
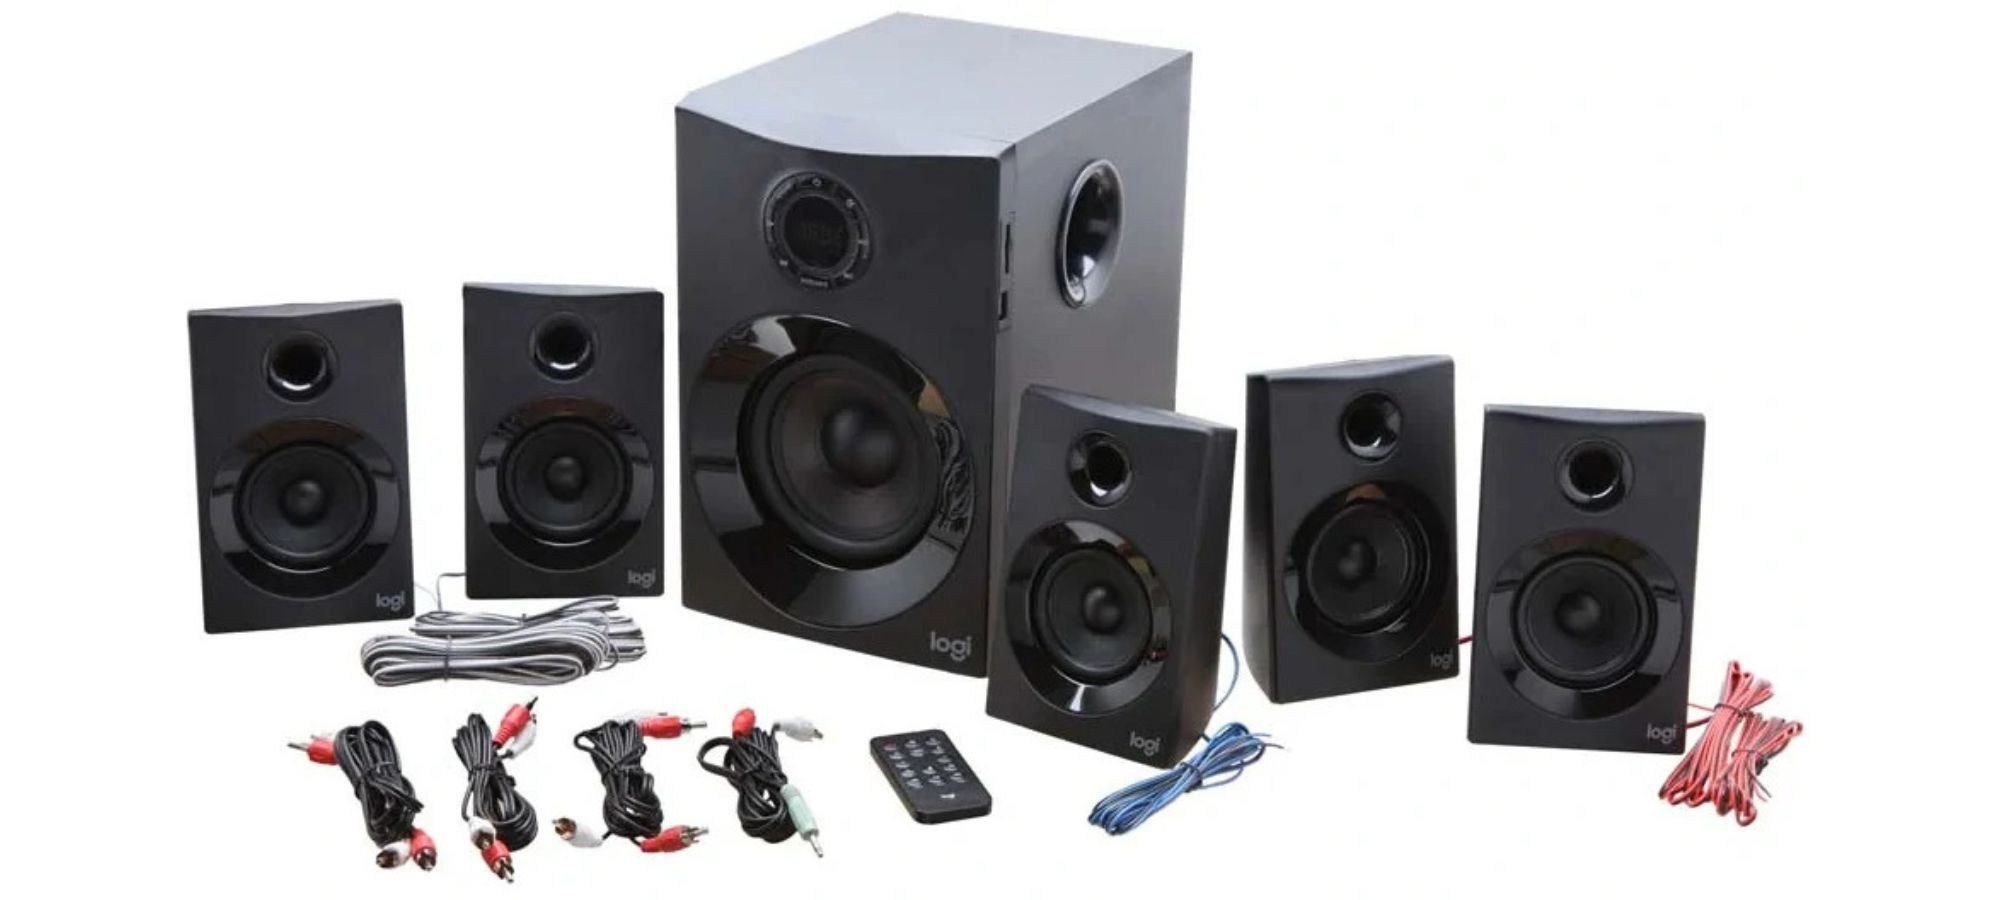
There are various types of speakers available, each serving a different purpose in a surround sound system. Here are the main types of speakers:
- Front Speakers: These speakers are responsible for delivering the majority of the audio, including dialogue, music, and sound effects. They should be positioned on either side of the TV or screen, creating a stereo soundstage. Front speakers can be either floor-standing or bookshelf-style speakers, depending on your preference and the size of your room.
- Center Speaker: The center speaker is crucial as it reproduces most of the dialogue in movies and TV shows. It is typically placed above or below the TV, directly facing the primary listening position. This ensures clear and distinct dialogue, even when the actors are speaking off-center on the screen.
- Rear Speakers: The rear speakers, also known as surround speakers, are responsible for creating the surround effect. They should be positioned behind the listener, slightly elevated and angled towards the primary listening position. Rear speakers enhance the immersiveness of the audio, providing a sense of depth and spatiality.
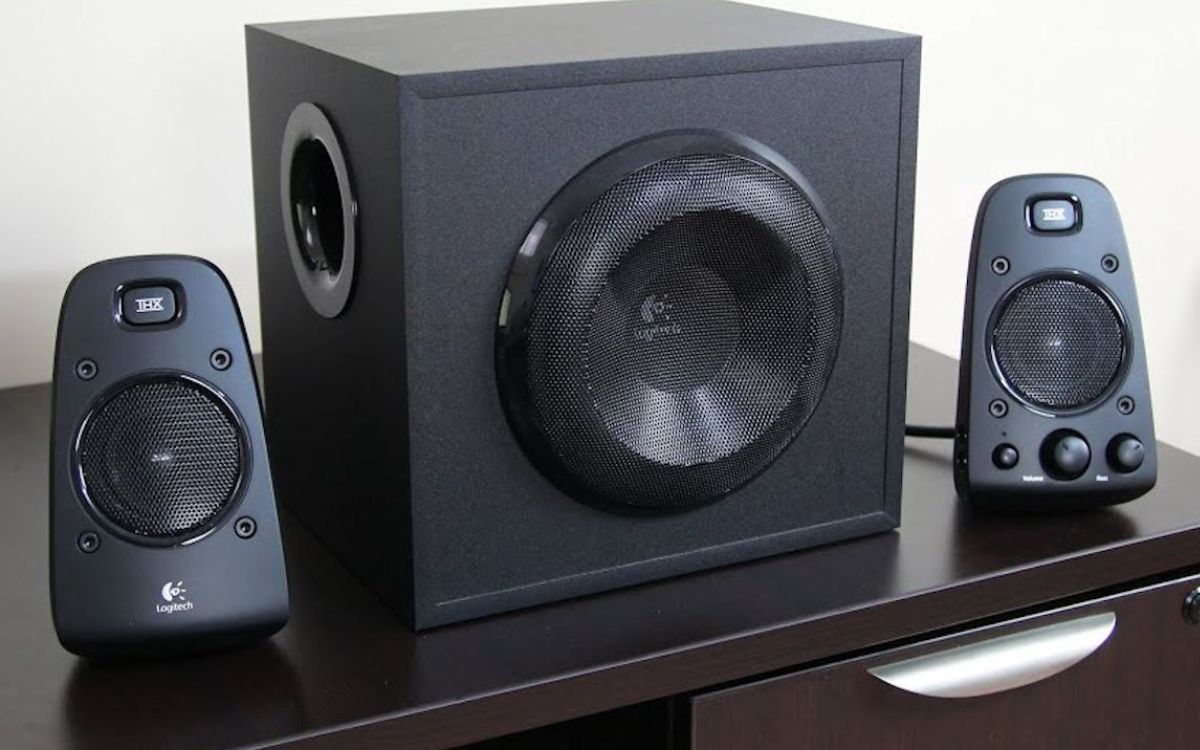
- Subwoofer: The subwoofer is dedicated to reproducing low-frequency sounds, such as the rumble of an explosion or the deep bass in music. It adds depth and impact to the audio experience. The subwoofer can be placed anywhere in the room, as these low-frequency sounds are less directional.
When choosing speakers, consider factors such as the size of your room, your budget, and personal preferences. It’s important to have a balanced combination of speakers that work harmoniously together to deliver a cohesive and immersive soundstage.
Additionally, pay attention to the power and sensitivity ratings of the speakers. Ensure that they can handle the power output of your receiver and that they are efficient enough to provide clear and powerful audio at various volumes.
Lastly, consider the aesthetics of the speakers. Since they will be a prominent feature in your room, you may want to choose speakers that complement your decor and personal style.
Take your time to research and audition different speaker options before making a final decision. Visit audio showrooms, read reviews, and listen to audio samples to get a better understanding of the sound quality and performance of the speakers you are considering.
Step 3: Position the Speakers
Now that you have chosen the right speakers for your surround sound system, it’s time to position them correctly to optimize audio performance and create an immersive audio experience. Proper speaker placement is essential for achieving balanced sound distribution and accurate sound imaging.
Here are some guidelines to help you position your speakers effectively:
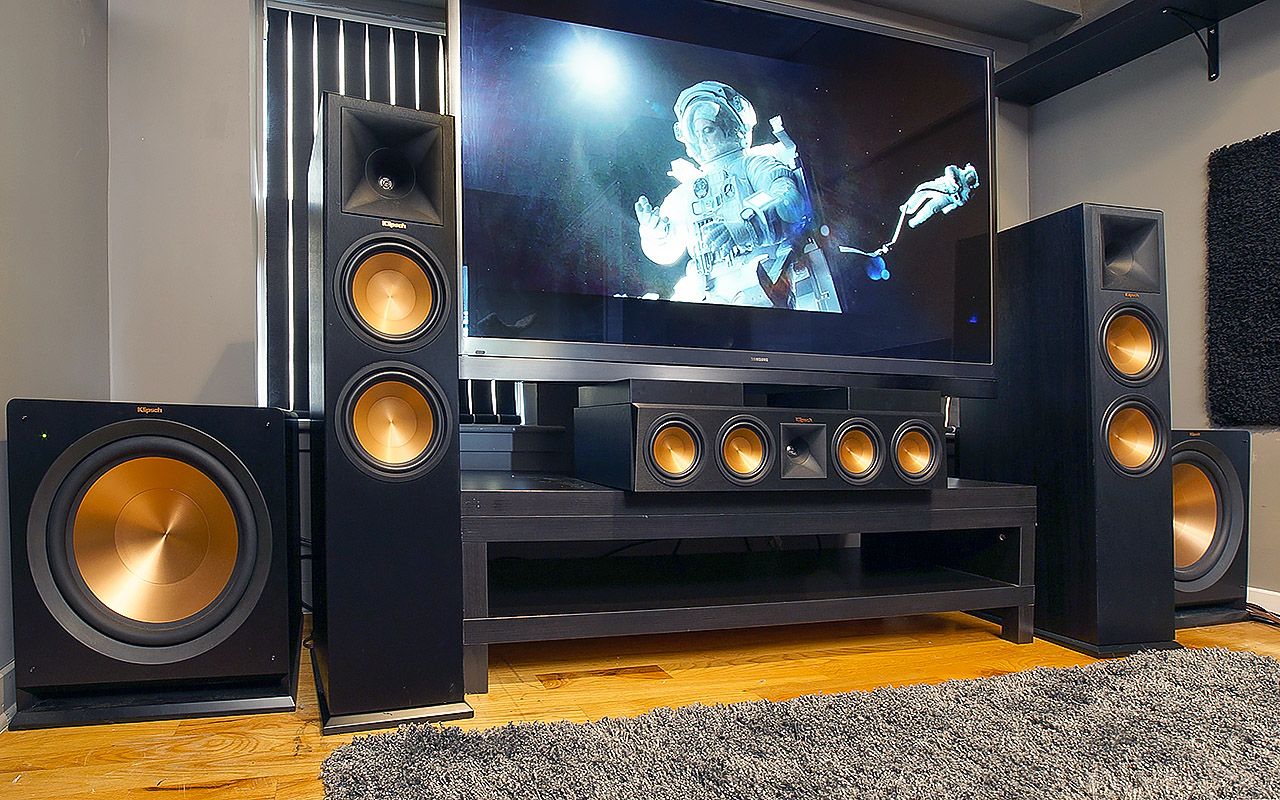
- Front Speakers: The front left and front right speakers should be positioned at ear level when seated in the primary listening position. Place them on either side of the TV or screen, angled inward towards the listener. This creates a stereo soundstage and ensures that the audio is directed towards the audience.
- Center Speaker: The center speaker should be placed in line with the front left and front right speakers, either above or below the TV or screen. It should be aimed directly at the primary listening position to ensure clear and focused dialogue.
- Rear Speakers: The rear left and rear right speakers should be placed slightly behind the primary listening position, elevated and angled towards the listener. This positioning creates a surround effect and enhances the immersion of the audio. Experiment with different angles and heights to find the optimal placement for your specific room.
- Subwoofer: The subwoofer can be placed anywhere in the room. To achieve the best sound, it’s recommended to experiment with different positions to find the spot that provides the deepest and most balanced bass response. Keep in mind that corners and walls can amplify bass, so try placing the subwoofer in different locations to achieve the desired effect.
When positioning the speakers, it’s important to maintain proper spacing and alignment. The front speakers should be equidistant from the primary listening position, forming an equal triangle. Similarly, the rear speakers should be equidistant from the listener and positioned symmetrically.
While these placement guidelines are a good starting point, it’s important to note that every room is unique, and you may need to make adjustments based on your specific acoustics. Consider using room correction software or consulting professional installers to optimize the speaker placement for the best possible sound quality.
Once you have positioned the speakers, take some time to fine-tune their placement and angles. Small adjustments can make a significant difference in the soundstage and overall audio experience. Trust your ears and experiment with different configurations until you achieve the sound quality and immersion you desire.
Step 4: Connect the Speakers to the Receiver
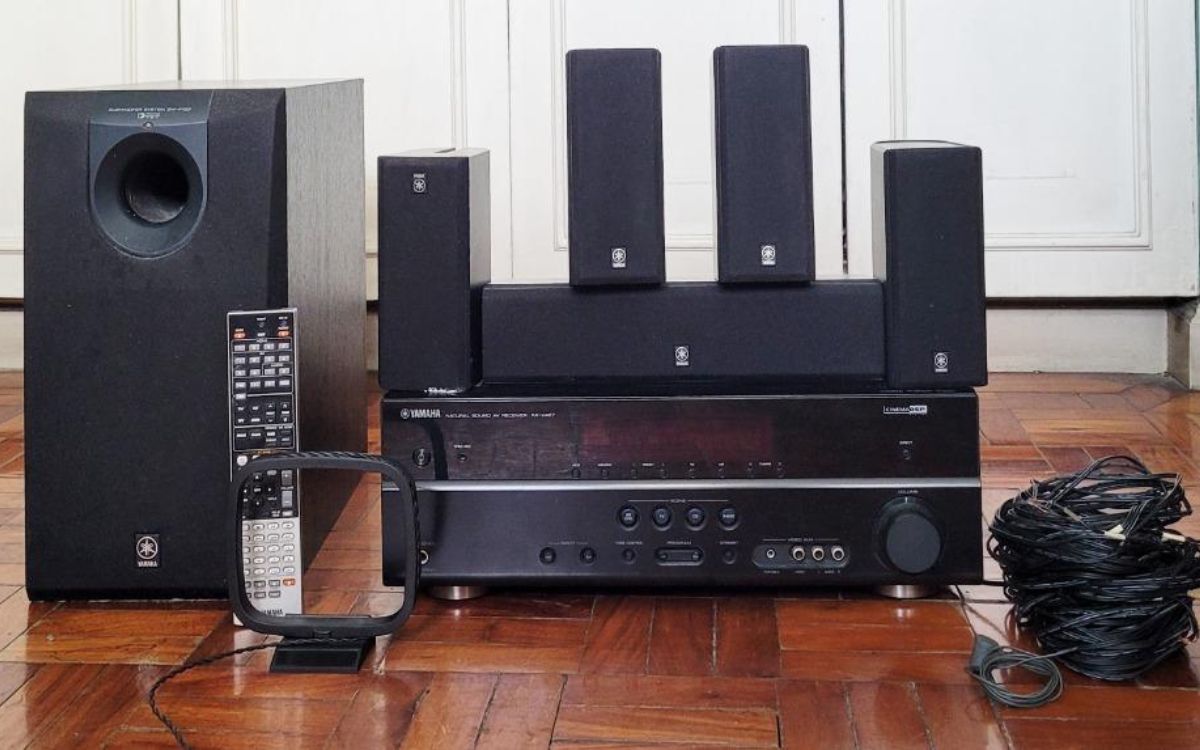
Now that you have positioned your speakers, it’s time to connect them to the receiver. The receiver is the heart of your surround sound system and acts as the central hub for all audio signals.
Here’s a step-by-step guide to connecting your speakers to the receiver:
- Identify the speaker terminals on the back of the receiver. These are usually labeled with corresponding channel names (e.g., front left, center, front right, rear left, rear right).
- Ensure that the receiver is powered off to avoid any accidental electrical damage.
- Take the speaker wires and strip a small section of insulation from each wire end to expose the bare conductor.
- For each speaker, match the positive (+) and negative (-) terminals on the back of the speaker with the corresponding terminals on the receiver.
- Insert the bare conductor of the speaker wire into the corresponding terminal, making sure it is securely connected.
- Repeat this process for all of the speakers, ensuring that the positive and negative terminals are correctly matched.
It’s important to note that some speakers and receivers may use different connection methods. For example, some speakers may have binding posts, while others may have spring clips. Familiarize yourself with the specific connectors on your speakers and receiver to ensure the proper connection.
When connecting the speakers, be mindful of the polarity. The positive (+) terminal on the speaker should be connected to the corresponding positive (+) terminal on the receiver, and the same goes for the negative (-) terminals. This ensures that the speakers are in phase and produces the best sound quality.
Once you have connected all of the speakers to the receiver, double-check the connections to ensure they are secure. Loose connections can lead to audio dropouts or reduced sound quality.
After verifying the connections, you can power on the receiver and follow its setup instructions to configure the speaker settings. The receiver will typically have an on-screen menu or display that allows you to specify the speaker sizes, distance from the listening position, and other settings to optimize the audio performance.
By properly connecting your speakers to the receiver, you are now ready to experience the full potential of your surround sound system. Sit back, relax, and get ready to immerse yourself in the rich, multidimensional audio that your system can deliver.
Step 5: Connect the Receiver to the TV
Now that you have connected your speakers to the receiver, it’s time to establish the connection between the receiver and your TV. This ensures that the audio and video signals are transmitted seamlessly, allowing you to enjoy a synchronized audio-visual experience.
Follow these steps to connect the receiver to your TV:
- Locate the HDMI output port on the back of the receiver. This port is typically labeled as “HDMI Out” or “Monitor Out”.
- Identify an available HDMI input port on your TV. These ports are usually labeled with numbers or names such as “HDMI 1”, “HDMI 2”, etc.
- Take an HDMI cable and connect one end to the HDMI output port on the receiver.
- Connect the other end of the HDMI cable to the HDMI input port on your TV.
- Ensure that the HDMI cable is securely inserted into both the receiver and the TV.
- Power on your TV and set it to the corresponding HDMI input that you connected the receiver to. This allows the TV to receive the audio and video signals from the receiver.
Once the HDMI connection is established, the audio and video signals from your DVD/Blu-ray player, gaming console, or any other connected devices will be routed through the receiver and displayed on your TV. The receiver acts as a central hub, allowing you to control the audio and video sources seamlessly.
It’s important to note that HDMI connections are the preferred method for transmitting both audio and video signals, as they offer high-definition quality and support for surround sound formats. However, if your TV or receiver does not have HDMI ports, you can use alternative connections such as optical (TOSLINK) or RCA cables to transmit the audio signal from the receiver to the TV.
Additionally, if you are using a smart TV or streaming device, you can connect it directly to the TV’s HDMI input ports or utilize the receiver’s built-in streaming capabilities. This allows you to access online content and enjoy streaming services through your surround sound system.
By connecting your receiver to the TV, you have completed the essential link between the audio and visual components of your surround sound entertainment system. Sit back, grab your favorite snack, and get ready to immerse yourself in a truly cinematic audio-visual experience.
Step 6: Set Up the Surround Sound Modes
Now that you have successfully connected your speakers and receiver to your TV, it’s time to delve into the settings and optimize the audio performance by configuring the surround sound modes. These modes determine how the audio is processed and distributed across the speakers to create a rich and immersive sound experience.
Here are the steps to set up the surround sound modes:
- Access the setup menu on your receiver. This can usually be done by pressing a dedicated “Setup” or “Menu” button on the remote control.
- Navigate to the audio settings within the setup menu. The exact location and terminology may vary depending on your receiver model.
- Here, you will find options for various surround sound formats, such as Dolby Digital, DTS, or other proprietary surround sound technologies. Select the format that best matches your content and system capabilities.
- Once you have chosen the surround sound format, you can further customize the settings to your liking. Common options include adjusting the speaker levels, setting the size of the speakers (e.g., small, medium, or large), and configuring the crossover frequencies.
- Experiment with different surround sound modes to find the one that suits your preference and content. Some popular modes include “Movie” for a cinematic experience, “Music” for enhanced music playback, and “Game” for immersive gaming audio.
- Take note that some receivers also offer advanced features like virtual surround sound, adaptive audio, or room correction technologies. Explore these options to enhance the audio performance based on your room acoustics and personal preferences.
It’s important to note that the effectiveness of the surround sound modes depends on the quality and encoding of the source material. Certain movies, TV shows, and music albums are specifically mixed and encoded to take advantage of surround sound technologies. For the best results, try to source content that offers native surround sound encoding.
During the setup process, make sure to listen to various audio samples and test different surround sound modes to find the one that delivers the most pleasing and immersive experience for your ears. Take note of any adjustments or tweaks that you make, as these settings can be personalized to your specific preferences.
Once you have configured the surround sound modes to your liking, sit back, relax, and immerse yourself in the captivating audio experience that your surround sound system brings to life. Whether you’re watching movies, gaming, or listening to music, the optimized surround sound modes will enhance your audio journey and transport you to a whole new level of entertainment.
Step 7: Test and Adjust the System
After setting up the surround sound modes, it’s time to test and fine-tune your system to ensure optimal audio performance. Testing and adjusting the system will allow you to make any necessary tweaks, ensuring that you’re getting the most out of your surround sound setup.
Follow these steps to test and adjust your surround sound system:
- Play a variety of audio content, such as movies, TV shows, music, and video games, to experience different soundscapes and genres. This will allow you to evaluate the performance of your system across various media.
- Listen for any imbalances or inconsistencies in the audio output. Pay attention to the clarity of dialogue, the positioning of sound effects, and the overall balance between the different speakers. You should be able to hear a seamless transition as the sound moves from one speaker to another.
- If you notice any issues, go back to the previous steps and make adjustments. This could involve repositioning speakers, adjusting speaker levels, or tweaking the surround sound mode settings. Small changes can make a big impact on the overall audio experience.
- Consider using audio calibration tools or room correction software to further optimize the sound. These tools can help to compensate for room acoustics and fine-tune the audio output to deliver the best possible sound quality.
- Take the time to familiarize yourself with the volume levels of your system. Ensure that it’s set to a comfortable listening level and test its dynamic range by playing audio with both quiet and loud passages. The volume should be balanced across all channels, allowing you to hear details at lower volumes while still maintaining impact at higher volumes.
- Continue to fine-tune and make adjustments based on your personal preferences. Remember that everyone’s hearing and preferences are different, so trust your ears and make changes that enhance your audio experience.
Testing and adjusting your surround sound system may require some patience and experimentation. It’s a process that should be approached iteratively as you listen to different content and fine-tune the settings to achieve the desired audio performance.
Keep in mind that the success of your surround sound system is not solely dependent on the equipment and setup, but also on your room acoustics and personal preferences. Don’t hesitate to seek advice from audio professionals or enthusiasts who can provide additional guidance and insights.
By thoroughly testing and adjusting your system, you’ll be able to fully experience the immersive audio capabilities of your surround sound setup. Enjoy the fruits of your labor and immerse yourself in a world of rich and captivating sound.
Conclusion
Congratulations! You have successfully set up your surround sound system and taken your audio experience to new heights. By following the steps outlined in this guide, you have optimized the layout, chosen the right speakers, positioned them correctly, and connected them to the receiver and TV. Additionally, you have configured the surround sound modes and tested and adjusted your system to ensure optimal audio performance.
Now, you can enjoy the immersive and dynamic audio that your surround sound system delivers. Whether you’re watching a thrilling action movie, playing your favorite video game, or listening to music, you can immerse yourself in a truly captivating audio experience. Every explosion, every note, and every whisper will come to life, transporting you into the heart of the action.
Remember, fine-tuning and personalizing your audio setup is an ongoing process. As you explore different media and preferences, feel free to make adjustments to improve your surround sound experience. Trust your ears and don’t be afraid to experiment with different surround sound modes, speaker placements, and settings to find your audio nirvana.
Lastly, take a moment to appreciate the effort and care you put into setting up your surround sound system. You have transformed your living room into a mini home theater, creating a space where you can escape reality and enter a world of immersive audio and visual entertainment.
Now, sit back, relax, and enjoy the incredible soundscapes that your surround sound system provides. Let every sound envelope you, every rhythm move you, and every word resonate within you. Embrace the power of surround sound and allow yourself to be transported to a whole new level of audio bliss.