Home>Devices & Equipment>Microphone>How To Connect Shure Microphone

Microphone
How To Connect Shure Microphone
Published: February 17, 2024
Learn how to connect a Shure microphone to your device with our step-by-step guide. Get the best sound quality for your recordings and performances.
(Many of the links in this article redirect to a specific reviewed product. Your purchase of these products through affiliate links helps to generate commission for AudioLover.com, at no extra cost. Learn more)
Table of Contents
Introduction
So, you’ve got your hands on a Shure microphone, and you’re ready to harness its power to capture crystal-clear audio. Whether you’re a podcaster, musician, content creator, or public speaker, Shure microphones are renowned for their exceptional sound quality and reliability. In this guide, I’ll walk you through the process of connecting your Shure microphone, ensuring that you unleash its full potential with confidence.
Shure has been a dominant force in the audio industry for nearly a century, consistently delivering top-notch microphones that cater to a wide range of audio applications. From dynamic microphones ideal for live performances to condenser microphones prized for studio recording, Shure offers a diverse selection to suit various needs.
In this comprehensive guide, you’ll learn how to select the right Shure microphone for your specific requirements, set it up correctly, and connect it to a mixer or interface. Additionally, I’ll provide insights on testing your Shure microphone to guarantee optimal performance and troubleshoot common issues that may arise. By the end of this journey, you’ll be well-equipped to make the most of your Shure microphone, ensuring that your voice is heard with unparalleled clarity.
Let’s embark on this adventure together as we dive into the world of Shure microphones and unravel the secrets to seamless connectivity and exceptional audio reproduction. Whether you’re a seasoned audio professional or a newcomer to the realm of microphones, this guide will equip you with the knowledge and skills needed to maximize the potential of your Shure microphone.
Choosing the Right Shure Microphone
When it comes to selecting the perfect Shure microphone for your specific needs, it’s essential to consider the intended application and the unique characteristics of each microphone type. Shure offers a diverse range of microphones, each tailored to excel in particular scenarios. Let’s explore the key factors to consider when choosing the right Shure microphone:
- Dynamic or Condenser: Shure manufactures both dynamic and condenser microphones, each with distinct attributes. Dynamic microphones are rugged and versatile, making them well-suited for live performances and recording loud sound sources. On the other hand, condenser microphones are known for their sensitivity and extended frequency response, making them ideal for studio recording and capturing nuanced audio details.
- Directionality: Consider the directional characteristics of the microphone. For instance, if you require a microphone that captures sound from all directions, an omnidirectional microphone would be suitable. However, if you need to isolate the sound source and minimize background noise, a unidirectional microphone, such as a cardioid or supercardioid, would be more appropriate.
- Frequency Response: Evaluate the frequency response of the microphone to ensure it aligns with the audio you intend to capture. Some microphones are tailored for vocals, emphasizing the midrange frequencies, while others offer a flatter response suitable for capturing a wide range of instruments and sound sources.
- Application-Specific Features: Shure microphones often come with features tailored to specific applications. For example, microphones designed for vocal performances may incorporate built-in pop filters to reduce plosive sounds, while those intended for instrument miking may feature specialized mounting options for easy placement.
By carefully considering these factors and understanding the unique characteristics of each Shure microphone, you can make an informed decision that aligns with your specific audio requirements. Whether you’re aiming to amplify your voice on stage, capture intricate details in the studio, or record podcasts with pristine clarity, Shure offers a microphone designed to meet your needs with precision and excellence.
Setting Up the Shure Microphone
Before diving into the technical aspects of connecting your Shure microphone, it’s crucial to ensure that you set it up correctly to achieve optimal performance. Here’s a step-by-step guide to setting up your Shure microphone:
- Positioning the Microphone: Begin by positioning the microphone appropriately for the intended sound source. For vocal performances, place the microphone at a comfortable distance from the performer, ensuring that it captures the voice clearly without causing discomfort. When miking instruments, experiment with placement to achieve the desired tonal characteristics.
- Mounting and Stability: If your Shure microphone requires mounting, ensure that it is securely attached to a stand or mounting apparatus to prevent unintended movement. Stability is crucial to avoid unwanted vibrations or shifts during recording or performances.
- Pop Filter and Windscreen: Consider using a pop filter or windscreen if your microphone is susceptible to plosive sounds or wind noise. These accessories can significantly improve the audio quality by minimizing unwanted sonic artifacts.
- Connection Considerations: Depending on the specific model of your Shure microphone, familiarize yourself with any unique connection requirements or considerations. Some microphones may have specific power supply needs or connectivity options that warrant attention.
By following these steps, you can ensure that your Shure microphone is set up optimally, ready to deliver exceptional audio quality in diverse scenarios. Whether you’re preparing for a live performance, studio recording session, or podcasting endeavor, proper microphone setup is the foundation for capturing pristine sound with clarity and precision.
Connecting the Shure Microphone to a Mixer or Interface
Once your Shure microphone is positioned and ready, the next crucial step is to connect it to a mixer or audio interface to harness its audio signal and integrate it into your recording or sound reinforcement setup. Here’s a comprehensive guide to connecting your Shure microphone:
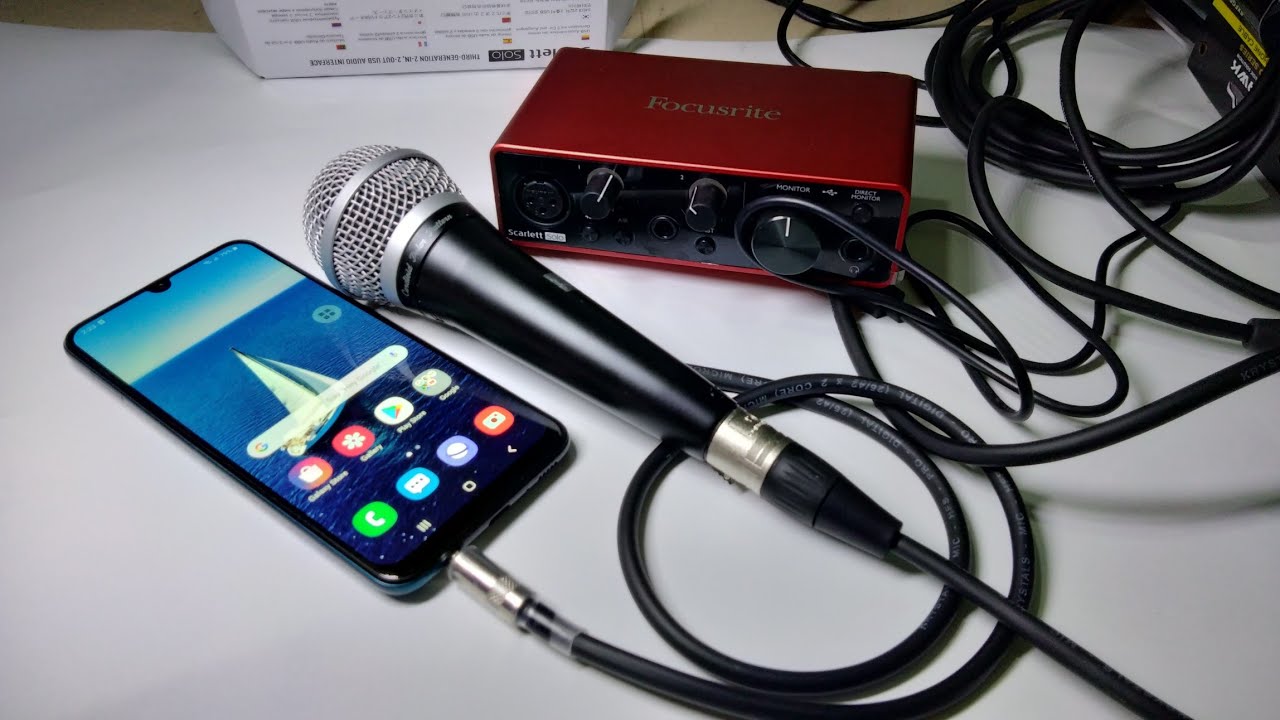
- Identify Input Types: Determine the input types available on your mixer or interface. Common input types include XLR, 1/4-inch TRS, and 3.5mm jacks. Shure microphones typically utilize XLR connections for balanced audio signal transmission.
- Selecting Cables: Choose the appropriate cables to connect your Shure microphone to the mixer or interface. For XLR connections, ensure that you have high-quality XLR cables with the necessary length to reach the input on your mixer or interface.
- Phantom Power: If you are using a condenser microphone from Shure, verify whether phantom power is required. Condenser microphones often necessitate phantom power for proper operation. Ensure that the mixer or interface can supply phantom power if needed.
- Connecting the Microphone: With the appropriate cable in hand, connect the output of your Shure microphone to the designated input on the mixer or interface. Ensure a secure connection to prevent signal interruptions or audio artifacts.
- Setting Input Levels: Once the microphone is connected, adjust the input levels on the mixer or interface to accommodate the audio signal from the Shure microphone. Aim for an optimal level that captures the audio accurately without introducing distortion or noise.
By following these steps, you can seamlessly integrate your Shure microphone into your audio setup, whether you’re preparing for a live performance, studio recording session, or podcast production. The correct connection and configuration of your Shure microphone ensure that its exceptional audio quality is faithfully transmitted and captured, setting the stage for remarkable sonic experiences.
Testing the Shure Microphone
After setting up and connecting your Shure microphone, it’s essential to conduct thorough testing to ensure that it performs as expected and delivers the desired audio quality. Testing your Shure microphone allows you to identify any potential issues, fine-tune its settings, and validate its suitability for the intended application. Here’s a comprehensive approach to testing your Shure microphone:
- Sound Check: Initiate a sound check to verify that the Shure microphone is capturing audio accurately. Speak or perform into the microphone and listen to the output through headphones or studio monitors. Assess the clarity, tonal characteristics, and overall fidelity of the captured sound.
- Dynamic Range Evaluation: Test the microphone’s ability to capture both soft and loud sounds. Speak softly and then project your voice loudly into the microphone to gauge its dynamic range and sensitivity. Ensure that the microphone accurately reproduces the nuances of your voice or instrument without distortion.
- Background Noise Assessment: Evaluate the microphone’s performance in minimizing background noise and unwanted sounds. Create controlled ambient noise and assess how effectively the microphone isolates the desired sound source. This is particularly crucial for live performances and studio recording where pristine audio capture is paramount.
- Frequency Response Analysis: Test the microphone across its frequency range to ensure that it faithfully reproduces the entire spectrum of audio frequencies. Play or sing various musical notes and analyze how the microphone captures different frequencies, ensuring a balanced and accurate representation of the sound.
By meticulously testing your Shure microphone, you can gain confidence in its performance and make any necessary adjustments to optimize its settings for specific applications. Whether you’re preparing for a live event, studio recording session, or content creation, thorough testing ensures that your Shure microphone delivers exceptional audio quality, setting the stage for captivating and immersive sonic experiences.
Troubleshooting Common Issues
While Shure microphones are renowned for their reliability and exceptional performance, encountering occasional issues is not uncommon. Understanding how to troubleshoot common problems ensures that you can swiftly address any challenges that may arise, allowing you to continue capturing pristine audio with confidence. Here are some common issues and their troubleshooting steps:
- Intermittent or No Audio Output: If you experience intermittent audio or no output from the microphone, first check the cable connections for any looseness or damage. Ensure that the microphone is securely connected to the mixer or interface, and consider testing with an alternate cable to rule out potential cable issues.
- Excessive Background Noise: If the microphone is capturing excessive background noise, assess the environment for sources of unwanted sound. Consider adjusting the microphone’s positioning and utilizing directional characteristics to minimize ambient noise. Additionally, verify that the microphone’s sensitivity settings are appropriate for the environment.
- Distorted Audio: Distorted audio can result from input levels that are too high, causing the microphone to overload. Adjust the input levels on the mixer or interface to ensure that the audio signal from the microphone remains within a suitable range. Additionally, verify that any built-in pads or attenuators on the microphone are not engaged unnecessarily.
- Phantom Power Issues: For condenser microphones requiring phantom power, ensure that the mixer or interface is supplying the necessary phantom power. Verify that the phantom power switch is activated if applicable. If the microphone still does not function, test it with a different mixer or interface to isolate potential power supply issues.
By addressing these common issues with systematic troubleshooting steps, you can swiftly resolve challenges that may arise during microphone use. Additionally, referring to the Shure microphone’s user manual for specific troubleshooting guidance and reaching out to Shure’s customer support can provide valuable assistance in resolving more complex issues. Armed with troubleshooting knowledge, you can maintain the seamless operation of your Shure microphone and continue producing exceptional audio experiences.
Conclusion
Congratulations! You’ve embarked on a journey to unlock the full potential of your Shure microphone, gaining insights into selecting the right microphone, setting it up, connecting it to a mixer or interface, testing its performance, and troubleshooting common issues. As you venture into the realm of audio capture and reproduction, armed with the knowledge and skills imparted in this guide, you are well-equipped to harness the exceptional capabilities of your Shure microphone with confidence and finesse.
By understanding the unique characteristics of Shure microphones and their diverse applications, you have gained the ability to make informed decisions when selecting the perfect microphone for your specific needs. Whether you are a vocalist, instrumentalist, content creator, or audio professional, the right Shure microphone can elevate your sonic endeavors to new heights, capturing the essence of your sound with unparalleled clarity and fidelity.
As you set up and connect your Shure microphone, positioning it with precision and integrating it seamlessly into your audio setup, you lay the foundation for capturing pristine sound that captivates and resonates. Thorough testing allows you to validate the performance of your Shure microphone, ensuring that it faithfully reproduces the nuances of your voice or instruments with exceptional accuracy and detail.
Furthermore, by familiarizing yourself with common troubleshooting steps, you are empowered to swiftly address any challenges that may arise, maintaining the seamless operation of your Shure microphone and preserving the integrity of your audio productions.
Armed with this comprehensive guide, you are poised to embark on a sonic journey filled with captivating performances, immersive recordings, and compelling audio content. The world of Shure microphones awaits your creative expression, and with the knowledge gained from this guide, you are primed to make a resounding impact through exceptional audio experiences.
Now, go forth and let your voice be heard, your music be felt, and your stories be told with the unparalleled clarity and fidelity that Shure microphones are renowned for. May your sonic adventures be filled with boundless creativity and awe-inspiring audio excellence!