Home>Devices & Equipment>Microphone>How To Hook Up A Microphone To A Computer
Microphone
How To Hook Up A Microphone To A Computer
Published: February 17, 2024
Learn how to easily connect a microphone to your computer and start recording or chatting with high-quality sound. Find step-by-step instructions and tips.
(Many of the links in this article redirect to a specific reviewed product. Your purchase of these products through affiliate links helps to generate commission for AudioLover.com, at no extra cost. Learn more)
Table of Contents
Introduction
Introduction
Are you looking to enhance your audio recording capabilities for podcasts, voiceovers, video calls, or music production? Understanding how to connect a microphone to your computer is a fundamental skill for anyone seeking to improve the quality of their audio input. Whether you're a content creator, musician, or remote worker, having a reliable microphone setup can significantly elevate the clarity and professionalism of your audio recordings and communications.
In this comprehensive guide, we'll walk you through the process of connecting a microphone to your computer, covering everything from selecting the right microphone for your needs to adjusting the settings for optimal performance. By the end of this article, you'll have the knowledge and confidence to seamlessly integrate a microphone into your computer setup and leverage its full potential for various applications.
Let's dive into the world of microphones and unravel the steps to seamlessly hooking up a microphone to your computer. Whether you're a novice or a tech enthusiast, this guide will equip you with the essential know-how to make the most of your microphone setup.
Choosing the Right Microphone
When it comes to selecting a microphone for your computer, it’s crucial to consider the specific use case and the environment in which it will be utilized. The market offers a wide array of microphone options, each tailored to different recording scenarios and preferences. Here are some key factors to keep in mind when choosing the right microphone for your needs:
- Microphone Type: Determine the type of microphone that best suits your requirements. For general voice recording and video calls, a USB microphone offers convenience and ease of use. On the other hand, for professional audio recording, a condenser microphone might be more suitable due to its sensitivity and broader frequency response.
- Directionality: Consider the microphone’s directional characteristics. For solo recordings or clear audio capture in a controlled environment, a cardioid microphone is a popular choice. If you need to capture sound from multiple directions or conduct interviews, an omnidirectional microphone may be more appropriate.
- Connection Interface: Assess the compatibility of the microphone with your computer. USB microphones are plug-and-play devices, making them accessible for most users. Alternatively, XLR microphones require an audio interface or mixer for connection, offering greater flexibility and professional-grade audio inputs.
- Budget and Quality: Balance your budget with the desired audio quality. While high-end microphones deliver exceptional sound reproduction, there are budget-friendly options that offer impressive performance for everyday use.
By considering these factors, you can narrow down the options and choose a microphone that aligns with your recording objectives and technical setup. Whether you prioritize convenience, audio fidelity, or versatility, the right microphone can significantly elevate your audio recording experience.
Connecting the Microphone to the Computer
Once you’ve selected the ideal microphone for your needs, the next step is to connect it to your computer. The process may vary depending on the type of microphone and the connectivity options available. Here’s a comprehensive guide to connecting different types of microphones to your computer:
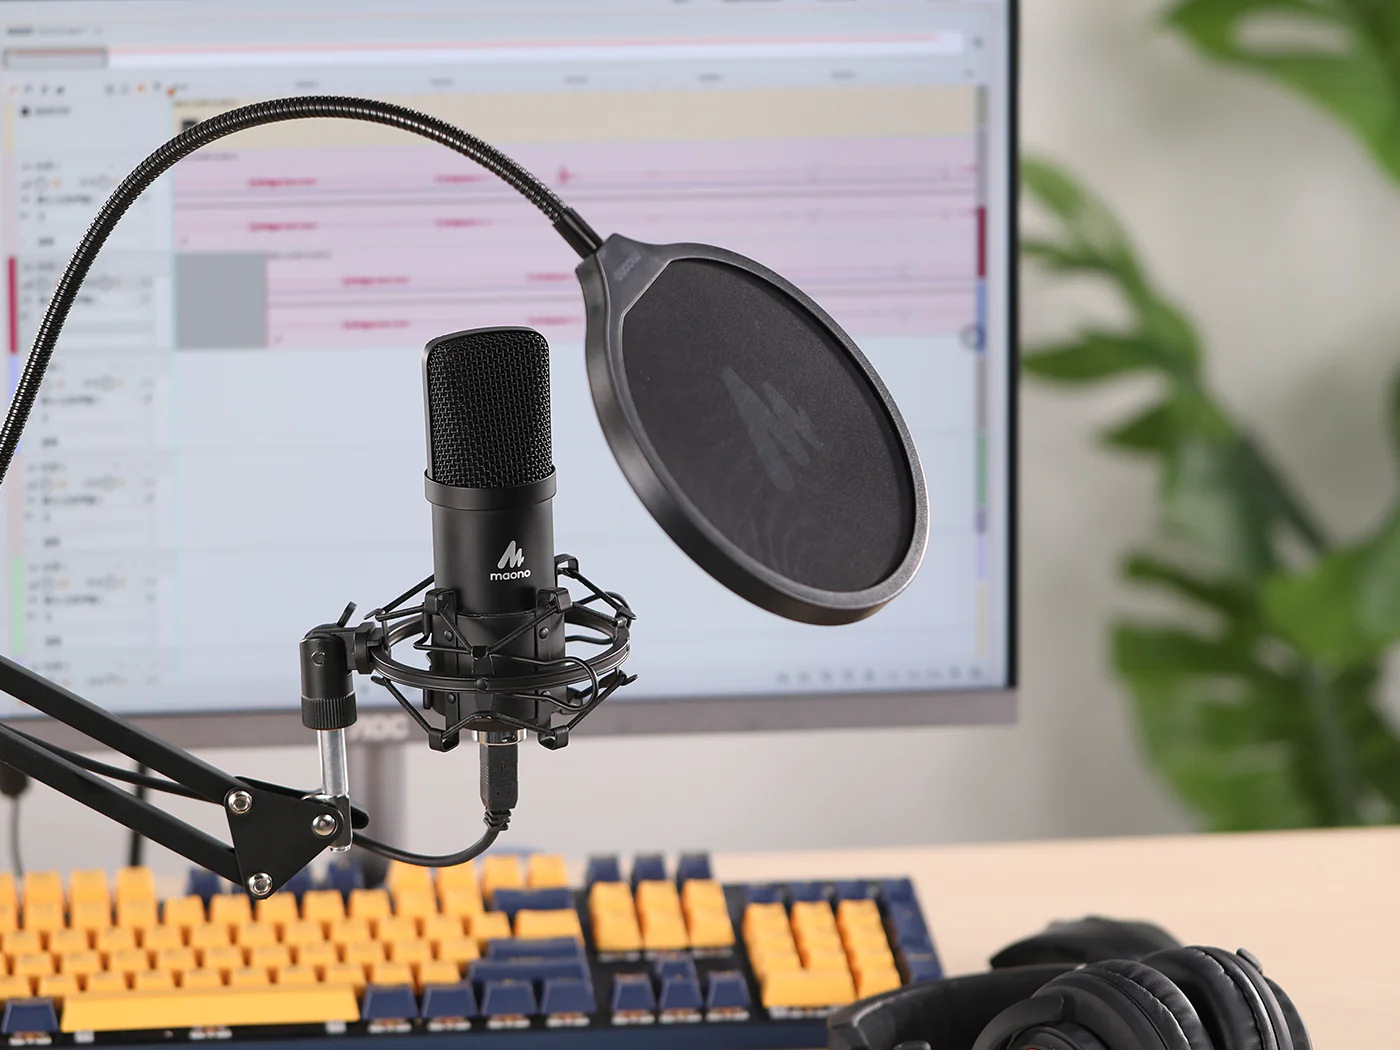
USB Microphones:
If you’ve opted for a USB microphone, the connection process is remarkably straightforward. Simply locate an available USB port on your computer and insert the microphone’s USB cable into it. Most modern operating systems automatically detect and configure the USB microphone, recognizing it as the default audio input device. Once connected, you can proceed to adjust the microphone settings to optimize its performance.
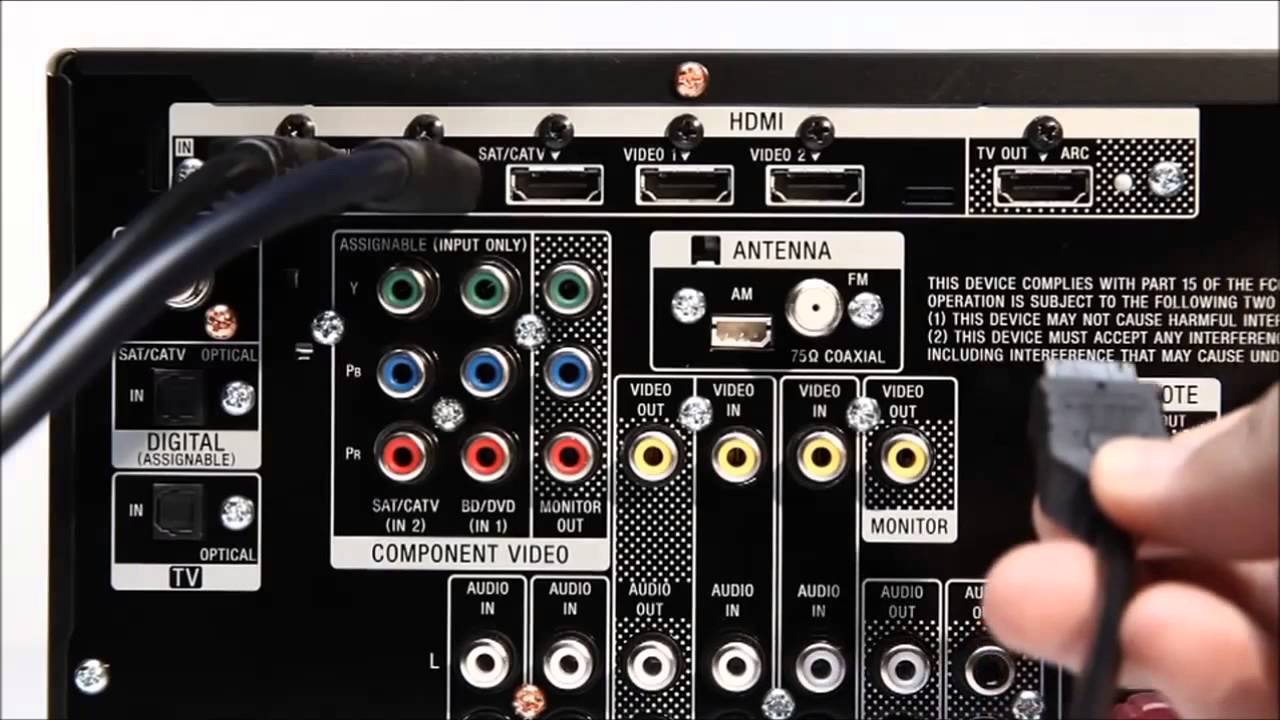
XLR Microphones:
For XLR microphones, the connection entails an additional step due to their analog nature. To connect an XLR microphone to your computer, you’ll need an audio interface or a mixer with an XLR input. Begin by plugging the XLR cable into the microphone and the other end into the audio interface or mixer. Subsequently, connect the audio interface to your computer using a USB or Thunderbolt cable, depending on the interface’s connectivity options. This setup allows the analog signal from the microphone to be converted into a digital format that your computer can process.
Regardless of the microphone type, it’s essential to secure the connections firmly to prevent signal interference or audio dropouts during recordings. Once the physical connections are established, you can proceed to configure the microphone settings on your computer to ensure optimal audio input and compatibility with your recording software or communication applications.
By following these steps, you can seamlessly connect your chosen microphone to your computer, setting the stage for high-quality audio capture and communication.
Adjusting Microphone Settings
After connecting the microphone to your computer, it’s essential to fine-tune the settings to optimize its performance and ensure that it integrates seamlessly with your recording or communication applications. Here are the key aspects to consider when adjusting your microphone settings:
Operating System Settings:
Begin by accessing your computer’s sound settings, which can typically be found in the system preferences or control panel. Locate the “Sound” or “Audio” settings and navigate to the input devices section. Here, you can select your connected microphone from the list of available input devices. Adjust the input volume or gain to achieve an optimal level without introducing distortion or background noise.
Microphone Properties:
If you’re using a Windows-based system, you can access the microphone properties by right-clicking on the speaker icon in the taskbar and selecting “Open Sound settings.” Under the “Input” section, click on “Device properties” to access additional settings such as microphone enhancements, levels, and spatial sound options. For Mac users, the microphone properties can be accessed by clicking on the Apple menu, selecting “System Preferences,” and navigating to the “Sound” settings.
Recording Software Configuration:
If you’re using specialized recording software for audio production or podcasting, it’s crucial to configure the microphone settings within the application. Access the preferences or settings menu in your recording software and select the input device as your connected microphone. Depending on the software, you may have access to advanced settings such as equalization, noise reduction, and input monitoring, allowing you to tailor the microphone’s performance to your specific requirements.
Communication Applications:
For video conferencing, online meetings, or voice calls, it’s important to adjust the microphone settings within the communication applications you use, such as Zoom, Skype, or Microsoft Teams. These applications typically feature settings to adjust microphone sensitivity, noise suppression, and echo cancellation, ensuring clear and uninterrupted communication during online interactions.
By meticulously adjusting the microphone settings at both the system and application levels, you can harness the full potential of your microphone, delivering crisp and professional-grade audio for your recordings, calls, and creative endeavors.
Testing the Microphone
Before diving into your intended audio recording or communication tasks, it’s crucial to conduct a thorough microphone test to ensure that it’s functioning optimally and delivering the expected audio quality. Testing the microphone involves verifying its connectivity, assessing the audio input levels, and confirming its compatibility with your recording or communication applications. Here’s a step-by-step guide to testing your microphone:
Physical Inspection:
Begin by visually inspecting the physical connections of your microphone. Ensure that the USB or XLR cable is securely plugged into the computer and the microphone, with no loose connections or visible damage. If you’re using an XLR microphone with an audio interface or mixer, confirm that all connections are secure and that the audio interface is powered on and recognized by your computer.
System Sound Settings:
Access your computer’s sound settings and navigate to the input devices section. Select your connected microphone and speak into it at a normal volume. Observe the input level meters to ensure that the microphone is registering sound. Adjust the input volume or gain as needed to achieve an optimal level without distorting the audio signal. If your computer features a sound test or microphone setup wizard, consider running these utilities to further fine-tune the microphone settings.
Recording Software Test:
If you’re using specialized recording software for audio production, launch the application and create a new recording or track. Speak into the microphone while monitoring the input levels within the software. Verify that the microphone is capturing sound accurately and that the recorded audio exhibits the desired clarity and fidelity. Experiment with different microphone settings within the recording software to familiarize yourself with the available adjustments and their impact on the audio output.
Communication Application Test:
For communication purposes, initiate a test call or video conference within your preferred communication application. Verify that the microphone is selected as the default audio input device and engage in a brief conversation or audio check with a friend or colleague. Use this opportunity to assess the microphone’s performance in a real-time communication scenario, ensuring that your voice is clear and intelligible to the other participants.
Audio Playback and Monitoring:
After conducting the microphone tests, review the recorded audio or playback from your communication application to evaluate the overall sound quality. Pay attention to any background noise, distortion, or irregularities in the audio capture. If necessary, make further adjustments to the microphone settings based on the test results, aiming to achieve an optimal balance between audio clarity and minimal interference.
By meticulously testing your microphone across various scenarios and applications, you can identify and address any potential issues, guaranteeing a seamless and professional audio experience for your recording, communication, and creative endeavors.
Conclusion
Mastering the art of connecting and configuring a microphone for your computer opens up a world of possibilities for content creation, communication, and audio production. By carefully selecting the right microphone to suit your specific needs and environment, you lay the foundation for capturing pristine audio that resonates with clarity and depth.
Whether you opt for the convenience of a USB microphone or the versatility of an XLR setup, the process of connecting the microphone to your computer and adjusting its settings is an empowering journey that culminates in a seamless and immersive audio experience. The ability to fine-tune the microphone settings at both the system and application levels empowers you to tailor the audio capture to your exact requirements, whether you’re recording podcasts, conducting video calls, or producing music.
Through meticulous testing and validation of the microphone’s performance, you gain confidence in its reliability and the assurance that it will consistently deliver exceptional audio quality across diverse scenarios. The microphone becomes an extension of your creative expression, faithfully capturing your voice or instruments with precision and authenticity.
As you embark on your microphone integration journey, remember that experimentation and exploration are key to unlocking the full potential of your audio setup. Embrace the process of testing different settings, recording environments, and applications, allowing your microphone to adapt and evolve alongside your creative endeavors.
Ultimately, the seamless integration of a microphone with your computer transcends technical proficiency; it becomes a conduit for self-expression, collaboration, and storytelling. Whether you’re a podcaster, musician, content creator, or remote professional, the ability to harness the power of a well-connected and finely-tuned microphone enriches your audio journey and elevates the impact of your voice in the digital realm.
So, as you embark on your microphone connection and configuration odyssey, remember that the journey is as enriching as the destination. Embrace the nuances of audio capture, celebrate the art of meticulous adjustments, and revel in the transformative potential of a well-connected microphone.