Home>Devices & Equipment>Radio>How To Remove Radio From Car
Radio
How To Remove Radio From Car
Published: November 10, 2023
Learn how to easily remove the radio from your car with our step-by-step guide. Upgrade your car stereo and enjoy a better audio experience.
(Many of the links in this article redirect to a specific reviewed product. Your purchase of these products through affiliate links helps to generate commission for AudioLover.com, at no extra cost. Learn more)
Table of Contents
Introduction
Removing a radio from a car might seem like a daunting task, but with the right knowledge and preparation, it can be a straightforward process. Whether you want to upgrade your car’s audio system or need to fix a malfunctioning radio, knowing how to remove it properly is essential.
Before we delve into the step-by-step guide, it’s important to note that this article assumes a basic understanding of car mechanics and electrical systems. If you’re not comfortable with these aspects, it’s always recommended to consult a professional to ensure a safe and successful removal process.
Removing a radio involves disconnecting the battery, removing the trim panel, detaching the radio unit, disconnecting the wiring harness, and finally, removing the antenna. Each step requires careful attention and precision, as the radio is an integral part of your car’s electrical system.
In this article, we will guide you through the process, providing detailed instructions and tips to help you successfully remove the radio from your car. By following these steps, you can avoid potential damage to your vehicle and ensure a smooth removal process.
It’s important to mention that radio removal procedures can vary between different car makes and models. Therefore, always consult your car’s manual or seek professional advice if you’re unsure about specific details related to your vehicle.
Now that you understand the importance of proper radio removal and the need for caution, let’s move on to the first step – preparing for the removal process.
Preparing for Removal
Before you begin the process of removing the radio from your car, it’s essential to gather the necessary tools and ensure a safe working environment. Here are the steps to prepare for the removal process:
- Gather the Tools: To effectively remove the radio, you will need a set of common tools such as a screwdriver (both Phillips and flathead), trim panel removal tools, and possibly a socket wrench or pliers. It’s advisable to have these tools handy before you start the process.
- Find a Suitable Work Area: Locate a clean and well-lit area to work on your car. This will make it easier to see and access the radio and its components. Make sure the area is free from clutter to avoid losing any small parts during the removal process.
- Read the Car Manual: Consult your car’s manual or do some research to familiarize yourself with the specific radio removal process for your particular car model. Every car has slight variations, so understanding the unique steps and precautions for your vehicle is crucial.
- Disconnect the Power: Before you start working on the radio, ensure that the car’s ignition is completely off and the keys are removed from the ignition switch. This step is essential to prevent any accidental electrical short circuits or damage during the removal process.
By taking the time to gather the necessary tools, selecting a suitable work area, familiarizing yourself with your car model’s specific instructions, and disconnecting the power, you are well-prepared to begin the radio removal process. These preliminary steps will help ensure a smoother and safer removal process.
Disconnecting the Battery
Before you start removing the radio from your car, it is crucial to disconnect the battery to avoid any potential electrical mishaps. Here is a step-by-step guide on how to disconnect the battery:
- Locate the Battery: The battery is usually located in the engine compartment or in the trunk of the car. If you’re unsure about the battery’s location, refer to your car’s manual to find the exact location.
- Ensure Safety: It’s important to wear protective gloves and safety goggles when working with the battery. This will protect you from any potential battery acid spills or accidental electrical shocks.
- Identify the Battery Terminals: The battery terminals are metal clamps that connect the battery to the car’s electrical system. There are two terminals – the positive terminal (marked with a “+” sign) and the negative terminal (marked with a “-” sign).
- Disconnect the Negative Terminal: Using an appropriate-sized wrench or a socket wrench, loosen the nut on the negative terminal. Once loose, carefully remove the cable from the terminal and tuck it away from the battery to prevent accidental contact.
- Disconnect the Positive Terminal: Repeat the same process as above for the positive terminal. Loosen the nut, remove the cable, and tuck it away from the battery.
- Wait for a Few Minutes: After disconnecting the battery, it is recommended to wait for a few minutes before proceeding with the radio removal. This allows any residual electrical charge to dissipate, reducing the risk of electrical shock.
Disconnecting the battery ensures that there is no power flowing to the radio or any other electrical components in the car. This step is crucial as it prevents the risk of electrical shock and damage to the radio or other sensitive electronics.
Remember to handle the battery terminals with care and avoid touching both terminals simultaneously to prevent a short circuit. Once the battery is disconnected, you can proceed with removing the trim panel to access the radio unit.
Removing the Trim Panel
Once you have safely disconnected the battery, the next step in removing the radio from your car is to remove the trim panel. The trim panel is the covering that surrounds the radio unit and other controls. Here’s how you can remove the trim panel:
- Identify the Attachments: Examine the trim panel carefully to identify any screws, clips, or other attachments that secure it in place. These attachments may be located around the edges of the panel or hidden behind small covers or panels.
- Remove the Screws: If there are screws holding the trim panel in place, use an appropriate screwdriver to remove them. Place the screws in a safe location to avoid losing them.
- Release the Clips: If the trim panel is held in place by clips, use a trim panel removal tool or a flathead screwdriver wrapped in tape to avoid scratching the surrounding surfaces. Insert the tool between the panel and the dashboard, and gently pry the panel away. Work your way around the panel, releasing the clips one by one.
- Disconnect Electrical Connections (if applicable): In some cases, there may be electrical connections running to the trim panel. If you see any wires or connectors, carefully detach them by pressing down on any release tabs or gently pulling them apart.
- Set Aside the Trim Panel: Once all attachments and electrical connections are disconnected, carefully remove the trim panel from the dashboard. Take care not to force or pry too forcefully, as this can cause damage.
Removing the trim panel allows you to access the radio unit and other components behind it. Keep in mind that the process may vary slightly depending on the make and model of your car. Consult your car’s manual if you encounter any difficulties or if the trim panel removal process is not as described here.
With the trim panel successfully removed, you can now proceed with detaching the radio unit from the car’s dashboard.
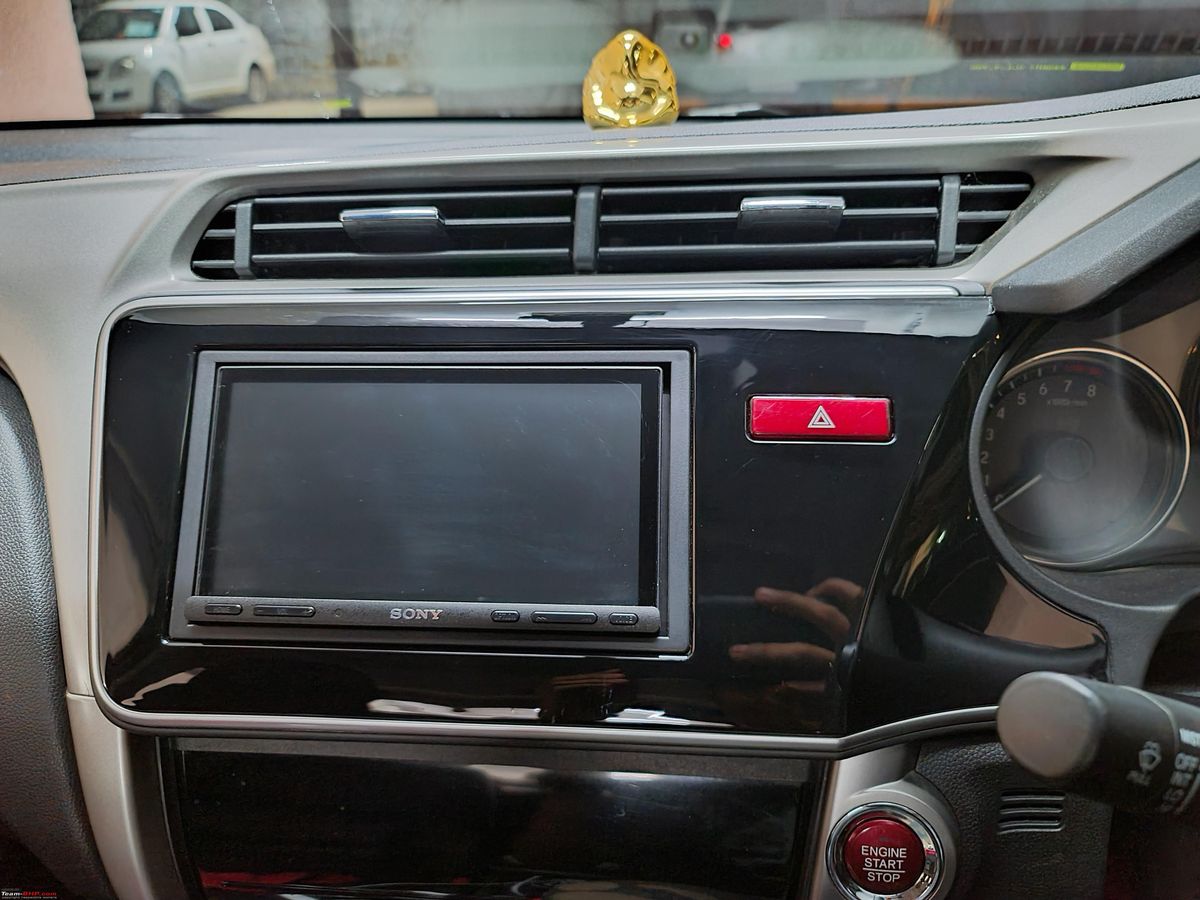
Detaching the Radio
Now that you have removed the trim panel, it’s time to detach the radio unit from the car’s dashboard. Here are the steps to follow:
- Locate the Radio: The radio unit is typically situated in the center of the car’s dashboard. It may be secured with screws, brackets, or clips, depending on your car model.
- Identify the Mounting Method: Look for any screws or bolts that secure the radio unit. These may be located on the sides, top, or bottom of the unit. Use a screwdriver or socket wrench to loosen and remove these screws.
- Release the Brackets or Clips: In some cases, the radio unit may be held in place by brackets or clips. Use a trim panel removal tool or a flathead screwdriver wrapped in tape to release these brackets or clips. Carefully pry them apart, allowing the radio unit to slide out.
- Gently Pull Out the Radio: Once the screws or brackets are removed, gently pull the radio unit towards you, slowly sliding it out of the dashboard. Be mindful of any wires or connections that may be attached to the back of the radio.
- Support the Radio: As you pull out the radio, provide support with your other hand to prevent any strain on the wires or connections. Place the radio unit on a soft cloth or surface to avoid scratching or damaging it.
During the process, be mindful of any wiring harnesses that are connected to the back of the radio unit. It’s important not to yank or forcefully disconnect these connections, as it can cause damage. The next step will guide you on how to properly disconnect the wiring harnesses from the radio unit.
Keep in mind that the specific steps to detach the radio unit may vary depending on your car model. Refer to your car’s manual or seek professional guidance if you encounter any difficulties or variations in the removal process.
Disconnecting the Wiring Harness
Once you have detached the radio unit from the car’s dashboard, the next step is to disconnect the wiring harnesses that are connected to the back of the radio. These harnesses provide the necessary power and signal connections for the radio to function properly. Here’s how you can disconnect the wiring harnesses:
- Inspect the Wiring Harnesses: Take a close look at the back of the radio unit and identify the wiring harnesses. Depending on your car model and radio unit, there may be one or multiple harnesses.
- Identify the Connectors: Each wiring harness will have a connector that plugs into the corresponding socket on the radio unit. These connectors might have small tabs or release buttons that need to be pressed to disengage the connection.
- Press the Release Tabs (if applicable): If there are release tabs or buttons on the connectors, press them gently while pulling the connector away from the radio unit. This will release the connection and allow you to remove the wiring harness.
- Gently Remove the Harnesses: With the release tabs pressed, carefully pull the wiring harnesses away from the radio unit. Ensure that you’re pulling straight back to avoid any damage to the connectors or wiring.
- Repeat for Additional Harnesses: If your radio unit has multiple wiring harnesses, repeat the same process for each one until all the harnesses are disconnected from the radio unit.
It’s important to handle the wiring harnesses with care, as they contain delicate wires and connectors. Avoid pulling on the wires themselves, as this can cause damage or create loose connections. Take note of the specific connectors and their positions to ensure easy reinstallation or replacement of the radio unit in the future.
Once all the wiring harnesses are disconnected, you have successfully disconnected the radio unit from the car’s electrical system. The next step will guide you on how to remove the antenna connection from the radio unit.
Note that the process of disconnecting the wiring harnesses may vary slightly depending on your car model and radio unit. Consult your car’s manual or seek professional advice if you encounter any difficulties or variations in the disconnection process.
Removing the Antenna
After disconnecting the wiring harnesses from the radio unit, the next step in removing the radio from your car is to remove the antenna connection. The antenna is responsible for receiving radio signals and is often located on the exterior of the car. Here’s how you can remove the antenna:
- Locate the Antenna: The antenna typically protrudes from the roof or fender of the car. It may be a retractable or fixed antenna depending on your car model.
- Identify the Antenna Connector: Examine the base of the antenna where it connects to the car. You should see a connector that attaches the antenna cable to the car’s antenna system.
- Unscrew or Unclip the Antenna Connector: Depending on the type of connector, you will either need to unscrew it (if it’s a threaded connector) or unclip it (if it’s a snap-on or push-on connector). Use the appropriate method to disconnect the antenna cable from the car’s antenna system.
- Gently Remove the Antenna: Once the connector is detached, carefully pull the antenna out of its mounting hole or socket. Take care not to bend or damage the antenna during removal.
- Set Aside the Antenna: Place the disconnected antenna in a safe location where it won’t get damaged or tangled. You may need to reuse the antenna or install a new one when installing a new radio unit.
Removing the antenna allows for a clean removal of the radio unit from the car. It ensures that there are no remaining connections or obstructions when you’re ready to install a new radio or perform any repairs.
It’s worth noting that if you plan to reinstall the radio unit or install a new one, you will need to connect the new unit’s antenna cable to the car’s antenna system using the appropriate connector. Make sure to match the antenna connector type and ensure a secure connection for optimal reception.
Now that you have successfully removed the radio unit and the antenna, you are ready to finalize the removal process and conclude this procedure.
Finalizing the Removal
Now that you have completed the necessary steps to remove the radio unit from your car, it’s time to finalize the removal process. Here are a few important steps to ensure everything is in order:
- Inspect the Dashboard: Take a quick look at the area where the radio unit was installed. Check for any loose wires, damaged connectors, or debris that may have accumulated during the removal process. Clean the area if necessary.
- Secure the Wiring Harnesses: Properly organize the wiring harnesses that were disconnected from the radio unit. Ensure they are neatly tucked away and secured using zip ties or clips. This prevents them from interfering with other components and reduces the risk of damage.
- Store the Radio Unit: If you plan on reinstalling the same radio unit or having it repaired, store it in a safe place where it won’t be damaged. Keep it protected from dust, moisture, and extreme temperatures to maintain its integrity.
- Consider Upgrading or Replacement: If you removed the radio unit to upgrade or replace it, now is the time to research and choose a suitable replacement. Consider factors such as compatibility with your car model, desired features, and budget. Consult a professional for advice if needed.
- Consult Professional Installation (if necessary): If you’re uncertain about the installation of a new radio unit or lack the technical expertise, it’s advisable to seek professional assistance. Proper installation ensures optimal performance and prevents any potential damage to your car’s electrical system.
Remember, the removal of the radio unit may vary based on your car’s make and model. Always consult your car’s manual for guidance specific to your vehicle and seek professional advice if you encounter any difficulties during the removal or installation process.
By following these steps and taking the necessary precautions, you can successfully remove the radio unit from your car. Whether you’re upgrading your car’s audio system or addressing a faulty radio, this knowledge empowers you to make the necessary changes and enhancements to your car’s entertainment experience.
Conclusion
Removing a radio from a car may seem like a complex task, but with the right knowledge and preparation, it can be accomplished successfully. By following the step-by-step guide outlined in this article, you can safely remove the radio unit from your car and make way for upgrades or repairs.
Remember to always prioritize safety during the removal process. Disconnecting the battery and wearing protective gear ensures that you avoid any electrical hazards. Additionally, gathering the necessary tools and preparing a suitable work area creates a conducive environment for a smooth removal process.
Throughout the process, it is important to take note of the specific instructions for your car model and consult your car’s manual if needed. Different cars may have variations in the radio removal process, so it’s essential to have the right information for your specific vehicle.
As you remove the trim panel, detach the radio unit, disconnect the wiring harnesses, and remove the antenna, make sure to handle the components with care. This will minimize the risk of damage and allow for an easier and more efficient reinstallation process if necessary.
Once the radio unit is successfully removed, take the time to inspect the dashboard, secure the wiring harnesses, and store the radio unit properly. If you plan on upgrading or replacing the radio, research your options and consider seeking professional installation to ensure optimal results.
Remember, if you are not comfortable or confident in removing the radio unit yourself, it is always recommended to consult a professional. They have the expertise and knowledge to perform the task efficiently and without causing any damage.
By following the steps outlined in this article, you can confidently remove the radio from your car and proceed with any upgrades or repairs. Take your time, exercise caution, and enjoy the process of enhancing your car’s audio experience.