Home>Devices & Equipment>Turntable>How To Build Turntable

Turntable
How To Build Turntable
Modified: January 22, 2024
Learn how to build a turntable from scratch and enjoy high-quality sound at home. Expert tips and step-by-step instructions.
(Many of the links in this article redirect to a specific reviewed product. Your purchase of these products through affiliate links helps to generate commission for AudioLover.com, at no extra cost. Learn more)
Table of Contents
Introduction
Welcome to the world of turntables, where the rich and warm sound of vinyl records still holds a special place in the hearts of music enthusiasts. While there are many pre-built turntables available on the market, building your own turntable can be a rewarding and fulfilling experience. Not only do you get to customize every aspect of your turntable, but you also gain a deeper understanding of how it functions.
In this article, we will guide you through the step-by-step process of building your own turntable. From gathering the materials and tools to testing and adjusting the final product, we will cover everything you need to know to embark on this DIY journey.
Building your own turntable may seem like a daunting task, but with a little patience and attention to detail, it can be an enjoyable project for anyone with a passion for music and DIY craftsmanship. Not only will you have a unique and personalized turntable, but you will also have the satisfaction of knowing that you built it yourself.
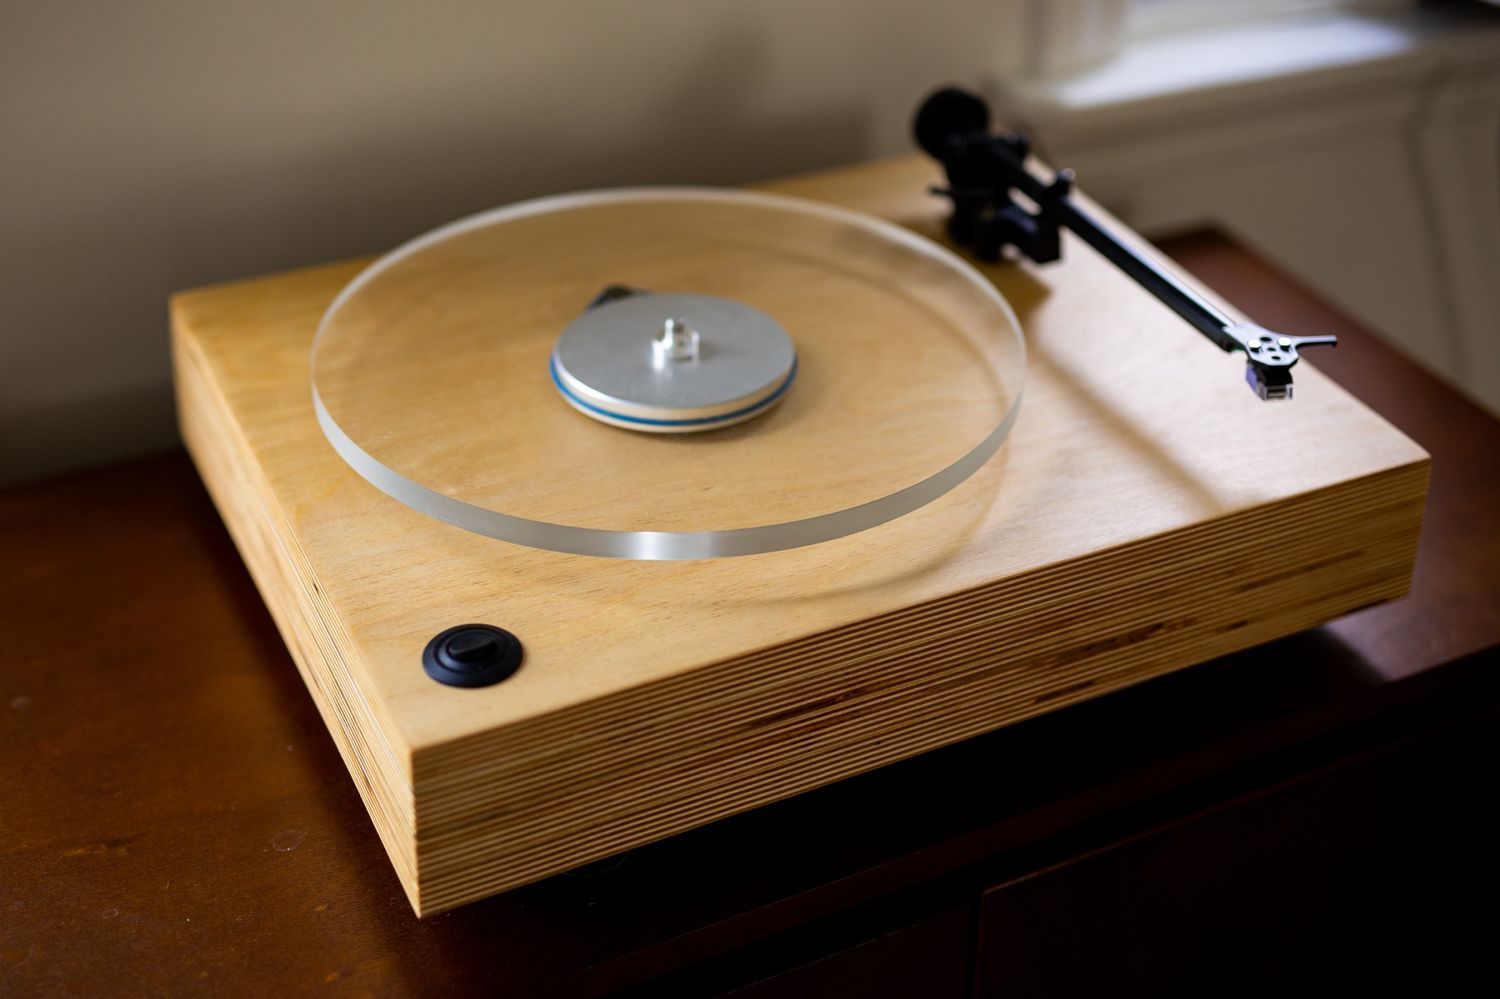
Before we dive into the construction process, it’s important to have a basic understanding of how a turntable works. At its core, a turntable consists of several key components: the base, the platter, the spindle, the motor, the belt, the tonearm, and the cartridge. Each of these components plays a crucial role in the overall performance and sound quality of the turntable.
Now that you have a brief introduction to the world of turntables and the basic components, let’s move on to the first step: gathering the materials and tools necessary for your DIY turntable project.
Step 1: Gathering Materials and Tools
Before you can begin building your own turntable, you’ll need to gather all the necessary materials and tools. Here’s a list of what you’ll need:
- Turntable Base: You can choose a pre-made turntable base or build your own using materials like wood or acrylic. Make sure it’s sturdy and provides proper stability for the turntable.
- Platter and Spindle: The platter is the rotating surface where you place your vinyl records, while the spindle holds the record in place. Look for a platter made of high-quality materials like aluminum or acrylic.
- Motor: The motor is responsible for spinning the platter. You can use a synchronous AC motor or a DC motor for your turntable.
- Belt: The belt connects the motor to the platter. Make sure to choose the correct belt size and material for smooth and consistent rotation.
- Tonearm: The tonearm is the component that holds the cartridge, allowing it to track the grooves of the record. Look for a high-quality tonearm with adjustable tracking force and anti-skate control.
- Cartridge: The cartridge is responsible for converting the physical grooves on the vinyl into electrical signals. There are various types of cartridges available, including moving magnet (MM) and moving coil (MC) cartridges.
- Electronics: You’ll need electronic components such as a phono preamp and amplifier to boost the signal from the cartridge and play it through your speakers.
- Tools: To assemble your turntable, you’ll need basic tools like screwdrivers, pliers, soldering iron, and wire strippers. Depending on your design, you may also require woodworking tools.
Now that you have a list of the materials and tools needed for your turntable project, you can start sourcing them. There are various online retailers, specialty audio stores, and DIY communities where you can find the components you need.
It’s important to consider the quality of the materials and components you choose. Opt for reputable brands and manufacturers known for producing high-quality turntable parts. This will ensure better performance and longevity of your DIY turntable.
Once you have gathered all the materials and tools, you can move on to the next step: building the base for your turntable.
Step 2: Building the Base
The base of your turntable is a crucial component as it provides stability and support for all the other parts. Building a solid and well-designed base is essential for optimal performance and minimizing vibrations that can affect sound quality. Here’s how you can build the base:
- Choose the Material: Select a material for your base that is sturdy and offers good damping properties. Wood, acrylic, and composite materials like MDF (medium-density fiberboard) are popular choices. Consider the aesthetics and functionality when choosing the material.
- Design the Shape and Size: Determine the shape and size of the base according to your preferences and the dimensions of the other components. A traditional rectangular or square shape is common, but you can also get creative with curved or unconventional designs.
- Cut and Shape the Base: Using woodworking tools, cut the chosen material to the desired shape and size. Ensure the corners and edges are smooth and even. Sand the surface to remove any roughness or imperfections.
- Add Reinforcements: To enhance the stability of the base, you can add internal reinforcements such as crossbars or additional layers of material. This will help minimize vibrations that can affect the turntable’s performance.
- Drill Mounting Holes: Depending on the design of your turntable, you may need to drill mounting holes for the platter, motor, tonearm, and other components. Use precise measurements and appropriate drill bits to ensure accurate placement of the holes.
- Finish the Base: Apply a protective finish to the base to enhance its durability and aesthetics. You can use paint, stain, or varnish, depending on the chosen material. Allow sufficient drying time before proceeding to the next step.
Building the base of your turntable requires careful precision and attention to detail. Take your time to ensure that the base is stable, well-constructed, and aesthetically pleasing. Remember to follow safety guidelines when working with tools and materials.
Once you have successfully built the base, you can move on to the next step: assembling the platter and spindle.
Step 3: Assembling the Platter and Spindle
The platter and spindle are integral components of your turntable, responsible for supporting and rotating your vinyl records. Assembling them correctly is essential for smooth and accurate playback. Here’s how you can assemble the platter and spindle:
- Attach the Spindle: Start by attaching the spindle to the base of your turntable. The spindle is the central rod that holds the platter and allows it to rotate. Ensure that it is securely fixed and aligned perfectly perpendicular to the base.
- Place the Platter: Carefully place the platter on top of the spindle. The platter should fit snugly and rotate freely. Double-check the alignment to ensure it is centered and level.
- Secure the Platter: Depending on the design of your turntable, you may need to secure the platter in place using screws or locking mechanisms. Follow the manufacturer’s instructions or design specifications to ensure proper attachment.
- Check the Platter Speed: Before proceeding, it’s important to check the speed of your platter. Use a strobe disc or a smartphone app specifically designed for turntables to verify that the platter is rotating at the correct speed (33 1/3 RPM or 45 RPM). Adjust the motor or belt tension if necessary.
When assembling the platter and spindle, pay close attention to the alignment and stability of the components. Any misalignment or wobbling can result in speed inaccuracies and affect the overall performance of your turntable.
Take your time during this step to ensure that the platter is securely mounted and rotates smoothly. Once you are satisfied with the assembly, you can move on to the next step: installing the motor and belt.
Step 4: Installing the Motor and Belt
The motor and belt are critical components of your turntable, responsible for providing the power and control needed to rotate the platter. Proper installation of the motor and belt is essential for accurate and consistent playback. Here’s how you can install them:
- Motor Placement: Determine the ideal placement for the motor on your turntable base. The motor should be positioned in a way that allows the belt to smoothly connect with the platter. Consult the manufacturer’s instructions or design specifications for guidance.
- Mount the Motor: Securely mount the motor to the base using screws or mounting brackets. Ensure that the motor is aligned with the belt path and firmly attached to prevent any vibrations or unnecessary movement.
- Attach the Belt: Place the belt around the motor pulley and the platter. Ensure that the belt is taut and properly seated on both the motor pulley and the platter. Adjust the tension if necessary to achieve optimal performance.
- Check Belt Alignment: It’s important to check the alignment of the belt to ensure that it runs smoothly and does not slip off during operation. Make any necessary adjustments to the belt positioning or tension to achieve the desired alignment.
- Test Motor Operation: Before proceeding, test the motor’s operation to ensure that it spins the platter smoothly and consistently. Turn on the turntable and observe the rotation of the platter. Listen for any unusual noises or vibrations that may indicate a problem with the motor or belt.
During the installation process, take care to properly align and secure the motor and belt components. Any misalignment or instability can result in speed variations or belt slippage, negatively impacting the performance of your turntable.
Once you have successfully installed the motor and belt, you can move on to the next step: wiring and connecting the electronics.
Step 5: Wiring and Connecting the Electronics
Wiring and connecting the electronics of your turntable is a crucial step to ensure proper signal transfer and functionality. This step involves connecting various components such as the tonearm, cartridge, phono preamp, and amplifier. Here’s how you can wire and connect the electronics of your turntable:
- Tonearm Connection: First, attach the tonearm to the designated mounting point on the turntable base. Connect the tonearm wires to the corresponding terminals on the tonearm base. Ensure that the connections are secure and free from any loose or frayed wires.
- Cartridge Installation: Mount the cartridge onto the tonearm following the manufacturer’s instructions. Take care to align the cartridge stylus (needle) properly with the tonearm’s tracking force and anti-skate settings. Use a small balance or stylus force gauge to ensure accurate tracking force.
- Wiring Connections: Connect the tonearm wires to the designated terminals on the phono preamp. Use appropriate connectors or solder the wires carefully to maintain a secure and reliable connection. Consult the wiring diagram or instructions provided with your specific components for guidance.
- Phono Preamp: The phono preamp plays a crucial role in amplifying and equalizing the signal from the cartridge. Connect the output of the phono preamp to the designated input on your amplifier or audio system. Ensure that the connections are secure and properly grounded to minimize noise and interference.
- Grounding: Most turntables require a grounding wire to reduce hum and interference. Connect the grounding wire from the turntable to a designated grounding point on your amplifier or audio system. This helps to eliminate any unwanted noise caused by electrical interference.
- Power Connection: If your turntable has any additional electronic components that require power, such as a motor controller or LED lights, connect them to an appropriate power source using the provided power cables.
When wiring and connecting the electronics, it’s essential to follow the manufacturer’s instructions and wiring diagrams. Properly connecting the components ensures optimal signal transfer, accurate tracking, and high-quality audio reproduction.
Once you have successfully wired and connected the electronics, you can move on to the next step: adding the tonearm and cartridge to complete your turntable setup.
Step 6: Adding the Tonearm and Cartridge
The tonearm and cartridge are vital components of your turntable, responsible for reading the grooves on your vinyl records and producing sound. Adding and properly aligning the tonearm and cartridge is crucial for accurate tracking and optimal audio performance. Here’s how you can add the tonearm and cartridge:
- Mount the Tonearm: Attach the tonearm to the designated mounting point on the turntable base. Ensure that it is securely fastened and aligned properly with the record platter.
- Adjust the Tonearm Height and Tracking Force: Most tonearms have an adjustable height mechanism. Set the tonearm height according to the manufacturer’s specifications to achieve the correct VTA (vertical tracking angle). Additionally, adjust the tracking force by using the counterweight provided with the tonearm. Consult the cartridge manufacturer’s recommendations for the optimal tracking force.
- Install the Cartridge: Carefully install the cartridge onto the tonearm, ensuring that the stylus (needle) is securely attached. Align the cartridge stylus with the correct overhang and offset angle as specified by the cartridge manufacturer. Use a protractor tool to achieve the accurate alignment.
- Check Alignment and Balance: Use a cartridge alignment tool or alignment protractor to check the alignment of the cartridge in relation to the tonearm. Make any necessary adjustments to achieve proper alignment. Additionally, ensure that the tonearm is correctly balanced to avoid excessive tracking force on the stylus.
- Secure the Cartridge: Once the alignment is correct, secure the cartridge to the tonearm using the provided mounting screws or locking mechanism. Take care not to overtighten the screws to avoid damaging the cartridge or tonearm.
Adding the tonearm and cartridge requires precision and careful attention to detail. Proper alignment and balance are crucial for accurate tracking and optimal sound reproduction. Take your time during this step to ensure that everything is correctly set up.
Once you have successfully added the tonearm and cartridge, you can move on to the final step: testing and adjusting your turntable to ensure its proper operation and performance.
Step 7: Testing and Adjusting
After completing the construction and installation of your DIY turntable, it’s essential to thoroughly test and adjust its various components to ensure optimal performance. Here’s how you can test and make necessary adjustments:
- Test Playback: Place a vinyl record on the platter and carefully lower the tonearm onto the record. Start playing the record and listen for any distortions, skipping, or tracking issues. Monitor the overall sound quality and ensure that it matches your expectations.
- Check Speed Accuracy: Use a speed measuring device, such as a strobe disc or smartphone app, to verify the accuracy of the turntable’s speed. Ensure that the platter rotates at the correct revolutions per minute (RPM) – typically 33 1/3 RPM or 45 RPM.
- Fine-tune Tracking Force: Listen for any excessive distortion or audible mistracking during playback. If necessary, make small adjustments to the tracking force of the tonearm by slightly increasing or decreasing the weight applied to the cartridge. Fine-tuning the tracking force can optimize the stylus’ contact with the record’s grooves.
- Adjust Anti-Skate: Anti-skate control helps to counterbalance the inward force placed on the tonearm by the record’s groove. Adjust the anti-skate setting to ensure proper tracking and minimize distortion caused by excessive inward or outward force.
- Inspect and Clean: Regularly inspect and clean the stylus and record surface to maintain optimal performance. Use a stylus brush or cleaning solution to remove any dust or debris from the stylus tip. Clean records using appropriate record cleaning techniques and products.
- Listen and Fine-tune: Continuously listen to a variety of records across different genres and recording qualities to refine and fine-tune the settings of your turntable. Pay attention to detail, dynamics, and any improvements or adjustments needed to achieve the desired sound quality.
Testing and adjusting your turntable is an ongoing process that requires patience and a keen ear for detail. Take the time to ensure that each component is functioning correctly, and make any necessary adjustments to optimize performance and sound quality.
Remember, every turntable setup is unique, and personal preferences may vary. Continuously monitor and adjust as needed to achieve the best possible listening experience with your DIY turntable.
Lastly, enjoy the fruits of your labor and savor the immersive and nostalgic experience of listening to your favorite vinyl records on the turntable that you built yourself.
Conclusion
Congratulations on successfully building your DIY turntable! By embarking on this project, you have not only created a unique and personalized piece of audio equipment but also gained a deeper understanding of the inner workings of a turntable. Throughout the process, you have learned how to gather materials, build the base, assemble the platter and spindle, install the motor and belt, wire and connect the electronics, add the tonearm and cartridge, and conduct testing and adjustments for optimal performance.
Building your own turntable allows you to tailor every aspect of its design and functionality to suit your preferences. You can experiment with different materials, components, and configurations to achieve your desired sound quality and aesthetic appeal. Whether you are an audiophile seeking the best possible audio playback or a DIY enthusiast looking for a rewarding project, building a turntable offers a satisfying and fulfilling experience.
Remember to continue exploring and refining your turntable setup. Fine-tune the settings, experiment with different cartridges, and expand your vinyl record collection to further enhance your listening experience. Regular maintenance and care of your turntable, including cleaning the stylus and records, will ensure its longevity and optimal performance.
Building a turntable is not just about the end result; it is a journey of craftsmanship and passion for music. Each time you place a vinyl record on your DIY turntable and immerse yourself in the warm and rich sound, you can take pride in the fact that you created this unique audio experience with your own hands.
So, sit back, relax, and enjoy the magic of vinyl on your very own DIY turntable. Happy listening!

