Home>Instruments>Guitar>How To Wrap Guitar Strings
Guitar
How To Wrap Guitar Strings
Published: February 14, 2024
Learn how to wrap guitar strings properly with our step-by-step guide. Keep your guitar in top condition and improve your playing experience.
(Many of the links in this article redirect to a specific reviewed product. Your purchase of these products through affiliate links helps to generate commission for AudioLover.com, at no extra cost. Learn more)
Table of Contents
Introduction
Changing guitar strings is an essential skill for any guitarist, whether you’re a beginner or a seasoned player. Fresh strings not only improve the sound of your instrument but also make playing more enjoyable. However, the process of changing strings can be daunting for those who have never done it before. With the right tools, materials, and a clear set of instructions, you can easily change your guitar strings at home.
In this guide, we will walk you through the step-by-step process of changing your guitar strings. Whether you play acoustic, electric, or classical guitar, the principles for changing strings remain the same. By following this guide, you’ll learn how to remove the old strings, clean your guitar, and install new strings with confidence. Additionally, we’ll cover essential tips for stretching and tuning the new strings to ensure they stay in tune and sound their best.
Before we dive into the process, it’s important to gather the necessary tools and materials. Having everything prepared will make the string-changing process smoother and more efficient. Once you have everything you need, you’ll be ready to transform the sound and playability of your guitar by installing a fresh set of strings. Let’s get started!
Tools and Materials
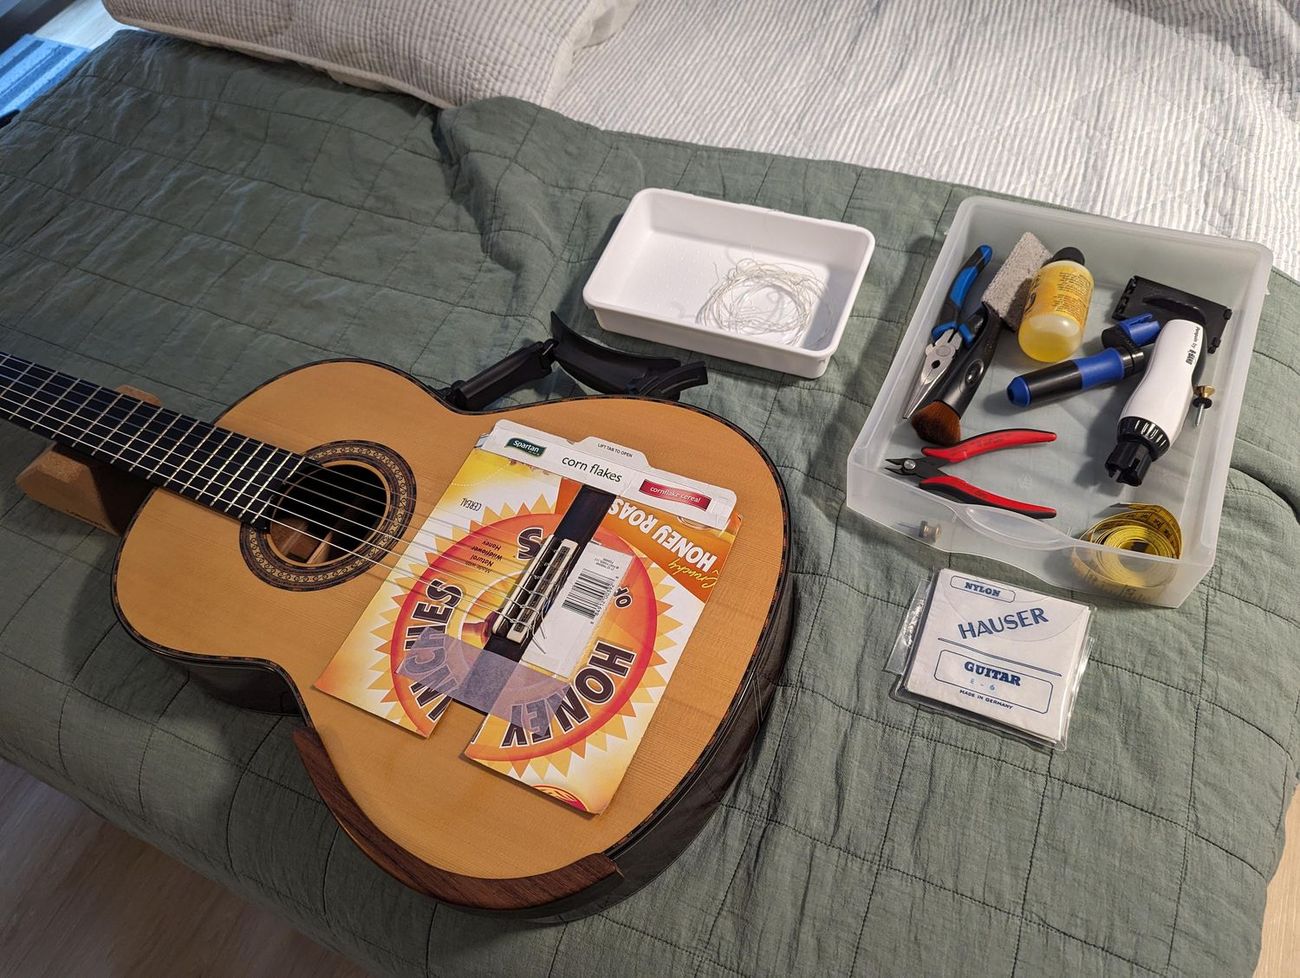
Before you begin changing your guitar strings, it’s essential to gather the necessary tools and materials. Having everything at hand will streamline the process and ensure that you can complete the task without interruptions. Here’s what you’ll need:
- New Guitar Strings: Ensure that you have the appropriate set of strings for your guitar. Acoustic, electric, and classical guitars require different types of strings, so make sure you select the right set.
- Wire Cutters: A pair of wire cutters will be necessary for trimming the excess string length after installation.
- Tuner: A tuner is essential for accurately tuning the new strings once they are installed.
- Guitar Polish/Cleaner: While not mandatory, having guitar polish or cleaner on hand allows you to clean the fretboard and body of the guitar while the strings are removed.
- Cloth: A soft cloth can be used to wipe down the guitar and remove any dust or debris.
- String Winder: This tool can speed up the process of removing and installing strings, making the task more efficient.
- String Action Gauge (Optional): If you want to adjust the string height (action) on your guitar, a string action gauge can be helpful.
By ensuring you have all the necessary tools and materials prepared, you can proceed with confidence, knowing that you have everything you need to change your guitar strings effectively.
Step 1: Preparing the Guitar
Before you start the process of changing your guitar strings, it’s important to prepare the instrument and create a clean and organized workspace. Here are the essential steps for preparing your guitar:
- Gather Your Tools: Ensure that you have all the necessary tools and materials listed in the previous section. Having everything within reach will make the string-changing process more efficient.
- Clean the Guitar: Use a soft cloth to wipe down the body of the guitar and remove any dust or debris. If desired, you can use guitar polish or cleaner to give the body and fretboard a thorough cleaning.
- Secure the Guitar: Place your guitar on a stable surface, such as a workbench or table, ensuring that it is secure and won’t move around during the string-changing process. If you have a guitar stand, this can also be a convenient option.
- Tune the Guitar: Before removing the old strings, it’s a good idea to tune the guitar to pitch. This will make it easier to identify any changes in string tension as you remove and replace the strings.
- Protect the Guitar: To prevent any accidental damage to the guitar’s finish, consider placing a soft cloth or towel under the guitar body and around the headstock while working on the strings.
By following these steps, you’ll ensure that your guitar is clean, secure, and ready for the string-changing process. Taking the time to prepare the guitar and your workspace will set the stage for a smooth and successful string replacement.
Step 2: Removing the Old Strings
Once your guitar is prepared and your workspace is organized, it’s time to remove the old strings. This process involves careful attention to avoid damaging the guitar or injuring yourself. Follow these steps to safely remove the old strings:
- Loosen the Tuning Pegs: Start by loosening the tension on the old strings. Use a string winder or turn the tuning pegs by hand to unwind the strings until they are slack.
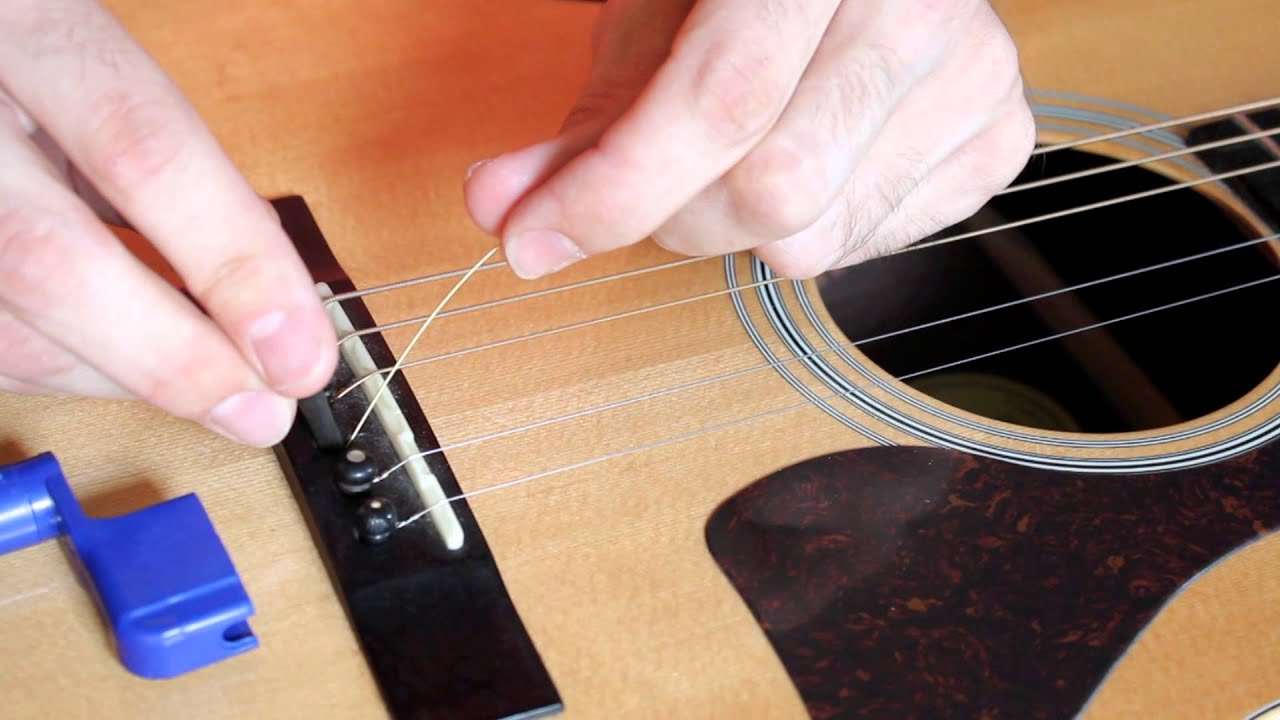
- Remove the Bridge Pins (Acoustic Guitars): If you have an acoustic guitar, you may need to remove the bridge pins to release the strings. Use a bridge pin puller or a small, flat object to carefully pry the bridge pins out of the bridge.
- Unwind and Remove the Strings: Unwind each string from its respective tuning peg and carefully pull it out of the bridge (for acoustic guitars) or tremolo system (for electric guitars). Be cautious of the string ends, as they can be sharp.
- Dispose of the Old Strings: Once all the old strings are removed, dispose of them responsibly. Old strings can be a safety hazard and should be discarded properly.
- Clean the Guitar: With the old strings removed, take the opportunity to clean the fretboard and body of the guitar using a soft cloth and, if necessary, guitar polish or cleaner.
By following these steps, you can safely and effectively remove the old strings from your guitar, preparing it for the installation of fresh, new strings. Taking care during this process will help maintain the integrity of your instrument and ensure a smooth transition to the next step of the string-changing process.
Step 3: Installing the New Strings
With the old strings removed and the guitar cleaned, it’s time to install the new strings. This step requires attention to detail to ensure that the strings are properly secured and tuned. Follow these steps to install your new guitar strings:
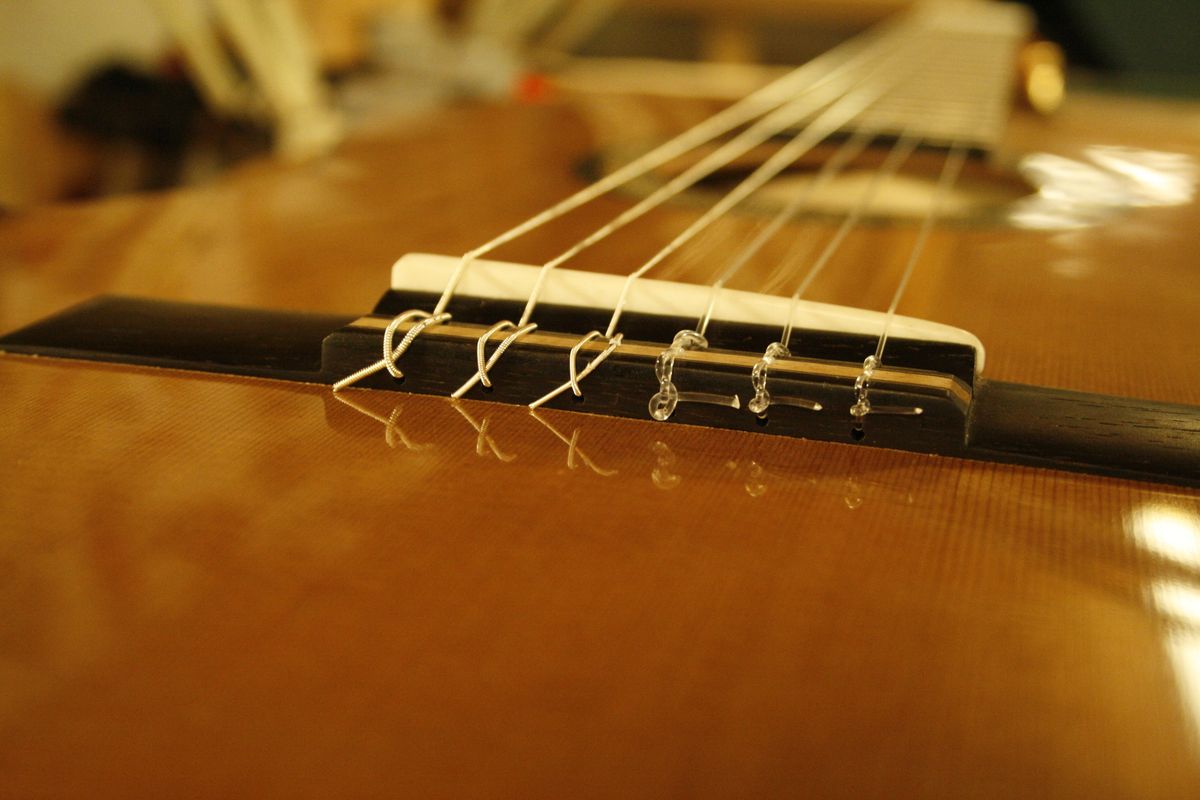
- Insert the Strings: Begin by inserting the end of the string into the bridge (for acoustic guitars) or the tremolo system (for electric guitars). For acoustic guitars, make sure the ball end of the string is secured under the bridge plate and that the bridge pins are properly reinserted. For electric guitars, ensure the string is properly placed in the tremolo block or bridge saddles.
- Thread the Strings: Guide the opposite end of the string up the neck of the guitar, through the corresponding tuning peg. Leave a few inches of slack to work with at the tuning peg.
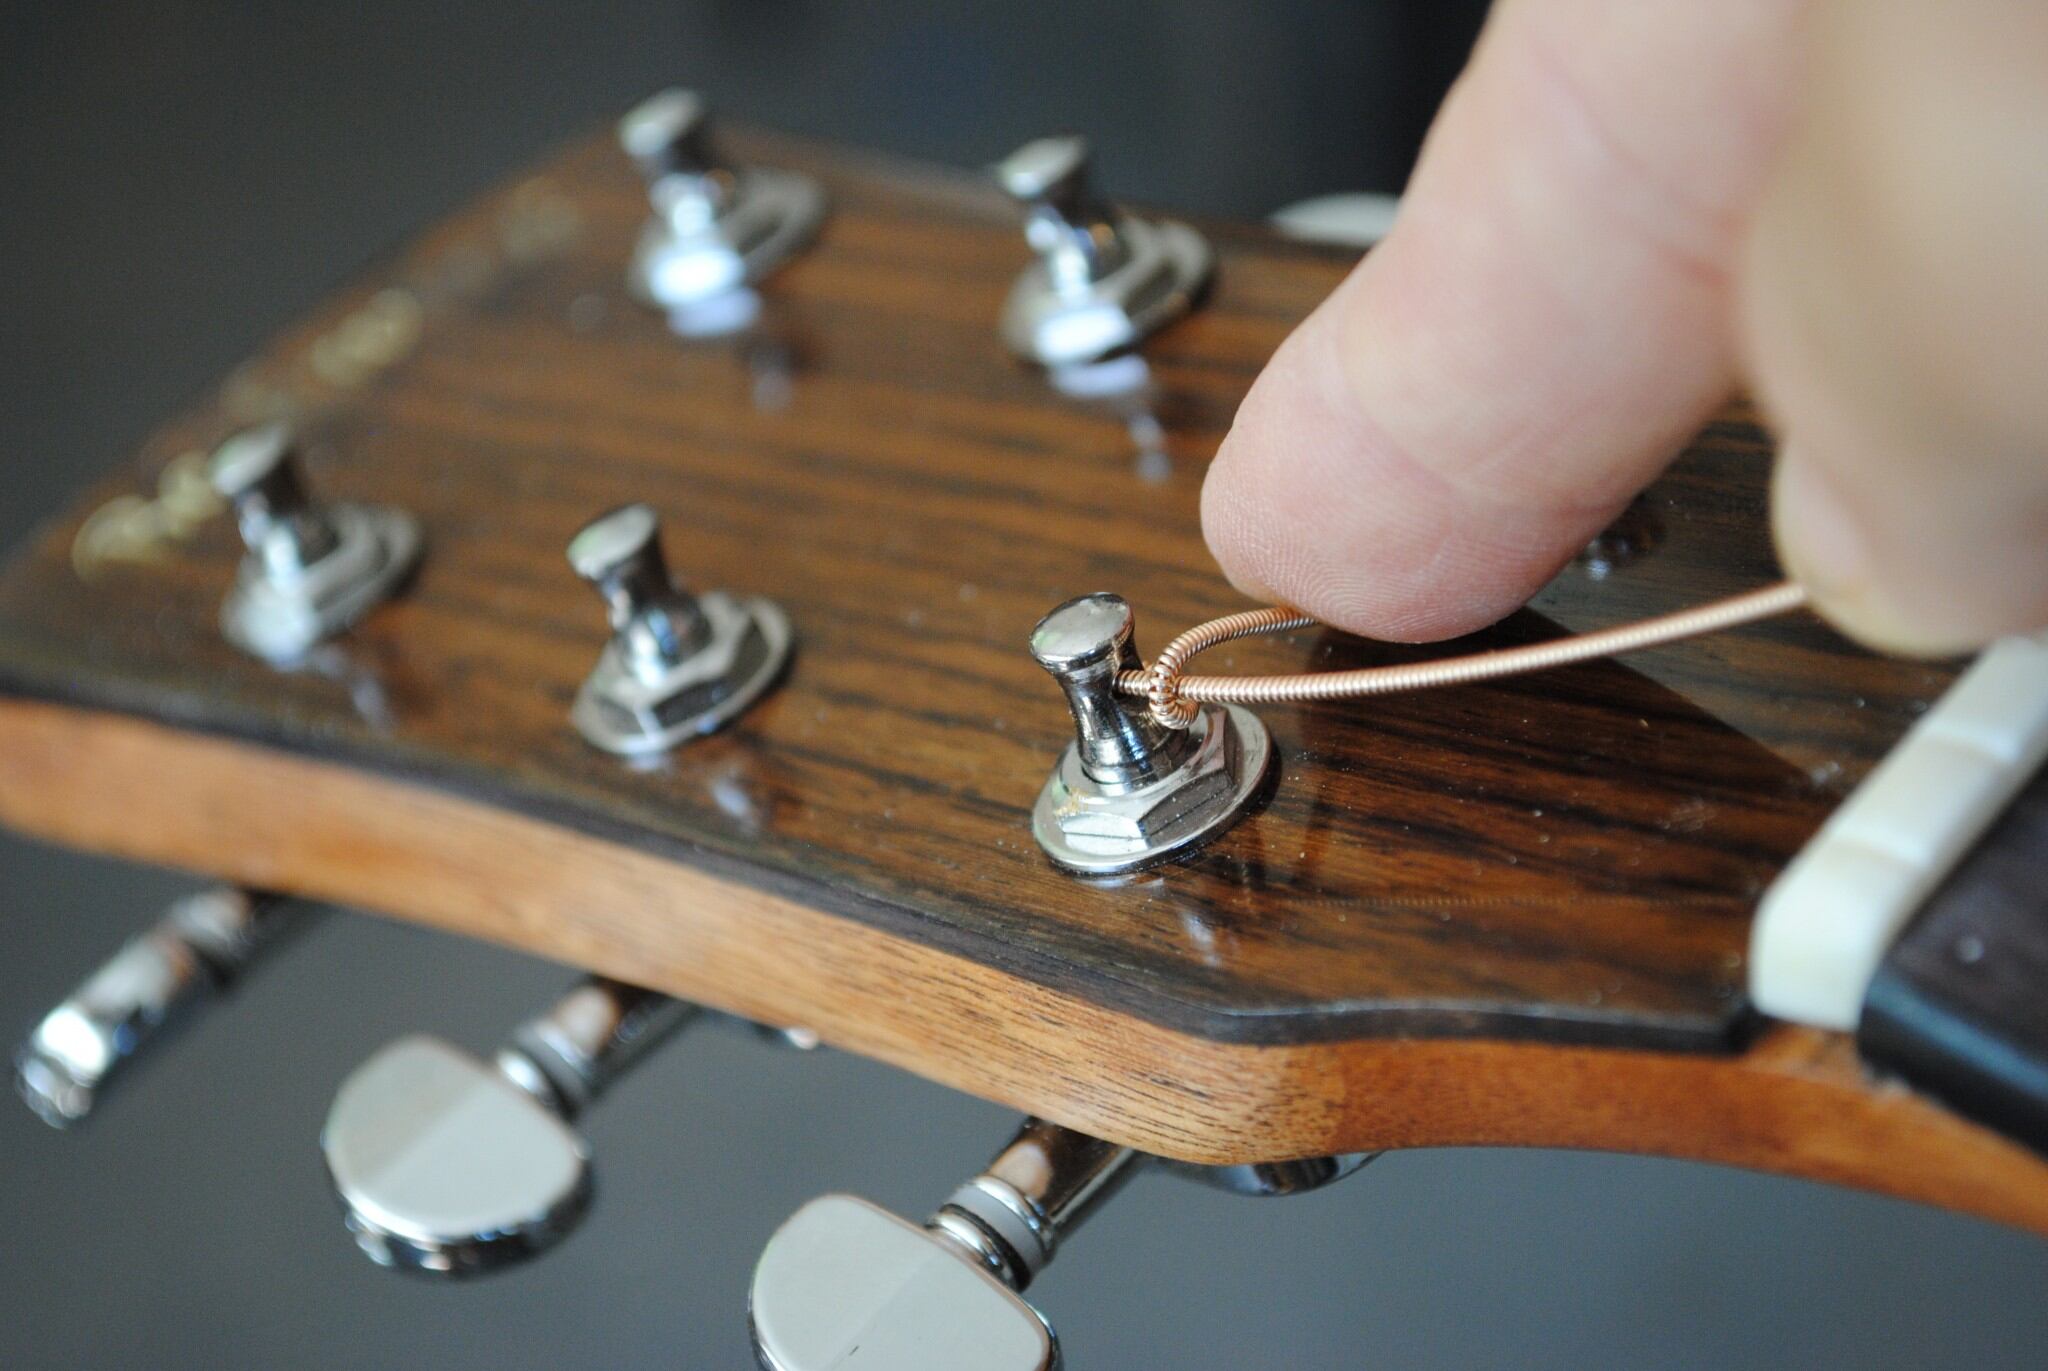
- Secure the Strings: With the slack in the string, begin winding it around the tuning peg in the direction that tightens the string when tuned. Make sure the winds are neat and orderly, and avoid overlapping the winds. Leave enough slack in the string to allow for several winds around the tuning peg.
- Wind and Tune the Strings: Use a string winder or turn the tuning peg by hand to tighten the string. As you wind the string, ensure that it wraps neatly around the peg without overlapping. Once the string is secured, use a tuner to bring it up to pitch. Repeat this process for each string.
- Trim Excess String: Once the strings are tuned to pitch, use wire cutters to trim the excess string length at the tuning pegs. Leave a small amount of slack to prevent the string from slipping.
By following these steps, you can successfully install your new guitar strings, ensuring that they are properly secured and tuned. Taking care to wind the strings neatly and tune them accurately will result in a satisfying and stable string installation.
Step 4: Stretching and Tuning the Strings
After installing the new strings, it’s crucial to stretch them and tune them properly to ensure stability and optimal sound quality. New strings tend to stretch and settle, so this step is essential for maintaining tuning stability. Follow these steps to stretch and tune your new guitar strings:
- Stretch the Strings: Starting with the low E string, use your fingers to gently pull and stretch the string along its length. Be careful not to exert excessive force, but aim to remove any slack and stretch the string. Repeat this process for each string.
- Retune the Guitar: After stretching the strings, they will likely have lost some tension. Use a tuner to bring each string back to its correct pitch. Repeat the tuning process multiple times for each string, as the act of stretching can cause the strings to detune initially.
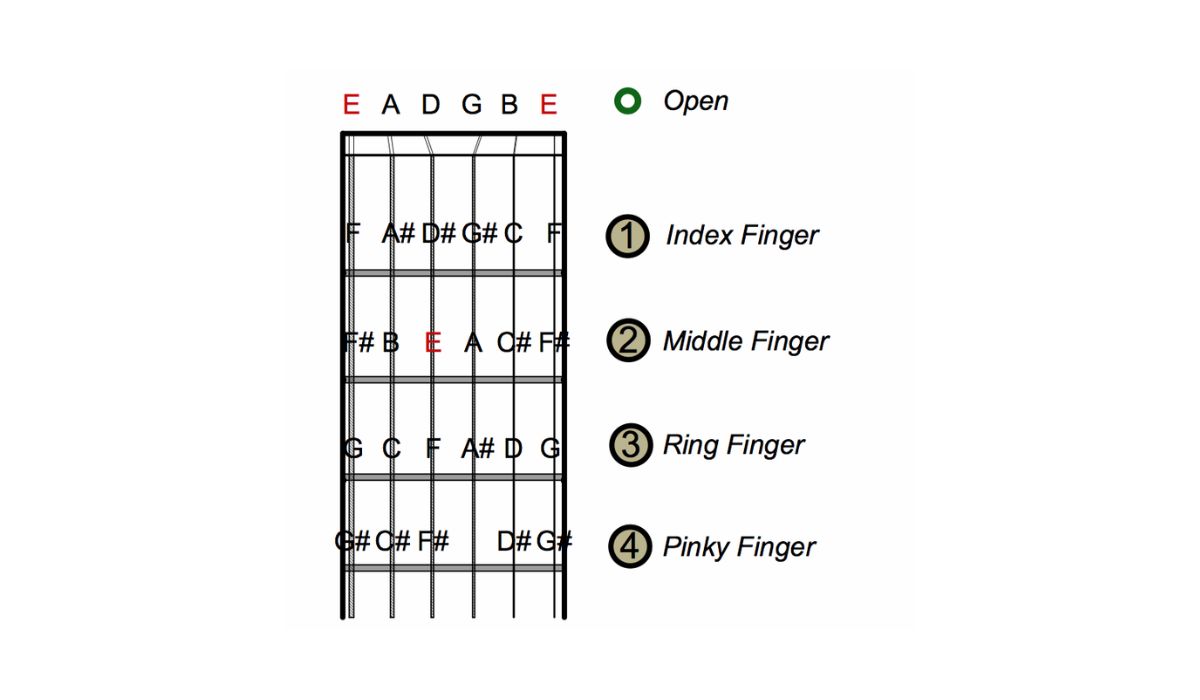
- Check Intonation (Optional): If you have an electric guitar, you may want to check the intonation by playing each string open and then at the 12th fret. Use a tuner to ensure that the open string and the 12th fret note are in tune. If adjustments are needed, consult your guitar’s manual or seek professional assistance.
- Play and Retune: After stretching and tuning the strings, play the guitar to allow the strings to settle. It’s normal for new strings to require periodic tuning as they continue to stretch and stabilize. Regularly check the tuning and make adjustments as needed until the strings stabilize.
By following these steps, you can effectively stretch and tune your new guitar strings, ensuring that they settle and stabilize for optimal performance. Taking the time to stretch and tune the strings properly will result in improved tuning stability and a satisfying playing experience.
Conclusion
Congratulations! You’ve successfully changed your guitar strings, revitalizing the sound and playability of your instrument. By following the step-by-step process outlined in this guide, you’ve gained valuable insight into the essential skill of string changing. Whether you play acoustic, electric, or classical guitar, the principles and techniques for changing strings remain consistent.
Remember, changing your guitar strings is not only a maintenance task but also an opportunity to connect with your instrument and improve your playing experience. Fresh strings can breathe new life into your guitar, providing enhanced tone and responsiveness.
As you continue to play and explore new musical horizons, don’t hesitate to revisit this guide whenever it’s time for another string change. With each repetition, you’ll gain confidence and efficiency, making the process second nature.
Lastly, take pride in the care and attention you’ve shown to your instrument. Regular maintenance, including string changes, will ensure that your guitar remains a reliable and inspiring companion on your musical journey.
Now that you’ve completed the string-changing process, take a moment to appreciate the renewed sound and feel of your guitar. Whether you’re strumming chords, picking melodies, or shredding solos, your fresh strings are ready to support your musical aspirations.
Enjoy the vibrant tones and responsive playability of your newly strung guitar, and let the music flow!