Home>Production & Technology>Acoustic>How To Restring An Acoustic Guitar Without Bridge Pins
Acoustic
How To Restring An Acoustic Guitar Without Bridge Pins
Published: March 11, 2024
Learn how to restring your acoustic guitar without bridge pins. Follow our step-by-step guide for a hassle-free restringing process. Keep your acoustic guitar in top shape!
(Many of the links in this article redirect to a specific reviewed product. Your purchase of these products through affiliate links helps to generate commission for AudioLover.com, at no extra cost. Learn more)
Table of Contents
Introduction
Restringing an acoustic guitar without bridge pins may seem like a daunting task, especially for those who are new to the world of guitar maintenance. However, with the right guidance and a bit of practice, it can become a straightforward and rewarding process. Whether you're a seasoned musician or a beginner eager to learn the ins and outs of guitar care, mastering the art of restringing an acoustic guitar without bridge pins is a valuable skill that will serve you well in your musical journey.
In this comprehensive guide, we will walk you through the step-by-step process of restringing your acoustic guitar without the use of bridge pins. By following these instructions and tips, you'll be able to maintain your instrument's playability and ensure that it produces the rich, resonant tones that acoustic guitars are known for.
Restringing an acoustic guitar without bridge pins involves a unique technique that differs from restringing guitars with traditional bridge pin setups. Instead of anchoring the strings in place with bridge pins, this method requires securing the strings directly to the bridge, making it essential to understand the specific steps involved in this process.
Whether you're preparing for a performance, recording session, or simply maintaining your instrument's optimal condition, knowing how to restring your acoustic guitar without bridge pins is a valuable skill that will empower you to keep your instrument in top playing condition.
Now, let's dive into the step-by-step process of restringing an acoustic guitar without bridge pins, ensuring that you have the knowledge and confidence to maintain your instrument's impeccable sound and playability.
Step 1: Remove the old strings
Before embarking on the restringing process, it's crucial to start by removing the old strings from your acoustic guitar. This step is essential for ensuring that the new strings can be installed smoothly and securely. Here's a detailed guide on how to remove the old strings from your acoustic guitar without bridge pins:
-
Loosen the strings: Begin by turning the tuning pegs to loosen the tension of each string. This can be done by turning the pegs in a counterclockwise direction, gradually reducing the tension until the strings become slack.
-
Unwind the strings: Once the strings are sufficiently loose, unwind them from the tuning pegs. Carefully unwind each string one at a time, ensuring that they don't get tangled or cause any damage to the guitar's body or neck.
-
Remove the strings from the bridge: After unwinding the strings from the tuning pegs, carefully remove the opposite end of each string from the bridge. In the absence of bridge pins, the strings may be secured by knots or other mechanisms, so take care to untie or release them gently.
-
Discard the old strings: Once all the strings have been removed, it's important to dispose of them properly. Old guitar strings can be sharp and pose a safety hazard, so make sure to discard them in a secure manner.
By following these steps, you can effectively remove the old strings from your acoustic guitar without bridge pins, setting the stage for the subsequent process of installing new strings. Properly removing the old strings ensures that the restringing process can be carried out smoothly and without any complications, allowing you to maintain your guitar in optimal playing condition.
Step 2: Insert the ball end of the new string
When restringing an acoustic guitar without bridge pins, inserting the ball end of the new string is a critical step that sets the foundation for a secure and stable installation. Unlike guitars with traditional bridge pin setups, where the ball end of the string is anchored in place, this method requires a different approach to ensure that the string is firmly secured to the bridge. Here's a detailed guide on how to insert the ball end of the new string when restringing an acoustic guitar without bridge pins:
-
Prepare the new string: Start by unwrapping the new string from its packaging and straightening it to ensure a smooth and hassle-free installation. It's essential to handle the string carefully to avoid kinks or bends that could affect its performance and longevity.
-
Identify the insertion point: Examine the bridge of your acoustic guitar to locate the insertion point for the new string. Without bridge pins, the strings are typically inserted through the bridge and secured using a different method, such as a bridge with holes or a unique anchoring system.
-
Thread the string through the bridge: With the ball end of the string in hand, carefully guide it through the designated insertion point on the bridge. Take care to ensure that the string is positioned correctly and that the ball end is fully inserted, as this will directly impact the stability and tuning stability of the string.
-
Pull the string through: Once the ball end of the string is inserted through the bridge, gently pull it through until there is minimal slack between the bridge and the string's point of entry. This step is crucial for ensuring that the string is properly seated and ready for the subsequent securing process.
-
Check the alignment: Before proceeding to the next step, double-check the alignment of the string and its positioning within the bridge. Ensuring that the string is correctly threaded through the bridge will contribute to the overall stability and intonation of the guitar once the restringing process is complete.
By following these steps, you can effectively insert the ball end of the new string when restringing an acoustic guitar without bridge pins. This meticulous approach sets the stage for the subsequent steps of securing the string at the bridge and winding it around the tuning peg, ultimately leading to a successful restringing process that enhances the playability and tonal quality of your acoustic guitar.
Step 3: Secure the string at the bridge
Securing the string at the bridge is a pivotal step in the restringing process for an acoustic guitar without bridge pins. Unlike traditional bridge pin setups, where the strings are anchored in place using bridge pins, this method requires a unique approach to ensure that the strings are firmly secured and capable of withstanding the tension required for optimal playability and tone. Here's a detailed guide on how to secure the string at the bridge when restringing an acoustic guitar without bridge pins:
-
Anchor the string: After inserting the ball end of the string through the bridge, it's essential to anchor the string securely to prevent slippage or instability during tuning and playing. Depending on the design of the bridge, this may involve threading the string through a specific anchoring mechanism or securing it within a designated slot or hole. Carefully follow the manufacturer's guidelines or consult with a knowledgeable technician to ensure that the string is anchored correctly.
-
Maintain tension: As you secure the string at the bridge, pay close attention to the tension and alignment of the string. Ensuring that the string is taut and properly seated within the bridge contributes to the overall stability and intonation of the guitar. Avoid any excessive slack or uneven tension, as these factors can impact the string's performance and the guitar's playability.
-
Test the stability: Once the string is anchored at the bridge, gently pluck it to assess its stability and resonance. Listen for any unusual buzzing or rattling sounds, which may indicate that the string is not securely seated. Making any necessary adjustments at this stage will contribute to the overall quality and reliability of the restringing process.
-
Repeat for remaining strings: After successfully securing the first string at the bridge, repeat the same process for the remaining strings. Each string should be anchored with precision and care, ensuring that they are all capable of withstanding the tension required for optimal playability and tonal quality.
By following these steps, you can effectively secure the strings at the bridge when restringing an acoustic guitar without bridge pins. This meticulous approach sets the stage for the subsequent step of winding the strings around the tuning pegs, ultimately leading to a successful restringing process that enhances the playability and tonal richness of your acoustic guitar.
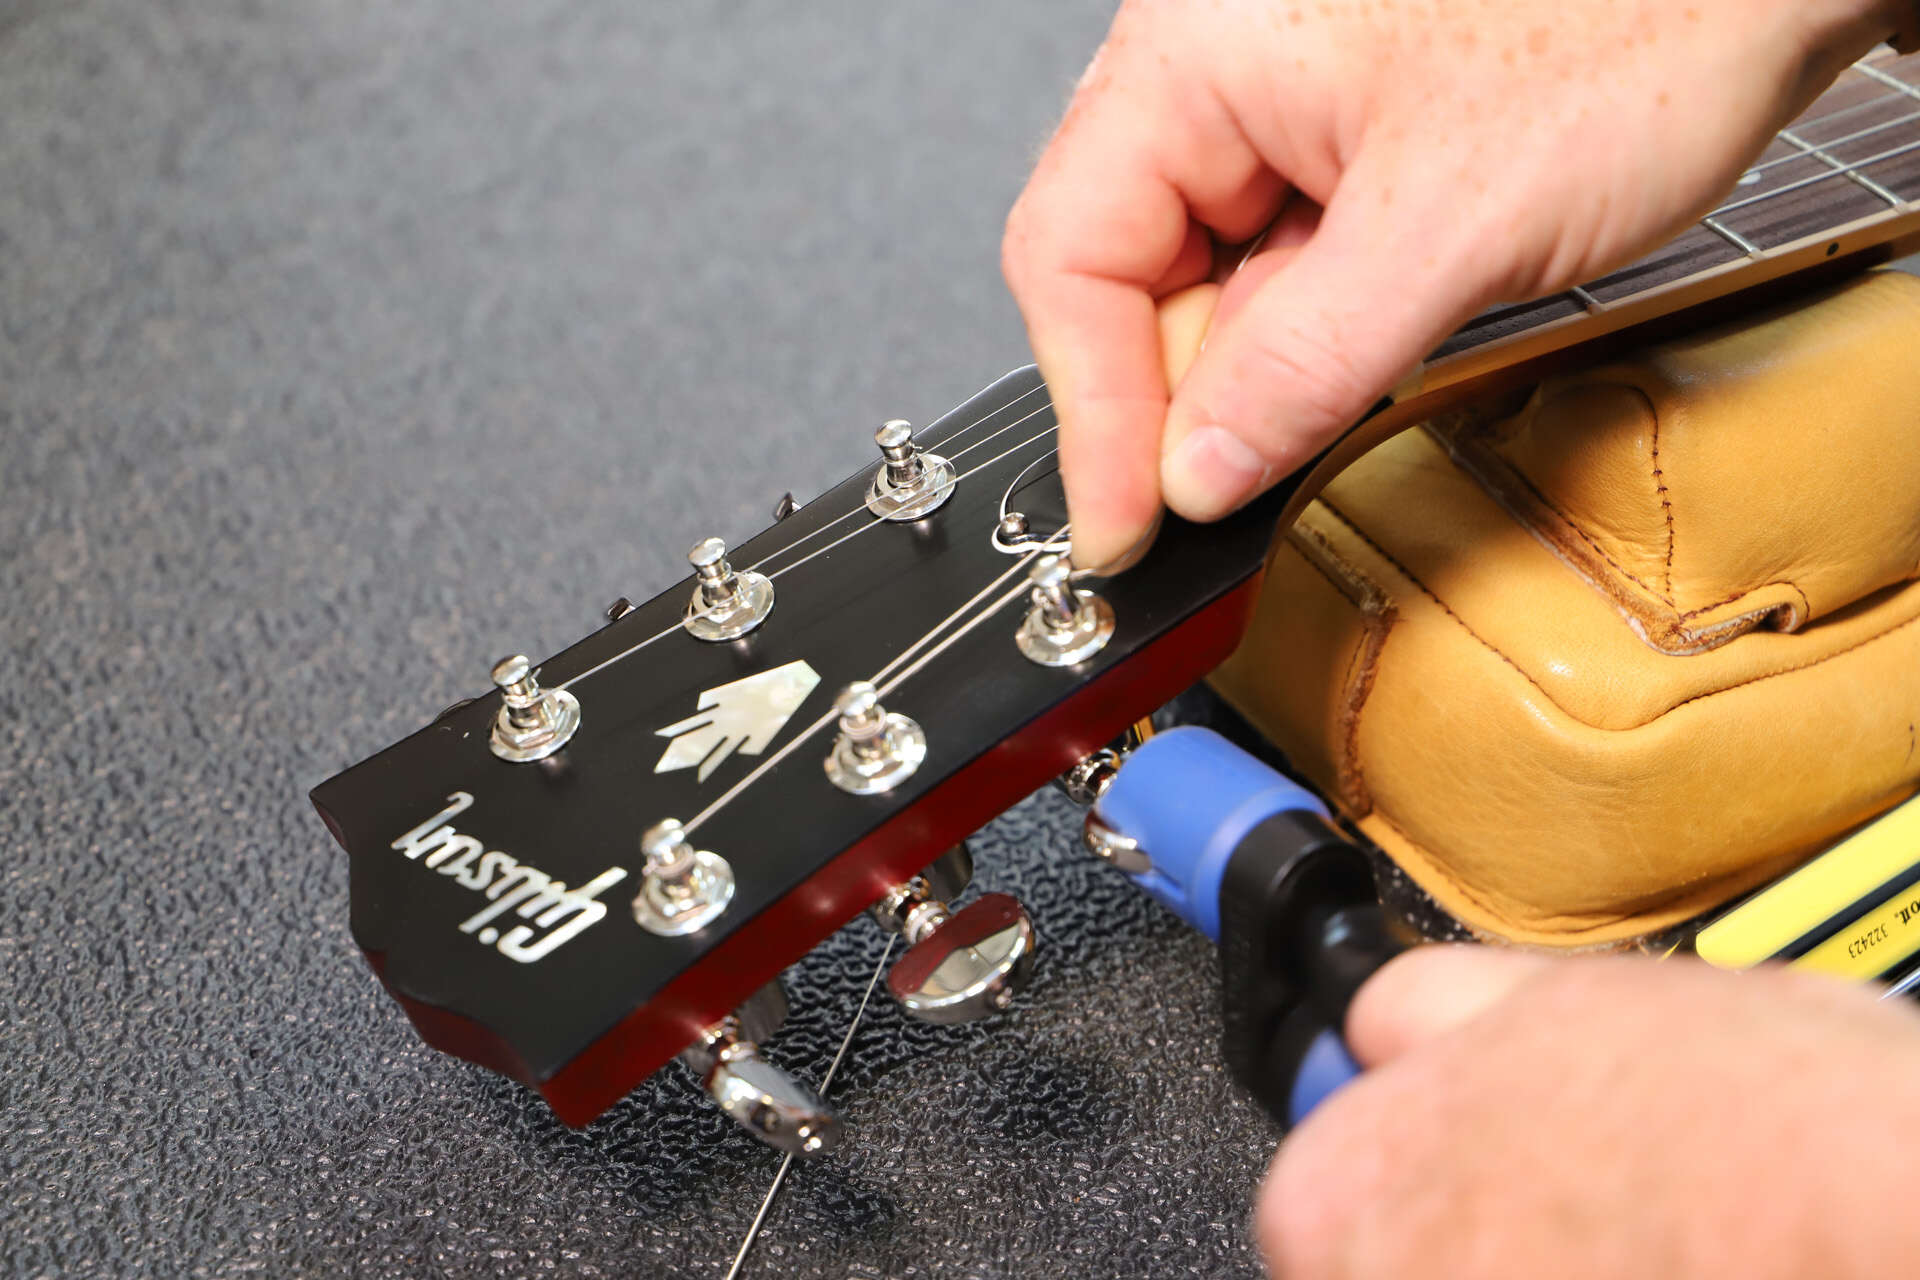
Step 4: Wind the string around the tuning peg
Winding the string around the tuning peg is a crucial step in the restringing process for an acoustic guitar without bridge pins. This step directly impacts the guitar's tuning stability, playability, and overall tonal quality. Proper winding ensures that the strings are secured firmly and capable of maintaining the desired tension for consistent and reliable performance. Here's a detailed guide on how to wind the string around the tuning peg when restringing an acoustic guitar without bridge pins:
-
Position the string: Begin by guiding the free end of the string through the appropriate tuning peg. Ensure that the string is positioned correctly to allow for smooth and even winding. The excess length of the string should extend beyond the tuning peg, providing ample material for winding without causing unnecessary tension or strain.
-
Create initial tension: With the string inserted through the tuning peg, pull it taut to create initial tension. This step is crucial for ensuring that the string is securely anchored and capable of withstanding the rigors of tuning and playing. Maintaining consistent tension throughout the winding process is essential for optimal string performance.
-
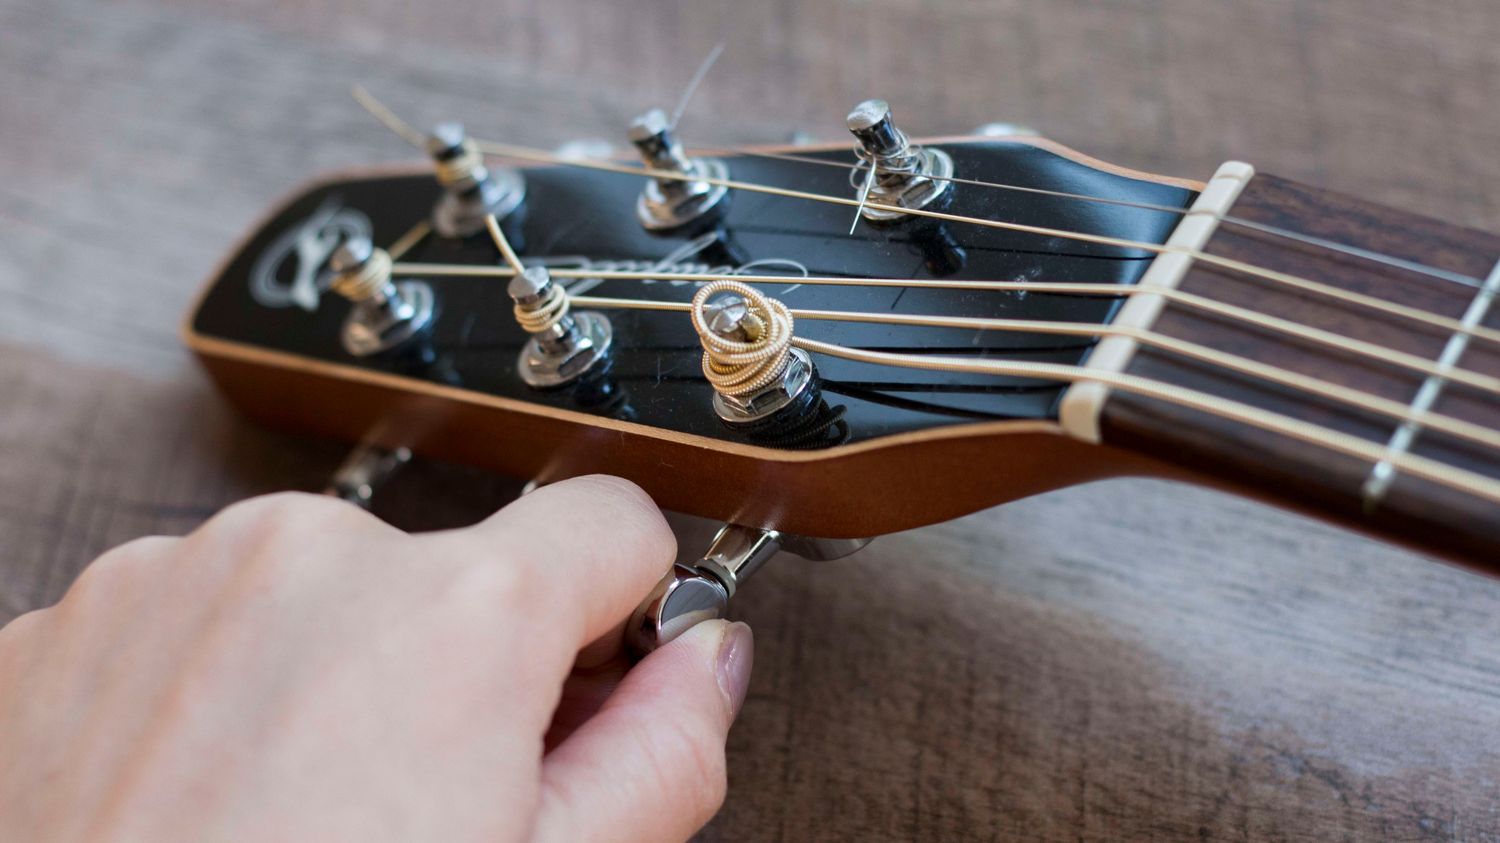
Begin winding: Using your dominant hand, start winding the string around the tuning peg in a clockwise direction. Ensure that each turn of the string is neat and snug, avoiding any overlapping or loose winding. The goal is to achieve a tight and uniform wind that maximizes the string's contact with the tuning peg, promoting stability and tuning accuracy.
-
Maintain alignment: As you wind the string, pay close attention to its alignment and positioning on the tuning peg. The string should wrap neatly and evenly, with each coil sitting flush against the previous one. This meticulous approach contributes to the overall stability and reliability of the string's tension, minimizing the risk of slippage or tuning inconsistencies.
-
Leave adequate slack: While winding the string, leave a small amount of slack between the coils and the point of entry into the tuning peg. This ensures that the string is not wound too tightly, allowing for smooth and controlled tuning adjustments without causing undue stress on the string or the guitar's neck.
-
Trim the excess: Once the string is securely wound around the tuning peg and tuned to the desired pitch, carefully trim the excess length using a suitable tool. Leaving a small amount of excess string is advisable to accommodate any future tuning adjustments while maintaining a tidy and professional appearance.
By following these steps, you can effectively wind the string around the tuning peg when restringing an acoustic guitar without bridge pins. This meticulous approach ensures that the strings are anchored securely and capable of maintaining the necessary tension for optimal playability and tonal richness.
Step 5: Tune the string and trim the excess
Tuning the newly installed string is a critical final step in the restringing process for an acoustic guitar without bridge pins. Achieving accurate pitch and ensuring proper tension are essential for the string to resonate harmoniously with the other strings and deliver the desired tonal quality. Additionally, trimming the excess length of the string contributes to the overall neatness and functionality of the restringing process. Here's a detailed guide on how to tune the string and trim the excess when restringing an acoustic guitar without bridge pins:
-
Initial tuning: Begin by using a reliable tuner to bring the newly installed string to the correct pitch. Pluck the string and observe the tuner's display, adjusting the tuning peg as needed to achieve the desired note. It's important to tune the string gradually, allowing it to settle into the correct pitch to ensure stability and accuracy.
-
Check for stability: Once the string is tuned to the appropriate pitch, play the string and listen for any signs of instability or tuning discrepancies. Ensuring that the string holds its pitch and resonates clearly indicates that it has been properly installed and tuned. Any necessary adjustments can be made at this stage to fine-tune the string's tension and intonation.
-
Trim the excess: After confirming the stability and accuracy of the tuned string, carefully trim the excess length using a suitable tool, such as wire cutters or a dedicated string cutter. Leave a small amount of excess string to accommodate potential future adjustments while ensuring that the trimmed end is neat and flush with the tuning peg. This step contributes to the overall tidiness and functionality of the restringing process, enhancing the guitar's appearance and playability.
-
Repeat for remaining strings: Once the first string has been tuned and the excess trimmed, repeat the same process for the remaining strings. Each string should be meticulously tuned to the correct pitch and trimmed to the appropriate length, ensuring uniformity and precision across all strings.
By following these steps, you can effectively tune the strings and trim the excess when restringing an acoustic guitar without bridge pins. This meticulous approach ensures that each string is tuned accurately and trimmed neatly, contributing to the overall playability, tonal richness, and visual appeal of your acoustic guitar.
Conclusion
Restringing an acoustic guitar without bridge pins is a process that demands attention to detail, patience, and a deep understanding of the instrument's mechanics. As you reach the conclusion of this comprehensive guide, it's essential to reflect on the significance of mastering this skill and the impact it can have on your musical journey.
By following the step-by-step instructions outlined in this guide, you have gained valuable insights into the intricacies of restringing an acoustic guitar without bridge pins. From removing the old strings to securing the new ones and tuning them to perfection, each stage of the process plays a crucial role in maintaining the instrument's playability and tonal integrity.
As you restring your acoustic guitar without the reliance on bridge pins, you are not only preserving the instrument's sound quality but also developing a deeper connection with your craft. The hands-on experience of restringing fosters a sense of ownership and understanding of your guitar, allowing you to fine-tune its performance to suit your unique playing style and preferences.
Furthermore, mastering the art of restringing an acoustic guitar without bridge pins empowers you to take proactive measures in caring for your instrument. Instead of relying solely on professional assistance for routine maintenance, you now possess the knowledge and confidence to ensure that your guitar remains in optimal playing condition at all times.
Beyond the technical aspects, the restringing process serves as a reminder of the symbiotic relationship between a musician and their instrument. Each step, from anchoring the strings at the bridge to meticulously winding them around the tuning pegs, embodies the dedication and respect that musicians hold for their craft.
As you embark on your musical endeavors, whether in the practice room, on stage, or in the studio, the ability to restring your acoustic guitar without bridge pins stands as a testament to your commitment to excellence. It signifies a willingness to delve into the nuances of instrument care and a desire to extract the fullest potential from your musical companion.
In conclusion, the journey of restringing an acoustic guitar without bridge pins transcends the realm of maintenance; it embodies a harmonious blend of technical proficiency, artistic expression, and unwavering dedication to the craft of music. By honing this skill, you are not only preserving the integrity of your instrument but also nurturing a profound connection with the art of music itself.