Home>Production & Technology>Audio Cable>How To Strip Audio Cable
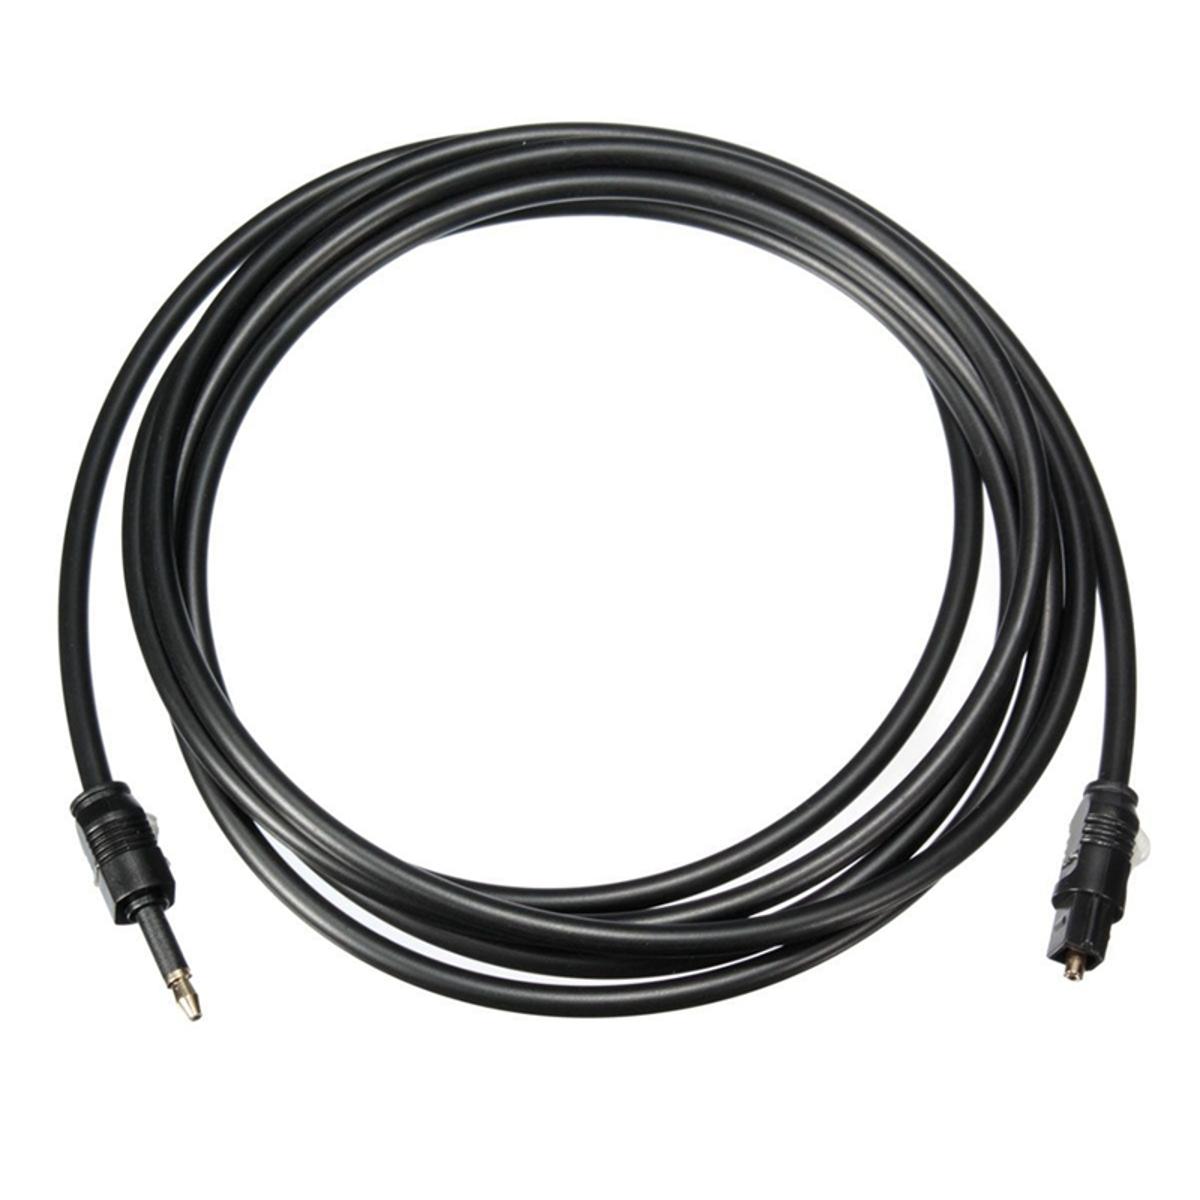
Audio Cable
How To Strip Audio Cable
Modified: January 22, 2024
Learn how to strip audio cable easily and efficiently with our step-by-step guide. Safely remove the outer insulation to reveal clean and accessible wires for your audio needs.
(Many of the links in this article redirect to a specific reviewed product. Your purchase of these products through affiliate links helps to generate commission for AudioLover.com, at no extra cost. Learn more)
Table of Contents
- Introduction
- Tools and Materials Needed
- Step 1: Gather the Necessary Tools
- Step 2: Inspect the Audio Cable
- Step 3: Determine the Length of Stripping
- Step 4: Measure and Mark the Cable
- Step 5: Cut the Cable
- Step 6: Strip the Outer Insulation
- Step 7: Separate and Insulate the Inner Wires
- Step 8: Test the Stripped Audio Cable
- Conclusion
Introduction
Welcome to our comprehensive guide on how to strip audio cable! Whether you’re a music enthusiast, audio professional, or simply someone who loves DIY projects, knowing how to properly strip an audio cable is a valuable skill. Stripping an audio cable involves removing the outer insulation to expose the inner wires, allowing for connections to be made for various audio applications.
In this article, we will provide you with step-by-step instructions on how to strip an audio cable like a pro. But before we dive into the process, let’s talk about the importance of using the right tools and materials.
Using the correct tools is crucial to ensure a clean and successful cable strip. It not only ensures your safety but also prevents damage to the wires, which can affect the audio quality. Furthermore, having a clear understanding of the cable’s specifications and the desired length of the stripped section is essential.
So, without further ado, let’s gather our tools and materials and get started on mastering the art of stripping audio cables!
Tools and Materials Needed
Before you begin the process of stripping an audio cable, it’s important to have the right tools and materials. Here’s a list of what you’ll need:
- Wire strippers: These specialized tools are designed to safely and effectively strip the insulation from the wires. Make sure to select a wire stripper that is suitable for the gauge of the audio cable you’ll be working with.
- Utility knife or scissors: These can be used as an alternative to wire strippers, especially for smaller cables. However, exercise caution as using a utility knife can be more challenging and may require more precision.
- Multimeter: This handy device is used to test the continuity and resistance of the wires once they have been stripped. While not essential, it can be helpful in ensuring the integrity of the connections.
- Marker or pen: This will be used to mark the desired length of the stripped section on the cable.
- Heat shrink tubing: Optional, but recommended for providing additional protection and insulation to the stripped wires.
- Heat source: If you choose to use heat shrink tubing, you’ll need a heat source, such as a heat gun or a lighter, to shrink the tubing in place.
- Protective gloves: It’s always a good idea to protect your hands with gloves when working with sharp tools or heat sources.
With these tools and materials at your disposal, you’ll be well-prepared to tackle the audio cable stripping process with confidence and ease.
Step 1: Gather the Necessary Tools
Before you begin stripping an audio cable, it’s important to gather all the necessary tools and materials. This will ensure that you have everything you need within reach and can work efficiently. Here’s a quick checklist of the tools and materials you’ll need:
- Wire strippers
- Utility knife or scissors
- Multimeter
- Marker or pen
- Heat shrink tubing (optional)
- Heat source (if using heat shrink tubing)
- Protective gloves
Make sure that your wire strippers are suitable for the gauge of the audio cable you’ll be working with. Choosing the right size will ensure that you can strip the cable insulation without damaging the wires inside.
If you don’t have wire strippers, an alternative option is to use a utility knife or a pair of scissors. However, make sure to exercise caution and precision when using these tools, as they can be trickier to maneuver and may require more finesse.
The multimeter is not essential for stripping the cable, but it can be useful for testing the continuity and resistance of the wires once they have been stripped. It will help you ensure that your connections are secure and reliable.
Additionally, you’ll need a marker or pen to mark the length of the stripped section on the cable. This will help you stay precise and avoid cutting or stripping more than necessary.
If you choose to use heat shrink tubing, make sure you have it on hand. The tubing provides extra insulation and protection for the stripped wires. To shrink the tubing in place, you’ll need a heat source such as a heat gun or a lighter.
Finally, don’t forget to wear protective gloves. This will keep your hands safe from any potential cuts or burns during the cable stripping process.
Once you have gathered all the necessary tools and materials, you’re ready to move on to the next step: inspecting the audio cable.
Step 2: Inspect the Audio Cable
After gathering all the necessary tools, it’s time to inspect the audio cable. This step is important to familiarize yourself with the cable’s structure and identify any specific features or markings.
Start by examining the outer insulation of the cable. Look for any signs of damage, such as cuts, frays, or exposed wires. If you notice any such issues, it’s best to replace the cable to ensure optimal performance and safety.
Next, check if the cable has any distinguishing marks or color-coding. Some cables may have different color wires or markers to indicate specific channels or functions. Understanding these markings will be helpful when it comes to separating and identifying the inner wires.
It’s also important to assess the length of the cable and determine how much of it you need to strip. Consider the requirements of your specific audio project and mark the desired length using a marker or pen. This will provide a clear guide during the stripping process.
Furthermore, take note of the cable’s overall thickness or gauge. Different audio cables may have varying diameters, so it’s important to select wire strippers or utility knives that can accommodate the size of your cable.
By thoroughly inspecting the audio cable, you will have a better understanding of its condition, markings, and specifications. This knowledge will assist you in the following steps, ensuring a smooth and successful cable stripping process.
Once you have completed the inspection, you’re ready to move on to the next step: determining the length of stripping.
Step 3: Determine the Length of Stripping
Now that you have inspected the audio cable, it’s time to determine the length of stripping. This step is crucial as it will dictate how much of the outer insulation needs to be removed to expose the inner wires.
Consider the requirements of your audio project and decide on the appropriate length for the stripped section. Keep in mind that stripping too much insulation can leave the wires vulnerable to damage, while stripping too little may not provide enough exposed wire for making proper connections.
A common practice is to leave a few inches of the cable’s outer insulation untouched, especially if you plan to connect the cable to a connector or termination. This will provide a clean and secure connection point.
If you’re unsure about the length of stripping, it’s always better to err on the side of caution and strip a slightly longer section. You can always trim off any excess insulation later if needed.
Using a marker or pen, mark the desired length on the cable. Make sure the marking is clear and easily visible. This will serve as a reference point during the stripping process, helping you maintain accuracy.
By determining the appropriate length of stripping, you’ll ensure that the exposed wires are sufficient for your audio connections, making for a reliable and efficient setup.
With the length of stripping established, you’re now ready to move on to the next step: measuring and marking the cable.
Step 4: Measure and Mark the Cable
After determining the length of stripping, the next step is to measure and mark the cable. This will help you accurately strip the outer insulation and ensure consistent results.
Start by measuring the distance from the end of the cable to the point where you want to begin the stripping process, based on your previous length determination. Use a ruler or a measuring tape to ensure precision.
Using a marker or pen, make a small mark on the cable at the measured distance. This mark will serve as a reference point for where the stripping will begin.
Next, measure the length of the stripped section by subtracting the desired length of stripping from the total length of the cable. Mark this measurement on the cable using your marker or pen.
These measurements and markings are important, as they will guide you in stripping the outer insulation accurately and consistently across multiple cables, if necessary.
Having clear and visible markings on the cable will also help you maintain consistency in the appearance of the stripped sections, ensuring a professional and organized aesthetic.
With the cable measured and marked, you’re now ready to move on to the next step: cutting the cable.
Step 5: Cut the Cable
With the cable measured and marked, it’s time to proceed with cutting. This step involves carefully severing the outer insulation of the cable to expose the inner wires.
Place the cable on a flat, secure surface and ensure that it is positioned steadily. Keep in mind the marked reference point indicating where the stripping will begin.
Using a pair of wire cutters, utility knife, or scissors, carefully cut through the outer insulation at the marked starting point. Make sure to apply steady pressure and keep the cut straight to ensure a clean and even cut.
When making the cut, be cautious not to damage or nick the inner wires. Take your time and work slowly to avoid any accidental slips or close encounters with the wires.
Continue cutting along the marked length of the stripped section, applying the same care and precision. Make a clean, smooth cut without going beyond the marked endpoint.
Once you have completed the cut, take a moment to inspect the stripped section. Ensure that the outer insulation has been cleanly removed without affecting the integrity of the inner wires.
If you notice any uneven cuts, jagged edges, or accidental nicks on the wires, it may be necessary to trim the stripped section or start over with a fresh section of cable if needed. It’s better to address any issues now to ensure optimal performance and longevity.
With the cable successfully cut, you can now move on to the next step: stripping the outer insulation.
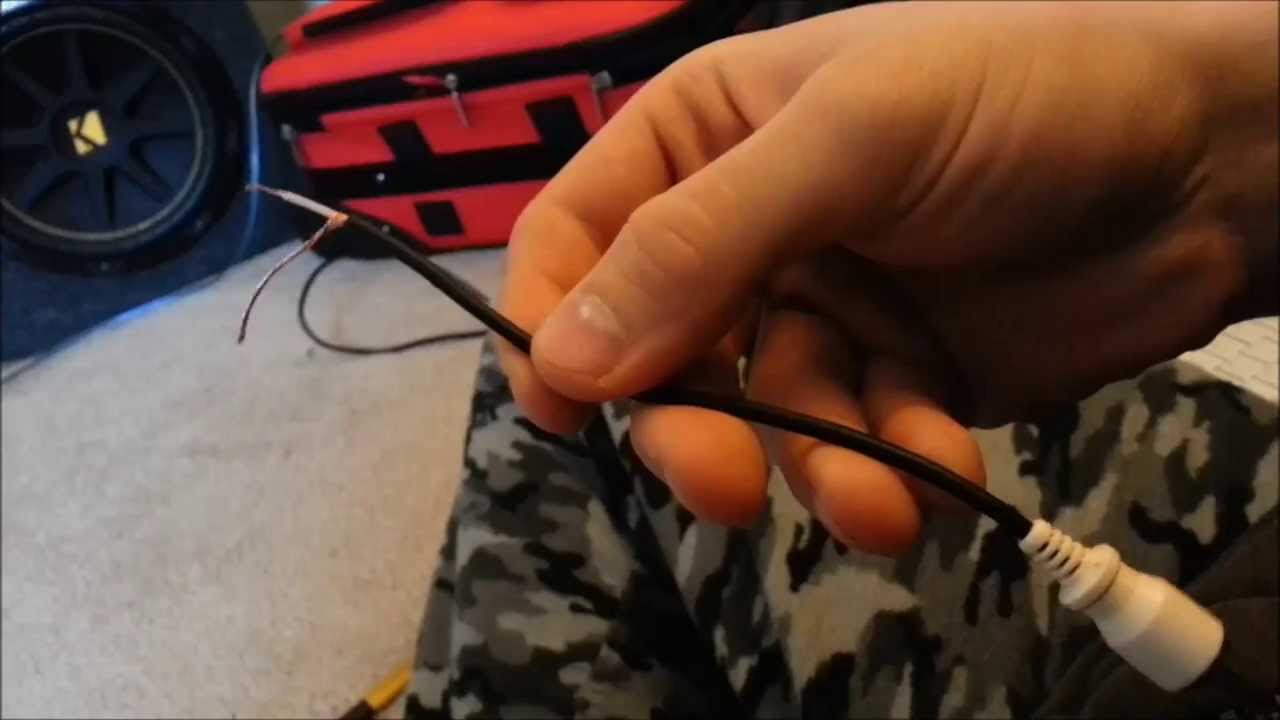
Step 6: Strip the Outer Insulation
After cutting the cable to the desired length, the next step is to strip the outer insulation. This process involves removing the outer layer to expose the inner wires.
Take your wire strippers, ensuring that they are appropriate for the gauge of your audio cable. The wire strippers are designed with notches or holes of various sizes to accommodate different wire gauges.
Position the wire strippers over the stripped section of the cable, aligning them with the edge of the insulation. Make sure that the notch or hole size matches the gauge of the cable.
Gently squeeze the wire strippers, applying a firm but controlled pressure. Slowly pull the strippers down the length of the cable, moving towards the endpoint. The strippers’ blades should cut into the outer insulation, allowing it to be easily removed.
Continue pulling the wire strippers until the entire stripped section of the cable has been freed from the outer insulation. Be cautious not to cut into or damage the inner wires as you strip the cable.
Once the outer insulation has been removed, you should be left with the exposed inner wires. Take a moment to inspect the stripped section to ensure that the wires are intact and undamaged.
If needed, gently tug on the outer insulation to remove any remaining fragments or loose debris. It’s important to have a clean and clear stripped section for optimal conductivity and connection.
As an optional step, you can now slide heat shrink tubing over the stripped section. This will provide additional insulation and protection for the exposed wires. Use a heat source, such as a heat gun or a lighter, to shrink the tubing in place.
With the outer insulation stripped, and optionally, heat shrink tubing in place, you’ve successfully completed the process! The stripped audio cable is ready for the next step: separating and insulating the inner wires.
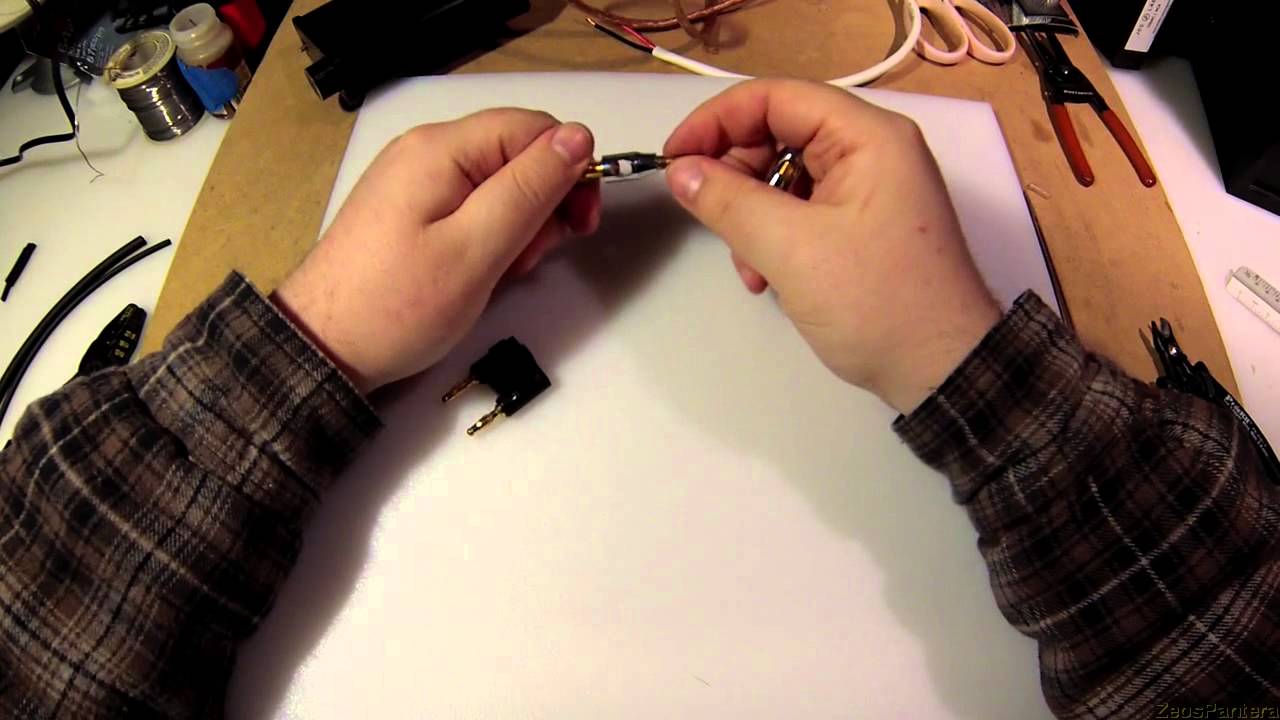
Step 7: Separate and Insulate the Inner Wires
Now that you have stripped the outer insulation of the audio cable, it’s time to separate and insulate the inner wires. This step involves identifying and organizing the wires and providing individual insulation for each one.
Start by carefully examining the exposed inner wires. Most audio cables will have two or more wires inside, typically color-coded to indicate different channels or functions.
Identify the different wires based on their color or markings. Use a marker or pen to label each wire if necessary to avoid confusion later on.
Once you have identified the wires, it’s time to separate them. Grasp each wire individually and gently twist it clockwise to keep the strands together. This will make it easier to work with and prevent them from unraveling.
If the wires are tightly bound together, you can use wire strippers or a pair of pliers to carefully separate them by gripping the base of the wires and twisting in opposite directions.
Next, insulate each wire individually to prevent any unwanted contact or shorting. The most common method is to use small pieces of heat shrink tubing or electrical tape.
If using heat shrink tubing, carefully slide a short piece over each exposed wire and position it close to the base of the insulation. Apply heat using a heat gun or a lighter to shrink the tubing and create a snug fit around the wire.
If using electrical tape, wrap a small strip around each exposed wire, ensuring that it covers the bare metal completely. Wrap the tape tightly but be careful not to stretch or tear it in the process.
Make sure the insulation covers each wire completely, leaving no exposed metal. This will prevent any accidental short circuits and ensure the integrity of your audio connections.
Repeat the process for each wire, taking your time to ensure precision and accuracy. Once all the wires are separated and insulated, take a moment to double-check your work and make any necessary adjustments.
With the inner wires separated and insulated, you’re nearing the completion of the audio cable stripping process. The final step is to test the stripped audio cable, which we will cover in the next step.
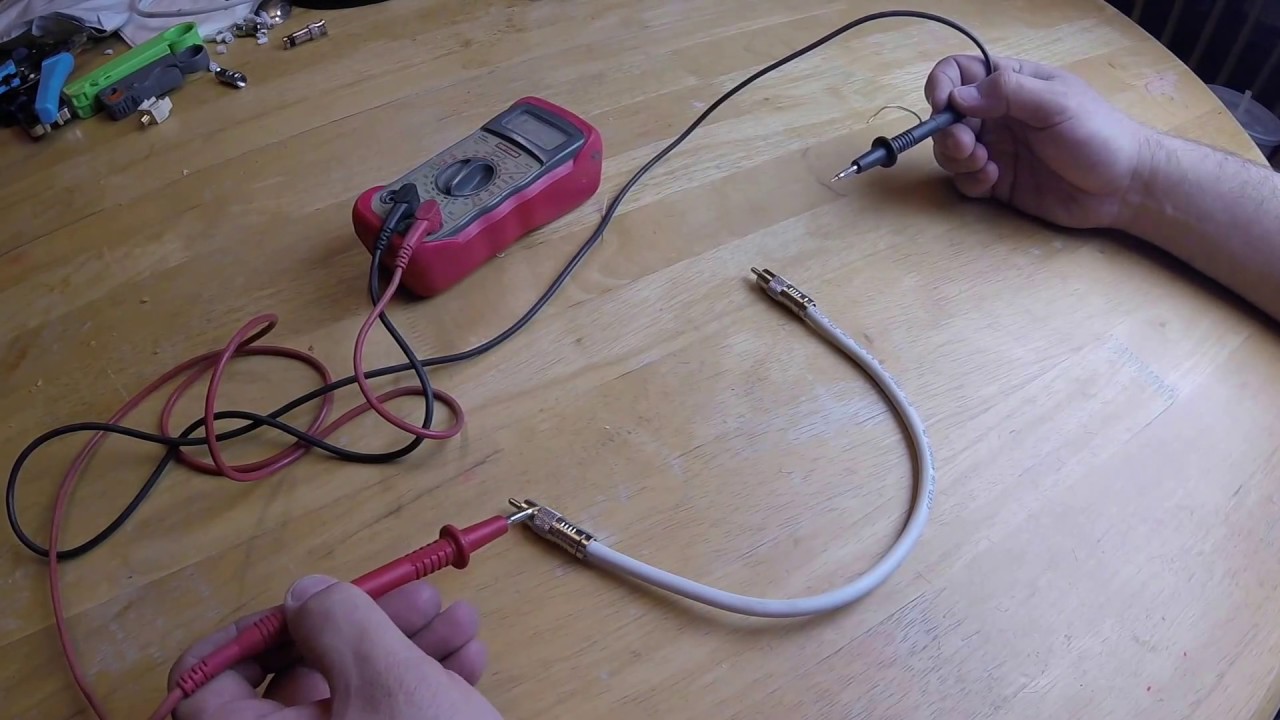
Step 8: Test the Stripped Audio Cable
After going through the process of stripping and insulating the inner wires, it’s important to test the stripped audio cable to ensure that the connections are secure and the audio signal is transmitting properly. Testing the cable will help you identify any potential issues or defects before using it in your audio setup.
To test the stripped audio cable, follow these steps:
- Plug one end of the cable into the appropriate audio source, such as an amplifier, mixer, or audio interface.
- Connect the other end of the cable to the corresponding input or output device, ensuring a snug and secure connection.
- Turn on the audio source and the connected device, if necessary, and activate the audio signal.
- Listen for any sound or audio output from the connected device to confirm that the stripped audio cable is transmitting the signal effectively.
- If you have a multimeter, you can also use it to test the continuity and resistance of the wires. Set the multimeter to the appropriate settings and touch the probes to the exposed wires, checking for a continuous reading and the absence of any measurable resistance.
If you encounter any issues during the testing process, such as no sound output or irregular readings on the multimeter, it’s recommended to double-check your connections, ensure proper insulation, and troubleshoot any potential problems.
If everything is functioning as expected, congratulations! You have successfully stripped an audio cable and verified its functionality.
Remember, always handle audio cables with care, avoiding excessive bending or pulling, and store them properly to maintain their longevity and performance.
With the stripped audio cable tested and confirmed to be working, you’re now ready to integrate it into your audio setup and enjoy high-quality sound!
Conclusion
Stripping an audio cable may seem like a daunting task at first, but with the right tools and knowledge, it can be easily accomplished. By following the step-by-step process outlined in this guide, you can confidently strip an audio cable and prepare it for various audio applications.
Remember that gathering the necessary tools and materials, inspecting the cable, and determining the length of stripping are essential preliminary steps. Cutting the cable, stripping the outer insulation, separating and insulating the inner wires, and finally, testing the stripped audio cable, are the key steps of the cable stripping process.
Throughout this guide, we have emphasized the importance of precision, care, and attention to detail. By following these guidelines, you can ensure that your stripped audio cable is of high quality, providing reliable connections and optimal audio performance.
Whether you’re a music enthusiast, audio professional, or simply someone who enjoys DIY projects, having the ability to strip an audio cable opens up a world of possibilities. From creating custom audio cables to repairing or modifying existing ones, this skill empowers you to take control of your audio setup and tailor it to your specific needs.
Always remember to prioritize safety by wearing protective gloves, handling tools responsibly, and being mindful of potential hazards during the cable stripping process.
Now that you have mastered the art of stripping an audio cable, you can confidently tackle audio projects with ease. So go ahead, connect your devices, and immerse yourself in the world of high-quality audio!