Home>Production & Technology>Audio Interface>How To Reduce Latency For Audio Interface

Audio Interface
How To Reduce Latency For Audio Interface
Published: February 4, 2024
Learn effective techniques to reduce latency for your audio interface and improve real-time audio processing. Take your audio production to the next level with these tips.
(Many of the links in this article redirect to a specific reviewed product. Your purchase of these products through affiliate links helps to generate commission for AudioLover.com, at no extra cost. Learn more)
Table of Contents
Introduction
Welcome to the world of audio interfaces, where pristine sound quality and low latency are of utmost importance. Whether you’re a professional musician, podcaster, or audio enthusiast, having a reliable and high-performing audio interface can greatly enhance your audio production experience.
An audio interface acts as the bridge between your computer and external audio devices, allowing you to capture, record, and playback audio with exceptional clarity. It provides essential features like microphone preamps, analog-to-digital converters, and digital-to-analog converters, ensuring accurate and faithful sound reproduction.
One common issue that many users face when using audio interfaces is latency. Latency refers to the delay between the moment you play or sing into a microphone and the moment you hear the sound through your speakers or headphones. This delay can be distracting and frustrating, especially during live performances or when recording multiple tracks simultaneously.
This article will guide you through the process of reducing latency for your audio interface, helping you achieve optimal performance and a seamless workflow. We will delve into the factors that contribute to latency, explore techniques for minimizing it, and provide tips for choosing the right audio interface for your needs.
So, if you want to unlock the full potential of your audio production setup and eliminate the annoying delays, let’s dive in and learn how to reduce latency for your audio interface.
Understanding Latency
Before we dive into the techniques for reducing latency, let’s first understand what latency is and how it affects your audio production workflow.
Latency is the delay that occurs between the input of a sound signal into the audio interface and its output through your speakers or headphones. It is measured in milliseconds (ms) and can vary depending on different factors. In a nutshell, latency can be divided into two main types:
- Input Latency: This refers to the delay between when you sing or play an instrument and when you hear it through your headphones. It is typically caused by the time it takes for the audio signal to go through the audio interface’s analog-to-digital conversion process and the computer’s digital processing.
- Output Latency: This refers to the delay between when you send a sound signal from your computer and when it is played back through your speakers or headphones. It is influenced by factors such as the digital-to-analog conversion process and the computer’s processing speed.
Latency can be perceived in different ways depending on the application you’re using. For example, during live performances or recording sessions, high levels of latency can disrupt your timing and make it challenging to play along with other musicians.
Latency can be influenced by a variety of factors, including:
- The audio interface’s hardware and driver performance
- The buffer size and sample rate settings
- The processing power of your computer
- The efficiency of your audio software
Understanding these factors is crucial in addressing and minimizing latency issues. In the next sections, we will explore different techniques and strategies to help reduce latency and optimize your audio interface’s performance.
Factors Affecting Latency
Reducing latency requires identifying and addressing the factors that contribute to it. Here are some key factors that can affect the latency of your audio interface:
- Audio Interface Hardware: The quality and performance of your audio interface’s hardware play a significant role in determining the latency you’ll experience. Higher-end audio interfaces typically have faster and more efficient components, resulting in lower latency. Choosing an audio interface with low-latency features like high-speed USB or Thunderbolt connectivity can greatly reduce latency.
- Audio Interface Drivers: Audio drivers are software components that allow your computer to communicate with the audio interface. Inefficient or outdated drivers can cause higher latency. It is essential to keep your audio interface drivers up to date to ensure optimal performance and compatibility with your operating system.
- Buffer Size and Sample Rate: The buffer size and sample rate settings in your audio software can impact latency. A larger buffer size generally increases latency but can provide a more stable audio stream. Conversely, a smaller buffer can decrease latency, but it may cause audio dropouts if your computer cannot handle the processing load. Finding the right balance between buffer size and sample rate is crucial for achieving low latency.
- Computer Processing Power: The processing power of your computer affects its ability to handle real-time audio processing. Insufficient processor speed or insufficient RAM can result in higher latency. To optimize performance, ensure that your computer meets the recommended specifications for the audio software you are using and close any unnecessary background applications.
- Software Efficiency: The efficiency of your audio software also plays a role in latency. Some software applications are better optimized for low-latency performance than others. It may be worth exploring different software options or configuring your current software to prioritize low-latency settings.
By understanding these factors, you can take the necessary steps to minimize latency and ensure a smooth audio production experience. In the following sections, we will explore various techniques and strategies to help you reduce latency for your audio interface.
Choosing the Right Audio Interface
When it comes to reducing latency, choosing the right audio interface for your needs is crucial. Here are a few key factors to consider:
- Connection Type: The connection type of your audio interface can impact latency. USB, Thunderbolt, and PCIe interfaces offer faster data transfer rates and lower latency compared to FireWire or older connection types. Consider the connection type that is compatible with your computer and offers the best performance for your audio production needs.
- Sampling Rate and Bit Depth: Higher sampling rates and bit depths can result in higher audio quality, but they can also increase latency. Keep in mind that higher sampling rates and bit depths require more processing power from your computer. Consider the trade-off between audio quality and latency based on your specific requirements.
- Number of Inputs and Outputs: Consider the number of inputs and outputs you will need for your audio production setup. Having enough inputs and outputs ensures flexibility and minimizes the need for additional devices or workaround solutions that could introduce latency. Assess your specific requirements, such as the number of microphones or instruments you will be recording simultaneously.
- Preamp Quality: Preamps are essential for capturing high-quality audio signals. Look for an audio interface with high-quality preamps that offer low noise and transparent sound reproduction. Good preamp performance can contribute to reducing latency and provide a better overall recording experience.
- Driver Support: Ensure that the audio interface you choose has reliable driver support for your operating system. Up-to-date and well-optimized drivers are crucial for achieving low latency. Research the manufacturer’s reputation for providing regular driver updates and compatibility with your specific operating system.
Additionally, it is essential to consider your budget and prioritize the features that matter most to your workflow. Reading reviews and consulting with fellow musicians or audio professionals can provide valuable insights into the performance and reliability of different audio interfaces.
By carefully considering these factors, you can select an audio interface that meets your specific needs and minimizes latency, allowing you to focus on your creative process without interruptions.
Updating Audio Drivers
One crucial step in reducing latency for your audio interface is ensuring that you have the latest audio drivers installed on your computer. Audio drivers are software components that allow your operating system to communicate with your audio interface effectively.
Outdated or incompatible drivers can lead to performance issues, including increased latency. Here are some steps to follow when updating your audio drivers:
- Identify your Audio Interface: Start by identifying the make and model of your audio interface. This information can usually be found on the audio interface itself or in the product documentation. If you are unsure, you can check the manufacturer’s website or consult the user manual.
- Visit the Manufacturer’s Website: Go to the manufacturer’s website and navigate to the support or downloads section. Look for the drivers or software section specific to your audio interface model.
- Check for Updates: Look for any available driver updates for your audio interface. Download the latest driver that is compatible with your operating system.
- Uninstall the Old Driver: Before installing the new driver, it is recommended to uninstall the previous driver from your system. This ensures a clean installation and prevents any conflicts or issues.
- Install the New Driver: Follow the installation instructions provided by the manufacturer. Most driver installations involve running an executable file and following the on-screen prompts.
- Restart Your Computer: Once the new driver is installed, it is generally a good practice to restart your computer. This allows the changes to take effect and ensures that the updated driver is properly initialized.
- Configure Driver Settings: After updating the driver, you may need to configure certain settings within the driver control panel or audio software. This can include adjusting sample rate, buffer size, or enabling low-latency modes. Consult the user manual or manufacturer’s documentation for guidance on optimizing the driver settings.
- Regularly Check for Updates: Keep in mind that driver updates are released periodically to improve performance and address any known issues. Make it a habit to regularly check for updates from the manufacturer and install them as needed.
By keeping your audio drivers up to date, you ensure that your audio interface is functioning optimally, which can lead to lower latency and a smoother audio production experience.
Optimizing Computer Performance
When it comes to reducing latency for your audio interface, optimizing your computer’s performance is essential. By making a few adjustments and ensuring your system is running efficiently, you can minimize latency and improve the overall audio production experience. Here are some tips to optimize your computer performance:
- Close Unnecessary Applications: Before using your audio interface, close any unnecessary applications running in the background. These applications can consume valuable system resources and cause latency issues.
- Disable Non-Essential Services: In addition to closing applications, consider disabling non-essential services and processes that are running in the background. This can free up system resources and help minimize latency.
- Free Up Storage Space: Ensure that your computer has enough free storage space on the hard drive or SSD. A cluttered and nearly full hard drive can slow down your system’s performance, affecting the performance of your audio interface as well.
- Optimize Power Settings: Adjust your computer’s power settings to prioritize performance over power-saving features. This can help ensure that your system operates at its full potential and minimizes latency.
- Manage Background Processes: Use task manager tools or system monitoring utilities to identify and manage any processes that are using excessive system resources. This includes closing unnecessary browser tabs or disabling resource-heavy applications.
- Update Operating System: Keep your operating system updated with the latest patches and bug fixes. Operating system updates often include performance improvements and optimizations that can positively impact the latency of your audio interface.
- Defragment Your Hard Drive (if applicable): If you are using a traditional hard drive rather than an SSD, consider defragmenting your hard drive. This process can improve the read and write speed of the drive, resulting in better performance for your audio interface.
- Upgrade Hardware Components: If your computer is struggling to handle the demands of real-time audio processing, consider upgrading its hardware components. This can include upgrading your processor, adding more RAM, or switching to a faster storage drive such as an SSD.
Each computer system is unique, and the impact of these optimizations may vary. Experiment with different configurations and settings to find the best combination for reducing latency and improving the overall performance of your audio interface.
Adjusting Buffer Size and Sample Rate
The buffer size and sample rate settings in your audio software play a significant role in determining the latency of your audio interface. Understanding how these settings work and making appropriate adjustments can help reduce latency and improve real-time audio performance. Here’s what you need to know:
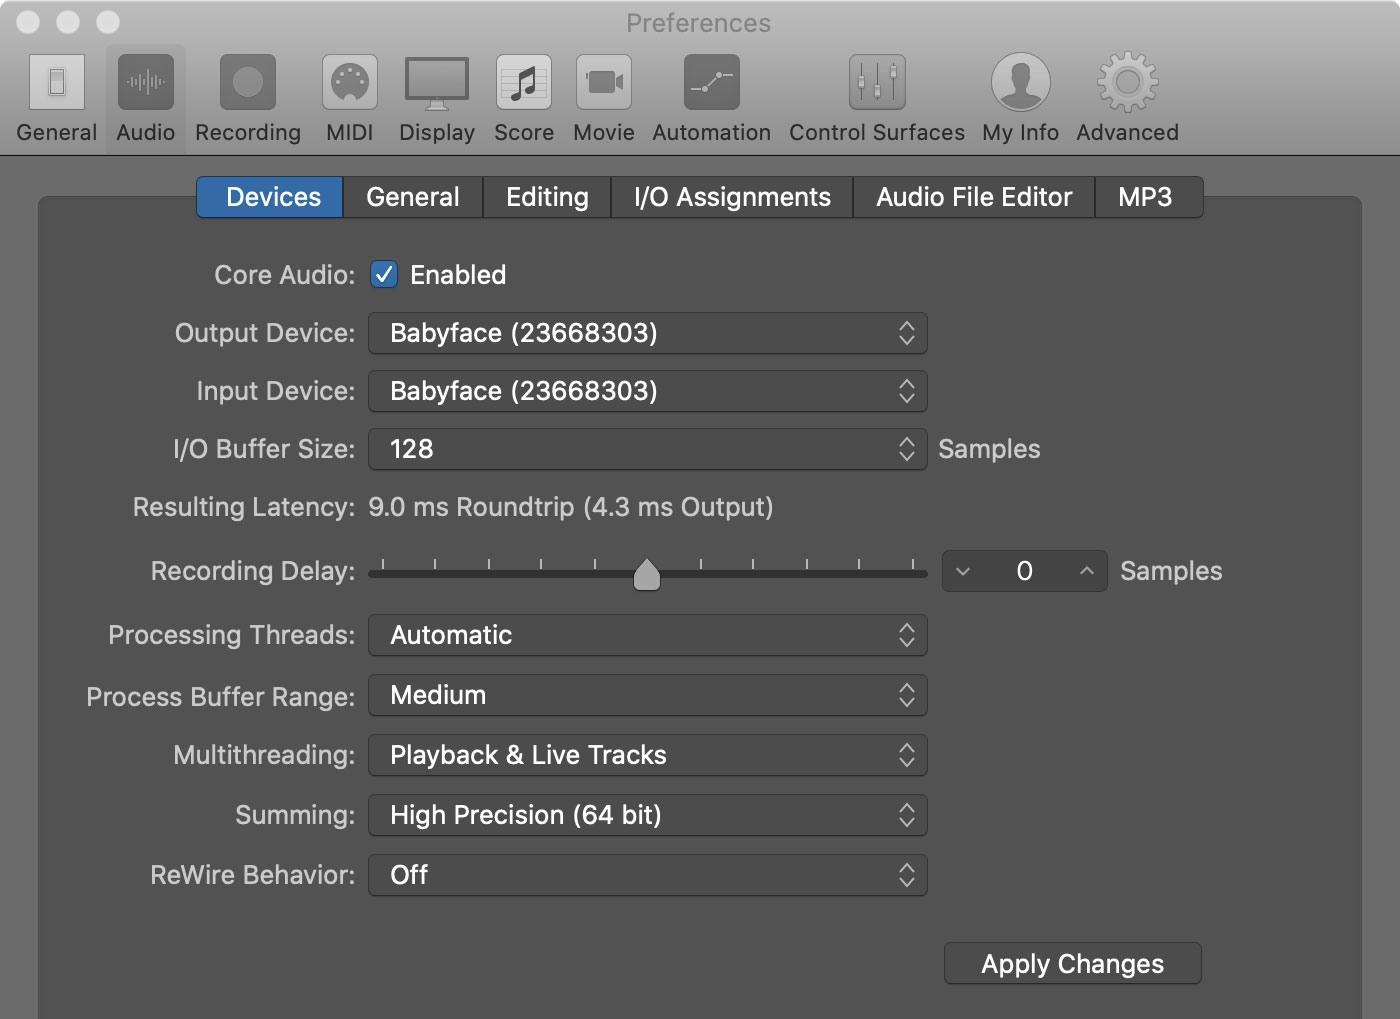
Buffer Size: The buffer size refers to the amount of audio data (in samples) that your computer processes at one time. A smaller buffer size reduces latency but requires more processing power. Conversely, a larger buffer size increases latency but reduces the strain on your computer’s CPU. Finding the right balance is crucial.
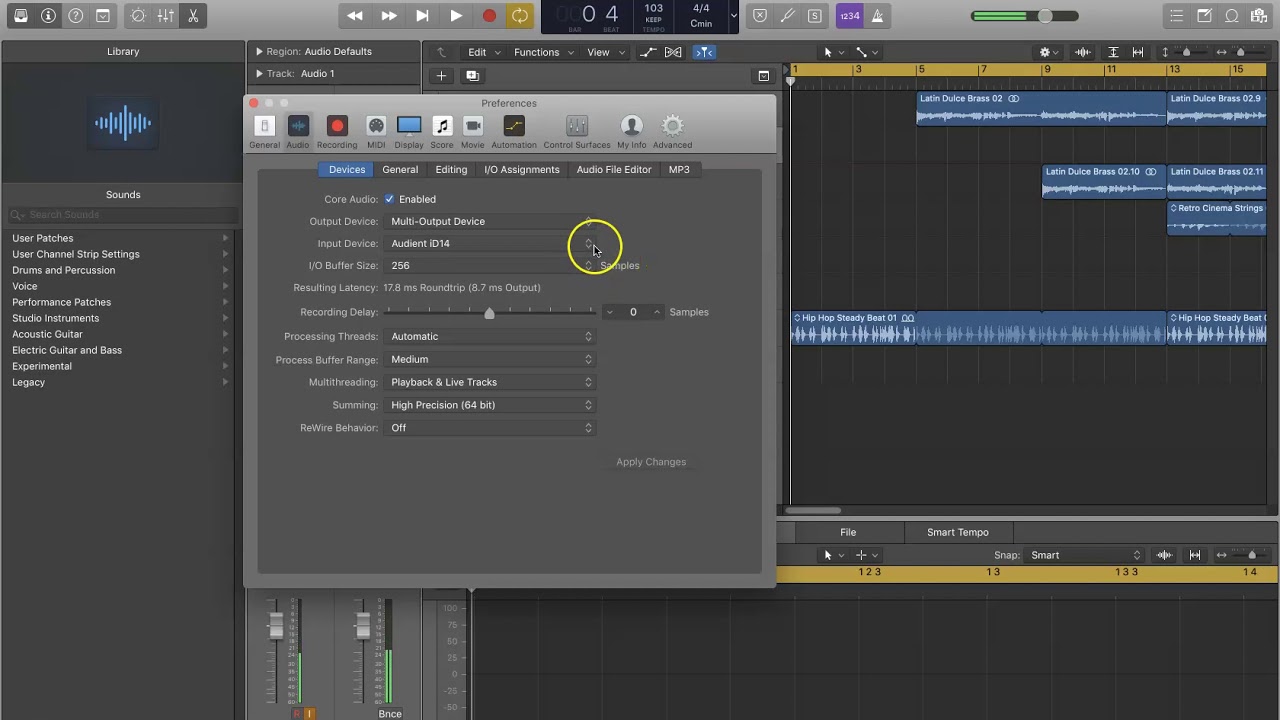
To adjust the buffer size, open your audio software’s preferences or settings and look for the buffer size setting. If you’re experiencing high latency, try reducing the buffer size. Keep in mind that setting the buffer size too low can cause audio dropouts and glitches if your computer can’t process the audio in time.
Sample Rate: The sample rate refers to the number of audio samples per second that your audio interface processes. Common sample rates include 44.1kHz, 48kHz, and higher. Higher sample rates generally provide better audio quality, but they can also increase latency and require more processing power.
When adjusting the sample rate, consider the specific requirements of your audio project. If you’re working on a project where high audio fidelity is crucial, you may opt for a higher sample rate. However, for real-time performance scenarios, such as live monitoring or virtual instruments, it’s often advisable to use a lower sample rate to reduce latency.
Remember to ensure that your audio interface and software support the chosen sample rate. Incompatibilities can cause errors or playback issues.
Experiment with different buffer sizes and sample rates to find the optimal settings for your specific needs. It’s recommended to start with a higher buffer size and lower sample rate and gradually adjust them based on the performance and latency requirements of your audio production workflow. Remember to take into account the capabilities of your computer and audio interface when making adjustments.
Using Direct Monitoring
Direct monitoring is a technique that allows you to monitor the audio input of your audio interface directly, bypassing the computer’s processing. By using direct monitoring, you can significantly reduce latency and have a more responsive monitoring experience. Here’s how it works:
When you enable direct monitoring on your audio interface, the incoming audio signal from your microphone or instrument is routed directly to the output of the audio interface, without going through the computer’s processing. This means that you can hear yourself or the audio input in real-time, with minimal latency.
To use direct monitoring:
- Enable Direct Monitoring: Check if your audio interface has a direct monitoring feature and ensure it is enabled. The process may vary depending on the specific audio interface model. Consult the user manual or the manufacturer’s website for instructions.
- Adjust the Monitor Mix: Direct monitoring usually allows you to adjust the blend between the input signal and the playback from your computer. This lets you achieve the desired balance between your audio input and any pre-recorded tracks or virtual instruments playing back from your software.
- Mute Software Monitoring: When using direct monitoring, it’s important to mute or disable the software monitoring in your recording software. This prevents the audio signal from being routed through the computer’s processing and ensures that you only hear the direct monitored signal.
Direct monitoring is particularly useful during live performances and when recording multiple tracks simultaneously. It allows you to maintain proper timing and perform without the distraction of noticeable latency.
It’s essential to note that direct monitoring does not affect the recording process itself. The audio signal is still captured by your software as usual, allowing you to make adjustments and apply effects during the mixing and editing stages.
While direct monitoring is a valuable technique for reducing latency, it may not be suitable for all scenarios. For example, when using software-based effects or plugins that require real-time processing from your computer, direct monitoring may not be available or appropriate. In those cases, it’s important to explore other techniques for latency reduction, such as adjusting buffer sizes or using low-latency plugins.
Overall, direct monitoring offers an effective solution for minimizing latency and ensuring a more responsive monitoring experience during recording sessions or live performances.
Minimizing Software Processing
Software processing refers to the digital signal processing (DSP) operations that occur within your audio recording or production software. These operations, such as applying effects, virtual instruments, or plugins, can introduce additional processing load on your computer, potentially increasing latency. Minimizing software processing can help reduce latency and improve real-time performance. Here are some strategies to consider:
- Use Lightweight Plugins: Opt for plugins that are designed to be CPU-friendly and have a low processing overhead. Some plugin manufacturers provide lightweight versions of their plugins specifically for real-time monitoring or low-latency performance. Consider using these versions when latency is a concern.
- Limit the Number of Simultaneous Plugins: Running multiple plugins simultaneously can increase the processing load on your computer. Try to use only the essential plugins you need during recording or live monitoring sessions, and disable any unnecessary or resource-intensive plugins.
- Freeze Tracks or Use Track Templates: If you have a complex project with several tracks and plugins, consider freezing tracks or using track templates. Freezing a track renders the audio with the applied plugins and temporarily reduces the processing load. Track templates allow you to save the configuration of plugins on a track, so you can quickly recall it without the need for extensive processing in real-time.
- Disable Background Processes: Close any background processes or applications that are not essential to your audio production workflow. Background processes, such as antivirus scans or software updates, can divert valuable system resources and increase latency.
- Adjust Buffer Sizes and Sample Rates: As mentioned earlier, optimizing buffer sizes and sample rates can help reduce latency. Experiment with different settings to find the balance between low latency and stable performance. Keep in mind that smaller buffer sizes will require more processing power.
- Use Hardware DSP: Some audio interfaces or external hardware processors come with built-in DSP capabilities. Offloading the processing tasks to the dedicated hardware can reduce the strain on your computer’s CPU and minimize latency. Consult the user manual of your audio interface or external processors to learn how to utilize their hardware DSP features.
Remember that the specific software and plugins you use will affect the amount of processing required and the overall latency. It’s important to experiment and find the optimal settings and combinations for your specific workflow.
By minimizing software processing and optimizing your plugin usage, you can significantly reduce latency and ensure a smoother real-time monitoring and recording experience.
Using ASIO or Core Audio Drivers
ASIO (Audio Stream Input/Output) and Core Audio are specialized audio drivers that provide low-latency performance and high-quality audio processing capabilities. These drivers are specifically designed for professional audio applications and can significantly reduce latency compared to standard audio drivers. Here’s how to take advantage of ASIO or Core Audio drivers:
ASIO Drivers:
ASIO is a driver technology developed by Steinberg, widely used in professional audio software applications. It allows direct communication between audio software and the audio interface, bypassing the audio subsystem of the operating system, resulting in improved latency performance.
- Check for ASIO Support: Determine if your audio interface or software supports ASIO drivers. Many audio interfaces come with their custom ASIO drivers for enhanced performance. Most professional audio software also includes support for ASIO drivers. Check the documentation or manufacturer’s website to verify ASIO compatibility.
- Download and Install ASIO Drivers: Ensure that you have the latest ASIO drivers for your audio interface. Visit the manufacturer’s website or check the software’s support/downloads section for the appropriate driver. Install the driver following the manufacturer’s instructions.
- Select ASIO Driver in Audio Software: In your audio software preferences or settings, select the ASIO driver as the audio device. The software should detect the installed ASIO driver, and you can choose it from the available options. Configure the desired buffer size, sample rate, and other settings within your audio software.
Core Audio Drivers:
Core Audio is a low-latency audio driver framework developed by Apple for their Mac operating systems. It provides high-quality audio processing and synchronization capabilities while minimizing latency.
- Check Core Audio Support: Verify that your audio interface and software support Core Audio drivers. Most audio interfaces designed for Mac systems offer Core Audio compatibility. Ensure that the software you’re using also supports Core Audio.
- No Additional Installation: Unlike ASIO, Core Audio drivers are built into the macOS operating system. There is no need to install additional drivers. However, it’s crucial to keep your macOS up to date to ensure you have the latest Core Audio optimizations for latency performance.
- Select Core Audio as the Audio Device: In your audio software preferences or settings, choose the Core Audio driver as the audio device. The software should detect the Core Audio driver automatically. Configure the necessary settings, such as buffer size and sample rate, within your audio software.
Utilizing ASIO or Core Audio drivers can significantly reduce latency and provide a more responsive audio production experience. However, it’s important to note that ASIO is primarily used on Windows systems, while Core Audio is specific to macOS. Ensure that your audio interface, software, and operating system are compatible to leverage the benefits of these specialized drivers.
Conclusion
Reducing latency for your audio interface is crucial for achieving a seamless and enjoyable audio production experience. By understanding the factors that contribute to latency and implementing the right techniques, you can optimize your setup and minimize delays. Here’s a recap of the key points discussed in this article:
First, understanding latency and its different types, input latency and output latency, is essential. Recognizing the factors affecting latency, such as audio interface hardware, drivers, buffer size, sample rate, computer processing power, and software efficiency, enables you to address these issues effectively.
Choosing the right audio interface that suits your needs and requirements is essential. Consider factors like connection type, sampling rate, number of inputs and outputs, preamp quality, and driver support. These aspects can have a significant impact on the overall latency performance of your audio interface.
Updating your audio drivers regularly ensures optimal performance and compatibility. Visit the manufacturer’s website, download the latest drivers, and follow the installation instructions. Additionally, make necessary adjustments to the buffer size and sample rate settings in your audio software to find the right balance between low latency and stable performance.
Using direct monitoring allows you to hear the input signal in real-time, bypassing computer processing and reducing latency. Take advantage of this feature if your audio interface supports it. Minimizing software processing, closing unnecessary applications, and disabling non-essential services can reduce the processing load on your computer, thus lowering latency.
Lastly, utilizing specialized drivers like ASIO or Core Audio provides improved performance and lower latency. Check if your audio interface and software support these drivers and configure them accordingly for optimal performance.
By implementing these techniques and strategies, you can minimize latency for your audio interface, ensuring a seamless and responsive audio production workflow. Remember to experiment with different settings and configurations to find what works best for your specific needs. With reduced latency, you can focus on your creativity and achieve outstanding results in your audio production endeavors.

