Home>Production & Technology>Audio Interface>How To Connect MIDI Keyboard To Audio Interface

Audio Interface
How To Connect MIDI Keyboard To Audio Interface
Modified: March 7, 2024
Learn how to connect your MIDI keyboard to an audio interface for seamless music production. Get the best audio quality with our step-by-step guide.
(Many of the links in this article redirect to a specific reviewed product. Your purchase of these products through affiliate links helps to generate commission for AudioLover.com, at no extra cost. Learn more)
Table of Contents
- Introduction
- What is a MIDI Keyboard?
- What is an Audio Interface?
- Why Connect a MIDI Keyboard to an Audio Interface?
- Steps to Connect MIDI Keyboard to Audio Interface
- Step 1: Check the Inputs and Outputs
- Step 2: Power On the Devices
- Step 3: Connect the MIDI Keyboard
- Step 4: Connect the Audio Interface
- Step 5: Set Up the Audio Settings
- Step 6: Test the Connection
- Additional Tips and Troubleshooting
- Conclusion
Introduction
Music production and recording have come a long way in recent years, thanks to advancements in technology. One essential part of any music studio setup is the connection between a MIDI keyboard and an audio interface. This connection allows musicians, producers, and engineers to harness the power of MIDI instruments and record high-quality audio.
So, what exactly is a MIDI keyboard? And what is an audio interface? In this article, we will explore the purpose of these devices and guide you through the process of connecting them.
What is a MIDI Keyboard?
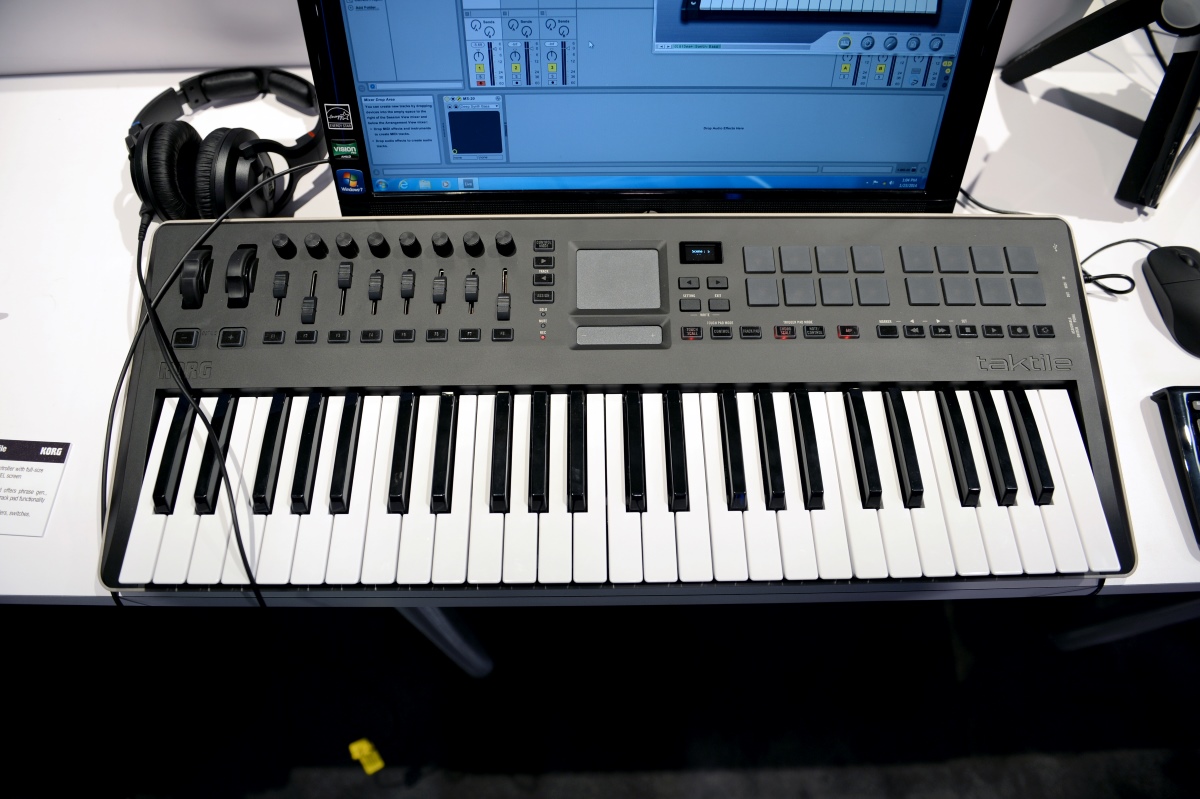
A MIDI keyboard, also known as a MIDI controller, is a musical instrument that allows you to control and input musical data into a computer or a MIDI-compatible device. Unlike traditional keyboards, which produce sound themselves, a MIDI keyboard sends data regarding the pitch, velocity, and timing of each key press to a connected device, such as a computer or a sound module.
MIDI keyboards vary in size, features, and the number of keys they offer. They often include additional controls like knobs, sliders, and buttons, which can be assigned to various parameters in music production software.
What is an Audio Interface?
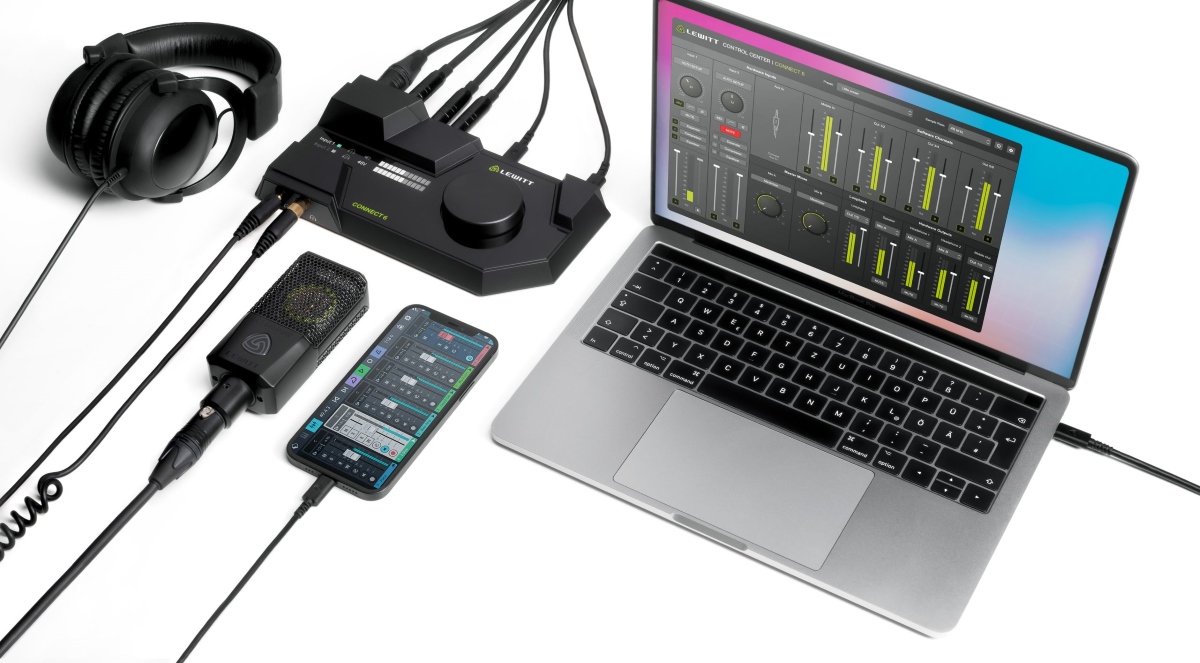
An audio interface is a device that connects your computer to audio equipment, allowing you to record and playback sound with professional-grade quality. It serves as a bridge between your computer and other audio devices, such as microphones, instruments, and speakers.
Audio interfaces come in various shapes and sizes, offering a range of inputs and outputs to accommodate different recording needs. They typically include microphone preamps, AD/DA converters, and headphone outputs, providing superior audio quality and low latency performance.
Why Connect a MIDI Keyboard to an Audio Interface?
Connecting a MIDI keyboard to an audio interface opens up a world of possibilities in music production. Here are a few reasons why this connection is crucial:
- Audio Recording: By connecting your MIDI keyboard to an audio interface, you can record the audio output of the keyboard directly on your computer. This allows for higher quality recordings and better control over the sound.
- Virtual Instruments: Many music production software programs offer a wide range of virtual instruments that can be played using a MIDI keyboard. By connecting the keyboard to an audio interface, you can utilize these virtual instruments and create realistic-sounding performances.
- Control Surface: MIDI keyboards often feature additional controls, such as knobs and sliders, which can be assigned to manipulate various parameters in music production software. Connecting the keyboard to an audio interface allows you to use these controls effectively.
Now that we understand the importance of connecting a MIDI keyboard to an audio interface, let’s dive into the steps to make this connection.
What is a MIDI Keyboard?
A MIDI keyboard, also known as a MIDI controller, is a versatile musical instrument that allows musicians and producers to interact with digital audio workstations (DAWs) and other MIDI-compatible devices. It serves as a bridge between the physical world of playing an instrument and the digital realm of producing music.
MIDI stands for Musical Instrument Digital Interface, which is a protocol that enables electronic musical instruments, computers, and software to communicate and synchronize with each other. Unlike traditional keyboards, which produce sound themselves, a MIDI keyboard does not have built-in speakers or sound generators. Instead, it transmits digital data in the form of MIDI messages to connected devices, allowing them to produce sound.
MIDI keyboards come in various shapes, sizes, and configurations to suit different needs and playing styles. Some feature a full range of 88 weighted keys, mimicking the feel of an acoustic piano, while others offer a compact design with fewer keys for portability. Additionally, MIDI keyboards often include additional controls such as knobs, sliders, and buttons, which can be assigned to manipulate various parameters in music production software.
With a MIDI keyboard, musicians have the ability to play virtual instruments, record MIDI data, and control software synthesizers and effects. Each keystroke, pedal movement, and modulation wheel manipulation generates MIDI data that can be recorded and edited within a DAW, opening up a world of possibilities for creating and arranging music.
Furthermore, MIDI keyboards are highly versatile and can be used with a wide range of software and hardware. They are compatible with popular DAWs like Ableton Live, Logic Pro, and Pro Tools, as well as virtual instrument plugins and hardware synthesizers. This flexibility allows users to customize their setup to suit their specific production needs.
Whether you’re a beginner exploring the world of music production or an experienced musician looking to expand your creative possibilities, a MIDI keyboard is an essential tool in your arsenal. It offers the tactile experience of playing an instrument while harnessing the power of digital technology to bring your musical ideas to life.
What is an Audio Interface?
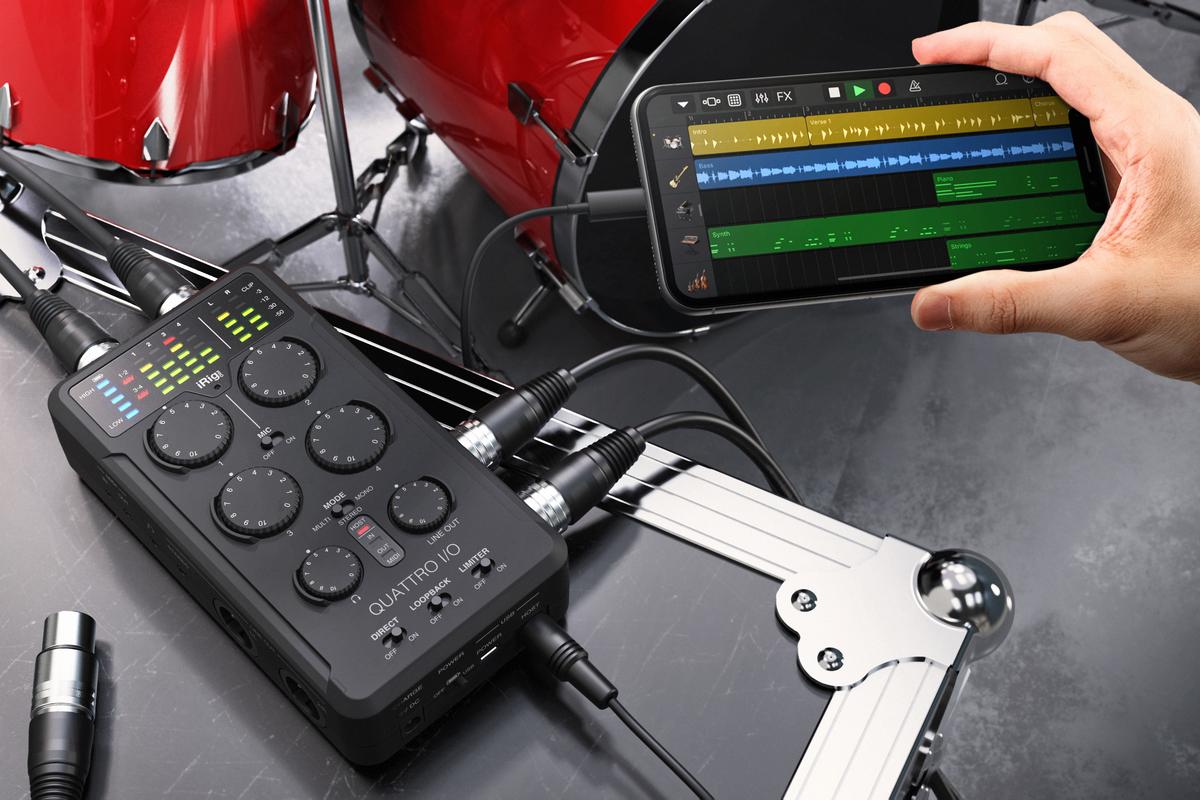
An audio interface is a crucial component in any professional recording setup. It serves as the intermediary device between your computer and other audio equipment, allowing you to capture and reproduce high-quality audio. Essentially, an audio interface is an external sound card that provides numerous inputs and outputs for connecting microphones, instruments, and speakers to your computer.
At its core, an audio interface converts analog audio signals from microphones or instruments into digital data that can be processed and stored on your computer. Conversely, it also converts digital audio data from your computer back into analog signals that can be played through speakers or headphones. This process is handled by the AD/DA (analog-to-digital and digital-to-analog) converters built into the audio interface, which ensure accurate and high-fidelity audio reproduction.
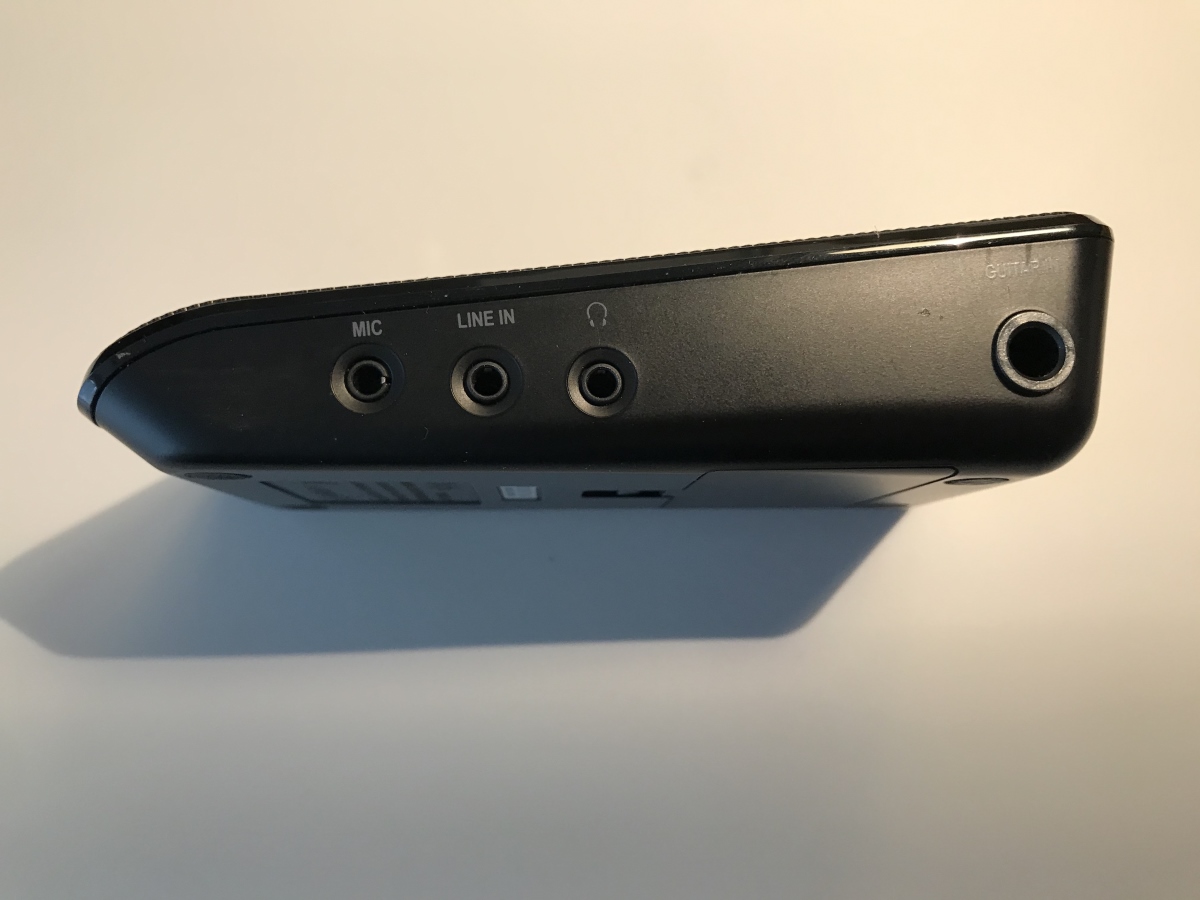
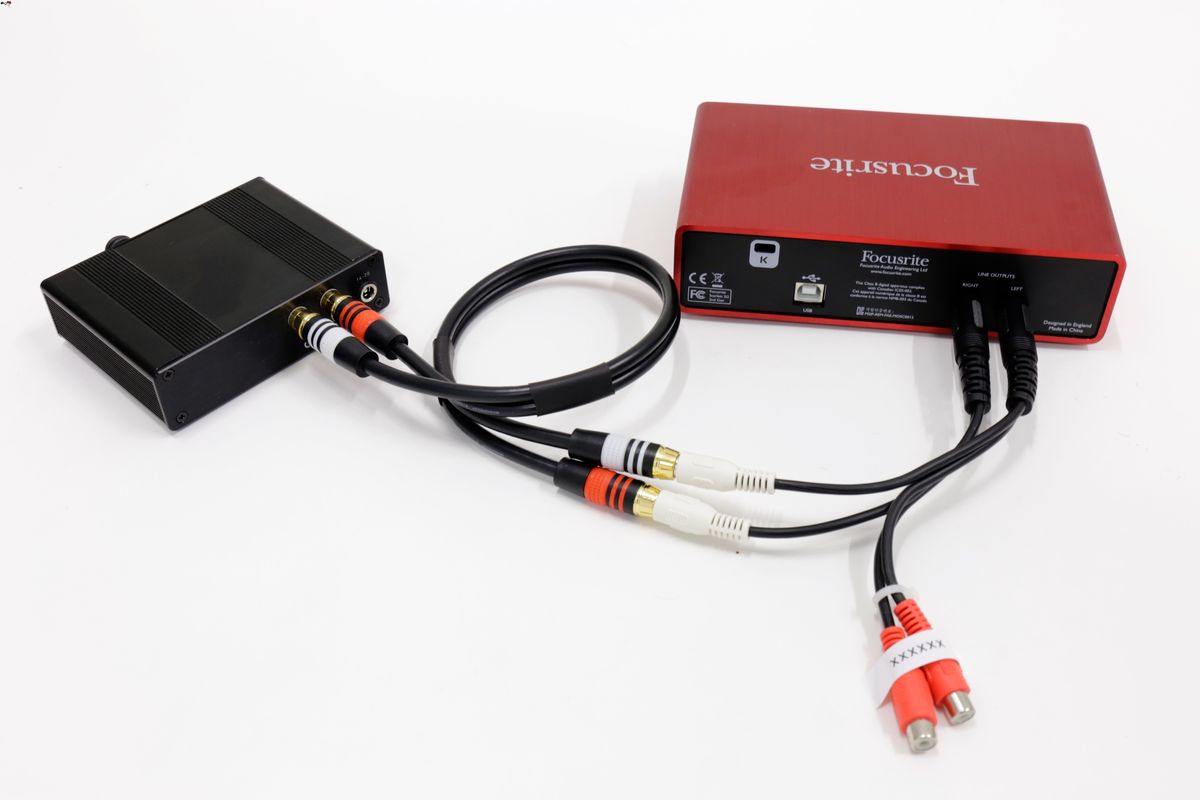
Audio interfaces come in a variety of shapes, sizes, and configurations, offering different input and output options to suit various recording needs. Common input types found on audio interfaces include XLR connectors for microphones, line-level input jacks for instruments, and even MIDI ports for connecting MIDI devices. On the output side, audio interfaces typically have balanced or unbalanced line outputs, headphone outputs, and in some cases, digital output options such as S/PDIF or ADAT.
Beyond simply converting audio signals, audio interfaces often incorporate additional features that enhance the recording and monitoring experience. These features may include microphone preamps, which amplify the signal from a microphone to a suitable level for recording; phantom power, which is crucial for powering condenser microphones; and hardware monitoring capabilities, which allow for real-time monitoring of the incoming audio signal with zero-latency.
Furthermore, audio interfaces offer varying degrees of audio quality, measured by factors such as bit depth, sample rate, and signal-to-noise ratio. Higher-end audio interfaces often provide greater audio fidelity, lower latency, and more expansive I/O options, while budget-friendly interfaces still offer respectable performance for home recording or podcasting setups.
Overall, an audio interface is an essential tool for anyone involved in audio recording, whether you’re a musician, podcaster, or sound engineer. It provides the necessary connections, signal processing, and conversion capabilities to ensure professional-grade audio capture and playback. Choosing the right audio interface for your needs will greatly impact your ability to achieve pristine recordings and unleash your creative potential.
Why Connect a MIDI Keyboard to an Audio Interface?
Connecting a MIDI keyboard to an audio interface has numerous benefits and opens up a world of possibilities in music production. Let’s explore a few key reasons why this connection is crucial.
- Audio Recording: By connecting your MIDI keyboard to an audio interface, you can record the audio output of the keyboard directly onto your computer. This allows for higher quality recordings and better control over the sound. Instead of relying on the keyboard’s built-in speakers or headphone output, you can capture the audio signal with the superior preamps and converters of the audio interface.
- Virtual Instruments: Many music production software programs offer a wide range of virtual instruments that can be played using a MIDI keyboard. These virtual instruments simulate the sounds of various instruments, such as pianos, drums, synthesizers, and more. By connecting your MIDI keyboard to an audio interface, you can utilize these virtual instruments and create realistic-sounding performances. The MIDI data generated by the keyboard triggers the corresponding sounds from the virtual instruments, giving you the ability to play and record complex compositions with ease.
- Control Surface: MIDI keyboards often feature additional controls, such as knobs, sliders, and buttons, which can be assigned to manipulate various parameters in music production software. These controls provide hands-on control over parameters like volume, pan, effects, and more. When connected to an audio interface, these controls can be used effectively to shape and manipulate the sound in real-time, enhancing your creative workflow.
- Low-Latency Performance: Audio interfaces are designed to provide low-latency monitoring, which means the audio you play or record gets back to your headphones or speakers with minimal delay. This is essential for real-time playing and ensures that you can play and hear the sounds from virtual instruments or software synthesizers with immediate response. The audio interface’s drivers, buffering, and processing capabilities optimize the performance and minimize delay, delivering a seamless and responsive playing experience.
- Expandability: By connecting a MIDI keyboard to an audio interface, you open up a world of expandability. Many audio interfaces offer multiple MIDI ports, allowing you to connect multiple keyboards, controllers, or other MIDI devices simultaneously. This flexibility enables you to build a more extensive and versatile music production setup that can cater to your specific needs and musical preferences.
Connecting a MIDI keyboard to an audio interface not only enhances the quality of your recordings but also empowers you to explore and unleash your creativity. It provides a seamless integration between physical performance and digital production, allowing you to create immersive and expressive music with ease.
Steps to Connect MIDI Keyboard to Audio Interface
Connecting a MIDI keyboard to an audio interface is a relatively straightforward process. Follow these steps to establish the connection:
- Step 1: Check the Inputs and Outputs: Examine both your MIDI keyboard and audio interface to identify the available input and output connections. Common MIDI connection options include MIDI ports (MIDI IN and MIDI OUT), USB, or a combination of both. The audio interface will typically have MIDI input and output ports, as well as USB ports for connecting to your computer.
- Step 2: Power On the Devices: Before making any connections, ensure that both the MIDI keyboard and audio interface are powered off. Plug them into a power source and switch them on.
- Step 3: Connect the MIDI Keyboard: Depending on the MIDI connection options available on your keyboard and audio interface, choose the appropriate cables. If you’re using MIDI ports, connect the MIDI OUT port of your keyboard to the MIDI IN port of the audio interface using a MIDI cable. If your keyboard offers USB connectivity, simply connect the keyboard’s USB port to a free USB port on your computer or the audio interface.
- Step 4: Connect the Audio Interface: If you haven’t already done so, connect your audio interface to your computer using a USB or Thunderbolt cable. Ensure that the interface is properly recognized by your computer and that the necessary drivers are installed.
- Step 5: Set Up the Audio Settings: Open your DAW or music production software and navigate to the audio settings. Select the audio interface as the input and output device. Set the sample rate, buffer size, and other preferences according to your needs. Typically, the drivers for your audio interface will provide a control panel where you can fine-tune these settings.
- Step 6: Test the Connection: With the MIDI keyboard and audio interface connected, launch your DAW or music software and create a new project. Add a MIDI instrument track and assign it to the MIDI input of your audio interface. Play some keys on your MIDI keyboard, and you should hear the corresponding sounds from the virtual instrument. If the connection is working correctly, you are now ready to record, play, and experiment with the MIDI keyboard through your audio interface.
It’s important to note that the specific steps may vary slightly depending on the MIDI keyboard model, audio interface, and software you are using. Consult the user manuals and documentation provided with your devices for detailed instructions.
Remember to regularly update your audio interface drivers and firmware to ensure compatibility and access the latest features and optimizations. Additionally, experiment with different settings and configurations to find the best setup for your specific recording and production needs.
By following these steps, you can seamlessly connect your MIDI keyboard to an audio interface, allowing you to unlock a world of creative possibilities in your music production endeavors.
Step 1: Check the Inputs and Outputs
Before connecting your MIDI keyboard to an audio interface, it’s essential to familiarize yourself with the available input and output options on both devices. This step ensures that you select the correct cables and connectors necessary for establishing a proper connection.
Start by examining your MIDI keyboard. Look for MIDI ports, which are typically labeled as MIDI IN and MIDI OUT. These ports allow for MIDI communication between your keyboard and other devices. If your keyboard doesn’t have physical MIDI ports, it may have a USB port that allows you to connect directly to your computer or audio interface. USB connectivity is becoming increasingly prevalent in modern MIDI keyboards and offers simplicity and convenience.
Next, assess your audio interface. Check for MIDI input and output ports. The MIDI input port on the interface receives MIDI data from your keyboard, while the MIDI output port allows you to send MIDI data from your computer or software back to your keyboard. Additionally, ensure that your audio interface has USB or other appropriate connections for connecting to your computer.
It’s worth noting that some MIDI keyboards and audio interfaces may have multiple MIDI ports or USB ports. This provides flexibility for connecting multiple MIDI devices or expanding your setup in the future.
Once you’ve identified the available inputs and outputs on both your MIDI keyboard and audio interface, you can decide which cables to use for the connection. If you’re using MIDI ports, obtain a MIDI cable with the appropriate connectors. MIDI cables have round plugs called DIN connectors that fit into the MIDI ports on your devices. If your keyboard supports USB connectivity, you’ll need a USB cable that matches the USB port type on your keyboard and audio interface (USB-A, USB-B, USB-C, etc.).
Take note of the specific ports and connectors needed for your setup, as this will ensure that you have the correct cables and adapters on hand. Consulting the user manuals and documentation for both your MIDI keyboard and audio interface can provide additional guidance in determining the exact input and output options available.
By carefully checking the inputs and outputs of your MIDI keyboard and audio interface, you’ll be fully prepared to proceed with the connection process in the subsequent steps.
Step 2: Power On the Devices
Once you have identified the appropriate cables and connectors for connecting your MIDI keyboard to an audio interface, it’s time to power on both devices. This step ensures that the devices are ready for the connection process and eliminates any potential electrical issues that may arise.
Start by locating the power source for your MIDI keyboard. Depending on the model, it may require either a power adapter that plugs into an electrical outlet or battery power. If your keyboard uses a power adapter, ensure that it is correctly connected to the keyboard and plugged into a functioning power outlet. If your keyboard is battery-powered, insert fresh batteries or ensure that existing batteries are charged.
Next, locate the power source for your audio interface. In most cases, audio interfaces require a power adapter that plugs into an electrical outlet. Connect the power adapter to the appropriate input on the audio interface and plug it into a power outlet. If your audio interface is bus-powered, meaning it receives power from your computer via the USB connection, ensure that your computer is turned on and connected to the audio interface via the USB cable.
Before proceeding, double-check that both the MIDI keyboard and audio interface have their power switches turned off. This is important to prevent any electrical surges or accidental data transmission during the connection process.
Once both devices are properly connected to their power sources, it’s time to turn them on. Locate the power switch on your MIDI keyboard and switch it on. The keyboard should power up, and any display or indicator lights should illuminate. Likewise, find the power switch on your audio interface and turn it on. Depending on the model, the interface may have indicator lights or a display that confirms the power status.
It is crucial to give both the MIDI keyboard and audio interface a few moments to fully power up and initialize. This ensures that all internal components and circuitry are functioning correctly before proceeding with the connection. The length of time needed may vary depending on the devices and their respective power-up processes.
By following this step and powering on both the MIDI keyboard and audio interface, you ensure that all necessary electrical connections are established and that the devices are prepared for the subsequent steps of the connection process.
Step 3: Connect the MIDI Keyboard
With both the MIDI keyboard and audio interface powered on, the next step is to physically connect the MIDI keyboard to the audio interface. This connection allows for the transmission of MIDI data between the two devices, enabling you to control virtual instruments and record MIDI performances.
Start by identifying the appropriate cables based on the available MIDI connection options on your keyboard and audio interface. If your MIDI keyboard has dedicated MIDI ports, you’ll need a MIDI cable with MIDI DIN connectors. One end of the cable should have a MIDI OUT connector, which you will plug into the corresponding MIDI OUT port on your keyboard. The other end of the cable should have a MIDI IN connector, which will connect to the MIDI IN port on your audio interface.
If your MIDI keyboard supports USB connectivity, you’ll need a USB cable that matches the USB port type on your keyboard and audio interface. Plug one end of the USB cable into the USB port on your MIDI keyboard and the other end into a free USB port on your computer or the audio interface. This USB connection allows for both the transmission of MIDI data and provides power to the MIDI keyboard if it supports bus power.
Once you have selected the appropriate cable and connector type, carefully align the connectors and insert them into the corresponding ports on the MIDI keyboard and audio interface. Ensure that the connectors are fully inserted but avoid using excessive force to prevent damaging the ports or cables.
With the MIDI keyboard connected to the audio interface, it’s important to verify that the connection is secure. Gently tug on the cables at both ends to ensure they are firmly seated in their respective ports. A loose or unstable connection can lead to data transmission issues or intermittent connectivity problems.
Remember, the specific MIDI connection options and port types may vary depending on your MIDI keyboard and audio interface model. Consult the user manuals or documentation provided with your devices for additional guidance and detailed diagrams if needed.
By following this step and properly connecting your MIDI keyboard to the audio interface, you establish the necessary communication link to utilize the keyboard’s functionality and control virtual instruments and software within your music production environment.
Step 4: Connect the Audio Interface
After connecting the MIDI keyboard to your audio interface, the next step is to establish the physical connection between the audio interface and your computer. This connection allows for the transfer of audio signals to and from your computer, enabling recording, playback, and monitoring of audio.
Start by locating the appropriate cable to connect the audio interface to your computer. Most audio interfaces use USB or Thunderbolt connections for this purpose. If your audio interface has a USB port, use a USB cable that matches the port type on your audio interface and your computer. Similarly, if your audio interface utilizes a Thunderbolt connection, obtain a Thunderbolt cable that is compatible with both the audio interface and your computer.
Once you have the appropriate cable, connect one end to the USB or Thunderbolt port on your audio interface. Then, connect the other end to a free USB or Thunderbolt port on your computer. Ensure that the connectors are properly aligned and insert them firmly, making sure they are securely connected.
It’s worth noting that some audio interfaces require external power, in addition to the connection to your computer. If your audio interface has a separate power supply, locate the power adapter and connect it to the appropriate input on the interface. Plug the power adapter into a functioning power outlet to provide power to the device.
After connecting the audio interface to your computer and providing any necessary power, it’s important to confirm that the connection is recognized by your computer. Depending on your operating system, you may receive an on-screen notification or see a new device listed in your computer’s audio settings.
If you encounter any issues with the connection, ensure that you have installed any required drivers or software for your audio interface. Check the manufacturer’s website for the latest drivers and compatibility information for your specific operating system.
By connecting the audio interface to your computer, you establish the crucial link that allows for audio recording, playback, and monitoring within your digital audio workstation (DAW) or music software. This connection, along with the MIDI keyboard connection established in the previous step, forms the foundation for your music production setup.
Step 5: Set Up the Audio Settings
After connecting your MIDI keyboard and audio interface, the next step is to configure the audio settings on your computer and digital audio workstation (DAW) or music software. Properly setting up the audio settings ensures that your MIDI keyboard, audio interface, and software work together seamlessly.
Start by launching your DAW or music software and accessing the audio settings section. The location of this section may vary depending on the software you are using, but it is typically found in the preferences or settings menu.
Within the audio settings, you will typically find options to select the audio interface as the input and output device. Choose your audio interface from the available options. This selection indicates that you want to use the audio interface to process incoming and outgoing audio signals.
Next, set the sample rate and buffer size. The sample rate determines how many audio samples are captured or played back per second, while the buffer size determines the amount of audio data processed at once. These settings impact the latency and performance of your audio system.
For sample rate, choose a setting that matches the capabilities of your audio interface. Common sample rates include 44.1 kHz or 48 kHz, but higher-resolution options may be available depending on your interface.
The buffer size determines the amount of time it takes for your audio interface to process audio data. A smaller buffer size reduces latency but may place a higher load on your computer’s processor. Experiment with different buffer sizes to find the balance between low latency and smooth performance.
Additionally, if your audio interface has multiple input and output options, ensure that you select the appropriate channels for recording and playback. This allows you to take full advantage of the inputs and outputs available on your audio interface when routing audio signals.
It’s worth noting that some audio interfaces come with dedicated control panels or software that allows for further customization of settings, such as input gain, phantom power, or hardware monitoring. Check the documentation provided with your audio interface to explore these additional settings and features.
Once you have configured the audio settings in your software, ensure that you save the changes or apply the settings. This will update the software to use your designated audio interface and its associated settings.
By properly setting up the audio settings, you ensure that your MIDI keyboard, audio interface, and software are synchronized and optimized for recording, playback, and overall performance. Take the time to fine-tune these settings based on your specific preferences and requirements to achieve the best results in your music production workflow.
Step 6: Test the Connection
After completing the previous steps of connecting your MIDI keyboard to the audio interface and setting up the audio settings, it’s crucial to test the connection and ensure that everything is working as expected. This step allows you to confirm that the MIDI data from your keyboard is accurately transmitted to your software, and that you can hear the audio output from your virtual instruments or recorded tracks.
Start by launching your digital audio workstation (DAW) or music software. Create a new project or open an existing one that you want to work with. Make sure that you have a MIDI instrument track ready to use.
On your MIDI keyboard, play some keys or trigger some MIDI events. You should see activity or feedback on the MIDI instrument track within your software. This activity indicates that MIDI data is being received from your keyboard and is being recognized by the software.
Next, select a virtual instrument or software synthesizer that you want to play with your MIDI keyboard. Assign the MIDI instrument track to the virtual instrument or software synthesizer within your DAW. This step allows the MIDI data to control the selected instrument and produce sounds.
Now, when you play the keys on your MIDI keyboard, you should hear the corresponding sounds from the virtual instrument or software synthesizer. Adjust the volume and other parameters as needed to fine-tune the sound to your liking. If you hear the desired audio output, this indicates that the MIDI data from your keyboard is successfully triggering the virtual instrument or synthesizer, and the audio interface is correctly routing the audio signal to your speakers or headphones.
It’s important to listen for any latency issues during this testing phase. Latency refers to the delay between playing a note on your keyboard and hearing the sound produced. Lower latency is desirable for real-time performance, especially if you’re recording or playing along with other tracks. If you notice excessive latency, you may need to adjust the buffer size in your audio settings to minimize the delay.
During the testing phase, you should also evaluate other functionalities and controls of your MIDI keyboard, such as pitch bend, modulation, sliders, and knobs. Confirm that these controls are transmitting MIDI data accurately and that they are assignable and responsive within your music software.
If you encounter any issues during the testing process, ensure that your MIDI keyboard and audio interface are properly connected and powered on. Verify that the correct drivers are installed for your audio interface, and double-check the MIDI and audio settings within your software.
By thoroughly testing the connection between your MIDI keyboard and audio interface, you can ensure that they work harmoniously together, allowing you to create and produce music with confidence and accuracy.
Additional Tips and Troubleshooting
While connecting your MIDI keyboard to an audio interface is generally a straightforward process, you might encounter some common issues or have questions along the way. Here are some additional tips and troubleshooting steps to help you overcome any challenges:
- Ensure Proper Cable Connections: Double-check that all cables are securely connected. Loose connections can result in intermittent connectivity or data transmission issues. Confirm that the cables are inserted into the correct ports on both the MIDI keyboard and the audio interface.
- Update Drivers and Firmware: Regularly check for updates to your MIDI keyboard and audio interface drivers or firmware. Manufacturers often release new versions that improve compatibility, performance, and fix any known issues.
- Optimize MIDI Settings: Explore your MIDI keyboard’s settings and software for any additional MIDI customization options. These settings might include velocity sensitivity, pedal functionality, and MIDI channel assignments. Adjust them to suit your playing style and preferences.
- Check MIDI Thru and Local Control: Some MIDI keyboards have a “MIDI Thru” feature that allows for the transmission of MIDI data received at the MIDI input port to the MIDI output port. It’s essential to disable this feature if you want to play virtual instruments or software synthesizers instead of using the internal sounds of the keyboard. Additionally, disabling “Local Control” ensures that playing the keys doesn’t trigger internal sounds while connected to virtual instruments.
- Test Different USB Ports: If you’re using a USB connection, try connecting your MIDI keyboard to different USB ports on your computer or audio interface. Sometimes, USB ports can have different levels of power and compatibility, and using a different port might resolve any connection issues.
- Restart and Reset: If you encounter issues with the connection or any unexpected behavior, try restarting your computer, audio interface, and MIDI keyboard. Sometimes, a fresh start can resolve temporary glitches or conflicts.
- Refer to User Manuals: If you’re unsure about any specific features or functionalities of your MIDI keyboard or audio interface, consult the user manuals and documentation provided by the manufacturers. These resources often contain valuable information and troubleshooting guidance.
Remember, each MIDI keyboard and audio interface setup can have unique characteristics and requirements. It’s important to adapt these tips and troubleshooting steps to your specific devices and software. Don’t hesitate to reach out to customer support or online forums for further assistance if you encounter persistent issues or have specific questions regarding your setup.
By following these additional tips and troubleshooting steps, you can overcome common challenges, optimize your MIDI keyboard and audio interface connection, and ensure a smooth and productive music production experience.
Conclusion
Connecting a MIDI keyboard to an audio interface opens up a world of possibilities in music production and recording. The combination of these two devices allows you to harness the power of MIDI instruments, record high-quality audio, and control a vast array of virtual instruments and software synthesizers.
In this article, we explored the concept of MIDI keyboards and audio interfaces, understanding their respective roles in the music production process. We learned that MIDI keyboards are versatile instruments that transmit digital data to control the sounds produced by connected devices, while audio interfaces serve as the bridge between your computer and audio equipment, ensuring high-quality audio recording and playback.
Throughout the step-by-step process, we discussed how to connect a MIDI keyboard to an audio interface, covering important aspects such as checking inputs and outputs, powering on the devices, physically connecting the MIDI keyboard, connecting the audio interface to your computer, setting up audio settings, and testing the connection.
We also offered additional tips and troubleshooting steps to help you navigate any challenges that may arise during the connection process. By following these recommendations, you can troubleshoot common issues, optimize your setup, and ensure a seamless and enjoyable music production experience.
Remember, each MIDI keyboard and audio interface setup can have unique characteristics, so it’s important to consult the user manuals and documentation provided by the manufacturers for specific instructions and guidance.
By connecting your MIDI keyboard to an audio interface, you can unlock your full creative potential, whether you’re an aspiring musician, an experienced producer, or an audio engineer. The ability to seamlessly blend the physical act of playing an instrument with the digital capabilities of music production software empowers you to create captivating and professional-quality music.
So, dive in, connect your MIDI keyboard to an audio interface, and let your musical journey unfold with endless possibilities.

