Home>Production & Technology>Audio Interface>How To Use Tascam Tascam Us 16X08 Audio Interface For Multi Tracking
Audio Interface
How To Use Tascam Tascam Us 16X08 Audio Interface For Multi Tracking
Modified: February 19, 2024
Learn how to efficiently use the Tascam US-16x08 audio interface for multi-tracking. Enhance your recording experience with this versatile audio interface.
(Many of the links in this article redirect to a specific reviewed product. Your purchase of these products through affiliate links helps to generate commission for AudioLover.com, at no extra cost. Learn more)
Table of Contents
- Introduction
- Overview of the Tascam US-16×08 audio interface
- Setting up the Tascam US-16×08 audio interface
- Connecting and Configuring Microphones and Instruments
- Using the Multi-Track Recording Feature
- Adjusting Input Levels and Monitoring
- Applying Effects and Processing
- Mixing and Exporting Your Recordings
- Troubleshooting Common Issues
- Conclusion
Introduction
The Tascam US-16×08 audio interface is a powerful tool for musicians, producers, and audio enthusiasts who want to take their recording and mixing capabilities to the next level. With its high-quality preamps, versatile connectivity options, and intuitive software control, the US-16×08 offers a seamless and professional audio recording experience.
Whether you’re a musician looking to record your next album, a podcaster aiming for top-notch sound quality, or a home studio enthusiast wanting to expand your setup, the Tascam US-16×08 has got you covered. This audio interface boasts an impressive array of features that allow you to multi-track record with ease and precision.
In this article, we will explore the various aspects of the Tascam US-16×08 audio interface and guide you through the steps to set it up, connect microphones and instruments, utilize its multi-track recording capabilities, adjust input levels, apply effects and processing, mix your recordings, and troubleshoot any common issues you may encounter along the way.
By the end of this article, you will have a comprehensive understanding of how to make the most out of the Tascam US-16×08 audio interface and unleash your creativity in the recording studio.
Overview of the Tascam US-16×08 audio interface
The Tascam US-16×08 audio interface is a robust and versatile device designed to meet the needs of both professional and home studio environments. It features 16 inputs and 8 outputs, making it ideal for multi-track recording and mixing.
At the heart of the US-16×08 are its high-quality Ultra-HDDA mic preamps, which ensure pristine audio capture with low noise and minimal distortion. These preamps provide ample headroom and can accommodate a wide range of microphones, instruments, and line-level signals.
Connectivity options abound on the US-16×08. It offers eight XLR/TRS combo inputs with switchable +48V phantom power, making it compatible with condenser microphones. Additionally, it provides two additional TRS inputs for instruments, and six balanced line inputs on the rear panel. For output flexibility, it boasts eight balanced line outputs, a headphone output, and MIDI I/O.
One of the notable features of the US-16×08 is its ability to perform at a high sample rate of up to 96 kHz and 24-bit resolution. This ensures exceptional clarity and detail in your recordings, capturing every nuance of your performance.
The US-16×08 is also equipped with built-in digital signal processing (DSP). This includes a compressor, EQ, and reverb, allowing you to apply these effects to your recordings in real-time during the tracking process. The DSP processing can be controlled via the Tascam Control software, which provides a user-friendly interface for adjusting settings and monitoring your input and output levels.
Another standout feature of the US-16×08 is its multi-track recording functionality. With this interface, you can record and capture up to 16 individual tracks simultaneously, making it perfect for bands, ensembles, or multiple microphone setups. This opens up endless possibilities for capturing professional-quality recordings right from your own home or project studio.
In the next sections, we will explore how to set up the Tascam US-16×08 audio interface, connect microphones and instruments, utilize its multi-track recording capabilities, adjust input levels, apply effects and processing, mix your recordings, and troubleshoot common issues.
Setting up the Tascam US-16×08 audio interface
Setting up the Tascam US-16×08 audio interface is a straightforward process that involves a few key steps. Follow the guide below to ensure a smooth and hassle-free setup:
- Ensure your computer meets the system requirements: Before diving into the setup process, make sure that your computer meets the minimum system requirements for the Tascam US-16×08. This includes a compatible operating system (such as Windows or macOS) and sufficient processing power and memory.
- Connect the interface to your computer: Use the provided USB cable to connect the Tascam US-16×08 to an available USB port on your computer. Make sure to use a reliable and high-quality USB cable to ensure a stable connection.
- Install the necessary drivers: Visit the Tascam website and download the latest drivers for the US-16×08 that are compatible with your operating system. Run the installer and follow the on-screen instructions to install the drivers. Once the installation is complete, restart your computer.
- Launch the Tascam Control software: After installing the drivers and restarting your computer, launch the Tascam Control software. This software provides a user-friendly interface for controlling the settings and monitoring the inputs and outputs of the US-16×08. It allows you to adjust input levels, apply effects and processing, and configure various parameters to suit your recording needs.
- Configure the audio settings: In the Tascam Control software, navigate to the audio settings section. Here, you can select the sample rate and bit depth for your recording sessions. It is recommended to choose a higher sample rate (such as 48 kHz or 96 kHz) and bit depth (24-bit) for optimal audio quality.
- Test the inputs and outputs: Connect a microphone or instrument to one of the inputs of the US-16×08. In the Tascam Control software, navigate to the input section and verify that the signal is being detected. Speak or play the instrument to ensure that the input levels are appropriate and not peaking. Similarly, check the output section to confirm that audio is being routed to the desired output channels.
- Adjust the settings: Take the time to explore the different settings and features available in the Tascam Control software. Familiarize yourself with the DSP processing options, such as the compressor, EQ, and reverb. Experiment with different settings to achieve the desired sound for your recordings.
- Connect your monitoring system: If you have studio monitors or headphones, connect them to the appropriate outputs on the US-16×08. Use the Tascam Control software to set the output levels and ensure that you can hear the playback of your recordings clearly.
With these steps, you should now have the Tascam US-16×08 audio interface set up and ready to use. Next, we will explore how to connect microphones and instruments to the interface and utilize its multi-track recording capabilities.
Connecting and Configuring Microphones and Instruments
One of the key features of the Tascam US-16×08 audio interface is its versatility when it comes to connecting and configuring microphones and instruments. The interface offers a range of inputs and options to accommodate various recording setups. Follow the steps below to effectively connect and configure your microphones and instruments:
- Choose the appropriate input for your microphone or instrument: The Tascam US-16×08 provides eight XLR/TRS combo inputs on the front panel. If you are using a microphone, connect it to one of these inputs using an XLR cable. If you are connecting an instrument, you can use either the XLR/TRS combo inputs or the dedicated TRS inputs. Ensure that you select the appropriate input in the Tascam Control software.
- Configure the input settings: In the Tascam Control software, navigate to the input section and select the input channel that corresponds to the microphone or instrument you are using. Adjust the input level to achieve an optimal recording level, ensuring that the signal is not too low or too high. You can monitor the input level meters in the software to guide you in setting the appropriate levels.
- Enable phantom power for condenser microphones (optional): If you are using a condenser microphone, make sure to enable +48V phantom power for the corresponding input channel in the Tascam Control software. This provides the necessary power for the microphone to function properly.
- Configure the monitoring settings: In the Tascam Control software, you can set up monitoring options to help you hear the audio playback while recording. This includes choosing between direct monitoring or software monitoring. Direct monitoring allows you to listen to the input signal directly through the interface, while software monitoring routes the audio through your computer’s recording software. Choose the option that best suits your preferences and workflow.
- Connect additional instruments or line-level sources: If you have additional instruments or line-level devices to connect, you can use the remaining TRS inputs or the balanced line inputs on the rear panel of the US-16×08. Simply connect the appropriate cables and select the corresponding input channels in the Tascam Control software.
- Test the inputs and ensure proper signal flow: Before you start recording, it is essential to check the inputs and ensure that the signal flow is working as intended. Speak into the microphone or play your instrument while monitoring the input level meters in the software. Adjust the gain and input levels as needed to achieve a clean and distortion-free signal.
By following these steps, you should now have your microphones and instruments successfully connected and configured with the Tascam US-16×08 audio interface. In the next section, we will dive into utilizing the multi-track recording feature of the interface.
Using the Multi-Track Recording Feature
The Tascam US-16×08 audio interface offers a powerful multi-track recording feature that allows you to simultaneously record up to 16 individual tracks. This capability is particularly useful for bands, ensembles, or any recording scenario that requires capturing multiple sources at once. Follow the steps below to effectively utilize the multi-track recording feature of the US-16×08:
- Open your recording software: Launch your preferred recording software on your computer. The Tascam US-16×08 is compatible with popular digital audio workstations (DAWs) such as Ableton Live, Pro Tools, Logic Pro, and others.
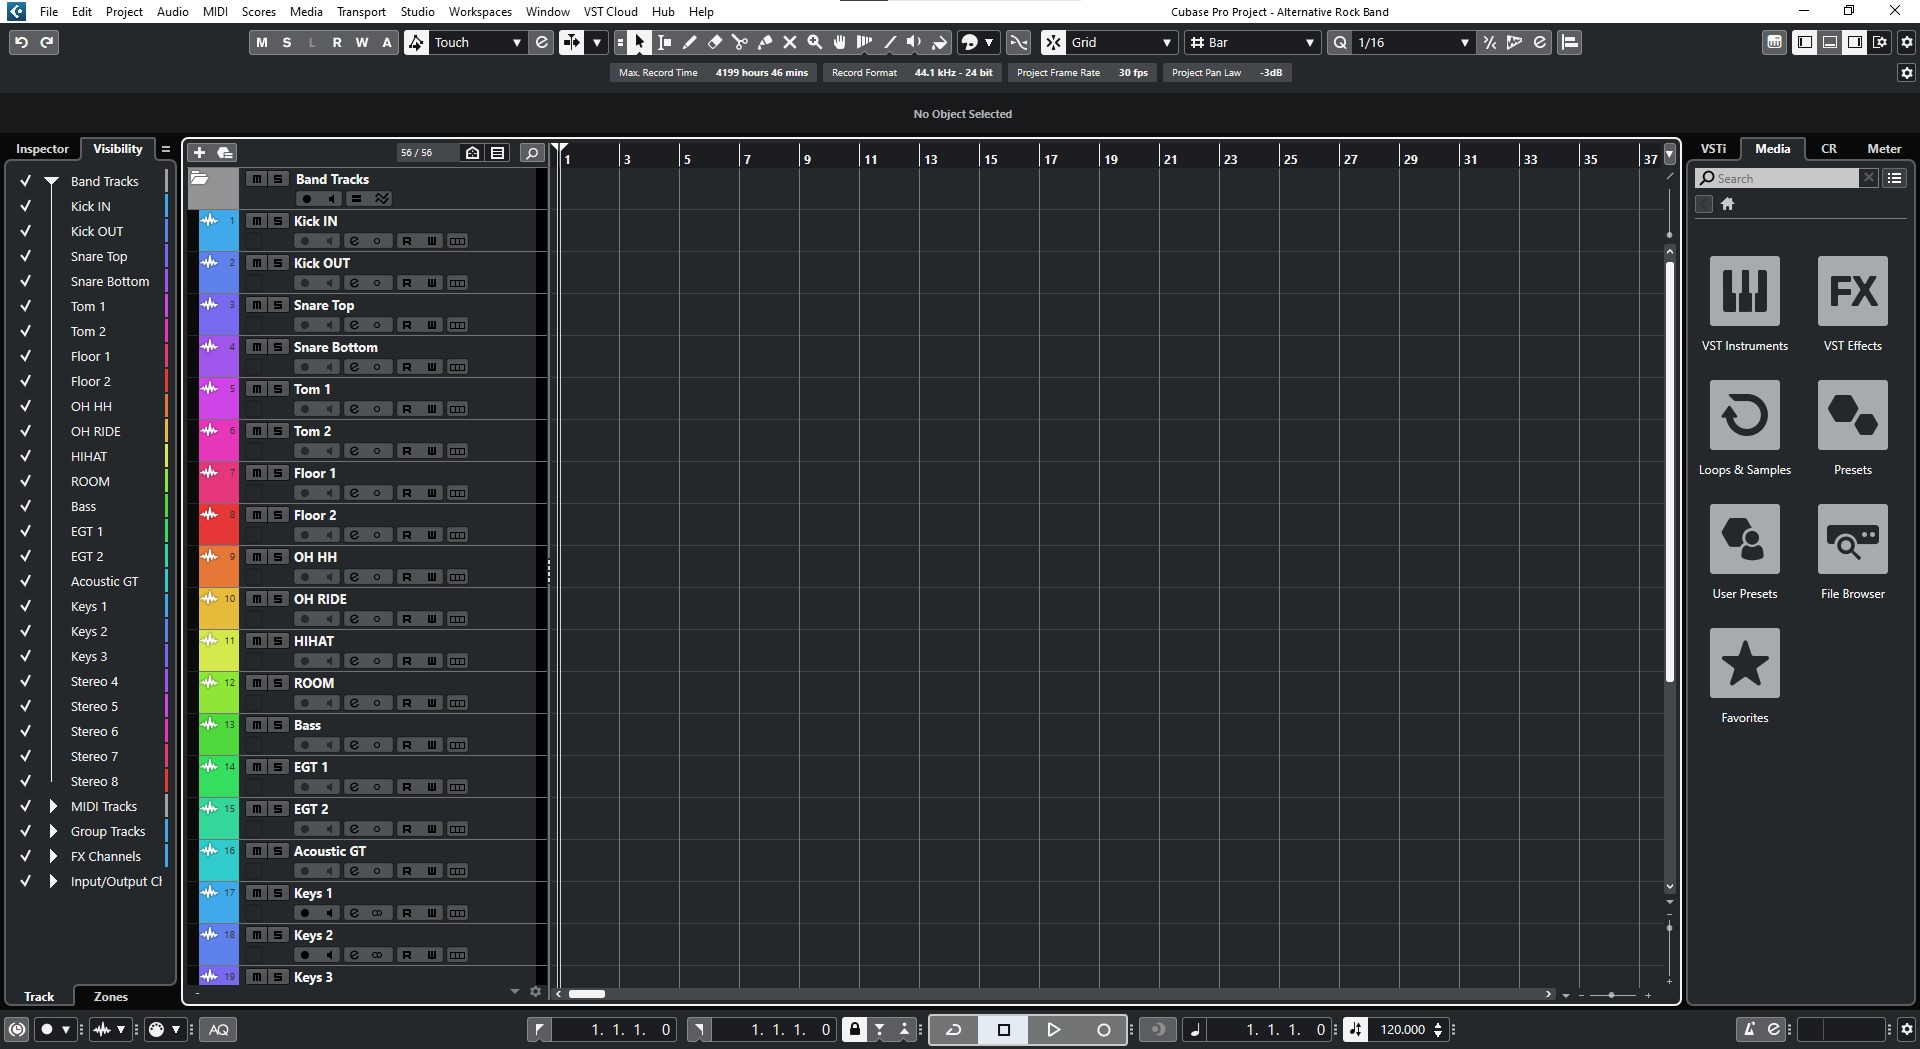
- Create a new project and set up tracks: In your recording software, create a new project and set up the desired number of tracks to correspond with the number of inputs you want to use. Assign each track to its respective input channel on the US-16×08.
- Configure the recording settings: In your recording software, make sure the sample rate and bit depth match the settings you previously configured in the Tascam Control software. This ensures compatibility and optimal audio quality during the recording process.
- Arm and monitor the tracks: Activate the record-enable button (often represented by a red dot) on each track you want to record. This arms the tracks for recording and allows the incoming audio from the corresponding input channels of the US-16×08 to be captured. Monitor the levels of each track to ensure that they are recording at appropriate levels without clipping.
- Start recording: Once everything is set up and you are satisfied with the input levels, you can start recording. Press the record button in your recording software, and the US-16×08 will begin capturing your audio onto the assigned tracks in real time.
- Control and adjust the recordings: During the recording process, you can use the Tascam Control software or your recording software to adjust the input levels, apply effects, and make any necessary changes to the captured audio tracks. This gives you the flexibility to tweak and shape the recordings to your desired sound.
- Save and organize your project: After recording and making any necessary adjustments, save your project in your recording software. Organize your tracks, label them accordingly, and consider creating backups to protect your recordings.
By following these steps, you can take full advantage of the multi-track recording feature of the Tascam US-16×08 audio interface. This capability opens up a world of possibilities for capturing detailed, professional-quality recordings right from your own studio setup.
Adjusting Input Levels and Monitoring
One of the critical aspects of recording with the Tascam US-16×08 audio interface is adjusting input levels to achieve optimal sound quality and preventing distortion. Additionally, monitoring the input signal ensures that you capture the audio accurately. Here’s how you can effectively adjust input levels and monitor during your recording sessions:
- Launch the Tascam Control software: Open the Tascam Control software on your computer, which allows you to control various settings and monitor the input and output levels of the US-16×08.
- Select the input channel: In the Tascam Control software, navigate to the input section and select the input channel you want to adjust. Each input channel is typically labeled with its corresponding number or the name assigned to it in your DAW software.
- Monitor the input level meter: The Tascam Control software displays input level meters for each channel, showing the volume of the incoming audio signal. Keep an eye on these meters to ensure that the levels are within an optimal range. If the signal is too low, it may result in a weak and noisy recording. If it peaks into the red, it may cause distortion. Adjust the input gain knob on the US-16×08 or in the software to achieve an appropriate level.
- Check for clipping: Clipping occurs when the input signal exceeds the maximum level that can be captured without distortion. If you notice the input level meter hitting the red or see clipping indicators, reduce the input gain until the signal no longer clips. This ensures clean and undistorted recordings.
- Use headphones or monitoring speakers: Connect your headphones or monitoring speakers to the appropriate output on the US-16×08. This allows you to listen to the input signal in real-time as you adjust the levels. It is essential to use high-quality headphones or accurate monitoring speakers to hear the nuances of your recording accurately.
- Test with representative audio: Before recording your actual material, it’s a good practice to perform a soundcheck or test run using representative audio, such as playing an instrument or speaking into the microphone. Adjust the input levels and monitor the signal to ensure it sounds clear and balanced.
- Use panning and monitoring options: In your DAW software, you can pan the input channels, adjusting the position of each channel in the stereo field. Additionally, you can use headphone cue mixes or monitoring speaker configurations to control what you hear in different headphones or speakers. This allows for flexible monitoring options to cater to your preference and workflow.
- Continuously monitor input levels: Throughout your recording session, keep an eye on the input level meters in the Tascam Control software. Avoid sudden level changes or unexpected spikes that may result in distortion. Make necessary adjustments to the input gain when switching between different sources or instruments to maintain balanced recording levels.
By carefully adjusting input levels and monitoring the signal, you ensure that your recordings are clean, distortion-free, and capture the intended audio accurately. This attention to detail will play a crucial role in the overall quality of your final recordings using the Tascam US-16×08 audio interface.
Applying Effects and Processing
The Tascam US-16×08 audio interface provides built-in digital signal processing (DSP) capabilities that allow you to apply effects and processing to your recordings. These features give you the tools to enhance and shape your audio to achieve your desired sound. Here’s how you can effectively apply effects and processing using the US-16×08:
- Launch the Tascam Control software: Open the Tascam Control software on your computer and ensure that the US-16×08 is connected and recognized.
- Navigate to the effects and processing section: In the Tascam Control software, locate the section dedicated to effects and processing. This section typically includes options for applying EQ, compression, reverb, and other effects.
- Select the desired effect or processing module: Choose the effect or processing module you want to apply to your audio. Each effect or processor will have its own set of parameters and controls for customization.
- Adjust the effect parameters: Once you’ve selected an effect or processor, adjust its parameters to achieve the desired sound. For example, if you’re applying EQ, you can shape the tone by boosting or cutting specific frequency bands. If you’re using compression, you can control the dynamic range of the audio by adjusting the threshold, ratio, and attack/release settings.
- Monitor and audition the effect/processing: As you make adjustments, it’s important to monitor the audio output to hear the impact of the effect or processing. Use your monitoring headphones or speakers connected to the US-16×08 to listen and evaluate the changes in real-time.
- Experiment and fine-tune: Don’t be afraid to experiment with different effects and processing settings to achieve the desired result. Fine-tune the parameters until you’re satisfied with the sound. Take note that it’s crucial to apply effects and processing tastefully, ensuring that they enhance the audio without overpowering or negatively impacting its quality.
- Save and recall presets: If you come across a particular effect or processing chain that you like, consider saving it as a preset. This allows you to recall it easily for future use, saving you time and effort in recreating the same settings for different recordings.
- Combine multiple effects and processing: The Tascam US-16×08 allows you to apply multiple effects and processing modules simultaneously. You can create complex effect chains to further shape and refine your audio. Experiment with different combinations to find unique sounds that suit your artistic vision.
- Record the processed audio: Once you’re satisfied with the results, you can record the processed audio directly into your recording software. The Tascam US-16×08 will capture the audio with the applied effects and processing in real-time.
Remember, the key to effectively applying effects and processing is to use them tastefully and purposefully. They should enhance your recordings and serve the overall artistic vision, rather than being used for the sake of it. With the Tascam US-16×08, you have a powerful tool at your fingertips to shape your audio and achieve a professional sound.
Mixing and Exporting Your Recordings
Once you have recorded your audio using the Tascam US-16×08 audio interface, the next step is to mix your tracks and prepare them for the final output. Mixing involves balancing the levels, panning, applying EQ and effects, and creating an overall cohesive sound. Here’s a step-by-step guide on how to mix and export your recordings:
- Import your recorded tracks: Open your preferred digital audio workstation (DAW) and import the recorded tracks from your recording software. Arrange the tracks in the DAW according to your desired order.
- Balance the levels: Adjust the volume faders for each track to achieve a balanced mix. Use your ears and reference tracks to help you determine the appropriate levels. Ensure that no individual track is overpowering or too weak and that all instruments and vocals sit well in the overall mix.
- Pan your tracks: Use the pan controls in your DAW to position each track in the stereo field. This creates a sense of space and separation in the mix. Consider the role and position of each instrument and vocals to make informed panning decisions.
- Apply EQ: Use equalization (EQ) to shape the tonal balance of each track. Experiment with boosting or cutting specific frequencies to enhance clarity, remove unwanted elements, and create a balanced frequency spectrum. Be mindful of the overall mix and ensure that no track is clashing with another.
- Add effects and processing: Apply additional effects and processing to enhance the overall sound of the mix. This may include compression, reverb, delay, or modulation effects. Use these effects tastefully to complement the genre and style of your recording.
- Create depth with reverb and spatial effects: Consider adding reverb and other spatial effects to create depth and dimension in your mix. Use different reverb settings to simulate different environments or modify the stereo field using delays or modulation effects to add movement and interest.
- Automate volume and effects: To add dynamics and control to your mix, use automation to adjust volume levels, panning, and effect parameters throughout the song. This allows for dynamic changes and emphasizes certain elements during specific sections of the track.
- Finalize your mix: Take the time to critically listen to your mix and make any necessary tweaks. A well-balanced mix will have clarity, depth, and a cohesive sound. Consider taking breaks and listening with fresh ears to ensure the best results.
- Export your final mix: Once you are satisfied with the mix, it’s time to export the final version. Set the export settings in your DAW, choosing the desired file format (such as WAV or MP3), bit depth, and sample rate. Additionally, select the appropriate dithering option if needed. Name the file, choose the destination folder, and start the export.
With these steps, you can confidently mix and export your recordings using the Tascam US-16×08 audio interface. Remember, mixing is an art form, and it takes practice and experimentation to achieve the desired sonic results. Take your time, trust your ears, and enjoy the process of crafting a polished and professional-sounding mix.
Troubleshooting Common Issues
While using the Tascam US-16×08 audio interface, you may encounter some common issues that can affect your recording and mixing experience. Here are a few troubleshooting steps to help resolve these issues:
- No sound or low sound levels: If you’re not hearing any sound or experiencing low sound levels, check the following:
- Ensure that your speakers or headphones are connected correctly and powered on.
- Check the volume levels on your computer, software, and the US-16×08 itself. Make sure they are set to an audible level.
- Verify that the input gain controls on the US-16×08 and the input levels in the software are properly adjusted for each channel.
- Check the cable connections between the audio interface and the speakers or headphones to ensure they are secure.
- Test your speakers or headphones with a different source to verify if the issue lies with the audio interface or the playback device.
- Audio dropouts or clicks/pops: If you’re experiencing audio dropouts or hearing clicks and pops during playback or recording, consider the following solutions:
- Ensure that your computer meets the system requirements for the Tascam US-16×08. Insufficient processing power or memory can contribute to audio performance issues.
- Close any unnecessary applications or processes running in the background that may be consuming system resources.
- Update the drivers and firmware of the US-16×08 to the latest version available on the Tascam website. This can often resolve compatibility issues or address known bugs.
- Try using a different USB cable or connecting to a different USB port on your computer to rule out any connectivity issues.
- Increase the buffer size in your recording software’s settings. A larger buffer size can help reduce the strain on your computer’s processing power but may introduce additional latency.
- If you’re using a laptop, make sure it’s connected to a power source to ensure consistent power supply.
- Latency issues: Latency refers to the delay between when you input audio into the US-16×08 and when you hear the playback. To address latency issues:
- Use the lowest buffer size that your computer can handle without causing audio dropouts or performance issues. A smaller buffer size reduces latency but requires more processing power.
- Enable direct monitoring on the US-16×08, which allows you to hear the input signal directly through the interface, bypassing the computer’s processing.
- Consider using a dedicated audio workstation with optimized drivers and low-latency monitoring capabilities.
- Recording noise or interference: If you’re hearing unwanted noise or interference during recording, try the following solutions:
- Ensure that all cables are properly connected and shielded to prevent electromagnetic interference.
- Check the grounding of your equipment and make sure you’re using proper power sources and surge protectors.
- Separate audio cables from power cables to minimize interference.
- Try using shorter cables or high-quality balanced cables to reduce the chance of noise pick-up.
- Use a power conditioner or power supply with built-in noise reduction capabilities to address power-related noise issues.
- Software compatibility issues: If you encounter compatibility issues between the Tascam US-16×08 and your recording software, consider these troubleshooting steps:
- Ensure that you have installed the latest drivers and updates for both the US-16×08 and your recording software.
- Check the software manufacturer’s website for any known compatibility issues or workarounds specific to your DAW.
- Consider using a different recording software that is known to be compatible with the US-16×08.
If you’ve exhausted these troubleshooting steps and are still experiencing issues with the Tascam US-16×08 audio interface, it may be helpful to consult the Tascam support resources or reach out to their customer support for further assistance. Remember to document any error messages or specific issues you’re encountering as this information will be useful in troubleshooting and resolving the problem. By troubleshooting common issues, you can ensure a smooth and problem-free recording and mixing experience with the Tascam US-16×08 audio interface.
Conclusion
The Tascam US-16×08 audio interface offers a versatile and comprehensive solution for capturing and mixing high-quality audio recordings. With its 16 inputs, 8 outputs, and robust features, it is a powerful tool for musicians, producers, and audio enthusiasts who seek professional-level recording capabilities.
In this article, we explored the various aspects of the Tascam US-16×08 audio interface, including setting it up, connecting microphones and instruments, utilizing the multi-track recording feature, adjusting input levels, applying effects and processing, mixing, and troubleshooting common issues. By following these guidelines, you can make the most of the US-16×08 and unleash your creativity in the recording studio.
Remember to take the time to properly set up the interface, configure input levels, and monitor your recordings to ensure optimal sound quality. Experiment with different effects and processing options to enhance your recordings and create a unique sonic signature. And in the mixing stage, strive for balance, clarity, and cohesion to bring your tracks to life.
Of course, along the way, you may encounter common issues, but armed with troubleshooting strategies, you can address them effectively and keep your recording experience smooth and productive.
The Tascam US-16×08 audio interface is a powerful tool that empowers you to bring your musical ideas to fruition. With its robust features and intuitive control, the possibilities for creativity and professional-level recording are endless. So, connect your instruments, fire up your DAW, and let the Tascam US-16×08 take your recording and mixing skills to new heights.

