Home>Production & Technology>Audio Interface>How To Add More Inputs To An Audio Interface
Audio Interface
How To Add More Inputs To An Audio Interface
Modified: March 11, 2024
Learn how to expand the capabilities of your audio interface by adding more inputs. Discover the best methods for increasing the versatility of your setup.
(Many of the links in this article redirect to a specific reviewed product. Your purchase of these products through affiliate links helps to generate commission for AudioLover.com, at no extra cost. Learn more)
Table of Contents
- Introduction
- Understanding Audio Interfaces
- Selecting the Right Audio Interface
- Why Add More Inputs to an Audio Interface?
- Options for Expanding Input Capabilities
- Method 1: Using a Digital Audio Workstation (DAW)
- Method 2: Using an External Mixer or Preamp
- Method 3: Using a Digital Audio Converter (DAC)
- Method 4: Using a USB/Firewire Mixer
- Method 5: Using ADAT or S/PDIF Expansion
- Conclusion
Introduction
Welcome to the world of audio interfaces, where musicians, producers, and audio enthusiasts can unlock the true potential of their recordings. An audio interface is a crucial piece of equipment that connects your microphone, instruments, and other audio devices to your computer, allowing you to record and playback high-quality audio.
Audio interfaces come in various shapes and sizes, ranging from compact portable units to studio-grade devices with multiple inputs and outputs. While most audio interfaces come with a standard number of inputs, sometimes you may find the need to expand your input capability.
In this article, we’ll explore why you might want to add more inputs to your audio interface and discuss the different methods you can use to achieve this. Whether you’re a musician looking to record a full band or a podcaster wanting to host multiple guests, expanding the input options on your audio interface can significantly enhance your creativity and productivity.
Before we dive into the methods, let’s first understand the basic concept of an audio interface.
Understanding Audio Interfaces
An audio interface is a device that acts as the bridge between your analog audio equipment and your computer. It converts the analog signals from your microphones, instruments, and other audio devices into digital data that your computer can process. This enables you to record, edit, and playback high-quality audio on your computer.
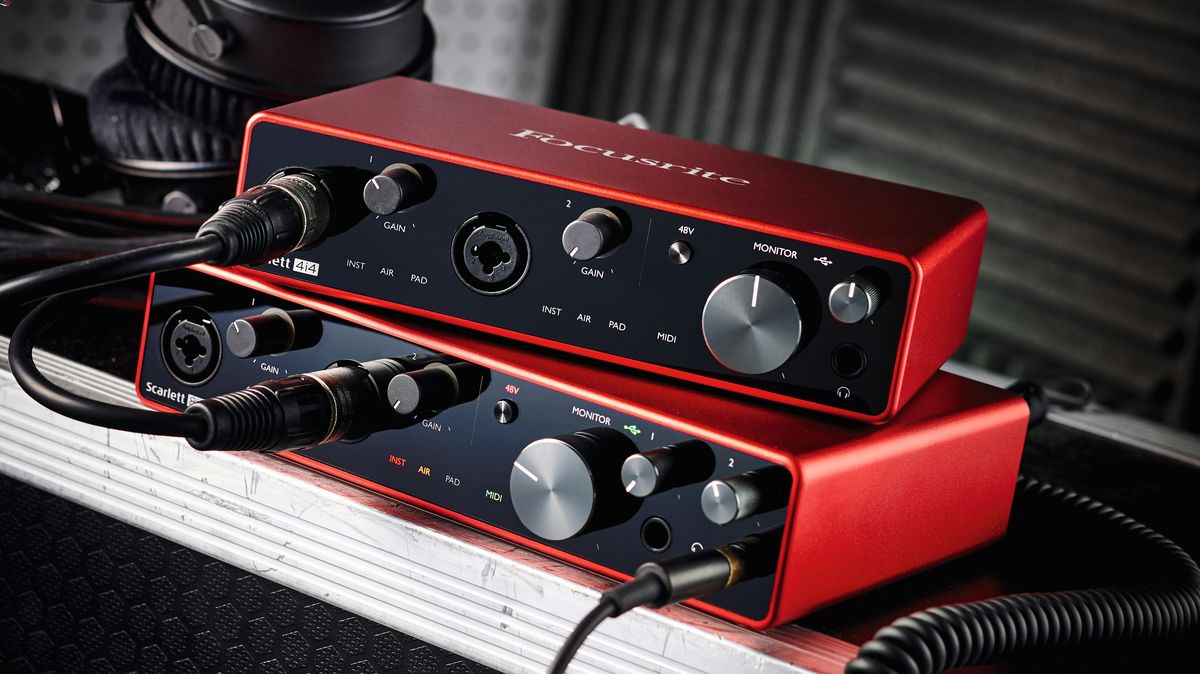
Audio interfaces typically connect to your computer via USB, Thunderbolt, or Firewire, and they come with various input and output options. The most common inputs found on audio interfaces are XLR and 1/4″ TRS jacks, which are used to connect microphones and instruments, respectively. Some interfaces also offer MIDI inputs for connecting MIDI controllers and other devices.
The number of inputs an audio interface has can vary depending on the model. Smaller, more portable interfaces may only have a couple of inputs, while larger studio-grade interfaces can have eight or more inputs.
It’s important to note that the quality of the audio interface can greatly impact the sound recording and playback quality. Higher-end interfaces often offer better preamps, converters, and overall audio quality, but they also come with a higher price tag. It’s essential to find the right balance between your budget and the features and quality you require.
Now that we have a basic understanding of audio interfaces, let’s explore why you might want to expand the input capabilities of your interface.
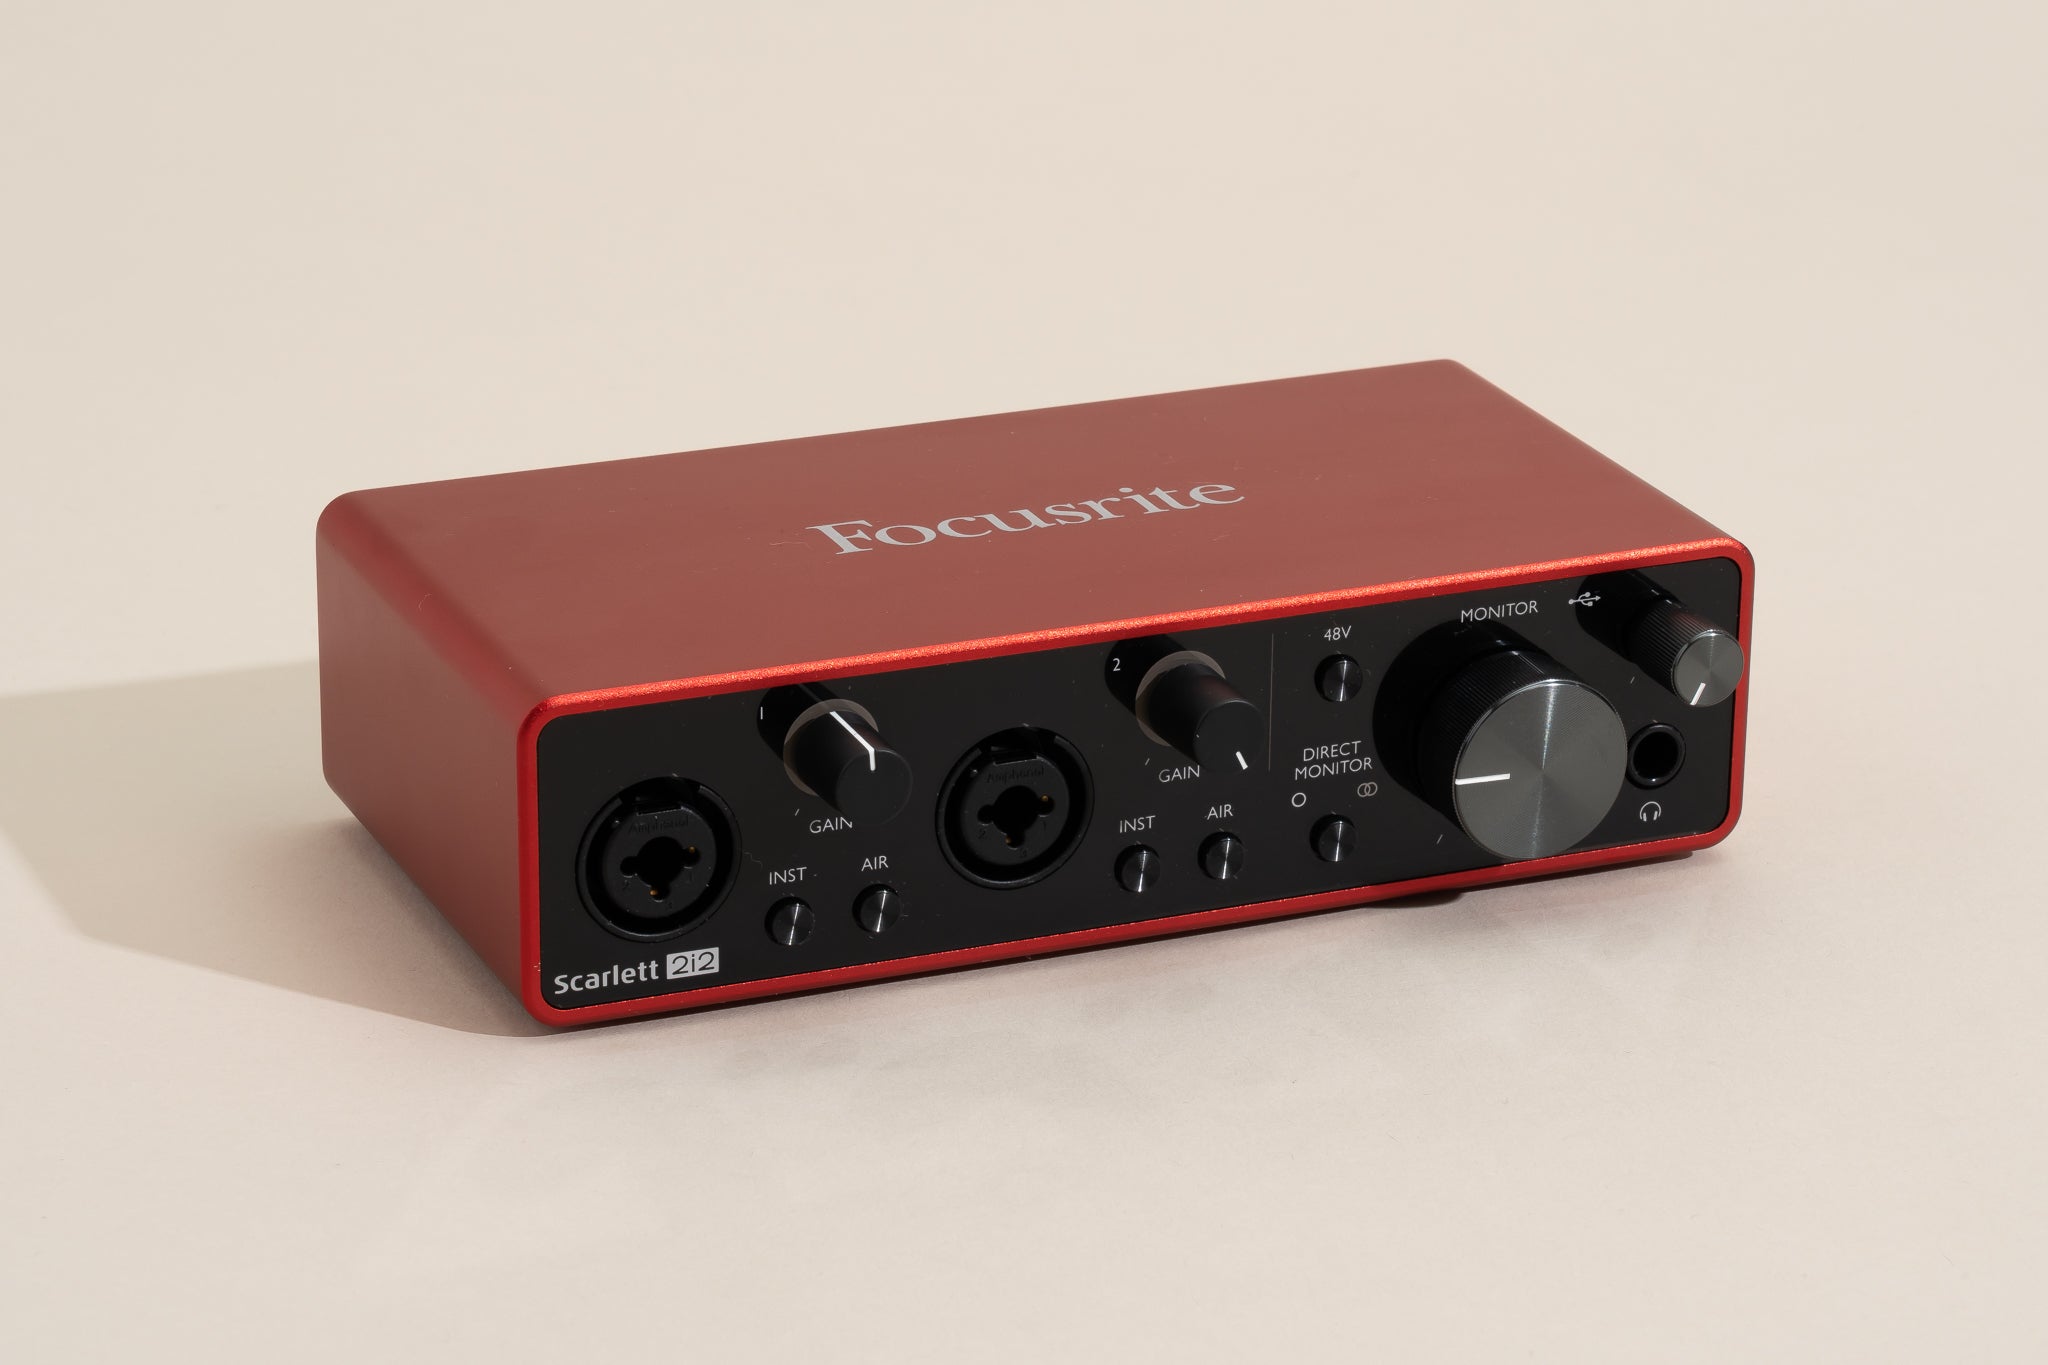
Selecting the Right Audio Interface
When it comes to selecting an audio interface, there are a few key factors to consider. These factors will help you choose an interface that meets your specific needs and provides the necessary inputs for your recording setup.
1. Number of Inputs: The first consideration is determining how many inputs you require. If you’re a solo artist or only plan on recording one or two sources at a time, a basic interface with two or four inputs may suffice. However, if you anticipate recording multiple musicians simultaneously or capturing a larger ensemble, you’ll need an interface with more inputs.
2. Connection Type: Next, consider the connection type that is compatible with your computer. The most common connection options are USB and Thunderbolt. USB is more widely supported and tends to be more affordable, while Thunderbolt offers faster data transfer speeds for low-latency recording. Ensure that the interface you choose is compatible with your computer’s available ports.
3. Preamp Quality: Preamps play a significant role in capturing clean and accurate sound. If you plan on recording vocals or acoustic instruments, pay attention to the preamp quality of the interface. Look for interfaces with high-quality preamps that offer low noise and transparent sound reproduction.
4. Sample Rate and Bit Depth: The sample rate and bit depth determine the audio quality and resolution. Higher sample rates and bit depths result in better audio fidelity. Consider the recording projects you’ll be working on and choose an interface that supports the sample rate and bit depth requirements for those projects.
5. Budget: Lastly, consider your budget. Audio interfaces come in a wide range of prices, catering to different needs and budgets. Determine how much you’re willing to invest in an interface and find the best balance between features, quality, and affordability.
By carefully considering these factors, you can select an audio interface that suits your specific needs and provides the necessary inputs for your recording setup. Now, let’s explore why you might need to expand the input capabilities of your chosen interface.
Why Add More Inputs to an Audio Interface?
There are several reasons why you might want to add more inputs to your audio interface. Let’s explore some of the common scenarios where expanding the input capabilities can be beneficial:
1. Recording Multiple Instruments or Musicians: If you work with a band or frequently record multiple instruments simultaneously, having more inputs allows you to capture each source separately. This gives you greater control during mixing and ensures that each instrument is properly isolated for optimal sound quality.
2. Podcasting or Interviews: If you host a podcast or conduct interviews, having multiple input channels enables you to connect multiple microphones and capture each participant’s voice individually. This allows for better audio balance and clarity during editing and post-production.
3. Live Sound Reinforcement: If you use your audio interface for live sound reinforcement, having additional inputs allows you to connect multiple microphones or instruments directly to your interface for amplification. This simplifies the setup and eliminates the need for extra mixers or outboard gear.
4. Collaborative Recording: If you collaborate with other musicians remotely, expanding the input capabilities allows each musician to connect their instruments or microphones directly to their own interface. This ensures higher audio quality and gives each collaborator more control over their recordings.
5. Flexibility and Future-Proofing: Even if you don’t currently require more inputs, it’s worth considering future needs. As your recording projects and ambitions grow, you may find yourself needing more inputs. Adding more inputs to your existing audio interface saves you from having to invest in an entirely new interface down the line.
By adding more inputs to your audio interface, you can expand your creative possibilities, improve the quality of your recordings, and enhance your workflow. Now that we understand why it’s beneficial to have more inputs, let’s explore the different methods you can use to achieve this.
Options for Expanding Input Capabilities
When it comes to expanding the input capabilities of your audio interface, there are several methods you can consider. Each method offers its own advantages and considerations, so it’s important to choose the option that best suits your specific needs and setup. Let’s explore some of the most common methods:
1. Using a Digital Audio Workstation (DAW): One of the simplest ways to expand your input capabilities is by utilizing your digital audio workstation. Most DAW software allows you to record multiple tracks simultaneously, even with a limited number of inputs on your interface. By recording in multiple takes or overdubbing, you can capture multiple sources one at a time and layer them together during the mixing process.
2. Using an External Mixer or Preamp: Another option is to connect an external mixer or preamp to your audio interface. This allows you to bypass the interface’s built-in preamps and connect additional microphones or instruments directly to the mixer or preamp. The output of the mixer or preamp can then be connected to one of the inputs on your audio interface, effectively expanding your input capabilities.
3. Using a Digital Audio Converter (DAC): A digital audio converter, or DAC, is a device that converts a digital audio signal into an analog signal. By connecting a DAC with multiple inputs to your audio interface, you can effectively expand the number of inputs available. This method is particularly useful if you have an interface with digital inputs, such as S/PDIF or ADAT.
4. Using a USB/Firewire Mixer: If you require a significant number of inputs, you may consider investing in a USB or Firewire mixer. These mixers come with built-in audio interfaces and offer a wide range of inputs. You can connect your microphones and instruments directly to the mixer and then connect the mixer to your computer via USB or Firewire, effectively expanding your input capabilities.
5. Using ADAT or S/PDIF Expansion: Some audio interfaces come with ADAT or S/PDIF ports, which allow for digital expansion. You can connect external ADAT or S/PDIF devices, such as preamps or converters, to these ports, effectively increasing the number of inputs available to you. This method offers a straightforward and seamless way to expand your input capabilities.
Each of these methods has its own advantages and considerations, so it’s important to choose the one that aligns with your specific requirements. Whether you choose to utilize your DAW, connect external mixers or preamps, use a DAC, invest in a USB/Firewire mixer, or leverage ADAT/S/PDIF expansion, expanding your input capabilities will give you more flexibility and freedom in your recording process.
Now that we’ve explored the different methods, you can choose the one that best suits your needs and take your audio interface to the next level.
Method 1: Using a Digital Audio Workstation (DAW)
One of the simplest and most versatile methods for expanding your input capabilities is by utilizing your digital audio workstation (DAW). Most DAW software allows you to record multiple tracks simultaneously, even if your audio interface has a limited number of physical inputs. This method is especially useful if you have a small interface but need to record multiple sources at once.
Here’s how it works:
1. Connect your instruments or microphones to your audio interface using the available inputs. If you have more sources than inputs, you can prioritize which sources need to be recorded together and which can be recorded separately.
2. Open your DAW software and create a new session or project. Set up the tracks that correspond to each input source. For example, if you have two microphones and a guitar, create three tracks in your DAW.
3. Arm the tracks for recording, ensuring that the input selection matches the corresponding input on your audio interface. This ensures that each track is set to receive the correct audio signal.
4. Start recording in your DAW. Since you have multiple tracks armed and ready, the DAW will record each source onto separate tracks simultaneously. You can record in multiple takes or overdub on different passes to capture all the desired sources.
5. After recording, you can edit, mix, and process each track individually within your DAW. This gives you complete control over the sound of each source, allowing for precise balancing and enhancement during the mixing process.
Using your DAW to expand the input capabilities of your audio interface provides a flexible and efficient solution. It allows you to capture multiple sources one at a time and layer them together during mixing, all within a single recording session. This method is particularly useful for solo artists who want to create full arrangements or for situations where you need to overdub additional parts onto existing recordings.
It’s worth noting that while using a DAW to expand your input capabilities is convenient, it does require a computer with sufficient processing power and audio interface compatibility. Additionally, recording multiple sources separately may introduce latency issues if your computer or audio interface cannot handle the workload. As such, it’s recommended to optimize your system’s performance and monitor for potential latency problems when using this method.
In summary, harness the power of your DAW to expand your input capabilities. Record multiple tracks simultaneously, overdub parts, and mix and process each source individually to achieve professional results with a limited number of physical inputs on your audio interface.
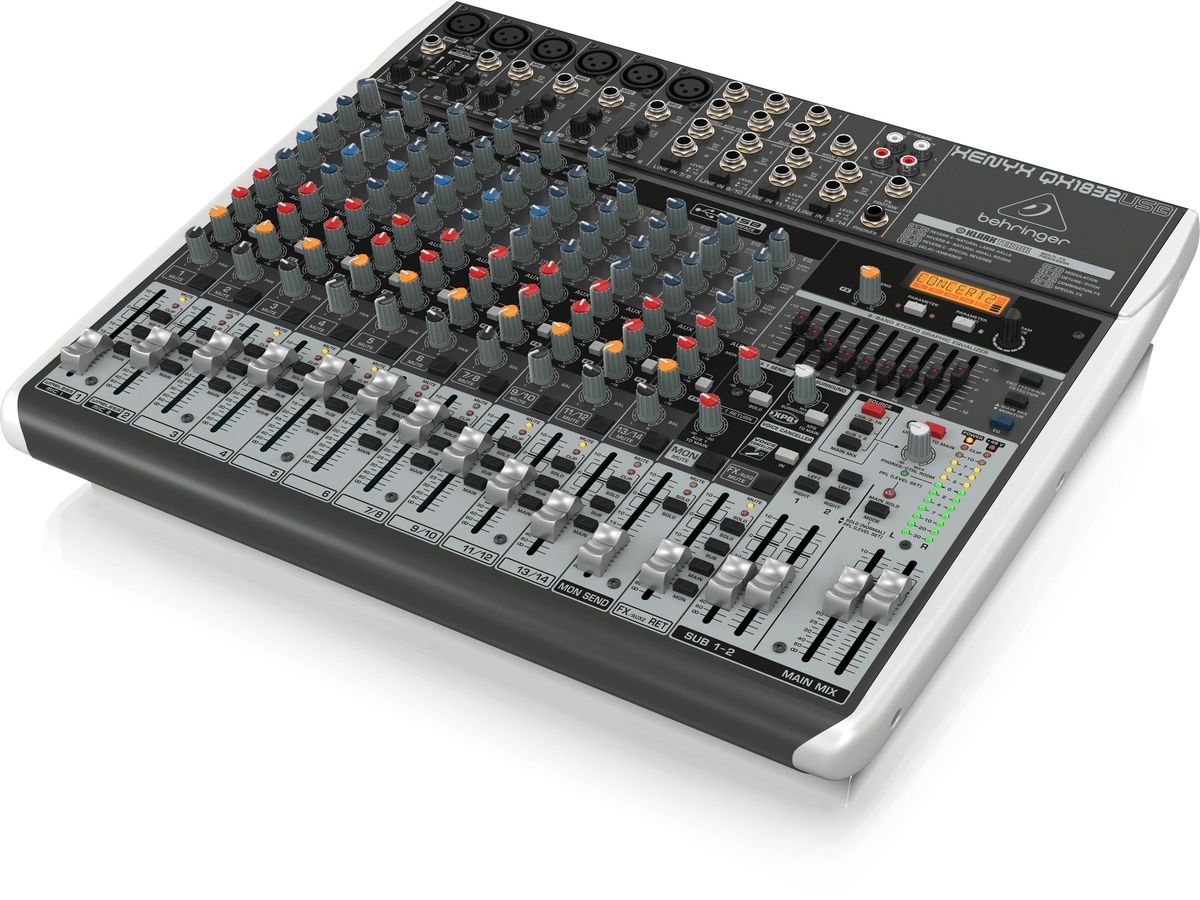
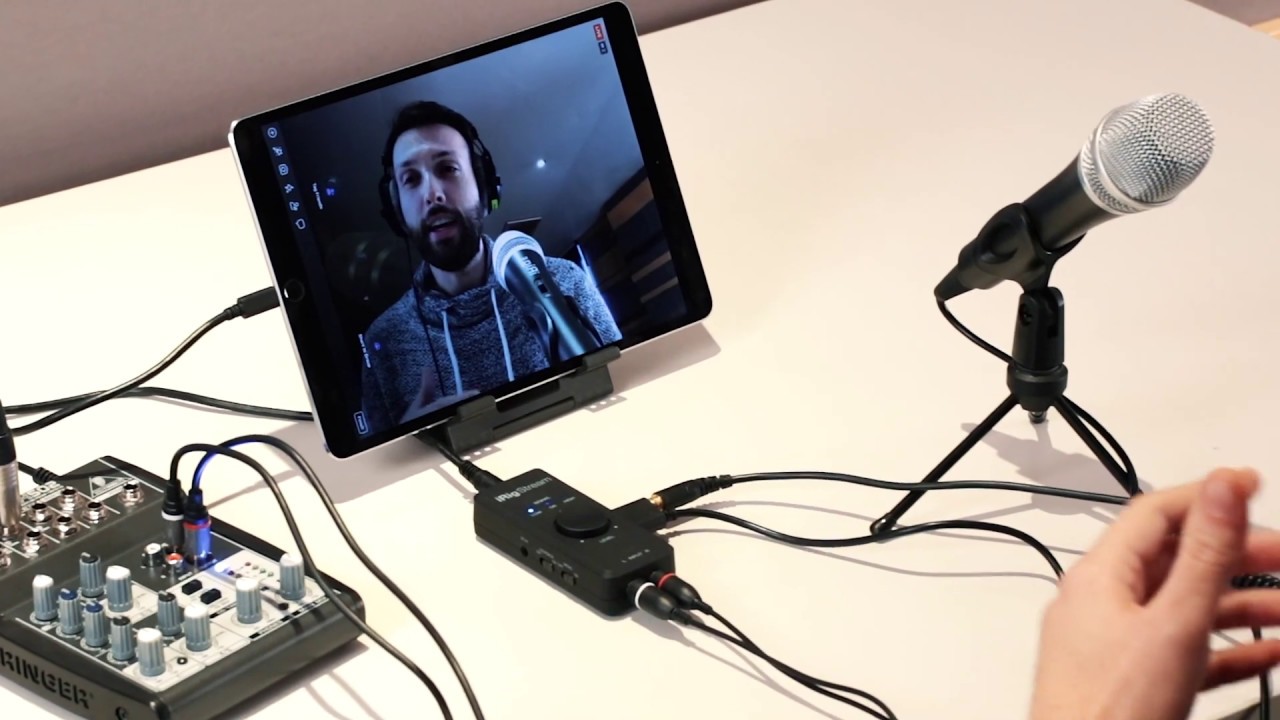
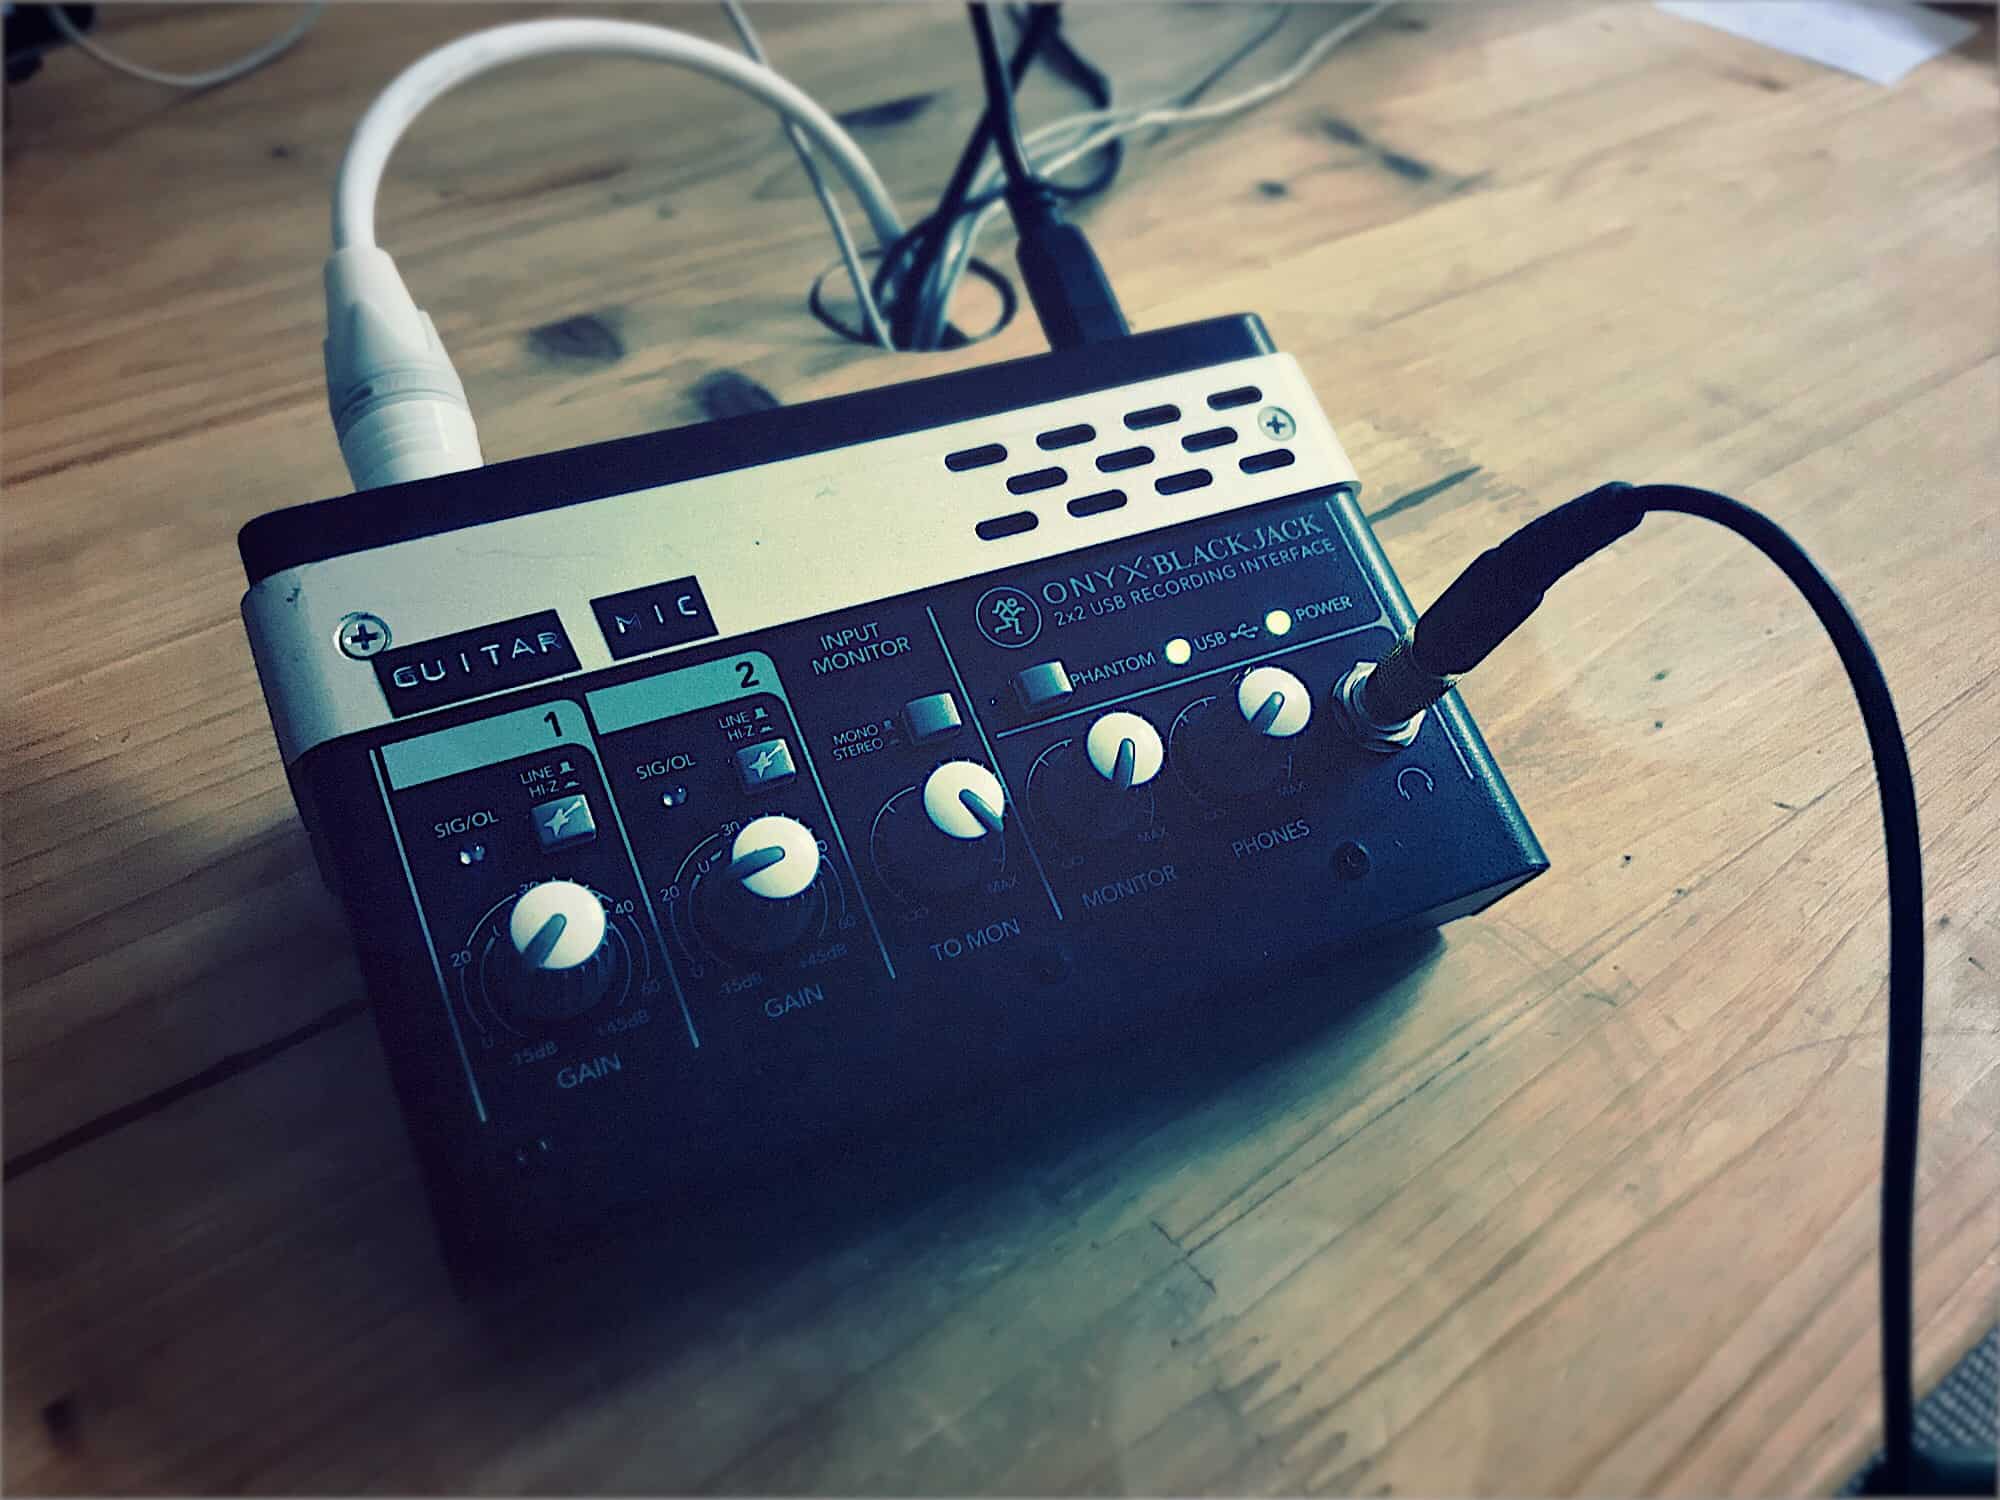
Method 2: Using an External Mixer or Preamp
If you find yourself needing to connect more microphones or instruments to your audio interface than it supports, using an external mixer or preamp can come to your rescue. This method allows you to bypass the limited input options of your interface and connect additional sources directly to the mixer or preamp.
Here’s how you can use an external mixer or preamp to expand your input capabilities:
1. Identify the additional sources you want to connect to your audio interface. This could be extra microphones, instruments, or any other audio devices that you need to record.
2. Choose an external mixer or preamp that accommodates the number of additional inputs you require. The mixer or preamp should have outputs that can connect to the inputs on your audio interface.
3. Connect your microphones, instruments, or audio devices to the inputs on the external mixer or preamp. Make sure to use the appropriate cable connections, such as XLR, 1/4″ TRS, or RCA, depending on the inputs and outputs available on your mixer and audio interface.
4. Connect the outputs of the external mixer or preamp to the inputs on your audio interface. Again, use the appropriate cables to ensure a secure and reliable connection.
5. Set the levels and adjust any necessary settings on the external mixer or preamp. This might include adjusting volume levels, EQ settings, or applying any desired effects.
6. In your recording software or DAW, select the corresponding inputs on your audio interface to record the sources connected to the external mixer or preamp. Arm the tracks in your DAW for recording and start capturing the audio from the additional sources.
By using an external mixer or preamp, you can effectively expand your input capabilities without needing a larger audio interface. This method is particularly beneficial if you have a limited number of inputs on your interface but still need to record multiple sources simultaneously, such as a full band or a podcast with multiple guests.
Furthermore, using an external mixer or preamp gives you more control over the sound of each source. You can apply different settings, such as EQ, compression, or effects, to each channel individually, ensuring optimal audio quality for each input.
It’s important to note that when using an external mixer or preamp, you need to have a clear understanding of signal flow and level management. Improper gain staging or routing can result in distorted or noisy recordings. Take the time to familiarize yourself with the mixer or preamp’s features and settings to achieve the best results.
In summary, if you need to connect more sources to your audio interface, using an external mixer or preamp is a straightforward and effective solution. This method grants you greater input flexibility and control over your recordings, allowing you to capture a wide variety of sources with ease.
Method 3: Using a Digital Audio Converter (DAC)
If you have an audio interface with digital input options such as S/PDIF or ADAT, you can expand your input capabilities by using a Digital Audio Converter (DAC). A DAC is a device that converts a digital audio signal into an analog signal, allowing you to connect additional sources to your existing interface.
Here’s how you can use a DAC to expand your input capabilities:
1. Identify the sources you want to connect to your audio interface. These could be microphones, instruments, or other audio devices that you need to record.
2. Choose a DAC that offers the number and type of analog inputs you require. Some DACs provide XLR, 1/4″ TRS, or RCA inputs depending on your setup. Ensure that the DAC has digital output options that match the digital input ports on your audio interface.
3. Connect your microphones, instruments, or audio devices to the analog inputs on the DAC using the appropriate cables. Make sure to use high-quality cables to maintain optimal signal integrity.
4. Connect the digital output ports of the DAC to the corresponding digital input ports on your audio interface. This could be S/PDIF or ADAT ports, depending on what your equipment supports. Be sure to use compatible cables, such as optical or coaxial, to establish a reliable connection.
5. Configure the settings on your audio interface and DAC to ensure they are synchronized. Make sure the sample rate and clock settings are aligned between the two devices to avoid any synchronization issues or errors.
6. In your recording software or DAW, select the appropriate digital inputs on your audio interface to record the sources connected through the DAC. Arm the tracks for recording and start capturing the audio from the additional sources.
Using a DAC to expand your input capabilities provides a flexible and convenient solution, especially when your audio interface has limited analog inputs. It allows you to utilize the digital input options on your interface to connect additional analog sources, expanding your recording possibilities.
It’s worth noting that when using a DAC, you need to ensure the compatibility of the digital formats between the DAC and your audio interface. Additionally, pay attention to the sample rates and bit depths supported by both devices to avoid any issues with audio quality or synchronization.
Using a DAC to expand your input capabilities is an effective method, particularly if you already have a compatible audio interface with digital inputs. It allows you to connect and record additional analog sources, providing more versatility and flexibility for your recording sessions.
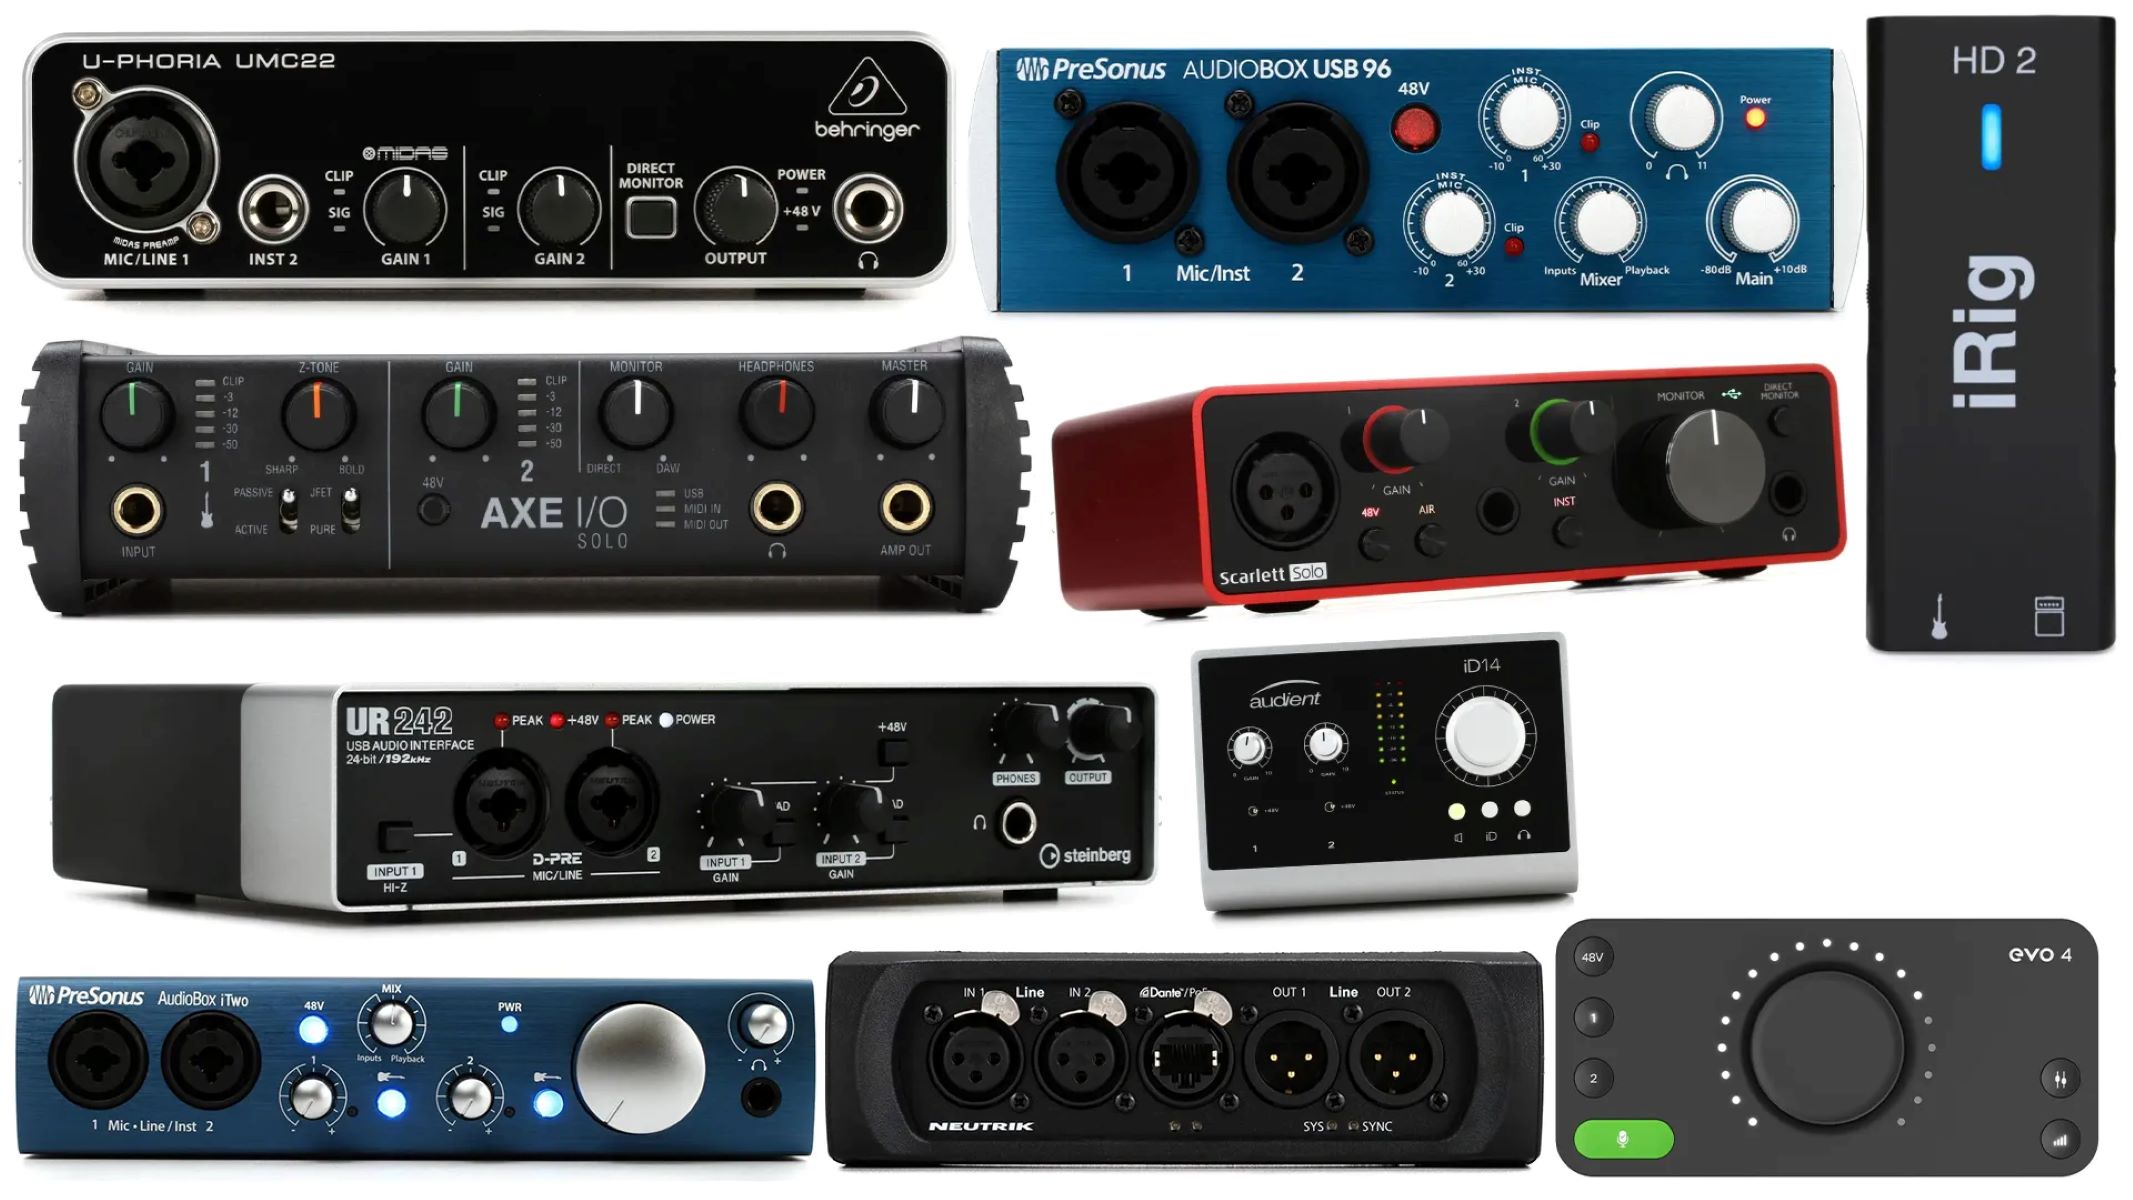
Method 4: Using a USB/Firewire Mixer
If you require a significant number of inputs and want a dedicated solution to expand your input capabilities, using a USB or Firewire mixer is an excellent option. These mixers come with built-in audio interfaces and offer a wide range of analog inputs, making them a convenient and comprehensive solution for expanding your input options.
Here’s how you can use a USB or Firewire mixer to expand your input capabilities:
1. Determine the number and type of inputs you require for your recording setup. USB or Firewire mixers come in a variety of configurations, so choose a mixer that offers enough inputs to accommodate your needs.
2. Connect your microphones, instruments, or audio devices to the appropriate inputs on the mixer. Most mixers will have a combination of XLR, 1/4″ TRS, or RCA inputs, allowing you to connect a wide range of sources.
3. Connect the USB or Firewire port on the mixer to your computer using the appropriate cable. Make sure to use a high-quality cable to ensure reliable data transfer between the mixer and your computer.
4. Install any necessary drivers or software that may be required for the mixer to communicate with your computer. Some mixers will require specific drivers or control software to enable proper functionality and control over the inputs and outputs.
5. Open your recording software or DAW and select the mixer as the audio interface. Set up your tracks and arm them for recording, ensuring that each track is assigned to the corresponding input on the mixer.
6. Adjust the input levels and any necessary settings on the mixer to achieve the desired sound for each source. Most USB or Firewire mixers offer individual controls for each input, allowing you to fine-tune the levels and apply any necessary processing or effects.
By using a USB or Firewire mixer, you can take advantage of the built-in audio interface and the numerous analog inputs to expand your input capabilities. These mixers provide a seamless integration between the hardware mixer and your computer, allowing for simultaneous multi-track recording with ease.
Furthermore, USB or Firewire mixers often come with additional features such as EQ, auxiliary sends, and built-in effects, providing even more versatility and control over your recordings.
It’s important to ensure that your computer’s USB or Firewire ports are compatible with the mixer you choose. Additionally, consider the processing power and system requirements of your computer to handle the increased workload when using a mixer with multiple inputs.
In summary, using a USB or Firewire mixer is an efficient and comprehensive solution for expanding your input capabilities. It provides a dedicated audio interface with multiple analog inputs, allowing you to connect and record a variety of sources simultaneously, all while offering additional features and control for your recordings.
Method 5: Using ADAT or S/PDIF Expansion
If your audio interface is equipped with ADAT or S/PDIF ports, you can expand your input capabilities by using ADAT or S/PDIF expansion. These digital formats allow you to connect external devices, such as preamps or converters, to your audio interface, effectively increasing the number of inputs available to you.
Here’s how you can use ADAT or S/PDIF expansion to expand your input capabilities:
1. Identify the external devices you want to connect to your audio interface. These could be preamps, converters, or other digital audio devices that offer ADAT or S/PDIF connectivity.
2. Determine if your audio interface supports ADAT or S/PDIF expansion. Check the specifications of your interface to confirm the availability of these digital input options.
3. Connect the ADAT or S/PDIF output of the external device to the corresponding input on your audio interface. Use the appropriate cables (optical or coaxial) to establish a secure connection.
4. Configure the settings on your audio interface and external device to ensure they are synchronized. Match the sample rate and clock settings between the two devices to avoid any synchronization issues or errors.
5. Set up your recording software or DAW to utilize the additional inputs provided by the ADAT or S/PDIF expansion. Select the appropriate digital inputs on your audio interface within your software to record the sources connected through the expansion.
ADAT and S/PDIF expansion offer a straightforward and seamless way to expand your input capabilities. ADAT supports up to 8 additional channels of digital audio, while S/PDIF typically supports 2 channels. By connecting external devices through these expansion options, you can effectively increase the number of inputs available for your recordings.
Using ADAT or S/PDIF expansion is particularly useful in studio setups where you require additional preamps or converters to capture high-quality audio from multiple sources. It allows for easy integration of external gear while ensuring a digital signal path with minimal conversion loss or degradation.
It’s important to ensure that your audio interface and external devices are compatible in terms of supported sample rates and formats. Additionally, pay attention to signal flow and routing to ensure optimal audio quality and proper synchronization between the devices.
In summary, utilizing ADAT or S/PDIF expansion is a practical method for expanding your input capabilities. By connecting external devices through these digital formats, you can increase the number of inputs available on your audio interface, allowing for more versatile and comprehensive recordings.
Conclusion
Expanding the input capabilities of your audio interface opens up a world of possibilities for your recording projects. Whether you need to record multiple instruments, host interviews on a podcast, or collaborate with other musicians remotely, having more inputs gives you the flexibility and freedom to achieve your creative vision.
In this article, we explored various methods to expand your input capabilities. Using your digital audio workstation (DAW) allows you to record multiple tracks simultaneously, even with a limited number of inputs on your interface. Utilizing an external mixer or preamp enables you to connect additional sources directly to the mixer, bypassing the limitations of your interface. Employing a digital audio converter (DAC) allows you to connect analog sources to the digital inputs of your interface. Incorporating a USB or Firewire mixer with a built-in audio interface provides a dedicated solution for expanding your input options. Lastly, utilizing ADAT or S/PDIF expansion allows you to connect external devices and increase the number of inputs on your interface.
When selecting the method that suits your needs, it’s important to consider factors such as the number of inputs required, connection type compatibility, preamp quality, sample rate and bit depth support, and budget. Always choose a method that aligns with your specific requirements and constraints.
By expanding your input capabilities, you can elevate the quality and creativity of your recordings. Whether you’re a musician, producer, podcaster, or audio enthusiast, having more inputs allows you to capture a broader range of sources, achieve better isolation, and enjoy more control during the mixing and editing process.
Remember to optimize your setup, check for compatibility, and follow best practices for gain staging, signal routing, and synchronization when implementing any of the methods discussed in this article.
With the knowledge and options presented here, you’re now equipped to explore and expand the input capabilities of your audio interface to unlock your full recording potential.