Home>Production & Technology>Audio Interface>How To Use An Audio Interface In Fl Studio
Audio Interface
How To Use An Audio Interface In Fl Studio
Published: February 4, 2024
Learn how to use an audio interface in Fl Studio to enhance your recording and production quality. Connect your instruments and microphones effortlessly with the help of an audio interface for seamless audio integration.
(Many of the links in this article redirect to a specific reviewed product. Your purchase of these products through affiliate links helps to generate commission for AudioLover.com, at no extra cost. Learn more)
Table of Contents
- Introduction
- Understanding Audio Interfaces
- Setting Up Your Audio Interface
- Configuring Audio Inputs and Outputs in FL Studio
- Selecting the Right ASIO Driver
- Adjusting Buffer Size and Sample Rate
- Routing Audio in FL Studio
- Using External Hardware with Your Audio Interface
- Troubleshooting Common Issues
- Conclusion
Introduction
Welcome to the world of audio interfaces! If you’re a music producer or a recording enthusiast, an audio interface is an essential tool for capturing and manipulating high-quality audio signals. Whether you’re a beginner or a seasoned professional, understanding how to use an audio interface can greatly enhance the quality of your recordings and improve your overall workflow.
An audio interface serves as the bridge between your computer and your audio equipment, allowing you to connect microphones, instruments, and other audio sources to your digital audio workstation (DAW). It converts analog audio signals into digital data that your computer can process and vice versa, ensuring accurate and high-fidelity recordings.
With the rise of home studios and the accessibility of music production software like FL Studio, learning how to use an audio interface has become more important than ever. In this article, we will delve into the world of audio interfaces and guide you on how to set up and optimize your audio interface in FL Studio.
Whether you’re a vocalist, a guitarist, or a producer who relies on MIDI controllers, understanding the ins and outs of audio interfaces will empower you to achieve professional-level recordings and unlock new creative possibilities.
So, let’s dive in and explore the fascinating world of audio interfaces and how to integrate them seamlessly into FL Studio!
Understanding Audio Interfaces
Before we jump into using an audio interface in FL Studio, let’s take a moment to understand the fundamental concepts behind these devices.
Simply put, an audio interface is a hardware device that connects your audio sources, such as microphones, instruments, and speakers, to your computer. It acts as a digital translator, converting analog audio signals into digital data that can be processed by your computer’s sound card.
Audio interfaces come in various shapes and sizes, offering different features and connectivity options. They typically have inputs and outputs to accommodate different types of audio sources and provide high-quality conversion and signal routing capabilities.
Audio interfaces can vary in terms of their connection types, including USB, Thunderbolt, FireWire, and PCIe. USB audio interfaces are the most common and widely used due to their ease of use, affordability, and compatibility with most computers. Thunderbolt interfaces offer blazing-fast data transfer speeds, making them ideal for professionals who require low latency and high audio quality. FireWire and PCIe interfaces are less common nowadays but can still be found in certain professional-grade setups.
When choosing an audio interface, it’s essential to consider your specific needs and requirements. Factors such as the number and type of inputs and outputs, preamp quality, sample rate and bit depth, and compatibility with your computer and DAW should guide your decision.
Audio interfaces usually come with software drivers that allow your computer and DAW to communicate with the device. These drivers ensure that the audio interface functions smoothly and provides optimal performance. It’s crucial to install the latest drivers provided by the manufacturer to ensure compatibility with your operating system and take advantage of any firmware updates or bug fixes.
Additionally, many audio interfaces come with built-in features such as phantom power, direct monitoring, MIDI connectivity, and headphone amplifiers. These features can further enhance your recording and monitoring experience, allowing you to capture and manipulate audio with greater flexibility and control.
Now that we have a basic understanding of what audio interfaces are and what they offer, let’s move on to the practical aspect of setting up an audio interface in FL Studio.
Setting Up Your Audio Interface
Setting up your audio interface correctly is crucial for seamless integration with FL Studio. Follow these steps to ensure you’re ready to start recording and producing with your audio interface:
- Connect your audio interface to your computer: Depending on the interface, you’ll typically use a USB or Thunderbolt cable to connect it to your computer. Make sure to use high-quality cables and connect the interface to a USB or Thunderbolt port that provides sufficient power and data transfer capabilities.
- Install the necessary drivers: Most audio interfaces require specific drivers to function correctly. Visit the manufacturer’s website and download the latest drivers for your operating system. Follow the installation instructions provided to ensure a successful installation.
- Power on your audio interface: Connect the power source, if applicable, and turn on your audio interface. Some interfaces can be powered directly through the USB connection, while others require an external power supply. Check the user manual for your specific interface for power requirements.
- Configure audio preferences in FL Studio: Launch FL Studio and navigate to the “Options” menu. Select “Audio Settings” and choose your audio interface from the input and output device dropdown menus. Make sure to select the correct sample rate and buffer size, which can affect latency and audio performance. It’s recommended to start with a buffer size of 128 or 256 samples and adjust as needed.
- Test your setup: To ensure everything is working correctly, connect a microphone or instrument to one of the interface’s input channels and enable the corresponding input in FL Studio. Make sure you’re getting audio signal by checking the meter in FL Studio’s mixer or recording an audio track. Adjust input levels as necessary.
Once you’ve completed these steps, your audio interface should be properly set up and ready to use with FL Studio. Keep in mind that specific interfaces may have additional setup steps or require specific configurations for optimal performance. Consult the manufacturer’s documentation or support resources for further guidance if needed.
Now that your audio interface is ready, let’s move on to configuring the audio inputs and outputs in FL Studio.
Configuring Audio Inputs and Outputs in FL Studio
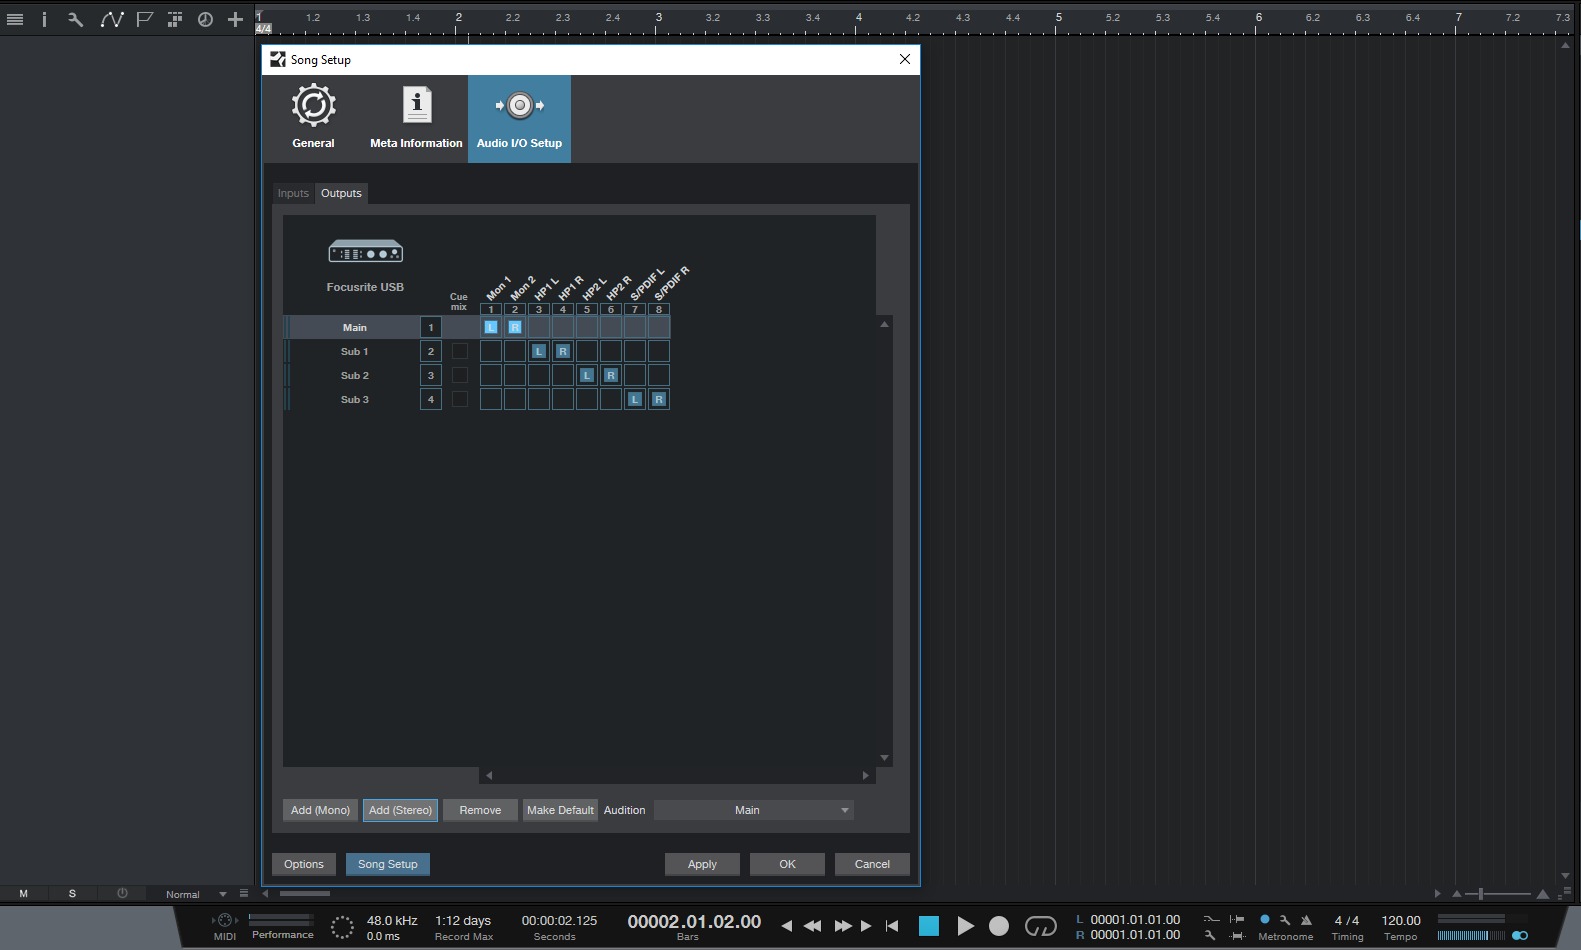
In order to effectively use your audio interface in FL Studio, you need to configure the audio inputs and outputs to route the audio signals correctly. Follow these steps to configure your audio inputs and outputs:
- Open the Mixer: Click on the “View” menu in FL Studio and select “Mixer” or press the F9 key on your keyboard to open the Mixer window.
- Assign input and output channels: In the Mixer window, locate the channel strip that corresponds to your audio interface. To assign an input, right-click on an empty area in the Mixer and choose “Insert” from the context menu. Select the desired input channel from the list of available options. To assign an output, right-click on the channel strip and choose “Set Mixer Track Output” and select the desired output from the list.
- Set up monitoring: If you want to monitor the incoming audio signal directly from your audio interface, you can enable “Input Monitoring” for the respective input channel. Right-click on the channel strip, navigate to “Input – None” and choose “Input – Auto.” This allows you to listen to the input signal in real-time without needing to record it.
- Adjust input and output levels: In the Mixer, you can adjust the input and output levels for each channel to ensure proper signal flow and prevent clipping. Use the faders or knobs on the channel strip to adjust the input and output levels accordingly.
- Configure recording settings: If you plan to record vocals or instruments, you need to set up the recording settings in FL Studio. Click on the “Options” menu, select “Recording” and choose your desired audio input channel for recording. You can also configure additional recording parameters such as the recording mode, file format, and bit depth.
By following these steps, you can configure your audio inputs and outputs within FL Studio to utilize your audio interface effectively. Take some time to experiment with different routing options and settings to optimize your workflow and achieve the desired results.
Next, we will discuss the importance of selecting the right ASIO driver for your audio interface in FL Studio.
Selecting the Right ASIO Driver
When using an audio interface in FL Studio, it is crucial to select the appropriate ASIO driver for optimal performance and low latency. ASIO (Audio Stream Input/Output) is a protocol developed specifically for professional audio applications, providing direct access to the audio hardware.
FL Studio offers support for a range of ASIO drivers, including those provided by your audio interface manufacturer or generic ASIO drivers such as ASIO4ALL. Here are some factors to consider when selecting the right ASIO driver:
- Compatibility: Ensure that the ASIO driver you choose is compatible with both your audio interface and FL Studio. Check the manufacturer’s website for updated driver versions or consult FL Studio’s documentation for a list of recommended drivers.
- Latency: ASIO drivers are known for their low latency performance, allowing for real-time monitoring and recording without significant delay. When selecting an ASIO driver, consider the supported buffer size and your specific needs for low latency, as this can vary depending on your system and audio interface.
- Stability and Performance: Look for ASIO drivers that are known for their stability and reliability. Read reviews and user experiences to ensure that the driver you choose provides consistent performance without any major issues or glitches.
- Advanced Features: Some ASIO drivers may offer additional features such as multiple input and output routing options, control panel customization, or hardware-specific functionality. If these features are important to your workflow, consider choosing a driver that provides the necessary capabilities.
- Support and Updates: Check the driver’s support and update policies. Make sure that the driver is actively maintained by the manufacturer and regularly updated to ensure compatibility with future updates of your operating system and FL Studio.
Once you have selected the appropriate ASIO driver, you can configure it within FL Studio. Open the “Audio Settings” menu by clicking on the “Options” menu and selecting “Audio Settings.” In the “Input/Output” section, choose your selected ASIO driver from the “Device” dropdown menu.
Make sure to adjust the buffer size according to your needs for low latency. A smaller buffer size can reduce latency but may put more strain on your system, so finding the right balance is important. Experiment with different buffer sizes to find the optimal setting for your setup.
Selecting the right ASIO driver is crucial to achieve low latency and reliable performance with your audio interface in FL Studio. Take your time to research and test different drivers to find the one that best suits your specific requirements.
Next, let’s explore how adjusting the buffer size and sample rate can further optimize your audio interface in FL Studio.
Adjusting Buffer Size and Sample Rate
When using an audio interface in FL Studio, adjusting the buffer size and sample rate settings is essential to optimize the performance and latency of your setup. Let’s delve into these settings and their impact:
- Buffer Size: The buffer size determines the amount of audio data that is processed at a time. It is measured in samples and affects the latency of your audio interface. A smaller buffer size reduces latency, allowing for real-time monitoring and recording, but it can also put more strain on your system’s CPU. Conversely, a larger buffer size increases latency but reduces the burden on your CPU. It’s important to find a balance between low latency and stable performance by adjusting the buffer size based on your specific needs and the capabilities of your computer.
- Sample Rate: The sample rate refers to the number of audio samples captured per second and determines the frequency range that can be accurately represented. Higher sample rates result in more accurate audio reproduction, especially for high-frequency content. However, higher sample rates also require more computational resources and may not be necessary for every project. Aim for a sample rate that meets your specific requirements without unnecessarily burdening your system.
To adjust the buffer size and sample rate settings in FL Studio, follow these steps:
- Open the “Audio Settings” menu: Click on the “Options” menu in FL Studio and select “Audio Settings.”
- Adjust the buffer size: In the “Input/Output” section, locate the “Buffer length” slider or numerical input field. Slide the slider or manually enter a value to adjust the buffer size. Start with a conservative setting (e.g., 256 samples) and gradually decrease it to find the lowest buffer size that your computer can handle without introducing audio glitches or dropouts.
- Set the sample rate: In the same “Audio Settings” menu, navigate to the “Recording” section and select your desired sample rate from the “Sample Rate” dropdown menu. Choose a sample rate that meets the requirements of your project and audio sources.
Experimenting with different buffer sizes and sample rates can help you find the optimal settings for your specific setup and maximize the overall performance of your audio interface in FL Studio. Remember to consider the capabilities of your computer and the demands of your project to strike the right balance between low latency and stable performance.
Next, let’s explore how to route audio in FL Studio using your audio interface.
Routing Audio in FL Studio
As you use an audio interface in FL Studio, understanding how to route audio signals is essential for managing inputs, outputs, and monitoring. Let’s explore the various routing options available in FL Studio:
Input Routing:
When recording audio with your audio interface, you need to route the input signals to the appropriate track or mixer channel in FL Studio. Follow these steps to route audio inputs:
- Create an audio track: In FL Studio’s Playlist or Channel Rack, add a new audio track where you want to record the input signal. Right-click and select “Insert > Audio Input” to add an audio track with the default input routing.
- Select the input source: In the audio track’s mixer channel, click on the input drop-down menu and select the input channel of your audio interface that corresponds to the source you want to record.
Output Routing:
To route the audio signal from FL Studio to your audio interface’s outputs, follow these steps:
- Select the output destination: In FL Studio’s mixer, locate the channel or track you want to route to your audio interface’s outputs. Right-click on the mixer track and select “Route to this track’s hardware output.” Choose the appropriate output channel of your audio interface from the available options.
Monitoring:
Monitoring refers to the process of listening to the incoming audio signal in real time. FL Studio offers various monitoring options:
- Direct Monitoring: Many audio interfaces provide direct monitoring capabilities, allowing you to listen to the input signal without the audio passing through FL Studio. Enable direct monitoring on your audio interface or in the ASIO driver control panel to achieve real-time monitoring while recording.
- Software Monitoring: FL Studio also allows for software monitoring, where the input signal passes through the DAW before reaching your speakers or headphones. This allows you to apply effects and processing to the input signal before monitoring it. To enable software monitoring, select the “Input – Auto” option in the mixer’s input routing menu for the desired channel.
Experiment with different routing configurations to meet your specific recording and monitoring needs. It’s important to continuously check and adjust input and output levels in the mixer to ensure proper signal flow and avoid clipping or distortion.
Next, we’ll discuss how you can incorporate external hardware into your audio interface setup in FL Studio.
Using External Hardware with Your Audio Interface
One of the great advantages of using an audio interface in FL Studio is the ability to incorporate external hardware into your setup. This allows you to expand your sonic palette and take advantage of the unique capabilities of external devices. Here’s how you can use external hardware with your audio interface:
Connecting External Hardware:
To connect external hardware to your audio interface, follow these steps:
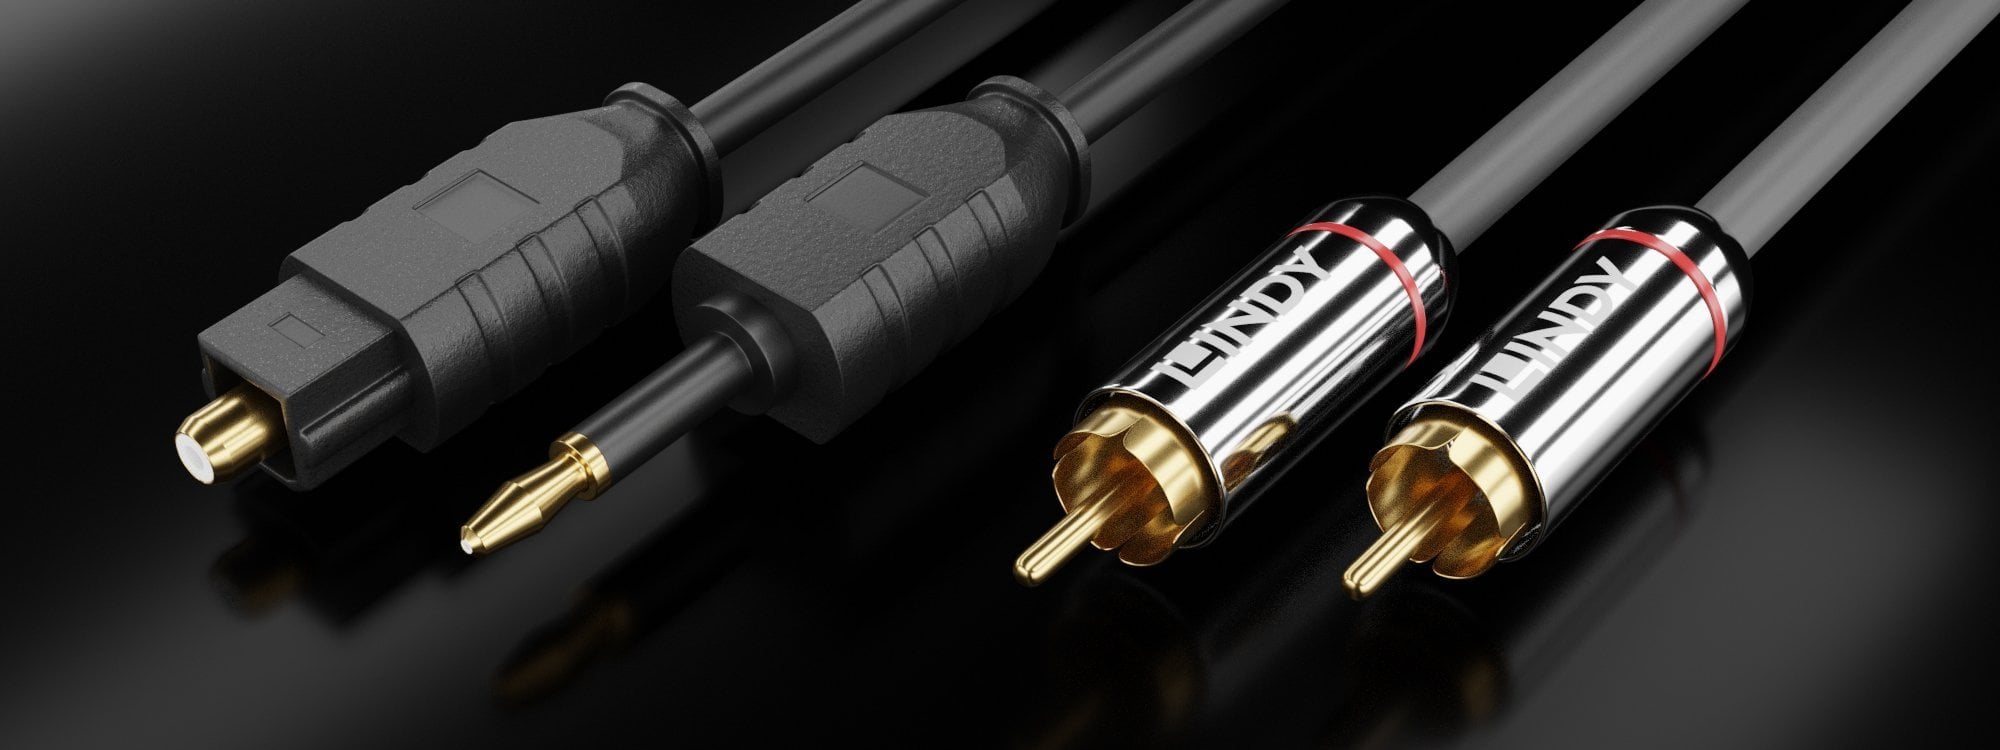
- Identify the appropriate connections: Determine the connection types required by your external hardware. Common connections include analog inputs and outputs (such as XLR, 1/4-inch TRS, or RCA), digital connections (like S/PDIF or ADAT), or MIDI connections. Use the corresponding cables to connect your external hardware to the appropriate inputs and outputs on your audio interface.
- Select the input source: In FL Studio’s mixer or channel settings, select the input source corresponding to your external hardware. This will route the audio signal from the external device to the desired channel or track in FL Studio.
- Set up monitoring: If you want to monitor the external hardware in real time, enable direct monitoring on your audio interface or use software monitoring within FL Studio. This allows you to listen to the incoming signal without any perceptible latency.
Using External Hardware as Effects:
You can also use external hardware as effects processors within FL Studio. Follow these steps:
- Connect the external hardware: Connect the audio output from your audio interface to the input of your external hardware. Then, connect the output of your hardware back into an available input on your audio interface.
- Insert the external hardware as an effect: In the mixer or channel settings, add an effect to the desired channel or track. Choose the input where your external hardware is connected as the effect’s input. This allows the audio to pass through your external hardware before reaching FL Studio’s mixer.
- Configure the routing: Ensure that the output of the external hardware is routed back into an available input on your audio interface. This completes the signal flow loop, with the audio passing through your external hardware and back into FL Studio.
Using external hardware with your audio interface opens up endless creative possibilities and allows you to integrate the unique sonic characteristics of your external devices into your productions.
Now that we’ve explored how to use external hardware, let’s address some common troubleshooting issues you may encounter when using an audio interface in FL Studio.
Troubleshooting Common Issues
While using an audio interface in FL Studio can greatly enhance your music production experience, it’s not uncommon to encounter some technical issues along the way. Let’s explore some common problems and their potential solutions:
Driver Issues:
If you’re experiencing issues with your audio interface, such as audio dropouts, distorted sound, or connectivity problems, the first step is to check for driver-related issues:
- Update your drivers: Ensure that you have the latest drivers installed for your audio interface. Visit the manufacturer’s website and download the most recent driver version compatible with your operating system.
- Restart your computer: Sometimes, a simple restart can resolve driver-related issues. Restart your computer after installing or updating the audio interface drivers.
- Try a different USB or Thunderbolt port: If you’re using a USB or Thunderbolt audio interface, try connecting it to a different port on your computer. Sometimes, connectivity issues can be resolved by using a different port.
- Check for firmware updates: Some audio interfaces may have firmware updates available. Check the manufacturer’s website or software utility for any firmware updates and apply them if necessary.
Latency Issues:
If you’re experiencing noticeable latency when recording or monitoring audio, you can try the following steps to reduce latency:
- Adjust buffer size: Decreasing the buffer size in your audio interface settings can decrease latency. However, be cautious as decreasing the buffer size too much can lead to audio dropouts or glitches. Find the optimal balance between low latency and stable performance.
- Optimize your system: Close any unnecessary applications or processes running in the background to free up system resources. Disable any power-saving features that may affect the performance of your computer while using FL Studio.
- Use a direct monitoring option: If your audio interface supports direct monitoring, enable it to hear the input signal in real time without processing it through FL Studio, effectively eliminating latency.
Noise or Distortion Issues:
If you’re experiencing noise or distortion in your audio signal, consider these troubleshooting steps:
- Check cables and connections: Ensure that all cables are securely connected and in good condition. Faulty or loose cables can introduce noise or distortion into the audio signal.
- Adjust input gain levels: If the input gain on your audio interface is too high, it can result in distorted audio. Try lowering the input gain levels until the audio signal is clean and free from distortion.
- Check compatibility and impedance: Make sure that the impedance of your audio sources (such as microphones or instruments) matches the impedance requirements of your audio interface. Mismatched impedance can cause unwanted noise or distortion.
If you’re still experiencing issues after attempting these troubleshooting steps, consult the manufacturer’s documentation or reach out to their technical support team for further assistance. They will be able to provide specific guidance tailored to your audio interface model.
With the right troubleshooting approaches, you can overcome common issues and fully enjoy the benefits of using an audio interface in FL Studio.
Now, let’s wrap up our discussion.
Conclusion
Using an audio interface in FL Studio is a game-changer for music producers and recording enthusiasts. It allows you to capture high-quality audio, expand your sonic possibilities, and take your productions to the next level. By understanding the fundamentals of audio interfaces and following the steps for setup and configuration, you can harness the full potential of your audio interface and optimize it for your specific needs.
In this article, we explored the importance of setting up your audio interface correctly, including connecting it to your computer, installing drivers, and configuring audio preferences in FL Studio. We also discussed how to adjust buffer size and sample rate settings for optimal performance and latency. Additionally, we delved into routing audio, incorporating external hardware, and troubleshooting common issues that may arise along the way.
Remember, every audio interface is unique, and it’s crucial to consult the manufacturer’s documentation and resources for specific instructions and guidance. Stay up-to-date with driver updates and firmware upgrades to ensure the best performance and compatibility with FL Studio.
With the knowledge gained from this article, you can confidently utilize your audio interface in FL Studio, unleash your creativity, and achieve professional-quality recordings. So, plug in your microphones, connect your instruments, and let your audio interface be the gateway to your musical masterpieces!