Home>Production & Technology>Audio Interface>How To Set Up Audio Interface Final Cut Pro X

Audio Interface
How To Set Up Audio Interface Final Cut Pro X
Published: February 5, 2024
Learn how to set up an audio interface in Final Cut Pro X and enhance your audio editing experience. Follow our step-by-step guide to optimize your workflow and achieve professional-quality sound.
(Many of the links in this article redirect to a specific reviewed product. Your purchase of these products through affiliate links helps to generate commission for AudioLover.com, at no extra cost. Learn more)
Table of Contents
Introduction
Welcome to our comprehensive guide on how to set up an audio interface in Final Cut Pro X. If you are a video editor or content creator working with Final Cut Pro X, you know how crucial audio quality is for delivering professional and impactful videos. An audio interface acts as the bridge between your computer and audio equipment, allowing you to capture and process high-quality audio for your projects.
Understanding how audio interfaces work and how to set them up properly can significantly enhance your audio production capabilities. Whether you are a beginner or an experienced professional, this guide will provide you with all the information you need to get started with your audio interface in Final Cut Pro X.
In this article, we will cover the basics of audio interfaces, the compatibility requirements, and how to choose the right audio interface for your needs. We will then dive into the step-by-step process of connecting the audio interface to your computer and configuring the audio settings in Final Cut Pro X. We will also discuss adjusting audio levels, monitoring audio, and troubleshooting common issues you may encounter along the way.
By the end of this guide, you’ll have the knowledge and confidence to set up and utilize your audio interface effectively in Final Cut Pro X, resulting in professional-grade audio for your videos.
So, let’s jump right in and get started with understanding audio interfaces!
Understanding Audio Interfaces
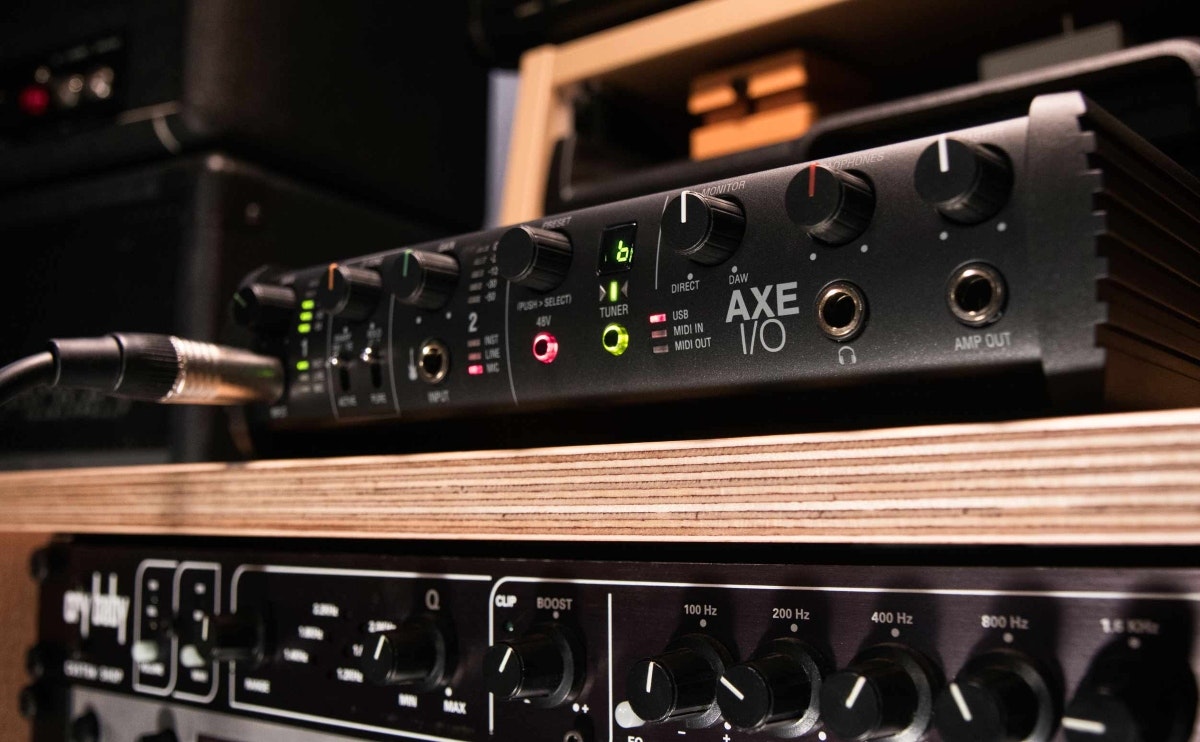
Before we delve into the process of setting up an audio interface in Final Cut Pro X, let’s first grasp the concept of what an audio interface actually is. In simple terms, an audio interface is an external device that connects your computer to various audio equipment, allowing you to capture, record, and playback high-quality audio.
Audio interfaces serve as the link between your computer and your audio sources, such as microphones, instruments, and speakers. They convert analog audio signals into digital data that your computer can process, and vice versa. This enables you to work with professional-grade audio in your digital audio workstation (DAW), like Final Cut Pro X.
One of the primary functions of an audio interface is its ability to provide high-quality, low-latency audio recording and playback. It typically features inputs for connecting microphones, instruments, and other audio devices, as well as outputs to connect speakers or headphones for monitoring.
Audio interfaces come in various shapes and sizes, with different input and output configurations to suit different recording and production needs. They can range from portable, compact interfaces designed for mobile recording setups, to larger desktop interfaces with extensive I/O options for professional studios.
Furthermore, audio interfaces may have different connectivity options, such as USB, Thunderbolt, or Firewire. The choice of connectivity depends on the capabilities of your computer and the level of performance you require.
It’s important to understand that the quality of your audio interface plays a crucial role in the overall audio production process. An audio interface with good preamps and converters can greatly enhance the sound quality and fidelity of your recordings.
In the next sections, we will explore the compatibility requirements for audio interfaces, helping you make the right choice for your setup, and guide you through the process of connecting and configuring your audio interface in Final Cut Pro X.
Compatibility Requirements
Before you embark on setting up and using an audio interface with Final Cut Pro X, it is important to ensure that your computer meets the necessary compatibility requirements. This will ensure smooth integration and optimal performance.
The first consideration is the operating system. Final Cut Pro X is designed to work on macOS, so you will need a Mac computer with the compatible version of macOS installed. Be sure to check the system requirements specified by Apple for the version of Final Cut Pro X you are using.
In addition to the operating system, you should also ensure that your computer has the appropriate connectivity options for the audio interface. Most audio interfaces connect via USB, while higher-end interfaces might use Thunderbolt or Firewire. Check the specifications of the audio interface you plan to use and ensure that your computer has the corresponding ports.
It is also worth checking the system requirements for the specific audio interface you are using. Some interfaces may require specific driver installations, firmware updates, or additional software components to function correctly. Make sure you have the necessary drivers and software installed before attempting to connect the audio interface to your computer.
Furthermore, consider the processing power and memory of your computer. Audio interfaces can be demanding on system resources, especially when dealing with high sample rates and multiple audio channels. Ensure that your computer has sufficient processing power and memory to handle the audio processing requirements of both Final Cut Pro X and the audio interface.
Lastly, consider the audio software itself. Final Cut Pro X is specifically designed for video editing and includes robust audio editing and mixing capabilities. Ensure that you have the latest version of Final Cut Pro X installed and check for any updates or compatibility issues between the software and your chosen audio interface.
By ensuring that your computer meets the compatibility requirements, you will be able to seamlessly integrate your audio interface with Final Cut Pro X and benefit from its full range of features and capabilities.
Choosing the Right Audio Interface
Now that you understand the basics of audio interfaces and have checked the compatibility requirements for your computer, it’s time to choose the right audio interface for your needs. The market offers a wide range of options, so it’s important to consider your specific requirements and budget before making a decision.
Here are a few factors to consider when choosing an audio interface:
- Input and Output Configuration: Consider the number and type of inputs and outputs you will need for your audio setup. If you primarily work with microphones, ensure that the audio interface has enough XLR or TRS inputs. If you need to connect instruments, look for dedicated instrument inputs. Additionally, consider the number of line outputs for connecting speakers or headphones.
- Preamp Quality: Preamps are crucial for amplifying microphone signals. Look for an audio interface with high-quality preamps that provide clean, transparent amplification to capture accurate audio recordings.
- Sample Rate and Bit Depth: The sample rate and bit depth determine the resolution and fidelity of your recordings. Higher sample rates and bit depths offer better audio quality, but they also require more processing power and storage space. Consider your specific needs and the capabilities of your computer.
- Connectivity Options: Consider the connectivity options that best suit your setup. USB is the most common and widely supported, while Thunderbolt and Firewire offer faster data transfer speeds for more demanding audio production workflows.
- Portability: If you plan on using your audio interface on the go, consider a compact and portable option that fits your needs. Portable interfaces are often bus-powered, meaning they draw power from the computer, eliminating the need for an external power source.
- Budget: Decide on a budget range that you are comfortable with and narrow down your options within that range. It’s important to strike a balance between your budget and the features and quality you require.
Once you have considered these factors, research and read reviews on different audio interfaces that match your requirements. Compare the features, specifications, and user experiences to make an informed decision.
Remember, choosing the right audio interface is an investment in the quality of your audio production. Take your time, assess your needs, and select an interface that will help you achieve the best results within your budget.
Connecting the Audio Interface
Now that you have chosen the right audio interface for your needs, it’s time to connect it to your computer and set it up for use with Final Cut Pro X. Follow these step-by-step instructions to ensure a successful connection:
- Gather the necessary cables: Depending on the audio interface and your computer’s connectivity options, you may need USB, Thunderbolt, or Firewire cables. Ensure you have the appropriate cables on hand.
- Power off your computer: Before connecting the audio interface, it’s recommended to power off your computer as a precaution.
- Connect the audio interface to your computer: Plug one end of the cable into the appropriate port on the audio interface and the other end into the corresponding port on your computer.
- Power on the audio interface: If your audio interface has a dedicated power source, connect it to a power outlet and turn it on. Some interfaces are bus-powered, meaning they draw power from the computer. In this case, the audio interface will power on automatically when connected.
- Check the computer settings: Once the audio interface is connected and powered on, go to your computer’s system preferences or settings and navigate to the audio or sound settings. Select the audio interface as the default input and output device.
- Launch Final Cut Pro X: Open Final Cut Pro X on your computer. Go to the preferences and select the audio settings. Verify that the audio interface is selected as the audio input and output device within Final Cut Pro X.
- Test the audio interface: To ensure the audio interface is working correctly, connect a microphone or instrument to the appropriate input on the interface. Open a project in Final Cut Pro X and start recording or playing back audio. Monitor the audio levels and verify that you can hear the sound through the connected speakers or headphones.
By following these steps, you should now have your audio interface successfully connected and integrated with Final Cut Pro X. Remember to refer to the documentation provided with your audio interface for any specific setup instructions or troubleshooting tips.
Next, let’s explore how to configure the audio settings in Final Cut Pro X to ensure optimal audio performance and quality.
Configuring Audio Settings in Final Cut Pro X
Once you have successfully connected your audio interface to your computer, it’s important to configure the audio settings in Final Cut Pro X to ensure optimal performance and audio quality. Follow these steps to set up your audio settings:
- Launch Final Cut Pro X: Open Final Cut Pro X on your computer and create or open a project.
- Access the Preferences: Go to the top menu and click on “Final Cut Pro” and then select “Preferences”.
- Open the Audio preferences: In the Preferences window, click on the “Playback” tab and then select “Audio”.
- Select the audio interface: Under the “Audio Device” section, choose your audio interface from the drop-down menu. This should be the same audio interface that you have connected and set up.
- Set the sample rate and bit depth: In the same preferences window, select the desired sample rate and bit depth for your project. It is recommended to use the same settings as your audio interface to maintain consistency and avoid potential audio issues.
- Adjust the latency: Latency refers to the delay between input and output signal. In the preferences window, adjust the “Audio Latency” slider to find the balance between low latency and system stability. Lower latency allows for more immediate monitoring but may put more strain on your computer’s resources.
- Configure audio channels: Depending on your audio interface and project requirements, you can specify the number of audio input and output channels. Click on the “Configure Speakers” button to define your speaker setup and select the appropriate number of channels.
- Apply settings: Once you have made your desired changes, click on the “OK” button to apply the audio settings.
With your audio settings properly configured, you can now take full advantage of your audio interface’s capabilities within Final Cut Pro X. Ensure that you regularly save and backup your projects to avoid any potential data loss.
Next, let’s explore how to adjust audio levels to achieve balanced and professional sound in your video projects.
Adjusting Audio Levels
Adjusting audio levels is a crucial step in achieving balanced and professional sound in your video projects. Final Cut Pro X provides powerful tools for controlling and fine-tuning audio levels. Here’s how you can adjust audio levels in Final Cut Pro X:
- Select the audio clip: In the timeline, select the audio clip you want to adjust. You can select multiple clips by holding down the Command key and clicking on each clip.
- Open the audio inspector: Go to the top menu and click on “Window”, then select “Show in Workspace” followed by “Inspector”. This will open the Inspector window.
- Adjust the clip volume: In the Inspector window, navigate to the “Audio” tab. Here, you can adjust the overall volume of the selected clip using the “Volume” slider. Drag the slider to the left to decrease the volume and to the right to increase it.
- Apply audio effects: If you want to apply specific audio effects to the selected clip, such as EQ, compression, or reverb, navigate to the “Effects” tab in the Inspector window. Here, you can choose from a range of audio effects and customize their parameters to achieve the desired sound.
- Keyframe audio levels: To make precise adjustments to the audio levels over time, you can use keyframes. Place the playhead at the desired point in the timeline, and in the Inspector window, click on the “Add Keyframe” button next to the parameter you want to adjust. You can then drag the keyframe up or down to increase or decrease the audio level at that specific point.
- Preview the audio: As you make adjustments, it’s important to preview the audio to ensure that it sounds balanced and appropriate. Play the video and listen to the sound. If needed, go back and make further adjustments until you achieve the desired result.
- Consider using audio meters: Final Cut Pro X provides audio meters that display the audio levels in real-time. The audio meters can help you visually monitor the audio levels and ensure they are within the desired range.
- Save and export: Once you are satisfied with the audio adjustments, save your project and proceed to the final export. Remember to double-check the audio levels in the exported video to ensure they are consistent and meet your requirements.
By following these steps, you can effectively adjust and control audio levels in Final Cut Pro X, resulting in a professional-sounding video with balanced audio throughout.
Next, let’s explore how to monitor audio during the editing process to ensure optimal sound quality.
Monitoring Audio
Monitoring audio is a critical step in ensuring optimal sound quality throughout the editing process. Final Cut Pro X provides several tools and features that allow you to monitor audio levels and make necessary adjustments. Here’s how you can effectively monitor audio in Final Cut Pro X:
- Enable audio monitoring: In the timeline, locate the audio icon on the desired video clip or audio track. Click on the icon to enable audio monitoring. This will allow you to hear the audio playback during editing.
- Use the audio meters: Final Cut Pro X provides audio meters that visually display the audio levels in real-time. The meters help you monitor the audio levels and ensure they are within the desired range. To enable the audio meters, go to the top menu and click on “Window”, then select “Show in Workspace” followed by “Audio Meters”.
- Observe the audio waveform: The audio waveform provides a visual representation of the audio signal. It shows the varying amplitude of the sound over time. Pay attention to the waveform and look for any unexpected spikes or drops in the audio, as this may indicate potential issues.
- Check the audio waveform for clipping: Clipping occurs when the audio signal exceeds the maximum level and results in distortion. To check for clipping, look for flattened peaks in the waveform. If you notice clipping, adjust the audio levels accordingly to prevent distortion.
- Use headphones or monitors: To accurately assess the audio quality and make precise adjustments, it is recommended to use high-quality headphones or studio monitors. These provide a more detailed and accurate representation of the audio, allowing you to identify any imperfections or issues.
- Make adjustments based on the audio meters and visual feedback: While monitoring the audio, pay attention to the audio meters and the visual feedback provided by the waveform. Ensure that the audio levels are consistent and within the desired range. Use this information to make any necessary adjustments to the volume or apply audio effects as needed.
- Regularly listen and review the audio: It’s essential to regularly listen to the audio during the editing process. Play the video back and carefully listen to the sound. If you notice any inconsistencies, imbalances, or other issues, make the necessary edits and adjustments to achieve the desired audio quality.
- Continuously save and backup your project: As you make changes to the audio, it’s important to regularly save your project and create backups. This ensures that you can easily revert to a previous version if needed and protects your hard work from any potential data loss.
By effectively monitoring the audio in Final Cut Pro X, you can make informed decisions and ensure that your video projects have high-quality sound that enhances the overall viewer experience.
Next, let’s explore some common issues you may encounter during the audio interface setup process and how to troubleshoot them effectively.
Troubleshooting Common Issues
While setting up and using an audio interface in Final Cut Pro X, you may encounter some common issues. Here are a few troubleshooting steps to help you resolve these problems:
- No audio input or output: If you are not getting any audio input or output from your audio interface, double-check the connections between the interface and your computer. Ensure that the interface is properly connected and powered on. Verify that the audio interface is selected as the default input and output device in both the computer settings and Final Cut Pro X preferences.
- Driver or software issues: Some audio interfaces may require specific drivers or software to function correctly. Ensure that you have the latest drivers and software for your interface installed. Visit the manufacturer’s website to download the most up-to-date versions.
- Dropped or glitchy audio: If you are experiencing audio dropouts or glitches, it could be due to insufficient processing power or an incompatible sample rate. Reduce the number of simultaneous processes running on your computer and ensure that the audio interface and Final Cut Pro X are set to the same sample rate.
- Crackling or distorted audio: Crackling or distorted audio can be caused by various factors. Check the cables and connections between your audio interface, microphones, speakers, and computer. Make sure that all cables are securely plugged in and not damaged. If the issue persists, try adjusting the buffer size or latency settings in your audio interface control panel.
- Mismatched input and output channels: If you are experiencing issues with input and output channels, ensure that your audio interface and Final Cut Pro X are using the same configuration. Verify that the correct number of input and output channels are selected in both the audio interface control panel and Final Cut Pro X preferences.
- Incompatibility with macOS: Ensure that your audio interface is compatible with the version of macOS you are using. Check the manufacturer’s website for any compatibility updates or known issues with specific macOS versions.
If you have tried these troubleshooting steps and are still experiencing issues, consult the documentation provided with your audio interface or reach out to the manufacturer’s support team for further assistance. They will be able to provide more specific guidance based on the model and specifications of your audio interface.
Remember, patience and persistence are key when troubleshooting audio interface issues. By following these steps and seeking the necessary support, you can overcome common problems and ensure the smooth operation of your audio setup in Final Cut Pro X.
Now that you have a better understanding of how to troubleshoot common issues, let’s wrap up this guide.
Conclusion
Setting up and using an audio interface in Final Cut Pro X can greatly enhance the audio quality and overall production value of your videos. By understanding the basics of audio interfaces, checking compatibility requirements, choosing the right interface, connecting it properly, and configuring the audio settings in Final Cut Pro X, you can take full advantage of professional-grade audio capabilities.
Remember to monitor audio levels, make necessary adjustments, and troubleshoot common issues that may arise during the setup process. By dedicating time and effort to these steps, you’ll be able to achieve balanced and high-quality sound in your video projects.
Having a well-functioning audio interface and properly configured audio settings allows you to capture clear and pristine audio recordings, apply audio effects, and create seamless soundscapes that complement your visual content.
Whether you’re a video editor, content creator, or aspiring filmmaker, investing in a reliable audio interface and mastering the setup process in Final Cut Pro X will elevate the overall quality of your video productions and captivate your audience.
Remember to regularly save and backup your projects to protect your work, and consult the documentation or support resources provided by the audio interface manufacturer if you encounter any challenges along the way.
Now that you have the knowledge and tools to set up and optimize your audio interface in Final Cut Pro X, it’s time to unleash your creativity and elevate the audio experience in your video projects.
Happy editing!

