Home>Production & Technology>Metronome>How To Make A Mechanical Metronome
Metronome
How To Make A Mechanical Metronome
Modified: January 22, 2024
Learn how to make your own mechanical metronome and keep perfect time while practicing your musical instrument. Perfect for musicians and music enthusiasts.
(Many of the links in this article redirect to a specific reviewed product. Your purchase of these products through affiliate links helps to generate commission for AudioLover.com, at no extra cost. Learn more)
Table of Contents
Introduction
Welcome to the world of music and rhythm, where precise timing is essential. Whether you’re a musician, a dancer, or simply someone who enjoys keeping a steady beat, a mechanical metronome can be a valuable tool. In this article, we will guide you through the process of making your own mechanical metronome, allowing you to have complete control over the tempo of your music.
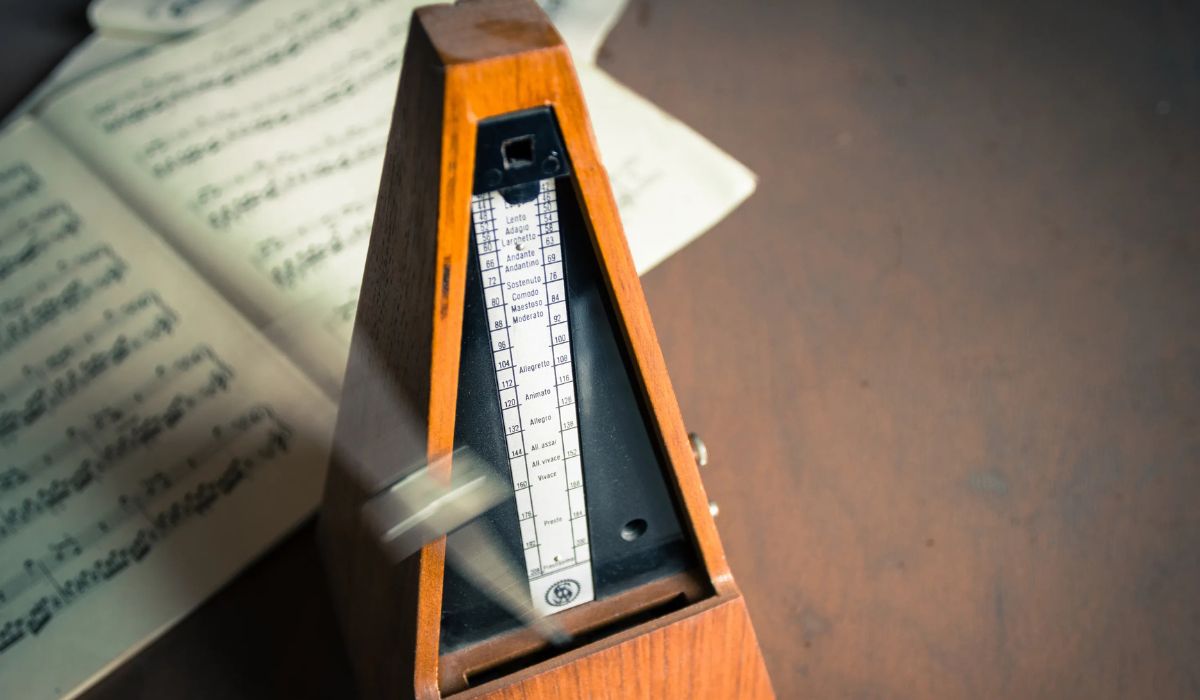
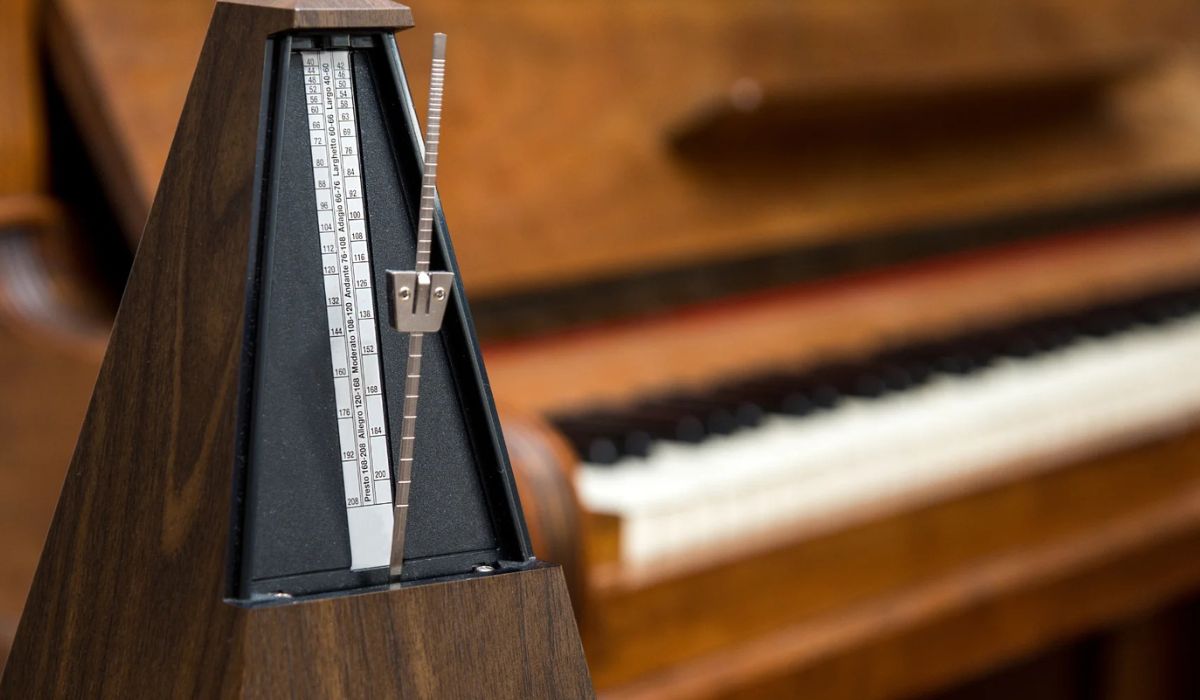
A metronome is a device that helps musicians maintain a consistent tempo by producing regular, audible beats. It is a quintessential tool for practicing and performing, as it helps musicians develop their sense of timing and precision. Metronomes are available in various forms, including digital and mechanical versions. While digital metronomes offer convenience and accuracy, there’s something special about the classic mechanical metronome with its ticking sound and swinging pendulum.
By building your own mechanical metronome, you not only have the opportunity to create a unique piece of equipment, but you also gain a deeper understanding of how it works. It’s a rewarding and educational project that allows you to combine craftsmanship with music.
In this DIY project, we will guide you through each step of the process, from gathering the necessary materials to testing and adjusting the final product. You don’t need to be an expert craftsman or engineer to successfully complete this project, as the steps are straightforward and beginner-friendly. So, let’s dive into the world of metronomes and bring your own musical timing device to life!
Materials Needed
Before we start building our mechanical metronome, let’s gather all the necessary materials and tools. Here’s a list of what you will need:
- Wooden base: Select a sturdy piece of wood with dimensions of approximately 6 inches by 4 inches. It should be thick enough to support the weight of the pendulum and stable enough to prevent wobbling.
- Pendulum arm: A lightweight and smooth wooden rod, around 12 inches long, that will serve as the pendulum for our metronome.
- Counterweight: You will need a small brass or metal weight that can be attached to the pendulum arm. This weight will help create the swinging motion.
- Beat mechanism: This component will create the ticking sound and regulate the tempo. You can repurpose an old clock mechanism or purchase a metronome movement kit online.
- Spring: If you are using a clock mechanism, make sure it comes with a spring that can be wound up to provide the necessary energy for the ticking motion.
- Metronome scale: This is an optional component but can add a decorative touch to your metronome. You can either create a custom scale by printing it or use a pre-made scale available in music stores.
- Adhesive: Use wood glue or strong adhesive to hold the pieces together securely. Make sure to choose an adhesive that is suitable for the materials you will be working with.
- Drill: A handheld drill with appropriate drill bits will be needed to create holes for attaching the pendulum and mounting the beat mechanism.
- Screwdriver: A screwdriver will come in handy when attaching and adjusting various components.
- Sandpaper: Have a few different grits of sandpaper available to smooth the wood surfaces and remove any rough edges.
- Paint or varnish (optional): If you wish to give your mechanical metronome a personalized touch, you can choose to paint or varnish it in a color or finish of your choice.
These are the basic materials and tools you will need to build your own mechanical metronome. Feel free to adapt and customize as per your preferences and availability. Once you have everything ready, we can move on to the next step of the process: assembling the base for your metronome.
Step 1: Gather the Parts
Before we begin assembling the base of our mechanical metronome, let’s gather all the required parts. Here’s a checklist of what you should have:
- A sturdy piece of wood for the base, approximately 6 inches by 4 inches in size.
- A lightweight and smooth wooden rod for the pendulum arm, around 12 inches long.
- A small brass or metal weight to serve as the counterweight for the pendulum.
- A beat mechanism, either a repurposed clock movement or a metronome movement kit.
- A spring, if you are using a clock mechanism.
- A metronome scale (optional), either a printed custom scale or a pre-made one available in music stores.
- Adhesive, such as wood glue or strong adhesive suitable for the materials.
- A drill with appropriate drill bits.
- A screwdriver.
- Sandpaper of different grits.
- Paint or varnish (optional) for personalized finishing touches.
Before you start the assembly process, it’s always a good idea to check that you have all the necessary parts at hand. Double-check the quantities and ensure that each component is in good condition and ready for use.
If there are any missing parts or if you need to purchase additional items, this is the time to do so. Take note of any modifications or adaptations you might want to make based on the availability of alternative materials.
Once you have everything you need, we can move on to the next step: assembling the base of our mechanical metronome.
Step 2: Assembling the Base
Now that we have gathered all the necessary parts, let’s start assembling the base of our mechanical metronome:
- Begin by preparing the wooden base. Make sure it is clean and free from any dust or debris. If needed, you can lightly sand the surface to create a smooth and polished finish.
- Take the drill and create two holes near one end of the base. These holes should be spaced apart, approximately 1 inch from each edge and centered vertically on the base. The size of the holes should match the diameter of the wooden rod that will serve as the pendulum arm.
- Apply adhesive to one end of the wooden rod, ensuring that it is well-coated. Insert the adhesive-coated end of the rod into one of the holes on the base. Press firmly and hold it in place for a few moments to allow the adhesive to set. This will serve as the pivot point for the pendulum.
- Allow the adhesive to fully dry and cure according to the manufacturer’s instructions. This will ensure a secure bond between the pendulum arm and the base.
- If you have opted to add a metronome scale to your metronome, now is the time to attach it. Cut the scale to the desired length and glue it along the top edge of the base. Make sure it is centered and aligned properly.
- Once the adhesive for the scale has dried, you can further enhance the appearance of the base with paint or varnish, if desired. Apply the paint or varnish evenly, following the manufacturer’s instructions, and allow it to dry completely before moving on to the next step.
By following these steps, you will have successfully assembled the base of your mechanical metronome. The next step will involve building the pendulum that will provide the swinging motion essential for the metronome’s functioning.
Step 3: Building the Pendulum
Now that we have the base of our mechanical metronome ready, it’s time to build the pendulum, which is a crucial component for creating the swinging motion. Follow these steps to construct the pendulum:
- Take the smooth wooden rod that will serve as the pendulum arm and measure approximately one-third of the way from one end. Mark this point with a pencil or a small piece of tape.
- Next, drill a small hole through the marked point on the pendulum arm. The hole should be just large enough to accommodate a screw or a piece of string.
- If you are using a small brass or metal weight as the counterweight, attach it to the other end of the pendulum arm. You can use a screw or adhesive to secure it firmly in place.
- If your counterweight is not heavy enough to achieve the desired swinging motion, you can add additional weights such as washers or small metal pieces. Make sure to distribute the weights evenly to maintain a balanced pendulum.
- If you prefer a more decorative pendulum, you can paint or varnish it to match your personal style. Apply the paint or varnish evenly, allowing it to dry completely before continuing to the next step.
With these steps, you have successfully built the pendulum for your mechanical metronome. The next step will involve attaching the pendulum to the base to complete the main structure of the metronome.
Step 4: Attaching the Pendulum to the Base
Now that we have built the pendulum for our mechanical metronome, it’s time to attach it to the base. Follow these steps to securely connect the pendulum to the base:
- Position the pendulum arm in the drilled holes on the base, ensuring that the arm is centered and perpendicular to the base surface.
- If necessary, you can adjust the length of the pendulum arm by trimming it slightly or drilling a new hole farther down the arm.
- Once the pendulum arm is in the desired position, apply adhesive to the hole on the base and insert the arm. Hold it in place for a few moments to allow the adhesive to set.
- Allow the adhesive to fully dry and cure according to the manufacturer’s instructions to ensure a strong and secure attachment.
- Once the adhesive is dry, test the movement of the pendulum by giving it a gentle push. It should swing freely without any obstructions or restrictions.
- If you notice any issues with the movement or if the pendulum doesn’t swing evenly, make necessary adjustments by repositioning the pendulum arm or trimming its length as needed.
By following these steps, you have successfully attached the pendulum to the base of your mechanical metronome. The next step will involve adding a weight to the pendulum arm, which is essential for creating the swinging motion and regulating the tempo of the metronome.
Step 5: Adding the Weight
Now that we have attached the pendulum to the base of our mechanical metronome, it’s time to add a weight to the pendulum arm. This weight is crucial for creating the swinging motion and regulating the tempo of the metronome. Follow these steps to add the weight:
- If you haven’t already done so, ensure that the pendulum arm is securely attached to the base and can swing freely without any obstructions.
- Take the small brass or metal weight that you have chosen for your metronome and ensure that it is clean and free from any debris. This weight will act as the counterbalance for the pendulum arm.
- If the weight has a hole or a loop, affix it to the end of the pendulum arm using a screw or adhesive. Make sure it is securely fastened to prevent it from loosening or falling off during use.
- If the weight doesn’t have a hole or a loop, you can attach it directly to the end of the pendulum arm using adhesive or by securely knotting a piece of string or wire around it.
- Ensure that the weight is positioned in a way that allows the pendulum arm to swing freely without any interference or imbalance.
- If necessary, you can adjust the position of the weight by drilling a new hole in the pendulum arm or reattaching it in a different spot.
With these steps, you have successfully added the weight to your mechanical metronome. The weight will provide the necessary momentum for the pendulum to swing and create the steady beating motion. The next step will involve creating the beat mechanism, which will regulate the tempo and produce the ticking sound of the metronome.
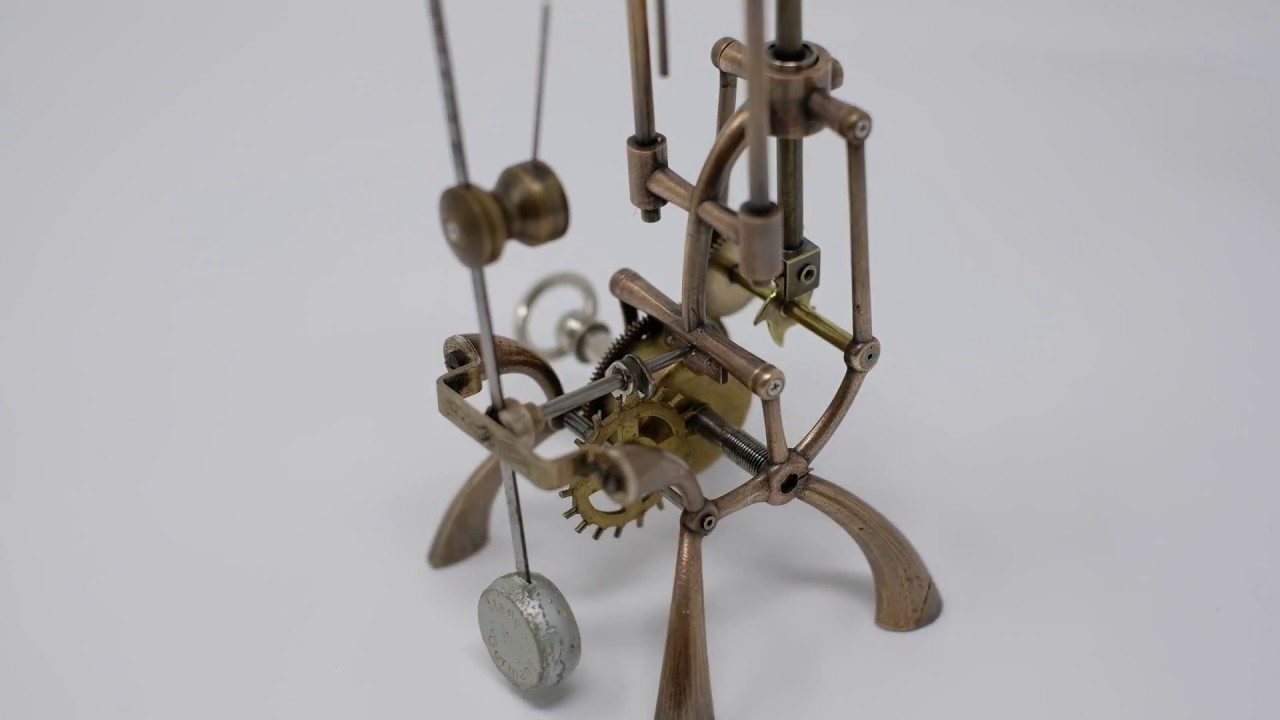
Step 6: Creating the Beat Mechanism
Now that we have the pendulum and weight in place, it’s time to create the beat mechanism for our mechanical metronome. The beat mechanism is responsible for regulating the tempo and producing the distinctive ticking sound. Follow these steps to create the beat mechanism:
- If you are repurposing a clock movement, begin by disassembling the clock and extracting the necessary components. Keep the main mechanism, including the oscillating arm and gear mechanism.
- If you are using a metronome movement kit, follow the manufacturer’s instructions to assemble the appropriate components. This may involve connecting gears, springs, and other parts in the designated order.
- Once you have the beat mechanism ready, position it on the base where it will be in contact with the pendulum arm. This contact will create the ticking sound and regulate the tempo.
- Use a drill to create a small hole or slot in the base, aligned with the point where the beat mechanism will make contact with the pendulum arm. This hole or slot should allow the arm of the beat mechanism to move freely and make contact with the pendulum.
- Attach the beat mechanism to the base using screws, adhesive, or any other method prescribed by the manufacturer or suitable for the specific design of the mechanism.
- If using a clock mechanism, ensure that it has a spring that can be wound up to provide the necessary energy for the ticking motion. Wind up the spring according to the manufacturer’s instructions.
- Test the beat mechanism by giving the pendulum arm a gentle push and observing the movement of the mechanism. The contact between the beat mechanism and the pendulum should produce a regular ticking sound and establish the tempo of the metronome.
- Make any necessary adjustments to the beat mechanism, such as tightening or loosening the contact point, to achieve the desired tempo and sound.
With these steps, you have successfully created the beat mechanism for your mechanical metronome. The beat mechanism, in combination with the swinging pendulum, will provide the rhythmic heartbeat that musicians rely on. The next step will involve final assembly and preparing your metronome for testing and adjustment.
Step 7: Final Assembly
Now that we have completed the major components of our mechanical metronome, it’s time for the final assembly. In this step, we will bring all the elements together to create a functional metronome. Follow these steps to complete the final assembly:
- Ensure that all the individual parts, including the base, pendulum, weight, and beat mechanism, are clean and free from any debris or dust.
- Position the pendulum arm with the attached weight in the drilled holes on the base. Make sure it is centered and secure.
- If you have added a metronome scale, ensure that it is aligned properly and securely attached to the top edge of the base.
- If desired, you can further enhance the appearance of the metronome by applying a final coat of paint or varnish to the entire assembly. Allow it to dry completely before proceeding.
- Once the paint or varnish has dried, test the metronome by giving the pendulum arm a gentle push. Observe the swinging motion of the pendulum and the ticking sound produced by the beat mechanism.
- Make any final adjustments to the weight, position, or contact between the beat mechanism and the pendulum arm to achieve the desired tempo and sound.
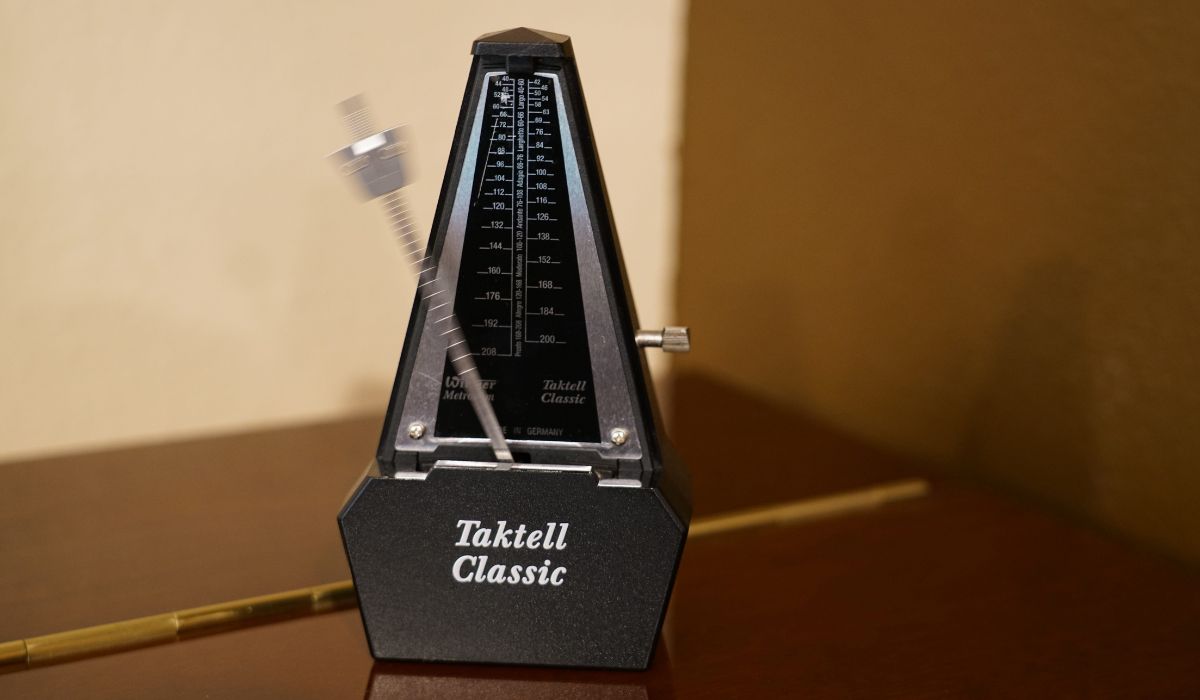
With these steps, the final assembly of your mechanical metronome is complete. Congratulations! You have successfully built your own metronome from scratch. The next and final step involves testing and adjusting the metronome to ensure accurate timing and reliable performance.
Step 8: Testing and Adjusting
Now that you have completed the final assembly of your mechanical metronome, it’s time to test its functionality and make any necessary adjustments. Follow these steps to test and adjust your metronome:
- Set the metronome arm in motion by gently pushing the pendulum to initiate the swinging motion.
- Observe the swinging motion of the pendulum and listen to the ticking sound produced by the beat mechanism. Ensure that the swing is smooth and consistent, and the ticking sound is regular and audible.
- Using a musical instrument or metronome app as a reference, set the metronome arm to a specific tempo. Observe if the metronome is accurately keeping time or if any adjustments are required.
- If the metronome is running too fast or too slow, adjust the contact point between the beat mechanism and the pendulum arm. For slight adjustments, you can either tighten or loosen the contact point.
- If necessary, you can also adjust the length of the pendulum arm by trimming it slightly or drilling a new hole to achieve the desired tempo.
- Keep testing and adjusting until you are satisfied with the metronome’s accuracy and performance. Remember that small adjustments may have a significant impact on the tempo, so take your time to find the perfect balance.
Once you are happy with the performance and accuracy of your mechanical metronome, you are ready to put it to use in your musical endeavors. It will serve as a valuable tool for practice sessions, performances, or simply keeping a steady beat. Enjoy the sense of accomplishment that comes with creating your own musical timing device!
Remember to periodically clean and lubricate the moving parts of your metronome to maintain its smooth operation and extend its lifespan.
With these steps, you have completed the testing and adjustment phase of building your mechanical metronome. Congratulations on your successful DIY project!
Conclusion
Building your own mechanical metronome is not only a rewarding DIY project but also a valuable tool for musicians and anyone who needs to maintain a consistent tempo. By following the step-by-step instructions outlined in this guide, you have learned how to assemble and customize a metronome from scratch.
Throughout the process, you gathered the necessary materials, assembled the base, built and attached the pendulum, added the weight, created the beat mechanism, performed the final assembly, and tested and adjusted the metronome for accurate timing.
By building your own metronome, you have gained a deeper understanding of its inner workings and developed a greater appreciation for the precise timing required in music. This hands-on experience not only enhances your craftsmanship skills but also contributes to your musical journey by improving your sense of rhythm and timing.
Whether you are a musician practicing a difficult piece, a dancer perfecting your choreography, or simply someone who enjoys keeping a steady beat, your mechanical metronome will be a reliable companion in your artistic endeavors.
Remember to continue experimenting with different tempos and rhythms, and make any necessary adjustments to your metronome as you progress in your musical journey. The ability to accurately control and maintain a consistent tempo will greatly enhance your performance and musicality.
So go ahead, gather your materials, unleash your creativity, and enjoy the satisfaction of building and using your own mechanical metronome. Embrace the rhythmic heartbeat it provides and let it guide you towards musical excellence!